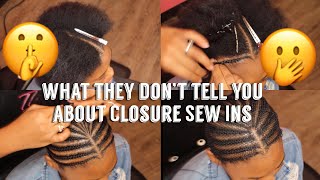
LaToya Kelly shows how to install a lace closure sew-in with no leave-out, using a sunburst braid pattern to reduce tension and breakage. She pre-threads needles to speed up the process, cuts a small lace section to show the natural part, and secures everything with edge control only, no glue.
Chapters
Hey everyone, it's your girl TT Does It All back with another slay, and this time we're going to take it up close, slow motion, and detailed. All right, so what we'll be working on is this client, which is a full sew-in with a lace closure, no leave out. So all this hair is going to be braided. So I start with my 2 anchor braids. On lace closures, I always have 2 anchor braids that I use braiding hair with. And you want to make sure that you have that braid starting right at the part. You don't want to smooth it down. You don't want to have it not at their hairline. You want to have a full braid at the hairline starting where the part starts. So for this client, she's getting a middle part, and I've already parted in the middle, and I've used some baby, um, actually some edge control, not my baby hair cream. So this edge control I will list in the description below. It is one of my favorites when I don't want it to be super hard. It has a light shine to it and a major hold, and it smells awesome. So I use a little bit of braiding hair in the first braid on both sides, and those two are what I call my anchor braids. And I just braid those down. And if you all have seen my previous videos, you know on the other side I go down the side, around the ear, around the back, and connect it with this braid. And then I do the braids in between. So this is the first braid that I stop right here at the corner of the back of her head, and then I do the next braid the same way down except I go all the way across back of the bottom of her hairline and connect those two. I do use grease between each braid. I use my KeraCare Glosser grease, which is one of my favorites. It has that tingling feeling in it, and it smells good also, and it's pink. So I love this grease. I do that between each braid, as you see, and I do a kind of sunburst pattern after the first 3 braids. So the first 3 braids are coming from the middle part, and then the ones behind it are coming from like a sunburst. And I'll show you why I do that. In order to sew the closure down, you want to be able to have that sunburst in the back so that your thread is not going on the beginning of a braid. You want as little tension as possible, and whenever you start sewing on the edge of a braid is when you start having breakage. So not only are we doing something that's fast and easy for us, but we're also doing something to protect our client's head, or yours if you're doing it on yourself. In addition to the KeraCare grease, I do use my Wild Grow hair oil I do that between each braid, and that is another one of those things that give you that tingling feeling. It's nice and cool. It feels like your scalp is taking like a deep breath and getting in some fresh air. So it is beautiful. And those anchor braids, you want to be going sideways from that middle part and not straight back because you would not be able to stitch this way to stitch the closure down once it's time if you did straight back. So it is important not to braid straight back unless you're doing like a 3-part lace closure, which I do have a video of that braid pattern which I do a little bit differently. So I do stitch around the part, and then I cut that out. And, um, you see that's being cut out, and then I lay my closure. So one thing you probably would notice unless I told you was that I use a super, super, super long threading when I'm stitching on the net, and this is to save time. So when you're working on someone else's head as a stylist You want to save as much time as possible. You want to create less work for yourself. So by threading longer threads for my needles, it, it takes me less time to have to thread needles, tie needles. So I do them all in advance. And this one is so long that the rest of it, which I stopped right there, is exactly what I'm going to use to start my first bundle. So you see there's a piece of thread that I'm going to have like on our left side, and that piece of thread, that thread that's hanging on her shoulder, is a thread that I'm actually going to use to start the first, um, bundle. And I am just cutting out this piece right here because to me it looks a lot more natural when her natural part shows through the lace closure. So that's why I cut that part out. So I go from side to side. You don't want to go all the way across one side and then all the way across the other side, because if you finish one side, you'll notice the other side is pulling at that point, and then it's like totally off center. So you see I'm holding my finger there, and then I part that section out, which is where I stitch down on my anchor braid. And this is so that the client doesn't have her closure flapping or anything while she's wearing it. And I don't use any adhesive on this install. No adhesive, no baby hair cream. You see, I just use some edge control to smooth their edges back into that braid. The next video, which will be the part 2, will go into the specifics of how I stitch it down, what I use to stitch it down, and the importance of stitching it down the way I do. Okay, all right, you guys, I will see you on the next video. Just enjoy the rest of this and see the finished product. Drop a comment and let me know if you have any suggestions about what I should include in the part 2 that I did not include in this one, and I will do so. And that video will be posted in a week. If a week has passed already by the time you watch this video, number 1, you late, and number 2, just take a look at the, um, link in the description and you will see, um, the video and you'll see everybody's comments as to what you missed. As far as getting in on part 2, as far as what I should include in it, because I'm ready to upload that baby. Okay, and this video goes super fast, and that's because you can pause, rewind, fast forward at any time. And don't worry, in the next video I'll show exactly how I stitch down that closure. All right, I will see y'all in part 2 of this video.