NEW Lace Closure Touch Up Tips and Tricks!
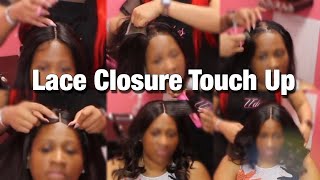
LaToya Kelly refreshes a month-old sew-in by removing the lace closure, reparting the hair, and resewing it forward so it sits at the hairline, not behind it. She skips bleaching the knots, uses a hot comb to flatten the closure, and finishes with styling to blend edges seamlessly.
Chapters
Hey everyone, it's your girl TT Does It All back with another video. This one is so requested. Oh my God, I'm sorry it took so long, but it's finally here. This one's a lace closure, okay? We're about to do a lace closure touch-up, so here we are. This This is what it looks like after a month of wear, and I am going to cut it out and replace it. So this is the after and what her hair will look like when I'm done styling and reinstalling that lace closure. I do not offer bleaching of the lace closure just because it wears it down a little bit longer to me. Um, I just think it's unnecessary when you can get it with a part. Now, if a customer is wanting to bond the front of the lace closure down and kind of tweeze the hairline and make it look like a frontal, then we can bleach the knots and do all that tweezing. But some clients, like this one in particular, just like to— likes to keep it in one part. So I will not bleach her knots and I will just customize that part. And I do have a video I will add in the description as to how I customize my lace closures without bleaching the knot and what the difference is and what they look like. So here I am just going around and I am removing all of the thread that I cut from around the lace closure, and I'm removing like the little thread that was cut from the track that goes all the way up to the closure because we're going to resew that down. So I'm using my hot comb to flatten the closure, repart it, and this is my baby hair cream. I'm just smoothing the edges back and just going to give her something to lay underneath the closure since her hairline has moved so far back. So I'm reparting her hair and just combing her edges back, and then once I put that closure down onto that it's going to have an even nicer, flatter stay. So you see how far up I'm moving the closure. And with this, I inform all of my clients to tie their hair down every night. So I am going to start sewing this down, and I do have videos on how I sew my lace closure. I do the touch-up the exact same. So I start with one side, and my finger is holding that middle part right where I want it. So I have my client put her head back when I put it on her head, and then I just keep my finger there when I'm stitching down each side, making sure there's tension on each side, um, pulling that closure nice and flat so that we don't want her to have anything flapping up when the wind blows. And you see how already the part is nice and just laid to her skin. And again, this is no bleach knots, this is no glue, no adhesive, um, and it just lays perfectly.
So your braids, you know how your hairline is, so the braids were already far back, you know, when I did it and I pulled the closure up so that, you know, it would look natural, right? So now that your braids have grown, grown even further back, it's even further back, so I really have to move it forward. So basically what I did was use my baby hair cream to Hold it to make it stay up here, okay, super flat. And I'm gonna sew as much as I can, but it's like I'm literally like bringing thread way back in here. So just make— you do it anyway, but just make sure you really keep this front tied down, okay?
Um, I mean, but it's still—
I mean, you see it, it looks good, it's right back to normal, but still just to make sure you keep it tied down because your braid is literally like back here.
Oh wow.
Yeah.
Wow.
But your hairline does start right here. Like I can see like the little bitty hairs, so I know that it starts right there.
So, wow. Does it feel too far up?
Okay, right. Okay, so we may, um, I cut a little bit around, like a couple rows around this, and honestly, since I'm pulling this up, you may not use all the hair back in it again, but I'm going to still fill it back in.
Okay.
So I'm just telling you what's going on in case I have hair left or something. So you see, like, look over here, you see how like, like this is your hairline, but it's— the braid is like that. Okay.
Yeah.
So I'm threading up here just to kind of bring it back and make— try to make it as flat as possible, but it's still being held with a baby hair cream too.
Okay, okay, okay. All right, so I'll just let you in on a little bit of conversation between my client and I. And I am very informative with all of my clients, just like I am with you all on YouTube, because I don't want my client to leave like, what the fuck is this? Like, why is this like this? You know, I want them to have an understanding on what's going on with their hair, and I did everything I could possible to make them have the best outcome. So there is that closure. So now that I have sewn the left side and the right side of the front down, I'm going to go around and stitch the back of the closure. And as I was informing my client, I do sew the bundle right up to the closure. I don't leave any gaps between there because when a client goes to part their hair, that is so uncomfortable. So, um, another thing I was gonna say— whoop, What was I gonna say? Oh, about these closures. Oh my God, you guys, so you know I live in St. Louis now and I'm not from here, and I have been trying out stylists. And the first time I moved here in 2016, I got this lace closure sew-in, and when I tell you, I was literally looking in the mirror at her shop and it was already behind my hairline, which doesn't make sense. Oh my God. So I literally sent her the video of me teaching how to do it And she did not respond. I don't understand it. It's like if there's somebody trying to help you or if there's a better way to do something, then whatever. And I can't say that my way is better, but for me it is better because if I get a full sew-in, I don't want any of my hair left out, and that includes my hairline. Okay, anyway, so I have stitched all the way up to her closure And now I'm just gonna go in and tighten up the sew— the sew— the sew-in closure. Is that what I was trying to say? Okay, I'm gonna go in and tighten up the back. This hair has been in a little over a month, so just going in, just tightening things up. And she also added styling to her appointment, so I am going to curl her hair as I go. And you all see that pink flat iron. So if you look in my older videos, you remember that pink and purple flat iron. Sadly, this is its replacement because one random day I dropped it and I was so sad. Like, oh my God, my feelings were so hurt. Like, I literally shed a tear because I've had it forever. Anyway, it's gone and this is the replacement. I got it off Amazon. But, um, I am just going through curling her hair and I do have curl videos as well, you guys. I got like every video already uploaded that you can imagine and honestly it's about time for me to probably do update videos at this point because I mean, I probably do something different than 2 years ago, right? I mean, I guess probably more than likely, but this is a look of my outfit. I got this little one-piece jumpsuit thingy from Amazon— not Amazon, Fashion Nova. But, um, yeah, this is my look. I did upload it on my Instagram, and if you are not following me, go ahead and follow me on Instagram. It's TT Does It All. Same across all platforms, Snapchat also. But yeah, her hair is coming along. And I am using a KeraCare wax stick, and that's what I use for the little flyaways. And then I'm just going to comb it through, and she's beautiful. She is back to how she started when I initially did her sew-in. And then just my hot comb to smooth it in and seal the deal. So after watching this, what questions would you have about lace closures, about touch-ups? Drop it in the description. I want to hear your feedback because a lot of people still in 2019 don't know, hey, what is a lace closure? What is it supposed to look like? And ladies, if you don't know, just know this one thing, okay? This one little piece of information. It is not supposed to start behind your hairline, okay? That's the best advice I can give you. So I am just smoothing out her edges with my baby hair cream as the final touch, and then I am going to just show you guys what those curls look like. Okay, hot mama, okay, I see you bouncing. That's pretty, y'all. I'm sitting here with my hair all over my head wishing that this was my head right now. Oh my God. Okay, y'all, but I will see y'all in the next video. It is coming soon. And y'all make sure y'all drop a heart if y'all like this and let me know your questions and feedback on lace closures. All right, I'll see you on the next one.
More from LaToya






St. Louis, Missouri - Lasts 4–6 months - Takes 4–6 hours - Investment: $3,000 www.TTDoesitall.ai


What are #ktips? Here’s your answer! Schedule at www.TTDoesitall.ai 🩷 #extensions #ktipextensions

4-6 hours install and last 4-6 months #ktipextensions done by the right stylist the right way 💕

Located in St Louis Missouri 💝 Consultations available www.TTDoesitall.ai 💕#ktips #natural

K Tips take 4-6 hours to install and last for 4-6 months with proper care! #ktipextensions