No Leave Out | Lace Closure Sew in | NO glue | Start to Finish | Tinashe Brazilian Loose Deep Hair
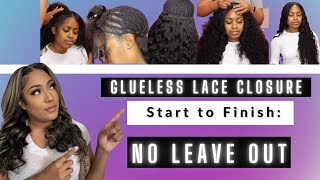
LaToya Kelly sews a lace closure onto braids using Tinashe Brazilian Loose Deep hair, installing four bundles with an over-and-under method that folds the wefts instead of cutting them. The full install takes about two hours, finished with a flat iron and styled for a natural, glossy look.
Chapters
It's your girl TT Does It All, and this is a start to finish with Tanashi Hair Brazilian Loose Deep hair. And the left side is before I put any water on it, and the right side is us turning up after we wet it. So this will be showing this lace closure sew-in, and this is the beginning of the sew-in. This is my sorority sister ChaCha, and that is not her real name, but her real name is Chandra Ray. Okay, so this is her natural hair. And I am going to do a full sew-in, leaving none of her natural hair out. She is completely natural, and, um, I am not leaving any of her hair out. To lay those baby hairs down, I did use baby hair cream that I make myself, and that is available in the description below. But first, I'm going to do my ankle braids. And I know you all are thinking, her hair is nice and long and thick, Why are you using braiding hair? I use braiding hair so that the start of that braid and the weight of that braid is strong enough at the top and at the start of the braid to be able to hold the thread that I am going to sew in it for the lace closure to lay flat without any adhesive, just my good old needle and thread. So I am using my KeraCare Glosser, which is a grease. I use that between each braid right before I start braiding it, and then I braid it on down. And I use this pattern on all of my lace closure sew-ins. It is very, very, very flat. And once you see like the last braid, you'll see exactly how flat it is. And you see how long and big her hair is, so for it to go from that to even this side as flat as it is, this braid pattern is one of my favorites. I do not like the beehive braid pattern. It is not my cup of tea because it's really bulky to me. All right, so I'm moving on to the right side, and I am doing the same braid pattern, braiding it all the way down. And then I'm going to pull the end of that braid into the next braid, and then we'll be left with one single braid hanging in the middle that I will tuck up in between the braids. And it'll be completely flat. And it's very easy to remove also, so that is not a concern with this braid pattern. I have videos showing how to do this braid pattern, how to sew on the lace closure, how like step by step, up close and personal. Now in this video I'll show it all, but it won't be like super up close, slowed down, and in personal. But I do have those videos for you, so don't feel like, oh my gosh, she's moving too fast. I don't know what she's doing because I do share that information. It is not a secret. All right, so you see how flat it is already, and I'm on my last braid, bringing both the ends up from the left and the right into that middle braid. And look how long her hair is, and this is all her hair, honey. I have been doing her hair for years and years and years and years, and she's been wearing sew-ins and braids and everything else and grew her hair out to where it is now. So hopefully that tells you guys my braids don't hurt and they don't pull your hair out or damage your hair. But I've already told you that, and if you all have watched my videos, you know that I'm very, very, very protective of my clients and their head. I treat my client's head how I would want mine treated, and I do not— first of all, I'm tender-headed, so I just can't deal with pain and tension and losing hair. I value my hair. So the next is so that I can stitch anywhere and that I don't need a braid to guide me on. So the braid pattern is super flat and the braid pattern is not dependent on where I sew. And this is the 20-inch lace closure, and back there I am parting it and using my wand flat iron to just part that out. And then I'm going to And I'm parting it in the middle of the closure. So then I'm going to cut the extra lace off of it, and then I'm going to do a few methods. I want to put concealer on the bottom where her part will be, which is a middle part, and then I'm going to also put concealer where her part will be on the top. So I put concealer on the top and bottom, and that just makes that concealer last a lot longer. And as soon as I put the closure on, you see it kind of melts right into her skin and looks perfect. So when you order this hair, you do not have to bleach the knots to get a sew-in with it. This is a method that you can either show your stylist or tell your stylist or bring some makeup with you and a flat brush and help her do it. Okay, now we have our 4 bundles of 22, 24, and 2 26 inches. And to her, she's like, it really doesn't look like a lot of hair. But this is what I found out about this hair. It is very, very, very lightweight. So it is very— it has a high density, meaning you're going to get a lot of hair and big hair, but it's just not heavy and it's not weighed down and it's not super like thick feeling. It looks super thin in the bundles, but it went a long way. So this was just the first bundle and I'm going to sew in all 4. Okay, so now I'm starting the second bundle, and I am doubling both of the first two bundles in, and then I'm going to single the third bundle and the fourth bundle. One question that I get often is how long does it take me to do this sew-in? It takes me 2 hours to do the sew-in, so about 45 minutes to braid, and the rest would go to actually sewing the hair in. So this— look at that! Oh my God, it's so pretty. It's soft. It is very, very lightweight. So you could have 5 bundles in and it would feel like feathers on your head. So now I am starting the third bundle and I am just going back and forth. And one question I also get a lot is, do you sew through the weft, or do you go over and under? And I go over and under. I do not want to poke through the weft and cause any additional shedding. As you see, I do not cut the wefts. I fold them over for all of the bundles. The only cut that I do is at the very end when it is time to cut whatever is left over if I don't use every single inch of the um, what's this called, of the track weft, whatever you want to say. All right, and still sewing in. Oh, another additional piece of information if you haven't watched my previous videos, I use dark brown thread. Okay, wait, here's the fourth bundle going in now. All right, so I use dark brown thread and that is so that it's easier for me to see it when I'm sewing it in. So so that if there's any extra loops or something that I know that I need to kind of pull to make sure that everything's in straight, then I, then I have it. And also, when my customer goes to remove her sew-in, she does not have to look for black thread that is the same color as the tracks. So it is a lot easier to remove, and it's also easier for me while sewing, and it is not visible at all. All right, so I am sewing in the last row around the closure. And then I'm going to cut the extra piece. And right now what I'm going to do is just readjust, make sure that middle part is right in the middle, flatten it with my wand curling iron. And then I'm going to flatten the closure so that it looks more realistic and not like elevated off of her head like some closures do. And I'm just flattening it to make it look more natural and make it lay on her hair better. Lay on her head better. And I'm using it on the other side to flatten it, of course, and have it lay a lot better. It looks better to me. That's just a personal preference. Do your stylists do this? Have you worn a lace closure before, and how did you feel about it? What do you think was done differently from when I did it? I want to see your comments in the description below— I'm sorry, in the comment box below. So this is how pretty it is. This is 4 bundles, and look how big it is compared to those bundles in my hand. It's huge. So now what I'm doing is kind of tweezing the part just to widen it a little bit and make it look a lot more natural. No one's part is that skinny. So here I'm just kind of tweezing it in a straight line, and this can also be done for a curved part or anything. So I'm just putting water on it from my spray bottle And then I am brushing it through with my Denman brush, and that is the look. What do you think? Well, that's the Care Care Wax Stick that I'm using to flatten it. And oh, it— look at, look at how big it got, and look at how just more natural it, it looks with water on it. It's gorgeous. And at the end of the video, I will show how it looked once it air dried. So this is the finished look. Let me know what you all think. There is a discount code in the description below for you all. The hair is beautiful, soft, lightweight. The curl pattern is gorgeous, and I love it. So let me know if you all have worked with this company before, if you've heard from them, because she's feeling herself based off of that tongue I just saw. But yeah, look at that wave pattern. It's nice and pretty. So let me know if you all have worked with the hair. If you love the hair, make sure you thumbs up this video, and I will see y'all in the next video. Okay.
More from LaToya






St. Louis, Missouri - Lasts 4–6 months - Takes 4–6 hours - Investment: $3,000 www.TTDoesitall.ai


What are #ktips? Here’s your answer! Schedule at www.TTDoesitall.ai 🩷 #extensions #ktipextensions

4-6 hours install and last 4-6 months #ktipextensions done by the right stylist the right way 💕

Located in St Louis Missouri 💝 Consultations available www.TTDoesitall.ai 💕#ktips #natural

K Tips take 4-6 hours to install and last for 4-6 months with proper care! #ktipextensions