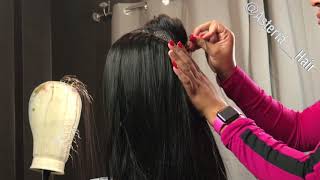
LaToya Kelly builds a side-part lace closure wig using three bundles and an 18-inch closure, sewing the longest bundle doubled, the second half-doubled, and the third as single weft to save space. She styles it with clips, a flat iron, and KeraCare wax for an everyday corporate look.
Hey y'all, it's your girl TT, and I just finished this video of this wig. It's 3 bundles.
It's a little thin for me, but the hair is so beautiful.
This is such an everyday look if I'm trying to go to like a corporate meeting or somewhere where I want to be really wholesome and not ratchet TT. So check out this video, thumbs up if you like the hair, and I will see y'all in the next video.
All right, so let's jump right in. If you all have watched my previous videos, you know why that swim cap is there. I got the weaving cap from the distributor and it came with the hair. I've never bought a cap like this. I do prefer it over the wig caps. I'll tell you why later, but I do go ahead and show you all me sewing on the closure. It's an 18-inch closure and 3 bundles: 22, 22, and 24-inch. And I do sew my closure on first. This is going to be a side part wig, so if you need help sewing it on, that video is in the list of my videos, so don't forget to check that out. I sew on my closure first, and then I start with the longest length and I double it at the bottom of the back. So after sewing in my 18-inch lace closure, I'm going to start with the 24-inch longest bundle and I will double that entire track. I'll start from the placement of what will be the left side of the person's head because the part will be on the right side. So I'll start like right at where the top of the ear would be on the left side and then I'll go all the way down and around to the bottom right corner and then I'll go back and forth from there. And that's because the closure is off-center. So you want to measure and sew your back bundles in so that once you get to the end, it'll be nice and even with the wefts. You won't have to stop midway. It'll just be nice and even to where the closure is. So I am sewing. I have videos on stitching, folding over the wefts, threading needles, and everything like that. So check out my videos. I do have those. I'm on the second bundle. With the second bundle, I am doubling half of the weft, so I'm not cutting anything, but I'm folding over the weft to be doubled only halfway through, and then the rest of it will be a single weft. So I'm going to go ahead and sew that in, and I'm doing that because it's only 3 bundles and it is a closure. Usually you don't want to run out of space, so you don't want to double all 3 of them, especially the top bundle because you want that to lay super flat. So I only double the first bundle, half of the second bundle, and then just single the rest of the, the rest of the way. And as you see here, it's just a single weft I'm sewing in. So you want to just keep your eye on how much space you have left. And kind of keep your eye on how much weft is in these bundles. These bundles— wefts were very long. Um, the reason why I wasn't so sold on my outcome was because it was so long. I think this hair is beautiful. It would have been even better if I left it straight, but of course I had to do some curl testing. I could have did one patch and left it, but I'm a stylist and stylists don't know how to leave stuff alone sometimes. So, um, I'm going to finish sewing all the way up just under the closure, and then I'm going to sew on my elastic band, which I do have in my previous start to finish videos. I have it very detailed, so There you have that. And the next step will be taking this thing off and putting it on my head and seeing how crazy I look without a real part in it yet. And trust me, it'll look crazy. So I cut out all the excess lace, even underneath the closure. I cut that lace from the cap, from the wig cap, and I cut the net from underneath that closure. I did not bleach the knots because with this being a wig I just would rather part it where I need to part it, tweeze it where I need to tweeze it, apply some concealer in my part, and go about my merry day. So you can bleach the knots, it's totally your own preference. For this one, I did not. Closures, it really doesn't need it. Frontals, it's a necessity, but this is just a closure, so you can get away with not bleaching the knots. It's just an extra step that you can do without. So this is where I'm sewing on my elastic band which holds it down. Um, I would suggest adding some clips around the closure and somewhat like you do on U-part wigs just to kind of keep it in place, and that's a personal preference as well. I'm using my wand flat iron and I'm creating my part And I am using the KeraCare wax stick there, which is in the description. It's a link on my website of items that I love to use, and that KeraCare is linked in there. I thought I was going to tweeze this on my head, but then I realized, no ma'am. So I put it back on the canvas head, and then I went ahead and tweezed my part. The canvas head is very light, so it's good to see transparent how the, how the, um, part will look on your head. And I go ahead and flatten it out while it's on the canvas head and I can see it better. I cut off the lace in front of the closure, the little extra piece of lace, and then I put it back on and start cutting, face framing. And, um, one thing that I'm really not a fan of is thin bangs. I'm not really a fan of thin hair, period. Um, I just like big beautiful hair. I don't know where I got this from, but I love big hair. So this hair was really a neutral look. It's a more of an everyday look. I think this is more of a look that a customer would come in and want their style to be. For me, me personally, I just like bigger hair. So I curled and cut and curled and cut and perfected whatever needed to be perfected on this. Then I posted a couple Snapchat videos and everyone was like, oh my God, that is so beautiful. The big hair is cool and all, but that is so pretty. So I think it's personal preference. A lot of people don't like big hair, a lot of people don't like a lot of hair, so I think this is more of an everyday look for those who do not like big hair. As you see, the straight was beautiful, but I went ahead and was extra and curled my hair., and with the length being 24 inches and 2 22-inch, it's impossible to get volume and a lot of body without cutting some layers into it. So I'll show that on the next video.
So I am rocking a lace closure, no leave-out, 3 bundles. Um, they came straight and I pretty much wish I left it straight, but you know, you have to do the curl test. So I can tell you all, yes, it curls beautifully and it holds the curl. Um, I'm going to do another video on how to make your limp hair have volume, and I'm going to cut some layers into it and curl it and show you all how I do that. So tune in for that. It'll be in the description below. And thank you guys for so much love. I love you all, and I will see y'all later.