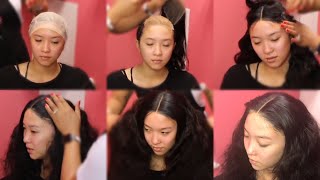
TT Does It All installs a 5x5 lace closure sew-in for a client with hair loss, using four bundles and Ghost Bond adhesive. She shows the full process from scalp prep through laying the hair with a hot comb, customizing the hairline to match skin tone, and finishing with a light straightening and trim.
Chapters
Hey everyone, it's your girl TT Does It All back with another slay. This is going to be something that I've never put on my YouTube before. This is going to be a lace closure using the baby hairs and the bleach knots and the bald cap method. So this is the outcome of what it will look like. And this is a 5x5 lace closure, okay? So she has options to part wherever she wants. I used 4 bundles, and this is 2 24 inches and 2 26 inches with a 20-inch 5x5 lace closure, okay? And you see how big that bad boy is. It is 5x5, honey. Okay, so I am going to go ahead and get started with my customer. She was kind of, um, uncomfortable showing her hair because of her condition, so I did not show the braid pattern. I'm sorry for that, but I did braid her hair to the back, and then I used the bald cap method And then I'm going to sew the sides down and bond the front. And I am using— I'm using Ghost Bond for her. So I went ahead and sewed the sides down, and then I tweezed the hairline just to see how it looked. She wants a middle part, so I am going to part it in the middle, and then I am going to lay it with that hot comb And I am going to mousse those little edges down so it looks a little bit more natural, and then tie it down as I sew in the rest. And again, I have 4 bundles coming in. So now that I've sewn the front sides of the closure down, I'm going to sew in the back just how I usually do. And I'm going to start with a 26-inch bundle first, and then I'm going to sew the second 26-inch bundle in, and then the 24 inches. The first bundle I'm putting in, and look at those waves, so pretty. All right, so I am doubling the weft. I am not sewing single since I have 4 bundles to put in. I'm just gonna go ahead and double the weft so I can get them all in. As the hairline dries, that will start to fall, which I didn't realize as I was really focused on sewing in the back that the front was just falling all the way down. So just— I mean, at that point, once it starts falling, just cut it off. See? Yeah, exactly. Just take it on off. All right, so I am still sewing in that 26-inch And actually, I am on the second bundle already, and then I have two more to sew in. So as I'm sewing it in, the second strip fell off, which tells me that it's dry, so it's okay to go ahead and take off at that point. And then I'm gonna keep sewing, and she's like, oh my God, this is so long and so full. She's never ever ever had a look like this in with her, um, natural hair's condition, um, of the hair loss. She's just really excited to have it in, and it's really pretty, and it looked perfect on her. It looks so pretty. For those of you who are new to my channel, don't forget to click that subscribe button. I am on Twitter, Instagram, and Facebook, and Snapchat under TT Does It All. So make sure you guys follow me on those to see a lot of the looks that I upload on YouTube before they actually hit YouTube. Okay, okay. All right, so we are done with the 4 bundles, and I am just customizing that hairline with her complexion, um, just to make it kind of blend in. And here is the finished look with her edges not defined, just more natural looking. And let me know what you all think. I love it. I wish it was my hair because just like in this video, I'm sitting here doing this voiceover with my hair all over my head. Okay, but look at those waves, it's gorgeous. So it is so full and so pretty, but, um, we are going to let her play with it for a second. And then the next day she actually wanted to straighten it and get some— a little bit of layers cut in it. So I kind of bumped it or pressed it a little bit, and then we went ahead and just did a little straightening. So I just kind of trimmed those ends and kind of straightened it a little bit more for her. Not too much, not bone straight, but just a little bit more. And you see it straightens out perfectly, so it's super pretty and perfect, and I love it. You guys, let me know what you think. And again, this was the next day, so go ahead and drop a comment and let me know if you all like the 5x5 closures, if you prefer the smaller ones, if you all like 4 and 5 bundles of hair, or you prefer like 2 or 3. Let me know what you all think. The hair was gorgeous. And she's just describing to someone like the difference in a frontal ear by ear and the difference in a lace closure. But look at her chewing that gum, she know she's cute. All right, you guys, drop a comment and let me know what you all think about this look. Yes, honey, it is so full.