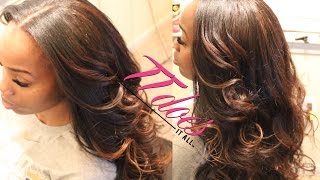
LaToya Kelly shows how to style sew-in extensions with face-framing layers using two curling methods on a BaByliss flat iron at 450°F. She blends five bundles of Brazilian Deep Wave with the client's natural hair, matching color and directing all curls away from the face for a seamless finish.
Chapters
Hey everybody, it's your girl TT, and I'm going to be giving you a few tips on me styling for my sew-ins. So I have another video with the braid pattern and the stitching and everything like that, so I'll attach that to the bio. But right now we're going to focus on me styling, and I have a few techniques. My number one is that all the curls must go away from the face. So this client has 5 bundles in. It's all the Brazilian Deep Wave from HairIncKansasCity.com. Right now I'm just going to press it out a little bit so I can do a bit of face framing. As you see with my stitching technique, when you comb through there are no snags or anything of the thread. Everything is particularly done. Here I'm going to face frame around her face so that her curls get a little bit more volume in the front. Not even volume, just a layered better look.. So my cameraman kind of switched the camera up, but it will go back to landscape. But for now, for the portrait, I'm still face framing the other side and I'm just going along the front. She's used this hair a few times, so she's ready to chop it up and get new hair for her next install. This hair is still fine, but you know how clients are, they just want something different. So here, just face framed a little bit and it's kind of layered in there in the front only. I'm not going through the back and doing it because she does want to keep all of her length around there. So the first thing to do, the first section is to curl away from the face. So I'm going to take this bottom section and just make sure you have a lot of clips handy just so you can pin everything out of your way and you don't have stray hairs. And I'm very particular, I don't leave any strand of hair uncurled. I want every piece curled and every piece uniform. I'm going to press down a little bit just to kind of straighten it out, and then I am going to actually curl overhand. So I'm going to curl this away from the face overhand, and there's two ways to do it. There's an underhand and an overhand way, both getting it out of your face on both sides of the face. So there's an overhand version, version, and an underhand version for both sides. So this is the overhand, and this is what she right hand. Alright, and again, you're curling backwards, so it's going away from her face. And you saw how the curl fell. You want to— I always keep my heat on high just so I can go faster. If I lowered my heat, I would have to go even slower, so I do keep my heat all the way up on my iron, which the highest is 450, and I get this. Any minute. Alright, so you don't have to do that twist with your hand. I just do it to kind of get the curl to stay in its form. So there you go with another overhand curl away from the face. Alright, this next one I'm going to do is underhand. So you notice how my hand just went under but it's still twirling away from the face. And I'm going to show you that one more time. Okay, so instead of going up, up, I'm going down. You see it spin down? And the end of that hair is going towards me, not towards the top of the flat iron, but it's folding to the bottom. You see the hair I'm pulling out towards me? And you just slowly pull your flat iron through the hair. Or pull the hair through the flat iron. Alright, so you see it's just going slow motion to show you that I am going slow and I'm pulling every piece of hair through. I'm feeding the hair into the iron, making sure that it's all even and nothing's curled up. You see how it flows away from the face. The next one, we're going to curl it underhand. In the top rows of the sew-in, I always curl them underhand because I want those top curls to give it that bounce flow to the back. The overhand gives you a curl to the back, but it doesn't give you this bump, like kind of like the Kardashian flow away from your face with those layers. That's what this underhand technique gives you. Again, I always want to remind you all, this is YouTube, so you can rewind, fast forward, press pause however many times you need to, write things down or whatever. Alright, so I am curling underhand on this side, and since I am right-handed, it's so much easier for me to curl the entire left side of her head with my right hand underhand. So I could use my left hand and curl over if I I wanted to, but it is just, it's too much and I'm not left-handed. For this side, you see I'm curling the entire side underhand. The curls have that Kardashian type of flow where everyone used to be in the phase where they're trying to get those Kardashian waves, just kind of flowing curls out of your face with those layers. This is how you would achieve that. That look. And you see that I'm pulling the hair to make sure that it feeds in evenly. There's nothing worse than frizzy ends of your curls, and I am very particular, so I make sure I feed it in so that that doesn't happen. All right, so you see that underhand So you get the gist of the left side of the head. The entire head I'm curling just like this. Even when I get to the top, I'm curling it just like this. So now we can move on to kind of showing you a little bit with the leave out and how I'm blending it. Alright, so this is her leave out. It's been in that braid, so I kind of comb through it and I press as I am flat ironing it just to kind of get her ends to be a little bit smoother and more manageable. I do use a carbon comb. It is heat resistant so it does not melt or anything even being on top of that iron. I'm straightening her leave-out and then I'm going to go piece by piece with my mini Babyliss flat iron and I'm going to press her hair. You see her hair looks really dark compared to the extensions and it blends right in. It's not a problem. I've blended red hair in with black hair. It's just all about combing it smooth. Smooth and evenly, um, and it works out perfect. Another thing that I do when I am flat ironing this close to somebody's roots, um, I blow as I get close. So right now I'm blowing. When that flat iron is going really close to her scalp, I'm blowing that steam so that it kind of cools her scalp down and it's not as hot because no one wants to be burned. And she did say I burned her on the other side, but I was blowing so I couldn't have. But anyway, maybe I did. She lives and she didn't have third-degree burns, so she's okay. So you see how I'm using that comb to follow through with it? And I am just taking very thin sections and I am just flat ironing them really good. And with the mini flat iron, if there's short hairs like edges or something like that, it works very well to use that because it just gets a closer, um, it gets a closer straighten than the bigger one. You can pull and you need to add tension when you're getting small short hairs. So you see there, she said I burned her, but she's okay. Stuff happens, everyone, everyone gets burned. So you see, I am taking the top row of the track with her natural hair, and I am going to flat iron them both together. And sometimes I kind of straighten out the root of the extensions if I feel like it's it's curly or whatever. So you see I'm doing my underhand and it pulls it away from her face. And I just comb, like I said, if you comb it in, look at that, it looks perfectly smooth. And just comb it in. So I flat iron that first piece of extensions with her natural hair and I do my underhand curl. And here's your end result. It flows, it has that volume in the front because of the face framing I did in the very beginning, and it's just beautiful. It moves, there's no, like, nothing stiff in there. And you see the colors blend perfectly. You can't see a line of demarcation separating her natural hair from the extensions at all. It just flows evenly. So I hope you guys enjoyed. Please comment, rate, subscribe, And, um, I'll see you soon.