Thin Hair (Sew in) Tips and Tricks
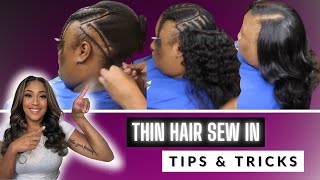
LaToya Kelly shows how to sew in extensions on thin, fragile edges using light-hand braiding, a protective net, and 16-, 18-, and 20-inch Brazilian deep-wave bundles. She places tracks higher than usual to balance coverage and keeps the weft flat with spritz-and-clip or a flat iron.
Chapters
Hey everyone, thanks for tuning in to another video from TT Does It All. This is a video of tips and tricks, how to do things a particular way for clients who have thin edges or a thin leave-out. This particular client right here has the thin edges. I started recording this in the middle of her sew-in because I'm like, oh my God, this would be something very good for YouTube, and I wanted to make sure she was okay with it, and she said sure. Her hair is only thin like right above her ears on those edges because it's hereditary. And she said not only is her hair like this, but her sister's hair is like this, her mom's hair is like this. So no, it's not from too many sew-ins. No, it's not from quick weaves. So all you idiots leaving those comments can shut the hell up and get off my page. So yeah, you guys know like I love to have fun and joke and laugh. However, Some people are just stupid and they get on my page and they make these dumb comments and I just delete them and go about my merry day. But you guys never see them, but I do. And if you guys have comments like that, then again, go ahead and move to the next video because it won't even go to the public eye. But anywho, or any who, what, wait, somebody just commented on my video. She said to say, oh, anyhow. So no, no more anywhos, anyhow.
Okay, I don't know, I'll probably still say anywho.
But this particular client, when clients come to me with thin hair, I know exactly what to do. I know that if I was a client and my hair was thin in a particular spot, of course I don't want it to show when I wear my extensions. I want it to cover whatever I'm insecure about. That's the whole point of extending your hair, it's to accent whatever you don't want to shown. Whatever you want to extend, we can extend it. So we're going to extend where the edges are and we're going to just kind of disguise it a little bit. So here's the braid pattern which you all have seen. She doesn't want to leave any hair out around the edges at all. And when I braided it back, I know it may look like, oh my God, it's pulling her edges out even more, but it is not. I am a very light-hand braider. This client can tell you if she watches the video, she can comment below and tell you, but I do not pull edges. I just make sure that her hair is braided into the braid so that it's not being pulled or having to be slicked down with edge control. You want to braid that hair up to keep it out of the client's way. So with that being said, I'm going to continue braiding, and then I will come back with the specifics, which is how to sew in to cover, because that is very important. So now that I'm done braiding, I do sew on a net. Any client with thin hair, I use a net for because we want to keep tension off of the client's natural hair. And even though I use a net, I still sew onto the braid, so it doesn't prevent any weight from being on the hair because I do still sew on the braid. I just need the net because taking some of that tension off of those braids and putting it on the net helps her hair as much as possible. So even though her thinning isn't caused from tension, we don't want to apply any extra tension and cause any extra thinning or damage to her hair. So I do use a net just so that there is a little less pressure on her hair. Whereas somebody with thick hair, I don't have to use a net. Their hair can take, um, the weight of the extensions. So again, for this client or any client that I work on with thin hair, I do use a net The net for me allows me to sew anywhere. So if there's a spot where the hair is really thin and I don't want to sew on her hair, I can just sew on the net and not the braid. So again, the net is not something that is used to make the sew-in last longer. It's just so that either less stress is on the client's hair in a particular spot, or I can sew where there is less hair, and I can also sew where there may not be a braid. So again, it just helps keep the tension off of the client's hair. It does not make the sewing last longer. So now that I am done with the net, I'm going to sew in her extensions, and I'm using a 16-inch, 18-inch, and a 20-inch. And again, all of The bundle deals that I offer come in 3 different lengths, and this is my Brazilian deep wave. The link to the website was below. It's hairinkkansascity.com, and I do ask you all to give me 3 to 4 weeks for shipping, or for you to receive it, because I travel a lot and sometimes hair gets shipped to me and I'm not home. So I just ask for your patience if you are in a rush to get hair. Text me. My number is provided when you order, and if you text me and I'm able to get an order out to you sooner, I'll tell you to go ahead and order it. But if not, please give me the 3 to 4 weeks. Sometimes it'll come sooner, sometimes it won't. But with my Brazilian deep wave hair, I always ask the client, do you want your hair straight in its natural state or styled? And it can be straightened. I'll show you a little bit of that in the bottom left-hand corner.. But for this particular client, she wants it curled, so I straighten the ends first before I install each bundle because this hair is— the Brazilian deep wave is just so tight when it first comes. It's just a lot easier to curl it if the ends are not in that tight curl pattern, and I only straighten the ends.
So when it comes to sewing in on someone with thin edges where hers are, I start my hair facing— well, there you go. I start with the weft hair covering the edges. So as I start sewing, it'll start right there where that arrow is, and Usually I would start right above the ear, but since we're covering, we want more hair. We don't want it to be thin when it covers her edges. So I do start further up, and then instead of, um, going on the other side to the corner, I go further up as well. So you'll see how if you look at my just traditional sew-in videos or my deep sew-in, um deep side part sew-in video, you'll see that the difference in this install and that install is I do go a lot further up on each side, and it takes a lot more concentration and paying attention to how much space you have left to make sure that you are balancing out each side near the end of the sew-in and you don't have more space on one side versus the other. So that's very important when someone has thin hair. You don't want them to have to tell you that they want full coverage over the thin part, they want it to be full. So, um, yeah. So this is where I was saying I usually go to the bottom corner, but on this side I stopped a little further up. And I'll also show you a trick where if you're doing your sew-in like this and your fold-over isn't so flat, I will, um, one of two things. The first thing, which is a quicker fix, is I will kind of spritz down that corner and then hold it with a clip, which you'll see me do a couple times in here. Um, with the weft hair, sometimes the way it is in the bundle, the way it's tied, it can make the hair stick up. So I know a lot of people ask, like, how do you get the hair to lay flat on the edges? Sometimes it's because of the way the hair was in that bundle. So you see, there's two ways: either the spritz and then clip it to hold it until it's dry, or you can flat iron the hair coming from the weft straight and then start sewing it in. So I actually use both. I actually flat iron when I get to the top, so that way all of the hair from the top is super flat and easy just to go ahead and style when ready. But for the other 2 bundles under the top bundle, I just go ahead and, and spray that corner and just pin it down, which you'll see me do in this video.. But just like a couple of my other videos, it's faster for me to style as I go. So instead of just taking the entire sew-in, just installing everything and then styling, I like to sew one bundle, style it, sew another bundle and style it. That way I don't have to worry about pinning hair up, I don't have to worry about getting hair out of my way, I can see everything, I don't have to worry about missing any hair. So I don't know, it's just something that I tried and it went well for me, so yeah. Yes, after all of the curling or straightening of this hair, it does go to a deep wave pattern. It does go back, and I'll upload a picture of that in the upper— or sorry, well, yeah, the upper left corner. I'll show you that picture of what it looks like when it's just washed and air dried, um, it does go back to its deep wave pattern. So a lot of people order like body wave expecting it to look like the natural state of the deep wave pattern when it is actually the deep wave that you are desiring. So now I am on the second bundle, which is the 18-inch. I installed the 20-inch first for the bottom, and I am starting right behind that corner where I left off with the last bundle. And no, I did not measure it to stop right there. It just so happened that that's where the track ended. But here, um, in this upper corner is where you're going to see me use the spritz, um, little tip. And honestly, that is the perfect way. If she was leaving her hair in the deep wave state, that would be a perfect, um, thing to use instead of flat ironing it. Because, um, you know, she wants her hair not straight. So just spray it and pin it down, and then by the time you go back around and come back to that side, it'll be dry and you can remove the clips. Or you can wait until you're done, but I just kind of pull it straight to how I want it to lay and add a pin in or a clip and then keep going. So as I'm installing, when I go to the other side, remember you're still going to be mindful of how much space you have left, and, um, I still am not— like, this track is stopping before her hairline. So if you see, it's stopping kind of at that second braid, and then I'm folding it over and going back again. If it's not flat, you can just spray it and add that pin— or add the clip. I don't know why the heck I keep saying pin. Add the clip to hold it down and then keep sewing. So again, you see that is where I stopped this track. I'm not going all the way to her edge yet, and this gives her the fullness up there, but it— there's no tension. All the tension is not all on that first braid. So we are just going to keep sewing, and, um, once this middle section that's left to be sewn in, it has the same amount from edge one side of her head to the other side, that's when I'll start taking it all the way to the hairline. So I hope y'all understand, like, there's still a lot of space up here, so I will not go all the way to the edge on that other side until the space on this side is kind of equal to the other side, because you don't want to run out of space. You don't want to have to sew a lot of hair on the one side, not the other. I like my sew-ins to balance out. And again, we still have one more bundle to sew in. All right, so we are 2 bundles in, 1 bundle left, and watch what happens. This is like a test for all clients. It's so funny, watch.
Go ahead and sneak that little girl.
Yeah, I see you, girl. She tried it. All right, so we are on the last 16-inch bundle and we are about to put it in. Toya, we see it. Okay, so here we go. And you see the clips are still in there. It doesn't hurt, it's dry now. You see I didn't curled and did everything, so At this point it's dry, I'm ready to come out, but you see it's flat, it's not sticking up or anything. So that is something that I love to do. All right, so you see here it's still a little more space on that right side of her versus the left, so I am going to fold it over before the edge one more time and then I will go all the way. So now I'm folding over. I'm not going to the edge yet, again because there was a lot more space on the other side and I wanted to even out. So the next time I will go all the way to the hairline. So this is me doing what I said I do. Um, if you don't want to do the clipping of it, you can just flat iron the the hair that's coming straight out of the track, and that will make it lay a lot flatter as well. Um, sometimes a lot of people are like, how do you get that hair from sticking up? That's how. If you just flat iron it when it's fresh out of a bundle, or when it's been held tight in a rubber band or something like that, like the hair just goes haywire where the rubber band was. Um, yeah, and I didn't realize you couldn't see that part, but I did go to the, to the hairline. You see it's a lot further up on this left side now. And I'm going from hairline to hairline, and I am flat ironing the root of the track so that it lays flat. And I just burned the crap out of myself. Oh my God, like, I can feel the pain all over again. It was terrible. Like, I'm gonna show you later. Like, I was so shocked. I know, why am I still standing there? But it hurt like it hurt. It was like 1-inch, 2 1-inch burns because I like clamped my arm with the flat iron. Look at that, it boiled over. It was terrible, it was like a big boil. Oh my God, it looks not so bad, but if you've had a burn, you know they don't stay like this. Okay, I'm back. I am very dramatic and I have very low tolerance for pain, so yeah. But I went to this edge on the right, and then I'm going all the way to the other edge on the other side. And this is not the last row. I have one more row to go. So when I go to the other side, I will sew all the way over there and then come back, and then I'll be done. I'm so crazy.
Don't judge my little happy dance, okay?
Don't judge me. Ladies, this is a random tip, and gentlemen too, because I know men watch my videos too that do hair. But if you do not know how to do something, just tell your client that you do not feel comfortable doing it. Um, I have turned away a client before because her hair was too thin for leave-out and she wanted one anyway, and I'm like, I don't I'm not going to do it because you're not going to walk out of here with the tracks showing and then accuse me of it. So I literally did not do her hair, but she did not— I offered her closure. I offered her, you know, another option, but she didn't want to pay any extra for closure, nor does she want to pay extra to have a closure installed. So I helped her find someone who would do like one of those full sew-ins with a circular closure that you make and glue in or sew in. I don't do those because no part does not look natural to me. So, um, I found her someone who would do it for her, but again, I have no problem turning away clients for things that I don't do or things that I am not comfortable doing. So please, instead of messing up your name with a client or your reputation, tell them that you don't know how to do it or you, you won't do it. Now, if you're practicing and the person knows that you're practicing getting better at something, by all means, go for it. But don't practice on someone's head who doesn't know you're practicing. Now this client's leave-out was perfectly fine. It is the next client whose leave-out was the thinner part of her head. And yeah, there's my burn. Okay, so this client, I'm going to show you the things that I use when someone's leave-out is thin. And again, I showed the entire process of this sew-in, which is in the description. But, um, she actually was going to get a frontal, and I'm showing her where I'm going to fill in her hair just to, just to be darker so that when I separate the line, you know what I'm saying? So I'm spraying it with brown for you on camera to see, and then of course over that brown I'm going to spray it with her hair color. And this is a hairspray that You can find it at Sally's, um, and you see this is the black and you want to match the client's hair. This is like the hairspray that people use for like Halloween or something, or they add streaks of blue or green, um, and it's just something that I use for in particular just to blend in that line so that you can't see it. And again, she was supposed to get a frontal, but we had to kind of improvise. So a lot of clients do have thin hair and sometimes I will not do the this method because the client's hair is too thin, but in this situation we did have to. So let me know what you all think, um, comment below and make sure you thumbs up this video.
More from LaToya






St. Louis, Missouri - Lasts 4–6 months - Takes 4–6 hours - Investment: $3,000 www.TTDoesitall.ai


What are #ktips? Here’s your answer! Schedule at www.TTDoesitall.ai 🩷 #extensions #ktipextensions

4-6 hours install and last 4-6 months #ktipextensions done by the right stylist the right way 💕

Located in St Louis Missouri 💝 Consultations available www.TTDoesitall.ai 💕#ktips #natural

K Tips take 4-6 hours to install and last for 4-6 months with proper care! #ktipextensions