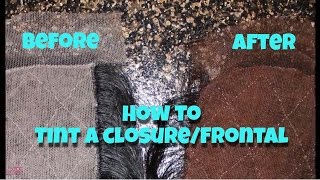
LaToya Kelly shows how to tint lace frontals and closures to match skin tone using Rit liquid dye. Mix two capfuls of dye with water, test on paper towel, then soak the hairpiece for five minutes. If it gets too dark, apply MAC foundation to lighten it.
Chapters
Hey everyone, it's TT Does It All with another how-to video for how to tint frontals and closures. And this works for silk closures as well. That's what you're seeing right here is the difference between the lighter one, which has not been tinted, and the darker one, which has been tinted. We're all different shades and complexions, so it is very useful to have this tip if you are someone who does a lot of work on yourself or other clients, because we're not the way a lot of these products come shipped to us. This is actually the silk closure that was tinted in that picture, and this is another one. And as you see, these two clients are two different complexions, yet the silk closures match their complexion perfectly. So, um, this is my way of tinting lace and silk closures as well as frontals, and I use Rit liquid dye, and I use a few color combinations. So Don't ask me for ratios because my ratio and what you use for your clients will be different. I'll show you what I use for this particular one, but, um, I usually use 2 capfuls. And if you are not familiar with this product, I recommend testing the formula that you use on a paper towel first. The product is very thick, but, um, it is a, it's a great outcome. But I put the 2 capfuls in, I mixed the water with the tint, and then I dipped my frontal closure or whatever in. And like I said, I recommend you dip a paper towel into it just to check the outcome. The lace, once stretched out across their forehead, especially for frontals, looks a lot different once it's on their head than it would, um, on you, but you see the difference in this one, and you see how dark that is compared to what it was. And this is for darker complexions, but it makes everything just blend nice and pretty. But, um, you want to make sure every piece is in there because there's a corner right there that's not, but you want to make sure every piece of it gets put in that lace. And if you need to add more water, then that's perfect. I let mine sit for 5 minutes in the hot water and then I rinse it out. You can shampoo if you want to. At this point, the tint is pretty much in there after 5 minutes, so it's not going anywhere. But I rinse it thoroughly and then I go on with my installs. And I have install tutorials on frontals, on lace closures, and silk closures. So, um, install videos are below in the description. But here's a few clips of frontals that I've tinted the lace to match their complexion. Complexion. And in the beginning you saw the silk closures, but this is from my Snapchat. My username is TT Does It All, just like everything else. There's another lace frontal where hers had actually been in a couple of weeks and we just kind of repressed it out and everything. But with everyone's complexion, you want to tint their lace according to what they look like and what they like. Now what if the lace is too dark? What would you do then? There's no way to lighten lace closures or anything like that. So my way of fixing this issue is actually foundation. I am actually a makeup artist as well, so I use foundations of every skin color, which I have. So if someone is really light, I have really light foundations, and I have the darkest as well., I use MAC foundation and it is Color Blend. So yeah, hope this video helps you all. Leave comments and ask any questions you want. This one particular is one of the lighter complexions that I had to actually do most recently. This was like last Friday and yeah, I had to use foundation on hers because I couldn't lighten the lace, but it looks perfect. If you enjoyed this video, please subscribe. Don't forget to comment rate, and share this video with fellow stylists or clients that you want to see my work.