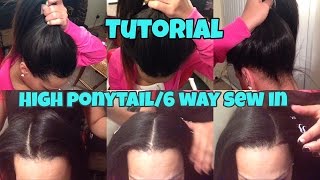
LaToya Kelly shows how to sew in a 6-way style that can be worn curly, straight, or in a high ponytail with three parting options. She uses a rounded horseshoe part, sews a net under the bottom layer to hide tracks, and explains why longer hair works best for this versatile look.
Chapters
Hey you all, it is TT Does It All and I'm back with another video. And this is my versatile slash 6-way sew-in. Today I'm going to do something a little bit different and I will be doing the video with the tutorial, um, so you'll see me talking as well as what I'm showing you. And that way you kind of see— I don't know, we'll see how it goes. We'll see if this is something that you like while I'm doing the voiceover. So this sew-in, you can wear it 6 ways. So you can wear it in its natural state curly down, you can wear it bone straight all the way down, you can wear it in a high ponytail, you can part it left, right, or in the middle. So it is a very versatile sew-in. It is for clients that have longer hair, so if you have shorter hair, it's not really going to be a good match for you. And if you're natural, Unless you're getting like, um, that heat-free hair, that would be a good match for it. But if you are looking for something like long and luxurious and just something that looks like yours, it's mainly for people who have a decent grade of hair but they're tired of dealing with their hair, tired of the maintenance. Sew-ins are low maintenance because your hair is up. You don't have to deal with straightening roots. You don't have to deal with humidity in the shower, you know. So there's so many advantages to having a sew-in even if your hair is already long. With this 6-way sew-in tutorial, I'm going to show you exactly how I got it to that high ponytail and show you my sectioning as well as my partings. This is the outcome after it's sewn in, what it will look like, and that's her leave-out of course around the bottom of the back. And this is everything just straightened out together., and that's the outcome. And if you all watched my previous video, the Caucasian sew-in tutorial, I did show this particular client, and she also has the versatile sew-in, so she can change her part left, right, or in the middle, and she can also wear it all up into a high ponytail if she wants to. So that is one thing that I didn't tell you all in that video, but here is the how-to of her particular hairstyle. Okay, so the first thing I do is I part out a horseshoe at the top of the head. Again, if you all remember, I do not use box parting because I don't like the finished square. So as you see here, the leave-out even around the back and the sides is rounded. The first braid is around the horseshoe on the right side, and the second braid is on the left side of the horseshoe., and then you see where that starts, I even leave the front hairline out as well. And the next braid comes down from the right side braid down to the bottom corner, and this is the side I'm talking about, and I stop it right at the bottom. And then the other braid goes the same way except it goes all the way around the bottom connecting to that corner braid, and that's that look right there. So after that braid is where it gets simple. You see me just going straight down, connecting the previous braid into the next braid. And just like I showed in one of my other videos, connecting those middle braids to the sewing in the back and still bringing the end of those braids up so that— you see, I kind of unbraided that right braid that was up here, and I'm going to connect it all the way into the sew-in, or sorry, into the back braids. And there's that finished look of both of those braids braided in, and then we'll get the braids in the middle done. And I'm still bringing up the ends of those outer braids into those inner braids, and then that's the finished look. So, um, that is the finished look. I will sew in a net to her head. Some versatile sew-ins I don't need it, but some I do. It is very important to sew underneath the first bottom layer just so that when she lifts her hair up, it doesn't show the track and it doesn't show her braid. And I am stitching from just left to right, left to right. I do double the first bundle and half of the second bundle if need be, and I can use 3 bundles in this sew-in. And I sew all the way up to the crown of her head where I left that horseshoe out, and you see there's no boxiness. You can't even see her parts when I lift her hair, um, other sew-in up. So this is all the sew-in right here that's lifted up, and then I'll show you all what it looks like after I actually flatten her hair, straighten her hair out. And she's holding it up in a high ponytail. It's very tight, no hair is loose or hanging. You see she's even pulling it further up so you can see, and that's her right part. And she can also do this, which is the middle part, and she can also do a left part, which there it is. And we can bump it to the side, and that's why I say I would rather have longer hair when you do this. This is her hairstyle. She wanted a right part, and she can still even pull it up with the curls and just have a curly ponytail. And as you see, the edges and everything are fully disguised. So if you all enjoyed this video, please thumbs this video up if you like the video mixed with the actual tutorial. Let me know how you feel about that. Leave a comment, subscribe, share this video with your friends and family. Um, and again, thank you all for the support. I really do appreciate it, and I do notice and I respond. I'm trying to do better on responding to comments, but Um, yeah, you all give me your feedback. I'm really looking forward to it. I'm still in Seattle. Have you all heard? Okay, you probably heard about the Delta system shutdown. So yeah, I am definitely stuck in Seattle because of it. But, um, yeah, I will see you guys on the next video. Hopefully I'll be able to record how to sew under the braid for you all because I know there's a lot of people requesting that. So, um, I will see you guys soon. Thanks for watching.