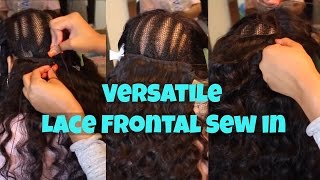
Stylist TT shows how to sew bundles behind a lace frontal without glue or tape, ordering them longest to shortest and stitching corner-to-corner. She keeps the bottom row under the braid so you can wear a ponytail, flattens stubborn wefts with a flat iron, and finishes by attaching the top track to the frontal edge.
Chapters
Hey everyone, it's your girl TT with another how-to video, and this video is to show you how I sewed in the back behind the frontal. I get this question a lot, and I'm usually very thorough about my how-to videos, so I wanted to make sure I got one specifically about how, how you sew in the back tracks. So I do have multiple videos on frontals and multiple how-tos. I show how I cut that band, I show how I install it, I show everything. Those videos are in the description. But for now, I am starting with the longest bundle first, and the shortest bundle will be last, and that's to give the client a more layered look without having to cut her tracks. So I fold the bundle in half And I start with the folded end, and I start with the folded end because I don't want any lumps at the end of that track when it comes to lay it down. And I find it easier to lay flatter just the loose ends versus that folded over part, so I always start with that part. And when I sew in the back bundles, I start from corner to corner, so I do start from the bottom right corner of one side and I go to the bottom right corner of the other side, and I literally sew back and forth. I do have other videos, as, um, you all might be asking, okay, I want to see how you started that, how are you stitching it, how are you going to fold it over? And I have videos on folding over, I have videos on stitching, and I also have videos on starting and ending a track the way I do it. Everybody does things differently, but I have had much success off of my way of doing it, so I'm teaching you all. But, um, yeah, so you see I'm going to the other corner and I'm folding it over. I don't use like a horseshoe method. I don't go up and down. I literally go left and right all the way up into the top. So I'm going to stop talking for a second and I'm going to let you all watch as I Like I said, I'll go back and forth, left and right, and I fold this bundle in half as well as the second bundle in half. In the third bundle, I do something different, so just keep watching. As you watch this, you may be asking yourself, am I sewing onto the frontal when I get up to it, or am I just stitching right up to it? I am stitching right up to it. I am not actually stitching onto the frontal. The frontal is stitched down and it's secure enough. I don't want the fold over of this going into the hair on the frontal. I want the frontal to lay as flat as possible, and I want the bundles in the back to lay as flat as possible. So no, I do not stitch onto the frontal. I stitch right up to it. One thing that I also do differently is I sew underneath the braid on the bottom row so that the client is able to flip her hair up into a ponytail and no tracks show. So you see, I'm pulling it up and you're not seeing any of her tracks. None of her tracks are showing. And, um, yeah, looks good already. I just love my hair. It's the Brazilian Deep Wave, as you all know already, but this is the exact same hair as my frontal tutorial I did. This client is just leaving hers in its natural state, and the other client wore hers bone straight. And the bone straight client, she can also go back to this look as well. But, um, this is the next bundle, and this is the second to the shortest length. Um, I folded this in half and I'm stitching it in double just like I did the first bundle. And I'm not sewing onto that frontal, I'm sewing right up to it. But I want to remind you all, all of my videos are HD, all of my newer ones. And, um, I would recommend expanding this, watching it on the TV. If you all have a Chromecast, that works perfectly. You can see every single detail., and make sure you are watching in HD and bigger. Now this is a tip: if your bundles are not flat enough for you, or if you don't know how to sew and fold it over flat enough, I do use the Pump It Up and I'll put a clip to hold it down, and it works wonders if for some reason that bundle will not lay flat. And there are times that the bundle doesn't lay flat because of the band that it was in. So if that hair is sitting in that bundle in that tight rubber band for so long, it's gonna impact the way that that hair is laying on that track. So either you can flat iron the root of that weft, or you can just use the Pump It Up. And people always got something smart to say about Pump It Up, but it's still on the shelves for a reason. People are still buying it, and I sure am. But again, I am getting to the finishing line, and it looks like, how are you going to get a whole nother bundle in there? And I am, so just keep watching. So we're at the last bundle in its natural state, and that's how my bundles come, of course, with my label around them. But I'm going to brush it out, um, and then I'm going to show you how I fold the last bundle over. So it's folded in half right here, but I'm pulling one of the wefts down. I'm pulling one side down a little bit shorter so that at the end I have just a single weft. So it's folded over right there, and then as I go down, you see that one side is longer than the other. And that's so that when I get to the top, I have a single weft that will lay super flat at the top of her head. So that is one single technique that I use, and it seems to work for me. So just check it out, and I will again show you exactly where it's stopped. And this is all from repetition. I want to remind you all that sew-ins, with repetition, with practice, you will become perfect at them. I didn't learn this overnight. It literally took many trial and errors to learn this and to be able to eyeball it and know where exactly my track will lay, where exactly it will stop. And not all the time will it be perfect. With her head, I won't have to cut anything. It'll end exactly in the right place, but that does not always happen every time. This is my hair, these are my extensions, this is my extension line that I work with quite often, so I am able to eyeball, you know, how much hair I have, how much space I have left on the client's head, and how far I can get. I'm going to continue the sew-in left to right. You see I'm not going in any U-shape, I'm literally just going back and forth. Now you see, now I am running out of that shorter end and the longer end is still going on, so I can go single when I get to the top. So I'm going to continue folding over and I'm going to keep these doubled up until I run out of the shorter end and it's just the single weft. Now I'm at that very end of that shorter piece, and I'm going to fold it over, and I'm going to reinforce it multiple, multiple times just to make sure that when she goes to comb her hair or style her hair, I never want the end of a piece of that bundle to ever come loose. So I'm going to reinforce it a couple of times because it's a very short piece I'm folding over right here for that shorter end. So I'm gonna— you'll see me knot it multiple times going back and forth over it so that when she does go to style her hair, there's nothing snagging. The little piece doesn't fall out of the thread. It's reinforced multiple times, so she's good to go. So now that I am on the last row I am going to stitch one way and then I'm going to reinforce it by stitching the other way. And at this point, I do attach that top track to the frontal. So I am sewing onto the very end of that frontal, not through the hair, just to the very end of the frontal. And I'm going to blend the frontal in with her bundles in the back. And I use a wand curl on the highest temperature. It doesn't matter what wand curl you use or what wand iron you use, but mine is Conair. It's very old. I bought it from a CVS drugstore like 10 years ago. But as you see inside her frontal, it looks very good. I'm so happy with her results. She's still able to wear it all up, and this is her end result. I hope this video did help you guys. Um, if you want to see styling and other videos about this, please visit the links in the description and share this video with stylists. If you have a stylist that you want to, um, show it to, go ahead. But thanks for watching, guys.