VERY Important (Leave out) Tips | Braid Pattern and Sewing on the Net
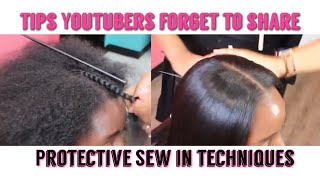
LaToya Kelly shows how to install a middle-part sew-in with perfect leave-outs. She details her braid pattern, anchor placement at the part line, and net-stitching technique that avoids scalp tension. The next video covers sewing and styling.
Chapters
Hey everyone, it's your girl TZ Does It All back with another slay, and this is going to be a tutorial, how-to DIY of a middle part natural part leave-out sew-in. And this is going to be our end result, and I'm going to start with the leave-out. I have two videos showing how to measure your leave-out One of those is for a middle part sew-in, one of them is for a side part sew-in. So if you need help with either of those, the, uh, link to those videos is in the description below. But I have already gone in thorough detail about that. So I'm going to clip that on, and then I'm going to do my little side pieces next to the part, which help you to— when you have that part that goes back into the sew-in, it just makes it look a little more natural to me. And I also show how I do that also. I also show how I do that also. Okay, y'all know what I mean. So now I am going to do my anchor braids, and you all know, um, if you've watched my previous video of this install, this is really just an update. I do this I've done this before, but this is just a different angle for you. I took that down because it's not close enough to the part for me. It needs to start at the start of that part. It doesn't need to have any smooth back, and I'll show you the difference between this and what I just took down. So as I braid, I'm gonna get a little further back and then show you a side by side, and you'll notice exactly what I meant. So the part on your right is starting right at the part. The part on the left started a little bit further back than the part. So you want it to be a perfect square, like a perfect angle, so that when you go to stitch it down, um, you have a perfect line. Um, it is really weird if that first braid is further back than the braid under it. Um, it just doesn't lay flat, and it also shows track underneath it if there's nothing to cover it up. So I will show you all that part when I do the actual sewing in, um, sewing the net, and when I actually sew in the bundles. I'll show you exactly why that's important. So here is where I'm just kind of showing how I take one side of that strand of hair and I double it, and the other side is just still full. So I just take half of that strand and then I split it in two to make the three. So I am just braiding, and I just kind of slowed it down for you all so you can see my hand placement and everything. You all, one thing that I hear from all of my customers is that I am a light braider. I'm not heavy-handed at all, and that's because I am tender-headed to the max. Like, I— it hurts when I braid my own hair, so I'm very delicate with my clients. Um, Yeah, so I am just going to braid this through. You want to make sure that none of those strands are in this because you can either break the person's hair off or have it in your sew-in, and you don't want that. So you want to make sure you clip it apart and it stays out of your way. So I'm going to continue braiding down. If you want to know what I put on her edges to smooth it back, I will put that in the description below. It is by Design Essentials. Um, it's either between that or another one in particular. And you see how much I have on my finger? I just want you all to see how much I'm using. And I use that much on the entire piece, and I didn't have to get any more. So then I'll just comb that back, and I'm using my carbon comb, the same comb I use for all of my sew-ins. I have multiple of these, I mean, like, probably like 20 of them. And if we get dirty or between clients, I just swap it out. And I have my, um, sanitation jar on the side. Um, so I'm gonna braid that out. I do connect the bottom of this braid to that braid that I just did on the other side. And I also have another angle. So if y'all remember, I bought my GoPro and it goes on my head and it sits like on my forehead. So that I can show you all a different angle. And this is me taking half of that strand in two and then braiding it in like I did on the other side. So I am going to braid that down and around the back and connect it with the other braid, and then I will show you all the rest of that braid pattern and then get to sewing on the net, which there is something very, very, very important when sewing on the net also. So I am very tedious and meticulous with everything I do with these sew-ins. So please pay attention to the things that I do, the placement of my hands during the entire process, because it's all important to make your job easier and the experience better for your customer. And that's the square that I meant. You want to make sure that that top braid goes directly on top of that braid that's going down that I'm braiding now, because you want the weft that you sew onto that top braid to go over the bottom one, and it it just lays nice and flat and smooth, and you don't have any track showing. All right, so I went ahead and sewed the rest of that and connected it with that braid at the other side of the corner. And then I'm going to braid the rest of these back and show you how I carry each braid into the next. A lot of my subscribers have asked me why don't I comb each section before I start braiding it, and that's because it takes time. If you detangle the hair before it's braided or it's time for a sew-in, then when it's time for you to get your hair sewn in and braided, it takes a lot less time. My time would probably double if I took the time to comb each section, if I had to detangle each part as I parted it. Like, it just takes a lot longer, and I am a person who focuses on getting people in and out in a timely manner because not only do I value my time, I value my customer's time. So Again, detangling before you actually start braiding will save you a lot of time when you're braiding. Having to pull your fingers through tangly hair is not good when you're trying to work on your time, and time is money. The more clients you can get in, the more money you can make, right? Okay, so, and drop a comment if that makes sense to you. If you didn't understand, drop a comment and I'll reiterate, explain it. But this braid, that first, very first braid that I did, is what I'm going to connect now to the back. And that is what I will do to the other braid on the other side also. So remember, I clipped that down. So now I'm about to remove that clip, unbraid a little bit, and then I'm going to braid it into the back. And it will be nice and flat. As you saw, the outcome was nice and flat. So I'm just going to continue braiding that on down, bring that previous braid into it. And just braid. And in my previous video, um, with the lace closure tips and tricks, someone asked me to see the back, so here you go. I already had this up and ready to go. And, um, yeah, I knew— I know what y'all want to see. I, I try to do things where not every video gives the same information, because if I do that, what's the point of you continuing to watch me? And it's not that I purposely say, hey, I don't want to give this information, but it makes sense that if you don't— if I don't show— if I don't show something in my last video, I'm gonna make sure I show it in my next video. That's growth. So I'm growing with y'all, and I'm listening to y'all, and I'm reading those comments for sure. So as you see, I brought that previous braid up, which is that corner braid, into this one. And then I am going to continue on with the next braid. So when you are done with this and all the braids are in, you will have one braid hanging, and that braid you can tuck up and sew on the net, and it will be flat, seamless, nothing bumpy, no lumps anywhere, smooth when you run your hand across it. So this is my favorite braid pattern. I've been doing it for years. It saves me so much time. I could save more time if I didn't do that braid on top, the, the first 2 anchor braids, but to me it helps it not have as much tension on the client's head. I've seen a lot of people from the part just braid straight down from the part that's left out, and to me I think that that top track when you're finished sewing in, you got that first track— that's the, the very last one, I'm sorry. To me, that's too much tension on the roots of her hair. So I am still braiding in those ends of that if any of you all wanted to see how that was. And please remember, if this video you're like, oh my God, I couldn't see this or I couldn't see that, just remember this is your video until YouTube decides to shut down, okay? So you can fast forward, rewind anytime, and remember that we are going at your pace. But how many of y'all are watching this live with me? Because we need to be talking in the chat. And if you're not watching it live, I still want to hear your comments on what I'm about to say to y'all. And if you're live, I want to hear your live feedback. I I am planning on starting a podcast because I have a lot of questions that you all ask me about how to start building clientele in a new city, how to build clientele period, how to start your social media, how to start a YouTube, um, how to do this, how to do that. And there are so many things that I can share with you all, but, um, I think a podcast will be excellent for that. So thumbs up this video, drop a comment below, comment in the live if you all are watching it with me now. Comment and let me know what you all think. Do you all listen to podcasts? I've actually never listened to podcasts, but do you all listen to podcasts? Are there particular ones that you all listen to or like, or what are the topics that you would like to hear from me? Yeah, I would love y'all feedback because I do this for you all, and, um, I just would love the feedback. So I am going to keep, keep on, keep on, keep on. Okay, where's that from? The Brady Bunch? I watch too many movies. I've been watching so much stuff on Netflix, y'all, between You and October Faction and what else? A lot of stuff. So here we go with my wild grow hair oil. OMG, when I tell you I get clients sniffing and they're like, girl, you just, you just cleared my nose up. And I'm like, yes. And they're like, what's that oil? I'm like, girls, it's not just the oil, it's in the grease too. So I did that little crooked, so I went back over it for— because I want that part to get that. And I'm also going to rub it in before I put the net on also. Um, again, I put the net on to allow myself to stitch anywhere. I don't put it on, um, to protect the hair. I am very delicate with my client's head. Um, I do not apply tension to my client's head. If something's hurting, I always encourage my clients to tell me because I can take it down and start over. Um, and not the whole thing. Please tell me when it hurts instead of like, oh my God, girl, it's been hurting for the last 30 minutes. I tell my clients all the time, let me know. Okay, so remember when I talked about those braids, like it's kind of like that square where my middle finger is right now up there? That is the important part when it comes to stitching the net on, and I want you guys to really pay close attention, okay? So these 2 anchor braids are what is very much needed to hold into place the first— or I'm sorry, last 2 rows of your sew-in. So this stitch right here is holding as an anchor between the 2 so that there is no gap, which is why it's important to have the top line up right above the bottom one. So that thread is going to connect that gap and give you something to stitch on. So as you see, I made that line connecting the two, and they're not pulling. I made sure I was not pulling them tight. You don't want them to pull on the client's hair. You want the thread to just be there. And you see, watch as I finish pulling. You see that I don't pull. And I'm going to do it again. I'm going through that top one and underneath that bottom one, pulling it through. And watch to see that I don't pull it tight. And you're seeing I'm going slowly because I don't want to snag her hair. See that? You see how I just left it? I did not pull. So please do not pull your hair or your customer's hair. I think this is a lot easier to do on a customer's hair because trying to see it on yourself is very hard, and that's for me at least. So as I stitch down on that top braid where my point finger is, I am kind of pulling that braid to be flush with the other one so that it is not wobbly. You don't want it to move, and you don't want to braid that braid super tight to where it's super tight to her scalp when you can just stitch it and make it nice and firm to where it doesn't move or wobble. It's all in sync with the rest of the sew-in. So again, ladies and gentlemen, I do everything for a reason. Even me having my client hold their head down right here is so that the net will, will be stretched. So if that net is stretched and her head is down, that means when she has her sew-in in, her hair won't be pulling when she pulls her head down. So if when I'm sewing on the back, I tell my client, hey, put your head down, make sure your head is down. If your head is down when I'm sewing back there, that means that when you put your head up, it's nice. And if you put your head back down, it's nice. If their head is up the entire sew-in, when they finally put their head down, it's gonna pull because their head is not used to being stretched out like that with the sew-in. So again, watch it over and over and over. There's so many reasons why I do every single thing that I do, and it's all for a reason. So I hope that this portion of this video gave you guys a lot of information, because it is a lot of information. Who's still watching? I need a thumbs up on this video, and I need y'all to drop a comment and let me know y'all watched it. Because this was a lot of information and this was a long video. But I really appreciate you all for continuing to watch the whole video. If this video is helping you in any way, shape, or form, drop a comment and let me know, because I love the fact that I'm helping you all. Because if, if I had these videos when I started doing sew-ins, oh my God, Oh my goodness, I probably would have never worked a day in my life. Like, I would have been like, who needs work? I got YouTube and all these videos teaching me how to do this sew-in. That's another thing I'm going to talk about— how I got started, how I grew, how did my clientele grow. I really want— I really want y'all to tell me if y'all want this podcast, because if not, then I'm going to save my energy and my time, because y'all know it's going to take up some time. But if y'all want it and y'all really want the information, I definitely want to give it to you all. Podcasts are free, they don't cost anything to listen to, and it's all informational purposes. So I cannot wait to share all this information with y'all. If you haven't already, make sure you thumbs up this video and subscribe because the next video I will be showing how I sew this in and make it so flat. And I will show me styling, straightening, and everything detail by detail. If you are a member of my memberships, um, just know that I have a whole full video of the view from my head. So yeah. Oh my gosh, the comments I get on these videos is crazy. One just popped up on my phone. So yeah, I will see y'all in the next video. I hope you all enjoyed this. All right, give me a week and I will have the next one posted for y'all, and I will post that based off of the comments I get on this video. So make sure if you have any questions, anything you need to know, you drop that comment because it's all coming next week. All right, I'll see you on the next video.
More from LaToya






St. Louis, Missouri - Lasts 4–6 months - Takes 4–6 hours - Investment: $3,000 www.TTDoesitall.ai


What are #ktips? Here’s your answer! Schedule at www.TTDoesitall.ai 🩷 #extensions #ktipextensions

4-6 hours install and last 4-6 months #ktipextensions done by the right stylist the right way 💕

Located in St Louis Missouri 💝 Consultations available www.TTDoesitall.ai 💕#ktips #natural

K Tips take 4-6 hours to install and last for 4-6 months with proper care! #ktipextensions