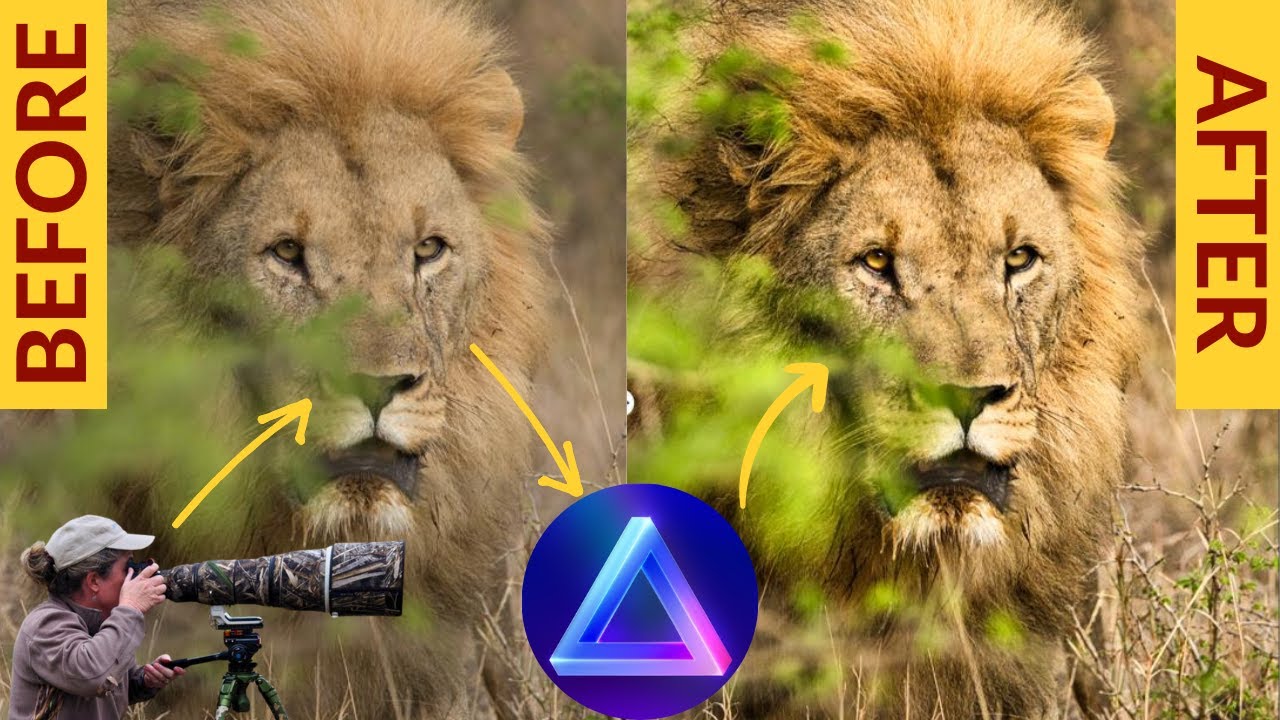
In this tutorial, Angie Birmingham walks viewers through a complete edit of a lion photograph using Luminar Neo. She begins by resetting the image and performing raw development, adjusting smart contrast, highlights, shadows, blacks, and whites, and applying optics corrections. She then uses the Enhance tool to mask the lion, copies the mask for later use, and refines the mask around the animal’s face, fur, and body. After cropping to focus on the lion, she applies Structure adjustments to enhance detail, followed by Smart Contrast and the Dramatic tool to fine‑tune tonal balance and saturation. A localized dodge‑and‑burn step brightens the eyes without losing color. Throughout, she intersperses channel calls‑to‑action and explains Luminar’s subscription options, detailing the Pro package ($119/yr) with extensions, the Explore plan ($99/yr), and one‑time extension purchases. The video ends with a before‑and‑after comparison and a reminder to like, subscribe, and follow on social media.
Chapters
All right, so before we get started, I just want to remind everybody to hit the like button and subscribe if you like Luminar editing for wildlife. So let's jump into the lion. All right, so here is the after and here is the before. So before I go and take this image and completely wipe all of the edits, first I'm going to go down to Actions and I'm going to hit Save as Preset. And I already got him over here, so I'm going to cancel that. Okay, so now I'm going to go here and I'm going to go revert to original. All right, so we're going to jump over here into edits. First thing you want to always do is start in develop raw. This way you can control the lighting in Luminar. You like set the parameters. So what we're going to do is we're going to take a little bit of this smart contrast. We're going to add a little bit of contrast to this, and then the highlights. So I'm actually going to take the highlights down to about Maybe about here. In the shadows, I'm going to lift the shadows just a little bit, maybe somewhere in there. Then I'm going to jump down here into the black and white. I'm going to hit my J key so it will turn on the highlights and shadows. And I'll show you what that looks like. The shadows will turn blue, as you can see there. We don't want that. We don't want that much solid black. And then whites will show up in red, and that would be your, your burnouts. But we don't want that either. So we're going to take our blacks And on this image, we're going to kind of take it down, maybe somewhere in here. You can always come back and change it later. I'll show you how to do that. And then the whites, I'm going to boost the whites probably quite a bit because I want to get some of that white to come out in his face. There we go. All right, and then one last thing I do before I leave here, I go down to Optics and I always check all 3 of these boxes. It just goes in and fixes all the issues that your lens might have had. So we can zoom in here on the lion. Probably not that zoomed in, but maybe right there. And we'll hit the before and after. That right there already made a huge difference. So now that we're done there, we're going to jump into enhance, and we're going to enhance The accents. We're not going to mess with the sky, of course. Whoops. We're not going to mess with the sky. We're going to jump over here into enhance, and we're going to first we're going to do is we're going to mask the lion. So we'll go ahead and take the brush. And I'm going to zoom in a little bit on his face. Probably a little bit less. I don't know. Right here, we're just going to kind of paint in right around his face. His fur makes it so the mask is a little bit more forgiving. Then we'll go over here to the sides. We'll take the sides down a little bit so we can kind of go down here into his legs and his chest a little bit. And then also hit this stuff here in the green, probably this little section right here. All right, now that we've done that, we're going to go back to masking. And since we've taken the time to do our mask for our lion, we are going to copy that mask so we can then paste it later during our edit. So now on the enhance, we're going to take it Up probably somewhere around here. I'm going to zoom in to his face. We'll go before and after. As you can see, it definitely enhanced the hair. So before I move on though, I'm going to go on and I'm going to do a crop. I always like to do a free crop. We're going to just kind of bring it in because our subject is our lion, and I want The main focus to be on the lion. Well, all right, there we go. Now we're working with the image that will be the final image. Makes it a lot easier when you're doing a lot of painting and masking. You don't have as much to do. So let's jump on down here into Structure. We're going to go in here to Masking. Down here in More Actions, we're going to hit Paste, and it will show you the mask that we did earlier. All right, so let's go over to Adjustments, and on the Structure, we're going to go up to about 38-ish, and we'll go We'll boost it probably about there. I like— I usually like a lot of structure. I just like the way it looks on my wildlife, especially when they have hair. There we go. All right, so now we're going to move down to one of my favorite tools, this Smart Contrast. Remind you to like And subscribe and ring my bell and comment below if you're liking these videos, please. I would really like input. And I've also recently started a monthly subscription. It is $1.99, and that gets you into a private chat area where we can talk anything photography. So you ask me any question And I will go over the answer. And if it's a really good question, I'll probably create a video on it. Don't forget to follow me at WTF Stop at all the social medias: Facebook, Instagram, TikTok. Um, I think that's all of them. Oh, and here at YouTube, don't forget to, um, like and subscribe. A special going on. Uh, $119 a year gets you the Pro package, also includes all of these extension packages: the HDR Merge, the Noiseless, the AI Background Removal, Upscale, Focus Bracketing, SuperSharp, and Magic Light. So if you purchase the Pro package, which is $119 a year, you get lifetime upgrades And anytime they come out with a new extension, it's yours. Or you can get the lifetime package. The product is yours forever, and you can purchase the extension packets at $299, one-time fee, and then $149 is a one-time fee. But if you don't think you'll use the extension packets and you don't need it for more than one computer, because if you notice here, Pro has 2 computers and the other one is strictly 1 computer along with your basics. So if you just want to get started and just kind of try out Luminar, you can always subscribe to the Explore, $99 a year. You don't get a lot of the extras But if it's something that you want to try out, it'd be a less expensive route to go. This— we're going to be working with the whole image, so we're going to take the Smart Contrast and we are going to take the highlights. We're going to take the highlights up maybe here. We can always mess with that a little bit later. And then the balance, probably take it to there. Yeah, that looks pretty good. Midtones, probably about the same spot. And maybe somewhere in there, or after. Yep. I'm liking that. Shadows somewhere around there and maybe here. Now let's see what that looks like. Before, after. All right, now let's move down to another really cool tool. It's called Dramatic. And Dramatic, we're going to be using the whole image, and we are going to bring it up to a About 11. So you can see it took away some of that saturation. You could actually probably even go a little higher. It'll take out some of the saturation and really make the, the blonde in his hair really pop. So Then the one of the last things I'm going to do here is I'm going to jump back up in here in my favorites. Oh, let me just show you real quick that if you want to make something your favorite, you just put your mouse on it, right-click, and hit add to favorite, and it'll put it right up here in your favorites. You don't have to go scrolling down through the whole menu to find it. So we're gonna do a little dodge and burn here. We are going to lighten up the eyeballs just a little bit. So this might take a couple tries just because it's a little tedious. There's before and after. That looks pretty good. We'll zoom in 100%, bring his eyeball down, and we'll go before and after. We'll probably lighten up that top part just a little bit more. Yep, that's it. And then to use this tool again on the other eye, you just simply close the tool. Reopen it and it resets itself. So now we're going to go over here to this other eye and it's going to go up there, probably right through there, and see how that looks. We're going to downplay the strength on this one because it's a little too bright. We'll move the strength down. There we go. Now we can see the detail in his eyes still. I didn't want to lose the colors in his eyes. There we go. Alright, so that's the edit. There is your before. There is your after. So before you go and run off though— All right, so thank you for watching and see you on the next one.