Escaping Chains: Luminar is now available on iPad
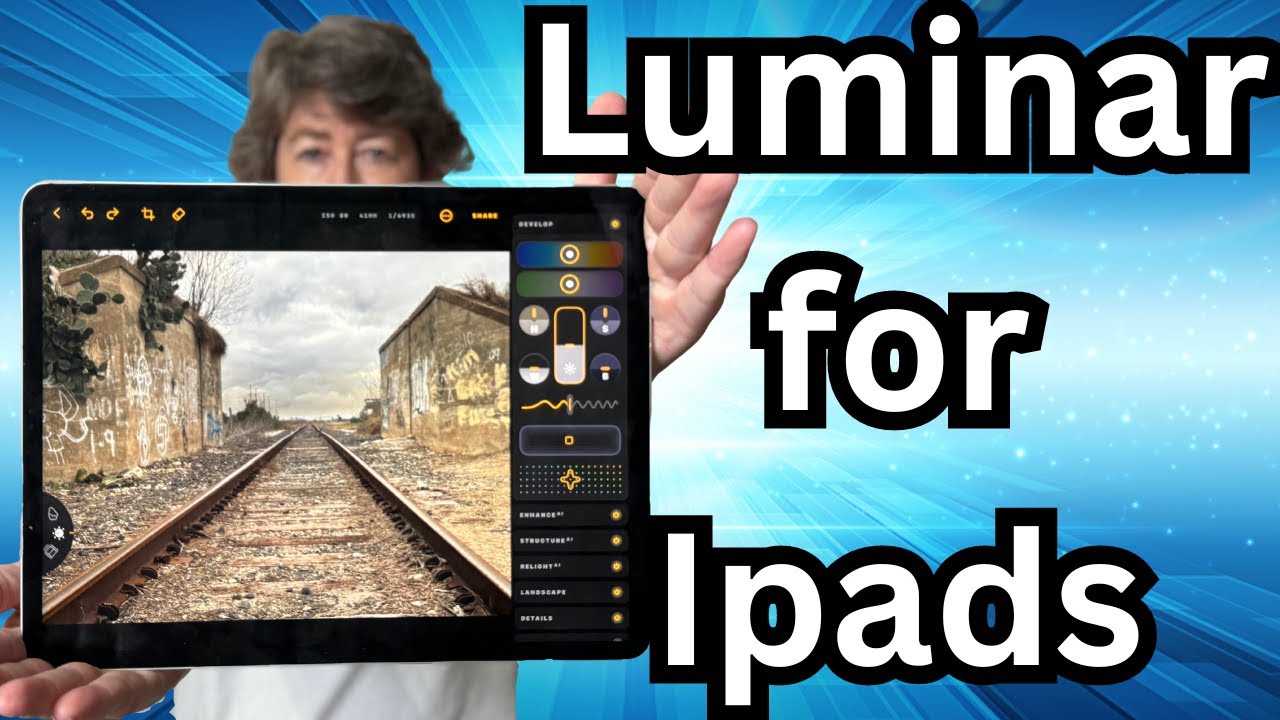
Angie Birmingham walks through Luminar Neo, now available on iPad for mobile photo editing. The app includes AI tools like Enhance and Relight, a full Develop module with temperature and exposure controls, landscape-specific features, and sky replacement. A limited-time promo code gets you 12 months at half price.
Chapters
Hey there! So you'll never guess what Luminar Neo has come up with now. They now have a Luminar app for your iPad. Yes, that's right. So all the chains have now been broken from our desks and our laptops. So now we are 100% mobile. Now you can drive down the road and edit— well, not you drive down the road, but while somebody's driving down the road, you can edit your images. So let's dive into this app and see how good it is and whether or not it's worth having. This is version 1, so keep in mind that when you do get the app, bigger and better things I'm sure are to come, especially from these Luminar Neo guys and gals. They're pretty amazing. Before we get started, I just wanted to let you know that there is a code and a link below for you to get 12 months for the price of 6 months. So make sure you go get that code, but watch the, the video first. And, um, or if you want to go get the app and then follow along, go do that, but make sure you come back to my video. All right, let's dive into this. This is a photo that I took with my iPhone earlier this week, um, over in a neighborhood in a neighboring town of mine. On my way to one of my many favorite bird spots in the area. So anyways, so you've got, let's just start up here in the top left. You've got your erase button. So you can hit erase. And I'm not gonna erase everything in here. I'm just gonna do like a little sample for you. So I got that water bottle right there. We're just gonna highlight that. And poof, it's gone. Left little remnants there, but I guess we could probably go over it again and probably make it even better. There we go. So that's the erase tool. So we'll hit done up in the corner, and then the next one over is your crop, which you could go in here and crop this if you wanted. Maybe take a little Now you can take the unlock button off and then you can just freeform. But I don't know that I really want to crop this much because I got my leading lines coming out of both of the corners. So I'm just going to leave it alone. So we'll hit done. And then we're going to jump up over here on the left, or I'm sorry, on the right side. And we're going to open up the develop. Modular. And this first bar at the top, when I get close to it with my pencil, you can see it kind of jump at you. There you go. And this one here is your temperature, so you can turn it blue or you can turn it orange. And then if you don't like that, you just double tap and it goes back to zero. And then below you've got your tint, just like in Luminar. And then here you've got your highlight dial. This dials in your highlights, add them or take them away. Typically I take them away. And then here we go, we got the shadows. We can open up the shadows or we can add a little extra shadows, which in this particular image I'll probably Probably add a little shadows. And this is your exposure bar. This will make it brighter or darker, which I guess we could take down the exposure and then open up the shadows a little bit. And then this is your whites, and this is your blacks. I'm sorry, your whites all the way 100%, all the way negative. So we'll probably leave those whites alone on that one. It looks pretty good. Blacks, you got your negative which adds more black or your positive that takes it away. We'll probably leave that alone too. And this next squiggly line here, This is your contrast. The more you add, the squigglier it gets, and the more you take away, the straighter it gets. So we'll probably put it somewhere right about there. And then this next one here is your vignette, so you can add that. I don't know that I would add it right now, but maybe after we're done. And this is your saturation and vibrance tool. They kind of work hand in hand. You just kind of dial it around until you get where you like, and that right there looks good. So then you can go up to the top and you can turn on and off the button. So you got before and after, before and after. And then you go down. We can go ahead and close that. You close it. Oh, tap it to close. And then we're going to go down to Enhance AI. And these AI tools on this app are pretty incredible. So here's your Enhance all the way up. And it's probably, probably 50%. I think I like 50%. So then we close that tool out. Then we go over here to structure and we can add or take away, or we can add But I don't typically add a lot of structure to landscapes just because it makes the clouds, especially in this, makes the clouds look kind of funky. So we'll add just a little, see what that does. That's on and off. That's alright. So we'll close that. Oh, and this tool here, this relight, is really cool. So it's like 2 little flashlights. You got one facing towards the background so you can really— see that line there about 3/4 of the way down? So you can really knock down your Your sky and then your foreground, you could brighten up your foreground, or you could do it the opposite. You could darken up your foreground and brighten up the background. That looks pretty good. Off and on. Maybe something like that right there. Off and on. There we go. Now we'll close Relight and now we'll open up Landscape Tool. So this one will add the fog if you want to add fog, which this, this image here actually looks kind of cool with fog. And then this is your foliage enhancer, which we don't really need. And this one is your golden hour, so you could really pump up your golden hour if you wanted to. But I have too much fog in my image and too much golden hour in my image. Maybe a little fog. Let's see, before and after. Well, I didn't really do much there, did I? Okay, let's jump on down to details. So this one is just like in Luminar where you have your small details your large details, and your medium details. But I'm not really going to mess with any of them. I might sharpen the overall image a little, but because it was taken with my iPhone, it's already pretty darn sharp. So we'll close that. I also have the curves in here, so you can go in if you like working with curves. You can play with that. Except when you, when you're working in the iPad though, you have to make sure that you give it time to render because it, it's not quite as quick and as fast as your desktop or laptops are. Alright, so here's the curves off and on. That looks pretty good. Alright, and then you got monochrome. So if you want to turn this image into a black and white, it's as simple as a dial. But I think I like it as a color. So, and then we're going to move back over to the left side. You've got this little pinwheel over here. This one here that we're on is for the editing modulars, the develop and stuff. If you want to change the sky You just go on over here and you pick a sky. And these are all new skies just for this app. So you can also add your own sky. So this sky here was one I took that day. And I'm going to add one more that I took that day. Which is right here. And it will put that sky. Okay, so it's got my sky in there now. You can go up here to this little dial up here. It's like a little joystick, and you can move your sky around until you get it to where you want it. But I don't really like that sky. How about if we went with I don't really like that sky either. I got my other clouds in the background that came, that seemed to be burning through. This one might be kind of cool if I can get the horizon line. Yeah, I don't think this image really needs a sky replacement, so we're going to Take that off, go back to the original sky, and then we're going to go over here to this little dial. We got one more over here. This is presets. So you've got presets. When you finally pick your presets, you just go up, select the preset you want. We want Rosa, and then you just go up here to this dial and just dial in the intensity that you want. 0, of course, would be where you came from. And I think I like it right about 40. So then we'll do the little on/off switch. We'll do before and after. And it looks pretty good. So then we'll go back over here to our Developing, Editing Modulars, and then we go up here. You got a link to your account. You got sound, which I don't want sound on. You got support, privacy terms, and then about them. And then over here you've got share. So now that we've got our image done, I'm going to Save it to my photos so I can share it to Facebook later. Make sure you go watch this video here, and then I will see you the next time on YouTube. Don't forget to like and subscribe and do all that good stuff.










