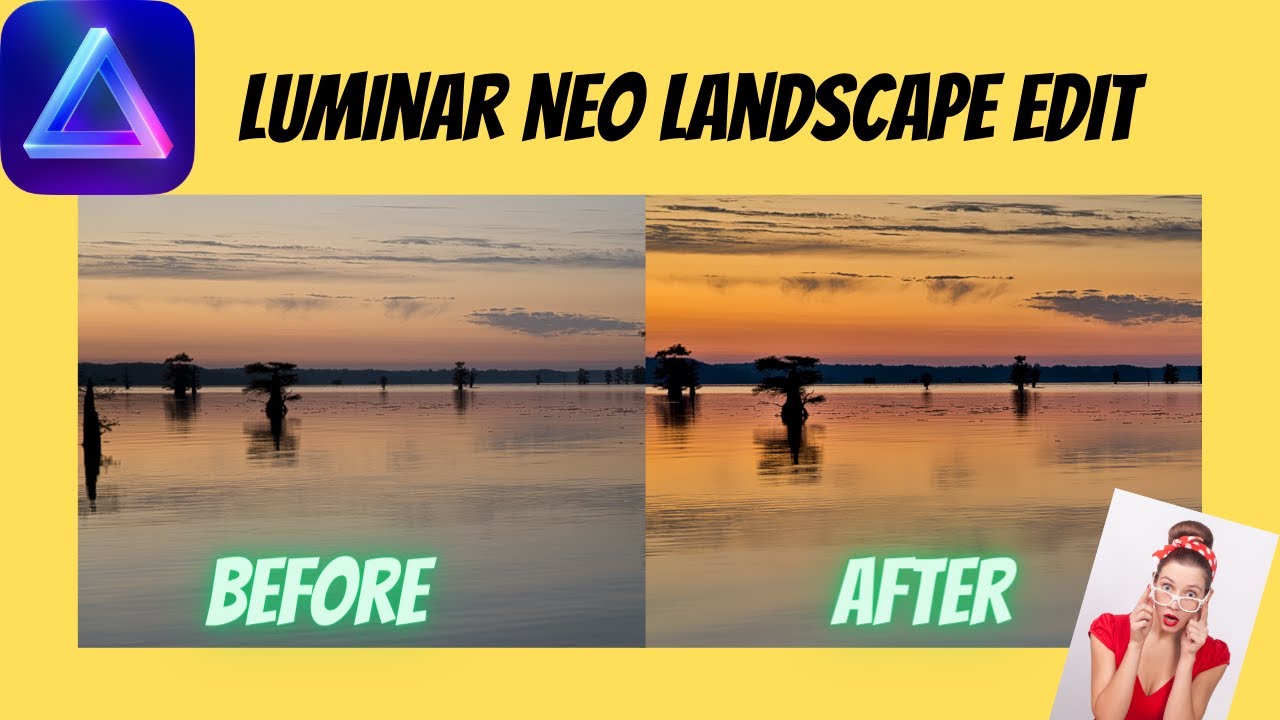
Angie Birmingham edits a Caddo Lake sunrise photo in Luminar Neo, lowering highlights, lifting shadows, and using Smart Contrast to enhance the sky and water. She masks the water to soften ripples with a reverse Structure brush, applies Super Contrast to boost colors, and crops the horizon straight.
Chapters
Hello and welcome to another episode of Jeff and Angie Photography WTF Stop. So this week we are going to do another edit in Luminar. We're going to take an ordinary image, we're going to put it in there, and we're going to see what we can come up with together. Stay tuned. All right, so today we're gonna do a little edit on a Caddo Lake image that I took last year when I was up at Caddo Lake. Actually, it wasn't last year, it was a couple years back. Went out on a boat ride and we took this— or I took this image while I was out there. And we're gonna do that and And I just want you to know about my upcoming workshop at Caddo Lake. If you are able to join me, it's November 9th through the 12th, over the weekend. And we're going to be up in Uncertain, Texas. If you come and join me for the workshop, I will tell you all about Uncertain, Texas. And we'll tell you all about Caddo Lake. There's a lot of history at this place, and I'll also take you to an old army depot, and we'll also do some bird photography while we're there. Seems how there is a lot of birds. All right, so today let's jump on over here to Neo. This is the image that we are going to edit. The sunrise image. So we're going to jump over into the Edit Modular, and we, we're working from the original, as you can see. All right, so jump into Develop, because remember, you always start in Develop. So you can control your light. So we're gonna take the highlights down so we can kind of accent that sky and water a little bit. We're gonna open up the shadows just a little bit, make it not so much of a silhouette. There we go. See what the smart contrast does. Oh, that's cool. That brings out the sky a bunch. There's, there's before, there's after. Well, that's looking pretty good. Then we'll hit the J key. There we go. We can see where our, our black, where we have the purest of black, and we don't have any of the highlights blown out. Because there's no red. If there was highlights, you would see red. And then you double-click on your slider and it will return to the original starting position. So then let's head over here. Let's go ahead and hit a little sharpening here. Then we'll go into the optics and do all that. That's pretty much it. So then we'll jump down into enhance, do a little accent. Really helps bring those skies out. Oh, let's hit the J key, get that turned off. Enhance the sky. That's looking pretty good. Go into Structure. We'll try doing this globally, which globally means the whole image. Typically I don't like to do it in my water because it's going to add too much detail in the water. It really brings out the ripples in the water. And I don't like that, so we'll double-click, it'll go back to 0. So I think I'm going to skip structure on this particular image. Let's jump into super contrast and see what that does. Highlight contrast really brings out the colors in the skies for sure. That's beautiful there. The sky that morning was just incredible. If you take it to the negative, it kind of takes away everything you just added. But if you go to the positive, it'll add a little bit more. Midtones. That's nice right there. And then we'll balance it out. Add a little bit more shadows. Something like that right there. Okay, and I think on the structure I'm gonna try doing something complete opposite. I'm gonna grab my brush and I'm just gonna go in here and I'm gonna create a mask of this water. And what I'm trying to achieve here is softening of the water using structure in reverse. So instead of adding texture, I'm going to take it away. There you go. There's my soft water. Perfect. That's exactly what I wanted. All right, so head on over to our affiliate page, click on the link below, and it will bring you over to our page. And from there, If you're wanting to grab Luminar Neo, click on the link and it will take you right over to Neo. View the plans, and I highly recommend the Pro plan. That's my favorite plan. That's the one I have, and right now they're running a special at $119 a year. And if you enter my code AB15, you get 15% off that already reduced price. So now's the time to buy. And if you don't want a monthly bill, you just want to buy a one-time, you can do that as well at $149. Buy it and it's yours. It comes with all future updates, so you don't have to be worried that you're going to get left behind. Either, either one is a great deal, and either one you get 15% off along with anything else that's on this website as well. Oh, but wait, if you act like you're gonna leave, click I Love Free Gifts and they'll give you 10 free skies with your Pro membership or Explore. But Explore, you're really limited on. I would really suggest the Pro because the Explore is still $119 a year. There's— and that's if you do monthly, but if you do annual, it's $99 a year. But really, $20 more and you get so much more. You get all the extensions, you get everything. All right, so some of our other affiliates, we got B&H. We got DxO. You click this link and it will take you to their website, and you do get a free trial with that. So click that link and go get you a free trial. And we got Promedia Gear, the makers of the best tripods on earth. And you got F-Stop Bags, which are great backpacks, but I especially like them for their inserts. Topaz Labs is another good editing program. I don't use it a lot, but it's pretty good. One of these shows I will show you how I go about using that as well. All right, well, let's jump back on over to the video and let's finish editing. So let's go ahead and zoom into the sky, see what that looks like. Looks like the sky has a little bit of noise in it. So go down here. This is how I like to denoise things. Grab my brush and then I'll just take it and I will just paint in the sky like so. Something like that. And then go over to adjustment, we'll zoom into a section, and we'll just take that and we'll just crank it down. And definitely reduce the noise in the sky. All right, here we go. And just like that, We went from blah to wow. So let's, let's go on and crop this image as well. Probably have to straighten up the horizon a little bit since I was on a boat and it was moving. So over here I'm going to take it to freeform. I don't want to lose any of my trees, and I want to keep that horizon right there on the third, and I want to keep this tree here on this third. There we go, and looks pretty good. All right, so how did you like that edit? That one was quick and easy and pretty painless. So don't forget to hit that like button and subscribe and ring my bell so you will get notified the next time I post a video, and you can join in with an edit, gear review, or travel notice. All right, thanks for watching and have yourself a wonderful day.