Luminar Neo Pro: Elevating Your Wildlife Photography
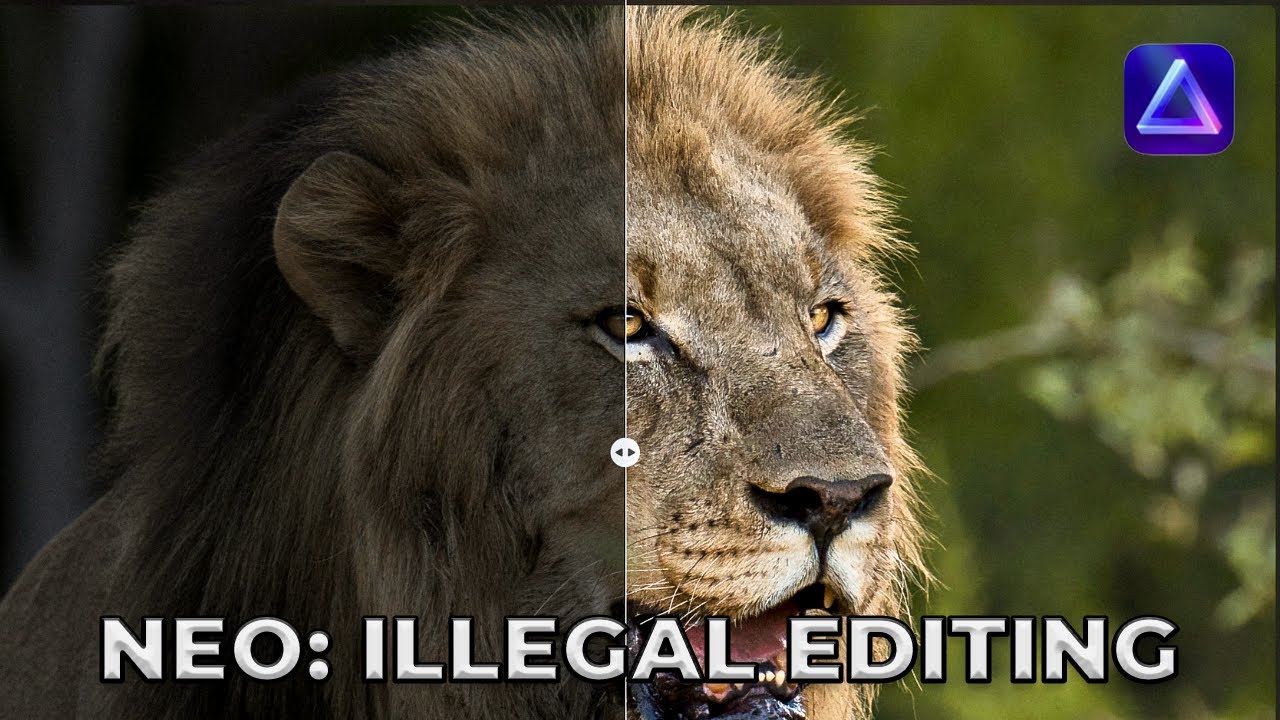
Angie Birmingham walks through editing a nocturnal lion photo in Luminar Neo using five core steps: Develop Raw, Optics, Enhance, Structure, and Denoise. She shows how to transform the lion with a sun-kissed look using masks, sliders, and the Blur tool to soften backgrounds, with before-and-after comparisons for each adjustment.
Chapters
Today I'm going to show you how I edit in 6 easy steps. Do you want to learn how to enhance wildlife images? Well, don't miss out on this game-changing editing process with Luminar Neo that will take your photos to the next level. So let's dive in and unleash our imaginations. Hello and welcome back to another episode of WTF Stop Photography. So today we are talking Luminar Neo wildlife editing, and I'm going to show you how I edit a majority of my images in 5 easy steps. And today I'm going to throw in the blur tool just to show you how it works, so when you need to blur something out, you'll know how to use it. All right, so let's go ahead and jump on over to Neo. Hey guys, don't forget to like, subscribe, and ring my bell so you'll get notified the next time I post a video. All right, so let's jump into Neo and get started. Let's go in here and take this lion back to the original. So we can edit him together. All right, so we're gonna do 5 easy steps to get you to where this guy will definitely stand out on the print or computer screen or whatever you decide to do with your edits. And then we'll jump into blur after that, and I will show you how to use that tool. All right, so first thing you want to do on any edit that you do, you want to make sure you start in Develop Raw. Develop Raw just helps kind of set the parameters for your, for your lighting. So let's go ahead and get started. So this one, this particular image was taken really late in the evening. There was no light, so there's not a whole lot of highlights in here. But there is a lot of shadows, but we're gonna make him look like he has sunlight on his face, like he was sun-kissed. All right, so first you bring down the highlights, then you mess with the shadows. You kind of bring up the shadows, get it bright enough, and then you want to do a little bit of contrast. And then we're gonna jump down to the blacks and the whites. And we're just gonna add just a little bit of black. We don't want to do too much. And then we're gonna do a little bit of white. And then from there, I jump down into Optics, still in the Develop tool, and I'm gonna do Auto Distortion and Auto Defringe. On this particular image, I'm not gonna do Ceramic Aberration because when you look around the edges of This lion, he does not have any, and there's no need to correct something that's not there. Alright, so now after doing that, then we're gonna close out Develop and we're gonna jump down into Enhance. So Enhance, we're gonna take the mask and I'm gonna do a brush. A lot of times I do radials, but on this guy, because his shape— he doesn't have a lot of curves or whatever, he's kind of boxy— I'm just going to just highlight him. There we go. And then before I leave mask though, I'm going to go down here and I'm going to hit Mask Actions, and I'm going to copy that mask so I can use it later. So now we're going to go into Enhance, and I just want you to watch the face of the lion. I'm going to do it drastic, and then I'm going to back it down to where I would set it at. But look at how much that really just makes him pop, makes it look like the sun is hitting his face. But we don't want quite that intense, so there you go, about 50. About 50, 48. I mean, you could probably even push it up to almost 60, but I want to make it look as natural as possible, so probably somewhere around high 40s. So there you go, before and after. Quite the difference. So now we're going to close that and we're going to go into Structure. We're gonna go to Mask and we're gonna mask— we're gonna paste that mask. So if you see now, the same area is masked. So now we're gonna go to Adjustments and this one you kind of want to zoom in on so you can see what it's doing to his face so you don't over-texturize his face because it can really, it can really add some serious grunge to him. I mean, look at this. 100%, 100%, it looks nasty, at least in my opinion. So typically I do somewhere around 40-ish, 40, 50. Usually it's somewhere between 30, 30 and 50 is what I usually do. So there's your before and your after. You can see how it just sharpened up all the little fine hairs. Just kind of defined his details in his face. Okay, so then from Structure, we're going to hop down here into Denoise, and we are going to do that same mask, but we're going to paste. So I'm going to show you, see, he's, he's masked like the other one. But I'm gonna take this one and I'm gonna invert it because I want to denoise all of the area around him but not him. So as you can see, I kinda left a little bit of his mane out. So I'm gonna go into— I'm gonna go into the mask and I'm going to— actually, I'm gonna reduce the strength so it's not such a drastic line between the two. Okay. And I'm just going to kind of erase that area right there. There we go. Now we're going to go into Adjust and Luminosity. Usually do somewhere around 50 to 60. This one I'm probably going to do 60 just because it was taken so late. You don't want to do too much because then it ends up looking— I don't know, looks kind of pasty in the back, I guess is what you would call it. So you just take all of them and you can boost it way up, and you can see the before and the after. But we're only gonna do— we'll do about 52, color around 19, and boost a little. So there's your before and your after. Alright, so that takes care of the edit, the basic edit. 5 easy steps and you got him to pop. Here is your before and after. Quite the difference in 5 easy steps. So now we're gonna go into the blur tool, and this tool we're gonna mask, and I'm gonna take the brush and I'm just gonna brush this area right through here because I really want to take this area right in here and kind of blend it into the background. But while I'm at it, I'm going to go ahead and do all of the area that is out of focus already, and I'm just going to kind of even up the bokeh using the Gunnison. All right, so I might have to go back and erase some of that, but we'll see how it turns out. So here's the blur tool I'm going to use, and I'm just going to get it just enough to where these twigs here are not so noticeable anymore. See that? Now I go back here and I'm going to do like I did with the other one, and I'm going to erase this area right here and right here where I kind of, kind of caught part of him. There we go. There we go. Before and after. All right, so here is our before and after. Now we got before and after. So just a quick reminder, I have a couple of workshops that I will be teaching. I have this one that I'll be doing with Jeff for PPA. It is their Um, annual workshops. They do one in the spring and one in the fall, and we'll be doing this workshop down here in Corpus Christi. It'll be the spring bird photography on Padre Island. Go to my website for the link. I'll also put a link in there if you're not a PPA member where you can get a discount. PPA membership does come with lots of benefits. Or the one I most cherish is the insurance on my photo gear. It comes with $15,000 in total coverage for your camera gear. And if you use the link below and you put me in there as your referral friend, Angie Birmingham, you will get a discount on your annual fee, and they give me a little kickback as well. You get $35, and I think I get $25. So it's a win-win for both. And then you get a discount on the workshop. And then I also have my other workshops that I put on. I have private workshops here in South Texas in the morning and in the evening hours. I have one spot left for the whooping crane photography workshop, uh, 3 available for my spring Texas and Wildlife Workshop down in South Texas. And I only have 2 spots left for my Caddo Lake Workshop, so check out the website. There's also a link on the website right here where you— with this link you get, and this code AB15, you get 15% off your purchases at Luminar. And all my workshops are sponsored by ProPrints, so check it out. When you're in here editing, don't forget that you can go back and you can reuse this develop mod or develop tool. You can go in here and you can do a couple masks. We're going to do a lineal, just kind of bring it down like so, and then I'm going to bring another mask down kind of like that. And I'm gonna grab me another one. Basically what I'm doing here is I'm kind of doing my own vignette, is what I'm doing. So we'll go into Adjustments. And all we're going to do is we're going to take the highlights down and we're going to take those shadows down. I mean, you could take the exposure down if you wanted to and really, really darken it up, or you could even lighten it up if you wanted to, but I wouldn't suggest that. And then you can also play with your contrast. You can add a little more contrast to the background. So that's your before and your after. But I'm going to take that mask and I'm going to do that again. Give me about 50% of strength, and I'm just going to kind of touch up this little area right down through here, right there. Just kind of even it up. There we go. Before and after. Okay, there you go. There is a nice simple edit for you. There's your before and your after. And you could always go in— one more thing I might do is Dodge and burn would be another good thing to do to him. So keep in mind that my edits I do, I do a basic edit just to make sure that the animal is— that the picture is going to be good for an edit. And then from there, I just pretty much do it on the fly with you to kind of show you my thinking process and my edit process. So there we go. There's dodge and burn on his eyes. See how easy that was? And then you could go down to— I don't know, we could go back into color and not do any kind of mask and just kind of bring up the vibrance a little. Vibrance only brings up the colors that are a little muted. Saturation will bring up everything, and vibrance also ignores skin tones. Let's see, and then we could go back into Develop again. See how my sliders have reset again? And I might just take the highlights down just a little bit because his face is a little bright in my opinion. There we go. I think that right there is a good edit. Then you hit F on your keyboard and it takes you into full screen. What do you think? How was that edit? All right, well, thanks for tuning in once again for another video. I hope this video helps you in your future Future edits with Luminar Neo. Don't forget your 15% discount and all my workshops. Come and shoot with me. I want to meet you. Comment in the links below, or not in the links below. Comment below if you liked it, or if you have a special request for a video. Let me know. I'm always open to special requests. Have a great day. Bye bye.










