Transform Your Photos: 7 Simple Editing Steps
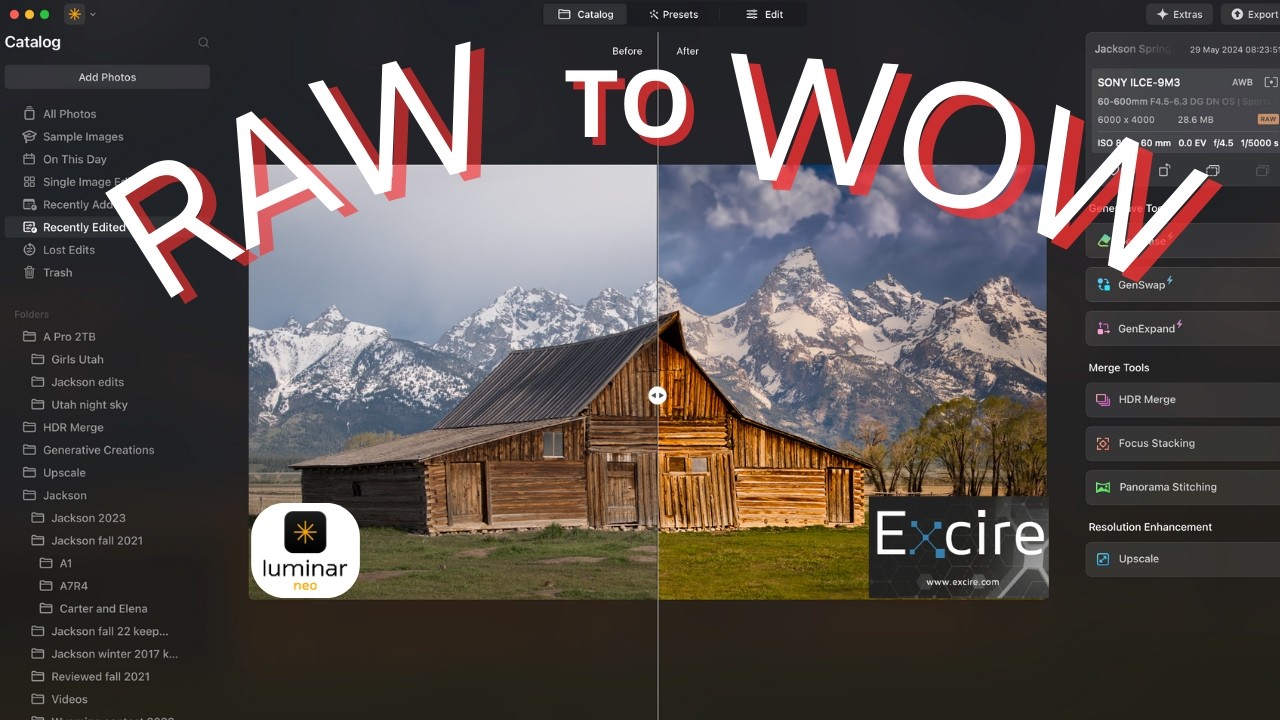
A seven-step landscape photo edit using Excire to find images and Luminar Neo to adjust them. The workflow covers raw development, local masking, sky replacement, cloning out spots, and a vignette to emphasize the barn.
Chapters
Today I'm going to show you 7 easy steps in editing landscape photography, but today we're going to use Luminar Neo and Excire together to find our image in Excire and then edit it in Luminar. So let's go ahead and get started. All right. So let's go ahead and get started. We are going to jump on over to Exire. Let me get that program opened up here for you. All right, so here's Exire opening up for us, and we are going to go in here, and I've already uploaded the images into Exire. Uh, just to speed things along. But we're going to go up here to Find by Text Prompt, and I'm just going to type in here barn because I am looking for the Moulton Barn from the Grand Teton National Park. And I have a lot of them in here because I've been there a lot of times. So here's the most recent one. So we just select on that image and then we're gonna go up here to this little search icon here and we're gonna find content that's similar, the whole database, and we're gonna search and here we go. So it brings up the most recent one, which we will be editing that, but I've got quite a few in here since I've been to the Teton National Park. Um, pretty regularly now since 2009, and I'm going to go ahead and put out a guide for y'all as well on where to find wildlife and hot landscape spots, along with a few restaurants and hotels, some of our favorite places to eat and stay at. All right, so Now that you've found your images, now you can right-click on it and then you can tell it to open it with any one of the editing programs that you use. But today we're going to use Luminar Neo, and I already have these in Neo, so we're going to go ahead and jump on over to Neo. And so we are going to take this image from raw to wow. So what do you think? In 7 easy steps. Are you ready? All right, so let's go ahead. I have 2 images in here. I have the one that I already edited, and then I also have the original one right here. Let me just make sure that this is— it is the original. Let's get started. So the first thing you always want to do in Luminar when getting started is you want to go down to this Develop Raw, and this is where you always want to start. The reason being is that it, by doing it, it helps control the highlights, the shadows, the exposure, and the contrast throughout the entire image. I mean, you can always just jump down here to enhance if you want to just do a really quick little edit. Do the slider enhance, sky enhance, go down here to structure Add a little structure, boost it a little, and just that right there takes it from blah to wow. Let me show you what we can do if we start in Develop Raw and work our way around. So first, open up Develop Raw, and then you're going to go in, and first thing you're going to do— well, one of the things that I do is I always bring my highlights down to, to something that's pretty pleasing to my eye. And then I will open up the shadows with the same, that's something pleasing to my eye. Because keep in mind, these are your images and how you edit them is totally up to you. And this is just how I like to do it. So first we did is we controlled the light. Now we're going to jump down here into black and whites, and we are going to adjust the blacks. Basically black and white, making it appear sharper to the eye. And then we're going to jump down here to color, and I'm going to adjust my color just a little bit. I'm going to make it just a little warmer. Then we'll take the saturation up just a little bit. I never go too crazy on this. Because it just makes it look kind of fake if you really bump it up there. For example, let's see if we take the saturation and we just really just oversaturate it. But once again, it's your image, you can do whatever you want to it. Everybody's entitled to their own opinion, and that's how editing is. It's kind of your own opinion of what your image should look like. And then we'll jump down here to Sharpen, and I'm just going to sharpen it overall. So one more thing I want to tell you is that when you're doing your Develop Modular or Develop tool for the first time, you want to do it globally. So I'm not masking anything, and I'm not changing any one specific part of the image. I'm doing it globally. So whatever I do on this slider, it's doing for the entire image. And then I always like to jump down here to my optics and go ahead and click all of those. So we'll just go ahead and go up here into crop, and I will just kind of straighten up the door. There we go. Notice how the, the lines— I was using the lines to straighten the door. With the horizon lines. See that? Okay, that looks pretty good, so we'll just click Apply. Now our barn's straight since I, I did shoot this freehand. I shot this with my Sigma 60-600. Now that we're done with that develop module or develop tool, let's go ahead and jump down to one of my favorite favorite tools, which is Enhance. And we're going to go ahead and we're just going to mask part of this barn. Oh, and Luminar has definitely improved their masking. This, um, with this last update, they've done a really good job. Look at this barn. Boom. It's masked. So, but now I'm going to take my brush and I'm going to erase. And the reason I'm going to erase is because I do not want to create— I don't want this to get any brighter because this was definitely shaded and I don't want to illuminate it at any point. And I'll probably also mask this little area right through here, or I should say remove the mask, just because I don't want it to get any brighter than it already is. There we go. So now we'll go into the adjustment after we masked it, and we are going to make this Somewhere around here maybe. Let's see what that looks like. That looks pretty good. Maybe a little brighter. There we go. That looks pretty good. Yeah, I like that. Okay, now we're gonna go down and we are going to go into the sky replacement. I'm going to replace this sky with some kind of big cotton fluffy clouds. You always, when you're selecting your skies, you need to try to stick with something that will go well with the scene. And if you happen to close your window by accident, you can go over to edits And you can go back in and you can continue with what you were doing before you accidentally closed it. So many options that it makes it really hard to choose. Believe it or not, I'm actually looking for one that's called Cotton Cloud. Okay, here is my cotton sky. We're gonna go down to Sky Orientation, and we're just going to align. See how it— you can see the sky moving up. We're just going to align it so that you cannot see that horizon line, and I really don't need to do any of that. So now we'll go down. We don't have any reflections to work with, so we don't have to worry about that. We're going to go over here to Sky Adjustments, and we're going to take this Defocus, and we're just going to defocus the sky. Because we don't want it quite in focus like that. Then we'll add a little grain to it, atmospheric haze, and then I'm just going to add just a little warmth to it to kind of match the scene. And then the brightness, I'm going to take the brightness down because I don't want my sky quite that bright. At least right at this particular moment. Okay, so that is a sky replacement. So now we'll jump back over into tools so we can get busy. The next step is going to be clone. So we'll open up the clone tool and it says here, select your source. So we're just going to click here because I'm going to get rid of all the brown spots. In the grass. So we'll just start over here. We'll just work our way. We'll try to leave the squirrels, little ground squirrels, in place. And then if you need to reselect your clone spot, you just hit Option on your keyboard. Then you go back over here, you select a new spot, and then you can always reduce the size. So that you don't get stuff you don't want. What it does is it gives your viewers of your image no bright spots to look at because you're getting rid of the bright tan dirt spots. I guess we're going to end up getting rid of the little ground squirrel guys. Then if you kind of select from different spots throughout your image, it will help in— oops. I got part of the barn there. It will help, um, so it doesn't look like it was cloned, because if you get too many repeating patterns, it'll look as if it was cloned, which you don't want. There's our cloning. Before. And after. So it looks like right through here we've got a little spot we need to clean up and make it different. Okay, that is our cloning. We are done. So now we're gonna go back into our Develop tool, because after you use a tool and close it, you can go back and reuse it because it completely resets itself. Even though it's still over here as used, you can reuse tools multiple times as long as you close them out. So let's go ahead and jump back into Develop, and on this one I am going to mask the grass And part of that mountain. See how well it does. Oh, there we go. Grass. Clean it up a little bit with the brush, but that is definitely a time saver. So I'm going to erase the mask from right up here, from these peaks, the tall peaks. Go back and we're going to take the exposure down just a little bit so you see where my, my mask Did not quite. Go back to adjustment. Let's just give it like a slight, very slight adjustment there. That's a little better there. Maybe take the highlights down a little. Something like that. It makes the mountain in the top of those mountain peaks definitely jump out. But I am going to go over here and I'm going to reduce the strength, increase the size, and I'm just going to kind of go right along here, kind of give it a division line where it just kind of fades in. There we go. I think that looks better. Okay, let's move on down. Let's go ahead and hit the enhance again. This time I'm just going to do it globally. Going to do the entire image just to brighten up the whole image. Maybe something like that. There you go. So first thing you do is you choose your subject, which the center of the barn is my subject. And then you go and choose your amount that you want. And a rule of thumb on vignettes is if you can— if it's noticeable, it is too much. I'm going to take my size down just a little bit as well, just because my subject is so big. Then I'm going to open up advanced settings and I'm going to go into roundness because I want it a little more round. And then I also want it to feather quite a bit. And then I'm going to take that inner light and I'm going to bump it up some so my barn really stands out. So here is the Before and after. So now my barn really pops. Okay, so if you would like to purchase Xire Photo, head on over to the link below in the description. And they actually have 2 choices. They have Xire Photo 2024 and they have Xire Search 2024. Xire Photo works with all of your editing programs and Xire Search, it works within Lightroom Classic. So if you are a Lightroom Classic user, you might want to get the Xire Search. But me, I prefer the Xire Photo. That's because I mostly use Luminar as a standalone product. So if you decide that you would like that program, go in and type in WTFSTOP as your coupon code and hit apply, and you'll save $28.30. And of course I'll get a little bonus from that. I think I get, I think I get what you save. So by you using the code, I in turn get paid. Head on over to xire and use that code. And Luminar, um, at the time of recording, Luminar is on sale for $149 for lifetime and $79 for subscription. I prefer the subscription because then you get all the updates at no additional charge. You get all of the extensions. I mean, it's pretty much a one and done, and right now it's $79 a year. And if you type in AB15 at checkout and hit apply, you will save money there as well, 15%. So you get that for $67.15 for your first year. It's definitely worth a try, plus it comes with a 30-day money-back guarantee. So head on over to those 2 websites and check it out. And Exire also offers a free 30-day trial as well. And then if you want to get both of them, you can get them as a bundle, but they do offer it Right down here, you can try it for free. All you got to do is put in your information and they'll give you a 14-day free trial. You are limited though as far as what you can do within the free trial, but it's enough for you to decide whether or not it's something you would like. So head on over there and go check them out. And if you're interested in learning more about the software, I hope you enjoyed the video on 7 easy steps for editing landscape photography. And if you like that video, head on over here and watch this one on editing wildlife in Luminar Neo. Luminar Neo is so easy, even beginners can do it, and it's good for beginners all the way through advanced. And Xire Photo Makes finding your images painless. Let me tell you, I've gone through my entire photography career without Excire, and now that I have Excire, it's a game changer. Try it out. Try your 14-day free trial and see if it's a good fit for you. See you next video. Hope you enjoyed it. Bye. Bye.










