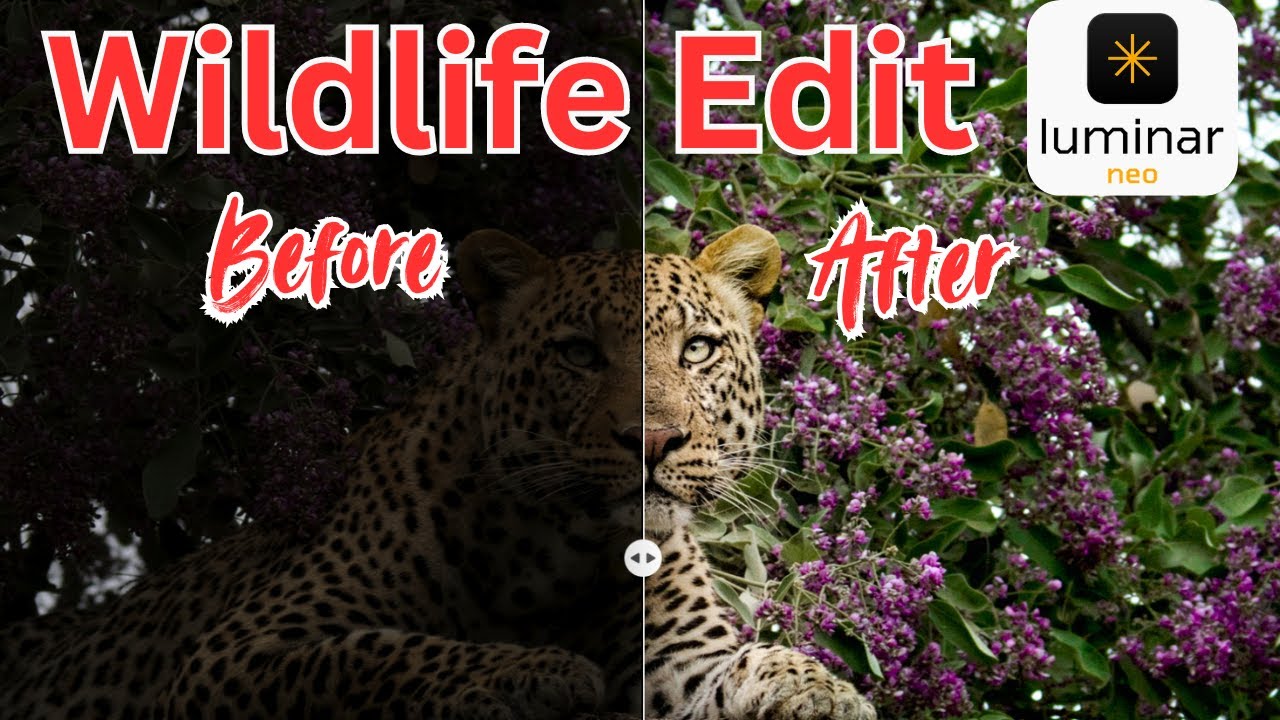
Angie Birmingham rescues an underexposed leopard photo using Luminar Neo. She walks through raw development, applies masks to enhance the animal while boosting the purple flowers behind it, crops to the rule of thirds, and finishes with dodge-and-burn on the eyes to bring the shot back to life.
Chapters
Have you ever been out photographing and you had this opportunity of a lifetime and you get to looking at the back of your camera and you realize that you blew the exposure? Have you ever thought, I wonder if I can save that image in editing? Well, today I'm going to show you how with Luminar Neo. So stay tuned and I'll show you how you can fix that image of a lifetime. So we were in Africa and we were photographing and we were out in the bright sunlight. We were photographing some elephants and then we drive around the corner and we see this leopard in a rain tree with purple flowers surrounding It, and I just stick my camera up and I just start shooting the shots and just rattling them off, and before I know it, I'm like, oh, I should look at the exposure. Well, my exposure was dark, but fortunately it was not too dark to where you couldn't make out anything at all. So here, let me show you what I got. So here you go. Here is the image that we're going to edit today, my leopard in a rain tree with nice purple flowers all around it. So let's go ahead and jump on over to the edit, and we will— of course, we'll start in Develop Raw, and we'll go ahead and take some highlights down even though there's not many in this image. And we're gonna boost the shadows. Look at that, it's just amazing what this program does. Then we'll go ahead and throw a little bit of contrast in there, and then I'm gonna hit the J key so I can get my, my true black and true whites to show up. There we go. And probably jump down here. I go back to that black and maybe back it off just a little bit. There we go. All right, so there we go. There is our basic exposure that we're going to work with, which is probably where it should have been the first time around. But I blew that shot, but that's alright, we're gonna fix it. So we're gonna add a little enhance, we're gonna do a radial mask around her. Actually, this was a male, this was a big male. He was up in this tree and he was just kind of hanging out, taking a nap on and off. And didn't even care that we were there. Kind of boosts. There we go. And then we'll go down to my other favorite tool, Structure, and we'll just kind of brush around his face here. Just add a little, little texture to him. Kind of zoom in so we can see what we're doing here. Add a little boost. Take that J key off. Okay, and then to get these colors to come out, come down here to color, but I'm going to take a brush and I'm going to brush around him because I don't really want to oversaturate him. I'd like for his colors to pretty much stay true. But I really need to boost those purples because they got really washed out. So we're gonna— I guess we'll start here. Oh, I gotta, I gotta invert my mask. Hold on. See, that's all I want to mess with the colors on is just the background. So we'll go ahead and Boost the vibrance, maybe even the saturation a little. And then we'll jump down here, we'll do the hue on that purple because those flowers were really, really purple. Try to get them as close to what they were in real life. And we'll jump over to saturation. All right, then probably over to luminance and make that purple just a little bit brighter. And the magenta— see how that looks now. It looks better. Let's, let's try something. Let's jump down here into color harmony. And we'll mask our leopard again. Then we'll go over here, we'll invert the mask, and we'll make sure Go back to brush, and I'm going to erase that little bit on his paws. Isn't he cute? He's just so adorable. Although he'd eat you, he's still cute. I love everything about cats. All right, so let's try Warming it up a little bit. Contrast. See what this does here to the purple. Split warmth. Go more towards the purple side. More towards the green side. Then shadows, we'll do more on the green. Probably, oof, that's a little too, too much. There we go. Midtones, green, a little blue to make that purple just a little more purple highlights. There we go. Now we're looking, now we're looking a lot more realistic. So there's the before and after. And I think I'm gonna go in here, take this mask, I know this brush, I'm going to erase— I'm gonna erase this tree trunk right here. And the only reason I'm erasing that is because I don't really want any colors introduced to it at all. I want it to stay all natural. Okay, there we go. Okay, now we can jump over to crop, and we'll go ahead and crop this image just a little bit, something like that right there. Put his eyes right there on that intersecting lines of the third. And if you notice here, we got a leading line that comes out of the corner and leads you right up to his beautiful little face. All right, now let's just do one more thing. Go down to Dodge and Burn, and we will do a little dodge and burn on his eyeballs. Make him— make his eyes just a little brighter. Not a lot, just a little. There we go. Before and after. Let's— I think that's pretty good right there. What do you think? Let's do the before and after. So we've got the before and the after. Now that definitely made a difference there. Actually, let's go ahead and let's go back into the Develop Modular and or tool, whatever you want to call it. Let's just kind of take the layer mask and just kind of drag it down like so. And then we'll do another one on the other side, kind of do the same thing. Something like that. We'll just take the highlights down, maybe even the shadows. Kind of just makes your eye draw right into him, doesn't it? Maybe even Take a brush, reduce the strength on it, and just kind of hit this corner right here. Maybe even this corner. Maybe bump this one up just a little bit more because that bright corner is bright. And then maybe just kind of Hit that little area right there, right there. There we go. All right, so before and after. What are your thoughts? So I hope you enjoyed this edit today, and if you did, head over to the other videos that are listed above and Click on one of them and dive into that, and it will give you some more tips on Luminar Neo. So I hope you enjoyed it. Don't forget to like and subscribe and do all that good stuff. Talk to you later. Bye.