How To Generate TV Quality Content Using AI | Freepik
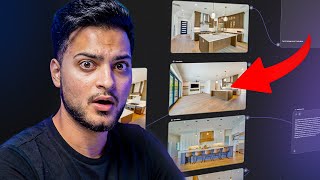
Areeb Mirza walks through Freepik's AI spaces tool to turn images into vertical ad videos. Connect images to generators, iterate prompts like "turn this into a wide shot", switch between Nano Banana and C Dream when results vary, then assemble clips with music and text overlays in the Video Project Editor.
Chapters
So I want to show you this new tool. It's an AI tool and it's absolutely amazing. So how you can use this is for, let's say, if you have images and you want to maybe make some ad videos or you want to make some, you know, moving shots out of these images. So how I've been using this, and I'll tell you a little brief about this AI tool I'm using. It's by Freepik and freepik. For a long time I've been using just to, like download graphics and images. So I had no idea they had, like, upgraded this tremendously. So how I use the software. So, for example, these are the images. These are the default images I had, which were provided to me. And these were supposed to be, quote, unquote, used for advertising. Like, hey, Reeve, these are the images. I want to do some ad pools, like, pools for ads. And I looked at the images and I was like, okay, these images aren't necessarily the best quality because you can see the glare coming in. I can't necessarily see anything. It's nighttime. It's taken by like an iPhone. It's not even by a proper camera. So instead of me just complaining about that stuff, in 2025, 2026, we have so many tools that we can just, you know, make amazing stuff out of this. And these are pretty much, you know, the final results we were able to. Not the final results. This is something we were able to pretty much craft out of it. Now, this is some high quality stuff, as you can see. Like, there is no drone footage provided. There is no drone footage provided. This is something that we just made by prompts, correct prompts, of course, using the right tools, you like, following the right procedure, all that type of stuff.
So even over here, like, simple stuff. And then we were able to, of course, compile all of this video and then turn it into something like this. So even this one, something like relatively still super new.
Something like this.
And that took us, what, like maybe like 30 minutes? So it's not necessarily a thing because people have this misconception of AI where, you know, you can just make something. You can just type a few prompts and then all of a sudden you have this magical video. Like, that's not how AI necessarily works. Like, you still need to make sure that you give it proper prompts. You have a proper procedure you're following because the intelligence of your output is going to be dictated by the intelligence of your inputs. Like, you have to make sure that the inputs that you're providing it is good so you receive a good output. So that's a very key thing to understand whenever it comes to using any sort of AI that you do on the planet. So even right now what I did was pretty simple. I took the images and I simply dragged and dropped it onto this spaces section over here. Super simple. And what I can do just to kind of like show you what I did, I can delete all of this. So I can just pretty much start from scratch. And I have this example over here. So all I did was click on add node and I went to image generator and then I can put this image generator over here and then what I'm going to do is click on this and then attach this image over here. Pretty simple stuff. If you can't follow this right now, you will have a hard time doing anything regarding AI. So over here, okay, so you have this image over here. And then all I said because this is going to be a 9 by 16 video. So I was like, okay, so the first thing I need to do before I do anything with videos is I need 9 by 16 images so I can turn them into videos. Because if I just take a, you know, one by one or 16 by nine image and turn that into a 9x16 video, it's just going to struggle. So that's what we did first. And I simply said, and I, as you can see, I also also misspelled over here, which is fine. I mean it still gave me the result I wanted. So I'm going to do the same thing over here. And the thing about the software, of course the first thing you want to do is just choose the aspect ratio you actually want. You can just click one by one and then tell it. You won't by nine by 16. Like that just is not how it works. So click 9x16 and then these are all the image generators that you want to use. So in my experience, of course, something like, you know, the Google's Nanobanana is good, Runway is good, C Dream for 4K is pretty good, which is something I'm using right now as well. So I'm going to do the same thing over here. As you can see, the image has been connected and my prompt is going to be extremely simple. It's just going to say turn this image into a wide shot.
Highlighting a, highlighting the kitchen. Perfect, now I can run this and instead of just me waiting for one like you do in so many other AI platforms. And that's why I like this because when it comes to the Actual.
Concept of it, it's pretty simple. So for example, you can do this in pretty much any AI software like Hicks Field or like, you know, like the native softwares as well. Maybe like Chat gbt. You can, you can do this in any software. But the fact that I can do 20 things at once makes it like that much more effective. So for example, right now this has been done. Now I want to check if the result is good. The result is fairly good. I like it. I think we can perhaps stick with this one. So what I'm going to do, I'm just going to copy this, I'm just going to do Control C and Control V and I'm going to disconnect this image because we want to dis. Because we want to connect this image right over here.
And just to have it a little more organized, I'm just going to move it left, right and center so.
We have an idea of which image is which. Okay, perfect. So I'm going to do the same thing over here. Turn this Image into a.
9 by 16 white shot highlighting the kitchen. I don't necessarily need to do the highlight in the kitchen part over here because we're already highlighting the kitchen. So I'm going to rerun this and it's going to take information from here and turn this into a 9x16 video. So I'm going to do, since I know the prompt is working, I'm just going to copy this multiple times. I'm going to put this here, attach it to this image over here.
Likewise.
Do the same thing over here. Again, attach this image.
To.
This image and then let's see the result over here. The result is pretty good. I like it. So this is a 9 by 16 and it also gave it some angle. Now if you want the still shot, if you, if you very specifically still want the front facing shot, you need to use specific prompts to get that front facing shot. So this is something you can also use like maybe the assistant. So if you click on assistant, this text prompt pops up. So what I would do with this is I would move this over here and then I would connect the text node to the text node over here. Oh, sorry, sorry, sorry. Yeah, yeah. You know, text note. The text note over here. Because I thought this was image generator, but this is the reference. So the text node would be applied to the image generator over here. So what you're going to do is you're going to paste this and then you're going to write something. You would. Let me just delete this I don't know what's going on. There you go. Perfect.
And I'm just going to paste this. We're turn this image into a 9 by 16 wide shot. And then I'm going to say.
Front angle.
Maybe like 16 millimeter lens.
And then I'm just going to run this and I'm going to type this node only for now. And then it's just going to think what I want. And all this is going to do is just improve the prompt I want.
All right, now I'm just going to see if I can rerun this and see if it's. If it gives me a good one. And don't worry about anything necessarily happening where you like the previous result, but the newer one is not that good. So you have to go to the previous one. You can always just do that. There's an option it gives you on the top.
You can always just do that. That's, that's, that's no worries. So with these ones, the one I just connected now I'm just going to click on Rerun. Same thing here, Rerun. I'm going to copy this, paste it over here.
I'm going to connect this image over to.
Over here. Rerun this.
Same thing over here. Just connect this image to this image over here. Rerun this.
Connect this image to this image over here. And then I'm going to click on Rerun.
Okay.
Perfect. All right, now let's see what we have over here. So not necessarily a fantastic one, because it just completely changed the entire angle. So this is something of course you can achieve. I mean, the concept has. The concept of this has been achieved, but this still needs to improve a little bit. So, for example, in this case, what I can do is I can just try like another image generator.
Because let's say we have to get it. In our case, we don't necessarily have to get it, like, as long as we have the vertical shots, because we're just going to add a little bit movement on it for us to use it for advertising. That's all our goal is over here.
Okay, so this is good.
This is arguably the best one, I would say. And this is extremely good as well because we want to make sure we're not necessarily changing anything because this is like actual work. So that's why I'm not necessarily wanting AI to like add in a lot of more information or just changing a lot of things. So in this case, it's just extending the walls a little bit, extending the flooring, which already is there, because this is work we're showing for other people, so we want to make sure it's still relevant. So there you go. So that's how you get this image, something like this. So I just changed it into another image tool. So in this case, Nano Banana. And as you can see, I got the exact same thing I wanted right over here. So like I said, this is just input and output. Like you just need to know what you want, how to get it. So in this case I enhanced the prompt. I saw that. Okay, so this specific C dream was not necessarily giving me the result I wanted. It kept changing details. So I used something more simpler like Google's Vanna Banana and I got the exact thing I wanted. But I still however, do like this.
And then maybe we can mix and match both of these because the other part of this one, which is arguably the more fun part, is the video creation. Now since we have the video, the image assets, the fun part is just beginning.
Okay, so this one I want to say again.
Highlight.
Kitchen area.
Spelled kitchen. I can't spell kitchen. Okay, there you go.
Run unlimited. Perfect. All right, so now since we have all of our images. What's it called, sorry, the stills ready. I'm going to take all of this, I'm going to copy it, I'm going to paste it over here and I'm going to disconnect these. And you can disconnect this just by double clicking.
I'm going to do the same thing over here.
You don't have to necessarily do this. You can just use, you can just also just drag and drop this or just connect it to another.
I just like to do this because it just keeps it a little more organized. All right, I'm going to copy this. As you can see, these look fantastic as well.
Pretty well done.
I don't know about this one because it didn't necessarily highlight the kitchen. So I'm going to again try another.
Image provider.
There we have it.
Perfect. Alright, so now at this point what I can do is I can just take a look on which specific ones I need to. I mean, I'm gonna do all of them, but I want to see if I can like mix and match any of them.
Okay, so let me come back over here. I know we had another one I liked, which is this one. I'm gonna copy this.
I'm gonna paste it over here. So I'm gonna make sure this is disconnected and then maybe we can couple.
My only pet peeve about the software is like the Control Z feature is not that Good. So, for example, let's say you mess up, let's say you put this over here to here. It's going to count like every single drag. It's not going to just put it back over here and then just go back quickly. So the undo features are still a little bit too lenient to my liking, but it's fine, I guess. Perfect. All right, so I like these two coupled.
Maybe perhaps even these two. I'm not sure. This is fine by itself. This is fine by itself. This is fine by itself. And let's check the other one. Okay. It's better. So I'm just going to copy this.
Going to put this over here. Okay. Let me just take a look real quick of what needs more coupling and it'll make sense in a bit as well. Maybe these two. We can try. We can try.
Okay.
All right, perfect. So this is where I add a video node now, like a video generator. Put this over here. And.
What I can do is I can.
So there's multiple types of video generators you have to understand. So there's of course, Google vo, there's cling. There's like so many other video generators that I'll show you on the screen. Some of the video generators allow you to have a start frame, like a start image, and an end image, which gives you kind of like a more consistent result on how you want the video to be planned. So, for example, let's say I start the image like this and I end the image like this. So let's say this is image one and this is image two. So what the AI is going to do, it's going to add all the parts in between. So for example, let's say it's this and then me moving to do this. I don't know if that makes sense. So again, first image this and then the second image is me doing this. So what all the AI is doing is going to be doing is help me add all the motion in between to the point I get to this. So similar thing I'm going to be doing over here is I want to see if AI can kind of like bridge the gap between both of these. So maybe I can, you know, like maybe add this as image number one, start frame and then reference end frame. Now, again, like, not all video generators have this. So for example, let's say if I was to click on.
I don't know, like, Google VO3. Okay, Google VO3 has it. Maybe like Sora.
I know cling 2.0 doesn't happen. Okay. I mean, all of them have it seemingly, I guess, which is good. Okay, so we have the start frame and the end frame.
So.
Maybe what we can do is.
We can try two ways. We can just try typing a prompt by ourselves first, see if that gives us anything. If not, then we can always use the assistant tool. Start with. And let me see which one we're starting with.
A speed round.
Effect to.
The second image.
Which shows the kitchen from wide to.
Close up. So I'm not sure of this. And also very important, make sure this is set to 9 by 16 and click 2.5, which is fine. 5 seconds are fine. Okay, so let's see how this does.
This node only.
Okay, perfect. And then for the rest of them, I think we can do pretty much maybe the same thing over here.
I'm gonna remove this.
We're gonna add this as.
Start frame. I'm going to end. Add this one as.
I'm going to try auto this time. I'm going to try auto and then end frame this one.
Okay. Image pans.
Right to left and then zooms out to display the.
Kitchen. I don't think we need sound effects.
Do we enable sound effects here? I'm not sure.
Okay, let's. Let's run it. Let's see how that does. Now, of course, like as that's working on that one. What we can also do is.
Work on some of these as well.
So again, I can add a video node over here.
And then just connect this start frame. And I necessarily like, I like using Clang 2.5. So what I'm going to do is slow.
Zoom in into the kitchen. That's a simple enough 9 by 165 seconds run. That's it.
And then we could do this kind of like multiple times over here. I'm going to. For organizational sakes, I'm just going to keep it down here. So we have all the videos just lining up over here. Okay, so let's see what it did. I have no idea.
Okay, so it completely changed the kitchen.
I mean, we can still use this one. Like, it's. It's not a bad shot. Like, there's no artifacts. There's nothing wrong with the shot, but it's not something that was in here. Like, I don't. I'm not sure sure how it got the drawers. So what I'm going to do is I'm going to put this into auto and then disable sound effects because I'm not sure if this has sound effects.
Okay. But this is still not bad. I'm just going to Rerun this.
See how that goes. Okay, meanwhile, we'll have these generating. I'll have put this over here.
Then, of course, I'll have these lined up as well.
And I'm just going to come over here one by one. Add this.
Add this.
Add this.
This.
Slow zoom out. That's it. Cling 2.5. Cling is like, relatively super consistent. I like cling.
In my experience. It's super good.
Slow zoom in into the kitchen. That's fine. Slow zoom out.
That's it. Slow zoom into the kitchen. Okay, so as you can see, this is like very simple shots. Maybe I can do like a little orbit action over here.
That's pretty much it. Okay, so we run this one, we run this one, we run this one, run this one. Generating videos. Okay, perfect. Cool. Now it's just pretty much kind of like a waiting game, you know, See the results it brings us. And then we'll pretty much take it from there. And then. Okay, let's see. We have one generated over here. Let's see what it did.
Okay, this one looks.
A little too artificial.
So what I'm going to do is I'm going to delete this. Oh, no, I'm not going to delete it. I'm just going to.
Save it over here. Because we still like the footage of this one. So this is something we might be still able to use. So what I'm going to do is I'm going to click on video generator. I'm going to put it over here and.
Do the same thing. I'm going to start the opposite way. Now.
Generate, start frame, end frame.
Which clang. Had the info. Okay.
Let'S start. Start with.
Cling. I'm trying to find which one has the end frame and start frame. So clink. 2.1. Perhaps the start frame, then end frame.
What if I just say.
Perhaps? That's just it. Like, that's simple as we can keep it.
And then the rest of them are still being generated. As we can see, those might take a while.
But notice the consistency. Like, there's.
It's extremely hard to kind of tell anything.
All right, we have one more over here.
And as you can see, this one's, like, amazing.
So there's like nothing distinct like this. Yeah, this is exactly how we would want it, basically.
Maybe not. Perhaps the stove. Maybe that part can be a little zoomed in on the actual editing, but other than that, exactly what we wanted.
See if we have others ready. This is good to go. I like this one. And then keep in mind we don't necessarily need to use all of them. So we just have all of these, like I said over here, we had all of these options, all these options to choose from when it comes to the images. And then basically what we're doing is, you know, like these are all professional photos. This is not even a kitchen. I don't know why that's there, but we're just taking all these photos and if we decided to do white shots, like maybe for like something like commercials, it's going to be even better because these are white shots originally. In my experience, like, white shots are also just super fun to make and easier to make as well. But the world we live in, the advertising and stuff, like, it has to be vertical. That's the only thing. Let's check here.
This one's amazing. The orbit did a fantastic job. Look at that one.
Like, I would have never imagined, like getting to this. This is what I wanted. Or here I wanted to kind of like jump and it did that exact thing over here.
Yeah, no, that's, that's, that's crazy because one thing we want to make, make sure that we keep is because this is their actual work, we want to make sure we're not necessarily falsifying anything, which is what this image was doing over here. Unless they have anything similar projects of this, maybe we can use it. But even in this one, like, I'm not necessarily sure if we're going to use it, but in a result standpoint it's good. But yeah, still. Yeah, no, this is fantastic. This is definitely something we're going to use. This is something that's done as well just now. I'm not sure why this has.
This frame over here. Strange.
I might change the prompt slow zoom out.
And to.
Going to run this one more time. Okay, now we have, we already saw that one. Okay, we have this one. This one's relatively still simple. I want it a little three dimensional. I don't want to necessarily make it feel like it's just a video zoom. It's just an image zooming out. Like it needs to still have some sort of element to it where it looks like a video or feels like a video.
So this one's still good or like just like maybe like a couple of seconds.
This one's taken forever for some reason.
But no, we have some cool stuff over here. So just for the sake of this video, what I can do is like I can pretty much get started on how I would edit these. And so let's say I do want to Wait for one or two of them, but it's fine. We can just start. So even in this specific suite, what I can do is I can go to all tools and I can click on Video Project Editor. Now on this Video Project Editor, if I could scroll all the way at the top, I go to maybe just let me refresh.
I'm going to select this one.
This is an image.
On that one. This one.
This one. Not this one. Perfect. Click on add to Video Project. I'm going to create new.
Okay, this one's done.
But for some reason it doesn't want to load. Like, this one's done.
And that looks fantastic.
So let me just refresh this maybe.
Yeah, it's done. I mean, I don't know why it's not showing it.
But I mean, it looks fantastic. So if I go over here.
That one's fantastic. And then of course, we can stop the video over here.
Then I can maybe perhaps extend this a little bit.
And then we play this one. This one's a good one too.
Let's do this one.
Okay, this is something we can stop here because we have the artifacts over here. So one, a couple things we can do is of course we can try to zoom it in so you're going to necessarily see the artifacts on the stove. Because if we don't, then we. We would be able to see it. So if I just undo this.
We can see it over there.
So yeah, so we're just going to zoom this up a little bit in and then we're going to not make sure the whole video plays because we don't necessarily need all five seconds of it. This is something you have to keep in mind as well whenever you get footages. Like, you don't necessarily have to use the full footage. You can just use the part you really need. Maybe it's like 2 seconds, 3 seconds. Sometimes people think like a video generated. So let's save this video. This video. Let's say if there was a lot of artifacts within this section, but then any. Everything after that was fine. Like, I would just use that part still. I wouldn't necessarily use the part that was not good. I would just cut that part out and use the rest.
But this, this one by itself is just fantastic.
So even this one I'm going to zoom in a little bit because it has some sort of lines on it. So we're just going to do that real quick. There we.
Go.
So I'm going to put this over here.
Perfect. I like these.
The rest of them just don't do not want to load for some reason. I mean, we already have them over here. Like, for some reason, it just doesn't want to show it over there over on the actual.
Software for some reason.
But, I mean, we already got what we needed. So from here, what do we do? Because this is going to be an image creative. Let me wear my headphones.
We're going to pick a cool music real quick.
Searching music can be, like, extremely fun or super annoying.
I'm going to use this one. At first I thought I wanted to go with something more slower.
But no, this is. This is better.
And let me see if I can just splice it over here.
And that's pretty simple too. You just press C. So I'm just gonna come over here.
And then boom.
All right, now what we need to do is add in some text. So the text is pretty much going to finish this entire thing off.
Because we have the music, we have everything. So I'm just going to take this title over here, going to switch it to maybe like 18.
And then if I could move this, this would pretty nice.
There you go. And then.
Just a very simple text.
Okay.
Maybe a little more smaller.
Okay.
I'm just going to play with things over here now.
Okay.
That's too much.
I'm not. The only problem with this one is I don't. I don't know if the white font actually helps. So we might have to just change that.
The thing with this text is, like, it just doesn't look as good.
So maybe we do something like this over here.
And then I just take this temporarily, put it over here, and let me just extend this more.
Okay. Let's see what this looks like.
Maybe I put over here. Kitchen remodels as big.
Not too small, not too small. We'll do 24 if it lets me.
And then the starting ad could be at the top.
I wish I could add some. Oh, there you go. There. Yeah.
Because I want to keep the font white.
And then we can add some shadows on it. There you go.
Got some blur to it. Where's the opacity?
Does it not let you do opacity? That sucks.
I like how they just decide for you, like, this is the opacity you'll get. Okay. I mean, it's better than nothing, honestly.
Gotta make sure the font is matching over here.
Perfect. So what we're going to do now is what's the difference between these two?
We definitely can't have it light. It has to be either regular or.
And the. The reason it's loading is because it's animated. That's why.
It takes a bit, a couple of seconds.
We'll just stick with baby one's regular for now. Okay, then we're gonna click show shadow distance. Not too much. We're gonna add blur on it.
Not too much. Angle it like this. And then. Perfect. That's good.
Now what we're going to do is just select both of them if I can, and then just maybe add it over somewhere over here.
Okay. So this one's loading and it just won't let me change anything. Okay, let me just wait for it to load.
Unless it's glitching out on me. Let me just save this first.
Kitchen.
Ad saved.
Let's reload this.
Okay, perfect. So sometimes it just needs a good old classic refresh. That's pretty much it. All right, so let's start again.
This makes more sense.
Just needs to be a little bit to.
The right. There we go.
I want to make sure that these, both of these are extended properly.
Going to do this one.
I'm going to make sure that these align properly, because if it doesn't, then it's just going to show a lot of black frames towards the end.
Perfect. Good. All the way to the start, Sam.
Perfect. And just like that, we have our videos, an ad video made just from, you know, some images that we had that we started with. So just to kind of like do a quick little recap.
I'm gonna let this space load and for some reason, like these three glitch out. And if this happens, just delete these, Just do another nod, and then you'll. You'll be pretty much good to go. So we started off with, of course, just some images. So these are the images over here. And then we had its own image now that we created. Basically put in a prompt, turn these into vertical. Because this, this is us preparing ourselves for videos. Theoretically, if you wanted to go directly from this to video, you could if you wanted it in this aspect ratio. But in my experience, if you do that, and also if you want this aspect ratio, it's going to mess up. But if you're fine with this aspect aspect ratio, you can easily just do it directly, too. Same thing with over here. I did basically took these images, turned them into vertical first, and I got. Got a little more creative. Since this is outdoors, we're like, okay, can we get a drone shot? So definitely over here, like, any type of creativity is welcomed. If you want to take this shot, you know, maybe focus on the design elements on the wooden, like, part of this design or something. You could do that. So there's a lot of things you can do, of course, which we've managed to display over here. So we have this design. This design. I don't know what this is, but you can ignore that one. We have this design over here, so they're all pretty good. And then, of course, we take those designs, turn them into videos, and then we compile them, of course, which is the most important part over here. And then arguably the other most important part is the actual offer itself, because we want to make sure we're hoping this one does well because we're highlighting the price pretty much on point. And if somebody's already been price shopping and we show them these results, we are hoping to get a ton of leads just by doing this. Perfect. Cool. And if you do have any questions, just leave them in the comments and then I'll make sure to answer you as fast as possible. And if you did enjoy this video, just click on the like comment and then I'll see you in the next one.