3 Best Practices in Photography | Photography Lessons from @Mark_Hemmings
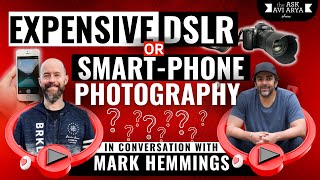
This is a YouTube video titled "3 Best Practices in Photography | Photography Lessons from @Mark_Hemmings" created on June 23, 2021. It features a conversational interview between Avi Arya and professional photographer Mark Hemmings. They discuss practical tips and techniques for smartphone and DSLR photography, including lighting, composition, camera settings, and video recording best practices. Avi Arya hosts the session, guiding the discussion and asking questions relevant to photographers and content creators.
So just do this to the room and find the center point and adjust and then take a picture. So it doesn't need to be eye level. It could be like this.
Exactly. And because you're 6:3, it may even be possible that you just kneel down, like on your knees. And that might be the perfect position for that particular room.
Hey, guys, this is Avi Arya, father of two girls, six dogs, husband to a superwoman, a streetcar racer turned hotelier, now social media marketer and founder of Internet Moguls. Welcome to my channel. I always tell my audience the shortest distance between two human hearts is a story. You want to connect with another human being, tell them a story. However, on the Internet, because everybody is so impatient and people are scrolling through, you need to have a fast, quick, heartfelt, true story that connects with people. So what I do is I'll tell you my short story and then I'll request you to tell us yours.
Sure.
Alrighty then. So, Mark, my name is Avi Arya, father of two girls, six dogs, husband to a superwoman, a streetcar racer, turn hotelier, now social media marketer and founder of the Micro Video Mastery System, a system of videos that allow regular entrepreneurs to become video entrepreneurs, to get known on the Internet, get leads from the Internet and get sales from the Internet. Over to you.
Yes, so I have. I'm a father of two girls as well and I'm a photographer. I've been for two over two decades. And a real breakthrough for me came after living in Latvia. And in Latvia I understood, I learned to understand how to actually market my skills to an international market. And that was sort of the breakthrough that I needed to enter into an online or digital portion of my business.
That is fantastic. Awesome. Nice to know your story and your background. And like I said, I discovered you through your amazing, amazing ads. It showed very clearly that there is a professional on the other side and he knows what he's talking about. But you know, for most of us, this is photography. And now more people are getting towards this. But I'm sure you can imagine for a lot of us, this is scary. This is so many buttons and so many things to do. It is scary. So I leave it to you to read the way. Read the presentation. That will help give us some tips and best practices and what we should do on our digital marketing and online business. Growing journey through videos.
Yes. So my first photograph, which I really appreciate that was in Japan, a first trip right after university. And I like to go back to this picture as an encouragement that, you know, I'VE come from a good, I've had a good run and it's still, still so much ahead of me. My first, my actual first nature photo. So I started in nature photography and travel photography. Loved my experiences in Japan. And that of course led to landscapes. And all of this was slide film, by the way. So this is just a little bit of history and then we'll get into some good stuff that I'm doing currently. But in 98 to 99 I just really started to love landscape photography. And because I live on the east coast of Canada, it's pretty easy to get great looking landscapes. And with black and white there was a whole new wave of self expression. And of course this is back still in the film days. And back then it was such a treat, almost like Christmas every time you went to the film lab and sometimes it was a week later, especially if it was slide film. And that, that feeling of anticipation was really, you know, we don't have that anymore because we have instant results. But, but back then it was fabulous, as you can imagine.
Oh, I totally can.
And 2004 was a real watershed moment for my career because I bought a Nikon D70. Now this is a test shot, my first digital camera photo. And I said, you know, this is a 6 megapixel, which was stunning at the time. And I look at it now and this stack of National Geographics, it's tack sharp. And this was back in 2004 with a sort of a beginner's, you know, digital camera, although it was pretty expensive. And that led me to saying, you know what? I really want to do photo workshops around the world. So in 2005 I did a photo workshop in Japan and, and I gathered people from North America or wherever. And ever since then, each year I've been doing photo workshops, teaching them in Mexico, Japan, South Korea, England, Hungary, Romania, Israel, Greece, usa, Italy and Hungary. Now each year I sort of mix them up. Some destinations I put on hold for the next year, some I keep. For example, Mexico and Japan are pretty much annual. And that's been really fun because it allows me to share my skills with people in person. Because of course I do have a lot of teaching that I do almost daily through the Internet, through social media channels. But it's so nice to be together with someone for a full week exploring a country and me being able to actually look at their camera and teach them how to get the best shot at the best location.
Right?
Yeah. So. And then during that time of, you know, getting really into how to work with digital cameras and digital processes, of course, became a normal commercial and advertising photographer. And that would be anything from, you know, magazine work, food, architecture, travel, tourism, and all of that. That good stuff that paid the bills. And the nice thing was that I actually enjoyed doing that work. So that was great. But here is the thing. Here's the big event in 2012. I was in mexico and I had a huge camera. And some of your listeners may remember a Nikon D300 or D3 hundreds. It was a substantial camera, and I had a huge professional nikon lens that weighed a ton. It was like an F2.8 professional lens. And I was going around doing street photography, and I said, you know what? I look absolutely silly. And it's so ridiculous for me to have this huge camera that could be used for safari and to photograph on the streets. For one thing, it's so heavy around the neck. The other thing, it's so obtrusive and you feel like a paparazzi. So I said, you know what? I have an iPhone 4S or something, or 5. I'm going to try. I heard that you can take pictures with it. I never took a picture with it before. So this is my first picture, my first introduction to iPhone photography. Or we could say mobile or smartphone photography. And it was instrumental in me realizing that anybody can take pictures with any camera they have. And it's not so much the quality of the camera, but it's more about composition. It's about light, it's about attitude, and it's about having fun. Then that, of course, during that time of exploration, of learning how to create really cool and dynamic international photos with my iPhone, I started working for iPhone photography school. And probably about 2015, 2016, I would write a lot of their blogs, and it was so much fun. And I would just do blogs about how to get really great photos with your iPhone in different genres. So a different genre could be like landscape, it could be sports, it could be portraits, all of those things. And then in 2017, they hired me to come to latvia and to teach courses. And these would be the online courses, one of them that you mentioned seeing on facebook. And it was quite instrumental. And I thoroughly enjoyed my time with iPhone photography school. And while I was there, not only did I do an iPhone art academy course where I taught, if you can see this picture here, with this woman, a friend of mine, actually, who I superimposed into the mexican background that was part of the iPhone art academy, where we taught, or I taught online how to mix photos together to create Great artwork. And then on the left, this was my home, actually. I took a picture, this picture outside of my balcony in Riga. Riga, Latvia, a beautiful city. And so this was a pivotal one year time in my career where not only I've advanced in my photography, iPhone photography, but I also learned by the masters on how to do digital marketing. And I must say, they are the masters. And you know, even right now, the information that I glean from them is still a fraction of what they, they know and what they do every single day. And that time was really great because it then launched me into sort of a desire to daily on my social media channels, teach photography. Just little snippets. And that led to the very famous For Dummies series book. And I was able to just finish about a month ago it was published, iPhone Photography for Dummies. And I love this book. It really came out well. And if anyone wants to get it, it's on any Amazon site within your own country. Amazon.com.ca.uk wherever you want.
Awesome. I'm gonna put a link to it.
Yeah, yeah, I'd appreciate that. And of course today I'm just rolling along with having so much fun giving out free content and really, really helping people with my social media feeds. And if you check on any of my social media, I give daily free lessons. And it's a lot of fun helping people with the art and science of photography.
Lovely, lovely. That's a beautiful story. And I can see the smile on your face as you tell your story, that it's heartfelt and I see that you loved every part of this journey. Yes, Mark, now my next. Now you know, can you run our audience through a bit of like what you teach every day? We've got about 30 minutes with you right now after this story. Can you teach us a few things on iPhone? Let's start with iPhone photography. You know, like people want to do photographs and they want to do videos. Where should they start? Can you, you know, can you run us through a best practices or a tutorial or something?
Yes. So the first thing that I do want to mention is that when I use the word iPhone photography, I also want to make sure that we don't leave out our friends with Android. So I probably should be using the word smartphone photography because everything that I teach, I try to make sure that it is accessible for Androids as well. And the nice thing is, is that most apps that I promote are cross platform. So that's perfect. One thing that I like to start out with is to encourage People that to get over one little technical hurdle before we get into any fancy stuff, this is the one technical thing that messes everybody up. And it's as simple as this. Your iPhone or Android lens is filthy. I guarantee it. Now, how do I know that? Because whenever we use our iPhone, we're pulling it out of where? Our pocket or our purse. Am I right? Sure it is. Absolutely. You know, there's fingerprints on it. You know all of this stuff. So what we do before we start anything is clicking clean our lens. Now, you and I both are wearing glasses. That means we probably have a glasses cleaner cloth. And that's very simple. Just do a little circular rub, make sure that there's no grit or anything on your cleaner cloth, and you'll be all set. And I guarantee you that your pictures are going to be so much sharper. Now, the reason being is that whenever we have any amount of film, dust, dirt, smudge on our lenses, it's going to soften the picture dramatically. The reason being is that you see how small these lenses are. Now, on a bigger dslr, I don't have mine with me right now. It's not as big a problem, but it is very big. It is a very big problem with smaller lenses like these. So first of all, clean the lens. Second of all, I love teaching this. Okay, so whenever we take a picture, hopefully you can see this. This is the way that I see people photographing. Okay, this is not good. Why? Because of instability in the strength of our arms. Now, even bodybuilders, even strong, you know, people who have very strong arms, it's still going to have a certain amount of shake when they're taking the picture. That's why I advise that we keep everything toward our core. So, for example, if I was going to be photographing, just. I'll try here, I take the phone. I have my, my elbows into my ribcage, really good center, sort of into my core. And what this allows is a much stabler shot. Now, a lot of people say, mark, my pictures aren't sharp. Well, I just gave you two incredibly helpful tools to get sharper pictures, and I guarantee you that they will work. Now, someone would say, well, Mark, how far, how close do you have, you know, your iPhone or Android to your body? And I would say it's simply based on your near or farsightedness, whatever's comfortable. For example, I can see comfortably at this distance, but maybe if a farsighted person needs to be here, that's okay. You just take it as close to your Face as you feel comfortable.
Understood. Right. And now would you like to tell us about more? So this is what should we do in when we're taking pictures inside an office setting during the day and inside an office setting during the night?
Yeah. Perfect. Now for anyone who has this question I love because new technology is just doing so many cool things. Now the newer iPhones have three advantages going for them. One's called Night mode, one's called Deep fusion and one's called Smart hdr. Now Android have their own versions of these things. They're called, you know, something different, they have a different title. But what's happening in the world of mobile devices is that when we take a picture inside, like for example, your office, my background, do you see behind me how I have my door, it's white. Now behind me is my living room, it's dark. Now if you were to say, okay Mark, I need a real estate photo of my, of this interior because I'm going to sell the house or I need to show off my environment. If you were to take, take this picture now, the background would be too dark, it wouldn't look good. So with the advent of newer iPhones that have this smart HDR and this is both Android and iPhone, the phone is automatically taking a number of pictures instantly or almost instantly and mixing these together and creating a final, excellent, really well exposed picture. Now if you have an older iPhone, don't worry, you're not left out. What I advise, and I'm going to show it to you is that I got this for $15 and this is a tabletop tripod. You can buy them anywhere and it doesn't matter what brand they are. For example, this one happens to be newer, but just no, it's this easy. And what this allows for is a shake free interior whenever you have to capture inside of a building. Now it's true, this is a tabletop, so no problem, you just put it on table and then you capture the scene. Very important whenever you're photographing interiors, you have to think like an architectural photographer. What that means is that you don't want to, you know, be high up in, you know, standing up, shooting down, you don't want to be shooting low, you want straight on. So let's think, find out where the center point of the room is, locate that and photograph straight on. And that's a powerful, really good, powerful image. Now a lot of people say, well what about the fact that my windows are so blown out that means that they're really super bright? Well, that happens when we have a differential of light, meaning it's a super bright day, the sun shining so much, but the interior is dark. Here is the best tip that I can give you. It's an amazing tip. Simply wait until what we call golden hour. Now, golden hour is early in the morning or late in the evening. And what that allows you to do is to have softer outdoor light, which means that there's less contrast and a better looking balance between interior light and exterior light.
Got it. So, Mark, tell us you said, you know, I like the tip about, you know, this is, this is uncomfortable, you want to stop. And here you can take pictures. So if I see a room, should I go to one corner and hug myself, you know, tug myself in the corner and then look at the center of the room and then take a picture?
That's a great question. So usually, and I'm glad you mentioned that corner of the room, I like to start out with a centered position on the middle of the wall. So for example, I'm seeing the back of your room and it looks like there's a vertical post sort of behind your shoulder. And that would, I think, is the center, if I can see. So that's your first shot then. And for example, you mentioned the 45 degree angle. Yes, we would definitely pull back all the way back and we would be photographing at a 45 degree angle. Now, a lot of people actually, and I see this in real estate photography quite a bit, is they stand up and they take a picture really high, but that distorts the verticality of the lines. That's why I would suggest also is trying to estimate the midpoint of the height of your wall and sort of try to photograph at that midpoint. Now it's a little bit tricky for you because you have a nice angle, but in my house currently, I'm just going to angle my screen. Now, as you can see, and we have the door opening and closing because of my daughters. Thank you very much.
That's awesome.
I have straight lines. So let's just say for fun that this is the midpoint of the distance. Then I would probably, right here have my camera so that I'd be able to photograph and have a resulting straight line on either side. This is really important and this is the basis for good architectural photography.
Got it. Because I'm 6ft 3 inches, when I stand up and I'm taking a picture like this, it never comes out right. So you're saying, so just do this to the room and find the center point and adjust and Then take a picture. It doesn't need to be eye level. It could be like this.
Exactly. And because you're 6:3, it may even be possible that you just kneel down, like on your knees, and that might be the perfect position for that particular room. For example, I'm a professional architectural photographer as well, and whenever I'm photographing for architects, I am really careful to make sure that lines are straight. So I have my tripod set up. And it's usually the case that the ideal height for me is just a little bit above where I'm kneeling. So when I'm on my knees. But I find that if I'm shooting like at this level, it's an ideal scenario. Of course, that depends on how high the roof is.
That's very interesting. That's very interesting. So, Mark, what about, what about lighting at night? Like, you know, I know there's a flash over here. And what else do we have in our hands that we can use for light?
So I advise don't use the flash. The flash won't do anything, especially because, well, the flash will work for anything that's about two or three feet away from the camera, but it's not strong enough to do anything for a room, for example. So here's what I advise. I always advise using a tripod like this or whatever, but if you don't have one, let's just say that you don't. What I would like you to do is to make sure that the lights that you turn on are the same type of lights. This will allow the the room to be evenly lit with regards to color balance. Now here's an example above me, I have newer LED light bulbs, but back there is a traditional tungsten light bulb. And back there I have, who knows, I could say an LED strip light. These three lights are completely different and they're going to create different color casts to my picture with dynamic look good. Here's a great tip for you. And this is a great tip actually for anyone in the real estate business, anyone selling their house, anyone who needs to get photos of their interiors for their website or social media, just go out to your store and simply invest in light bulbs that are exactly the same. So buy a five pack, for example, and all of them are LED or all of them are tungsten, it doesn't matter. As long as they're all the same type of light, you will get even color balance.
Very nice, very nice. What about black and white pictures? I see a lot of black and white pictures because they give so Much of the character, especially when you're building a personal brand online, you want more of your people to get to see the behind the scenes of you and behind the heart. I always say show your heart side, you know, and people connect with you more and more. And I see black and white pictures do that very well. How can I use something like this to do a black and white photograph?
Oh, I love that question. In fact, I love all your questions.
Thank you.
But the reason why I love this one especially is because I have a very cool app that I want all of your listeners to try. It's free. It's called Adobe Lightroom cc. Okay, so it's for Android and iPhone, don't worry. And it's a free version, of course you can pay extra later. But it has the most amazing black and white functionality within its camera. Now, most probably of your listeners will know that every iPhone and every Android has their built in camera app. Great. It works excellent. But you can also get different cameras. There's also apps that work as secondary cameras that you can use as well. Now this Adobe Lightroom CC app has its own camera and it is stunning. The quality is amazing. And after you take the picture within the Lightroom app, you can play around with the almost unlimited black and white options and you will be amazed at what kind of black and whites you can get through that app.
Lovely. I like that. So my next question is, you know, most of us, when we're taking pictures or using our phone to create a short video, we have all kinds of offices, small, large. So what should somebody like me do to create depth? You know, somebody told me just put a strip of light over there. It is separate what where you are from right here. So I want to do a before and after sort of a series for this video. So if you can tell me what I should do for a, you know, to spruce up this office so that it looks aesthetically pleasing in photographs. I do that and take a picture and you know, put it in part of this episode.
Yeah. And first of all, I'll tell you that what I'm going to say. Don't. I'm sort of preaching what I don't practice because as you can see, this is a huge mess back here. But in all reality, this is my Covid office and it's simply my house, as a lot of us are dealing with these days. But what, what I love to teach people about creating three dimensionality and this is so exciting, is that if you can get something called a backlight now, a backlight is, or some people call it a hair light. And in traditional photography it's a light. Let's just say, for example, just see my lamp back here. Let's just say that that would be the backlight source and it's okay to be in the picture. And if, if the light was pointing this way, it would hit my head at a 45 degree angle sort of right here. And what that allows for is a ring of light. And we call it rim light or backlight or hair light. And you can have one back, back here as well if you want. So two, it's not necessary. One is fine. And what that does is it creates a three dimensionality that you will find most professional YouTube or vlogging artists have. And the reason why this is so effective is it cut, sort of cuts out the person from their background. Now you did mention, you know, how do I make my surroundings look good? Of course we want to get rid of the clutter. Like look at all the stuff back here. I think you can do better with some of the things, the clutter in your background. Just get rid of a lot of it. But it won't be upsetting to anybody if you have what we call a video light. And you can get those cheaply. They're LEDs and they look good. You can even get them colored. But. And it would simply be in the corner, one of the corners of your room. And it shut. It's shooting at the back of your head at a slight angle that's going to cause a three dimensional separation of you from the background.
So you're saying just a small mini lamp.
Well, sort of. But this is more directional. So if you, for example, if you go to your local camera store or on Amazon or whatever, these are little lights, they can be about this small. They're on a thin tripod, like a black or a stand. And they are usually, these days they're led in the back. In the past they were tungsten. And it's simply a way that videographers and vloggers and YouTube guys and girls, they, that's how they illuminate themselves. And it doesn't need any special diffusion. This is just a straight light, almost like a laser going right to the back of your head. And it works really effectively.
I can just put it over there and point it towards my head and that's all.
Yeah.
And it's okay for it to show in the background as well? Yeah, I can just search it up on Amazon.
Yeah, just go to it. LED video light will probably bring it up. Now, there's also LED video light. There's also LED video panels, like light panels that may be a little bit too big to look good, but these little video lights are just like small camera lens, really, and I think that would look good. Okay. That's an LED light. So that light panel is not as attractive. But what I can do for you, if you want, is I can send you some links and you can put them in the show notes after we finish talking.
Got it. Because I would love to change this setup and then, you know, sort of put it in the end and say, this is what I learned from Mark Hemmings. Awesome. Yeah, yeah, Certainly so light over here. Coming to the head. Break the room into, you know, find the center of the room. You know, make sure your arms are stable. You know, I've got a lot of stuff that I want to do right away. Now let's talk a little bit about. We spoke about lighting. We spoke about angles. We spoke about, you know, black and white. You know, Adobe Lightroom cc.
Yeah.
Is the app that you said let's talk about. Can we talk about. When you say iPhone photography, is it okay to talk about videos as well?
Of course. I do videos all the time with my iPhone.
Awesome. So when I. So you know what, though? There are. So I'm a YouTuber. I do YouTube video videos. And, you know, we have a decent following of people who come and learn. These are tutorial videos. That's number one. And sometimes I like to do a vlogging setup of, you know, when I'm traveling around and whatever. So between both of those, between just sitting over here and putting my phone on a tripod, it's the easiest, and I've got the DSLRs and all, but are not easy to understand. Let's put a phone over here, record it, upload it on a drive, send it to the team, the edit it, and it's already up there, and I love it. So that's one way of doing it. So how can I do. How can all of our audiences do a better iPhone YouTube video? And second part of that question would be, how do we do a better iPhone vlog while we're traveling?
I have so much to offer. Now, the first thing that I want to show everybody, and I conveniently keep this in my Japanese Genmaicha tea case, which is metal, I love. This is the cheapest, but value for money. The best option I found because I do exactly what you're doing. And when I'm traveling, although I haven't been traveling much lately, but when I am traveling, I want the simplest way to create vlogging or YouTube videos. So what I do is I use the road smartlav plus okay? And of course it's smart and lav V as in victor and then the plus sign.
Got it.
Okay. Smartlav plus. And what I do is I simply of course just attach it like this, has a windscreen on it and on this end, for Androids who still have the normal plug that this works or for iPhone people, there's an adapter and it just goes into my iPhone and then I will just record myself speaking using, you know, the selfie camera if I want, or the other camera. And the quality, and this is you and I are in Canada. $99 for this smart lab setup. It's unbelievably good for that low price for Americans it's like 70 bucks. It's amazing. Now not only that, you may say, well mark, what if, what if you are alone and you want to get more of the background in? No problem. They also make a 50. Well, I don't know. I don't know if it's 50ft or it's huge. This is an extension cable. So I in fact when I was last in Tokyo airport in Haneda, wanted to capture the whole airport and I wanted to do a vlog. So what I did is I took my tripod and my tripod was way far away and I used this extension cord by rode R O D E and it was amazing. The quality did not wasn't denigrated at all. And I was able to get a really cool vlog.
I believe just recently they've come up with two very small square looking wireless mics as well.
Yes, and that wireless solution is excellent by the way. And I use a similar one by Sennheiser, although it's fairly expensive. The reason why I like to suggest this, at least for those who are getting into vlogging or YouTube, is that it's an intro price and it's much cheaper than the wireless. And to be honest, it's a little bit less intimidating because I do find that when people start out vlogging or advertising doing, you know, stuff from their own on their Android or iPhone, they may get a little nervous with the wireless technology.
Right, got it.
Can I throw one other tip in?
Yes, please, please. I'm loving this.
This, this is a game changer for me. These are the new Apple AirPods Pro and they allow me to do wireless vlogging on the go without any wires. It's really quite, quite great. Now the reason why I'm using this right now instead of these is simply because I wanted to get on the call with you quickly and I didn't have time to Bluetooth these to my computer. But anyway, I've done some tests and these work really well out on the field. And because they have noise canceling built in, they do cancel out a fair amount of wind noise and background noise that you may find ruins of vlogging or YouTube Live, Facebook Live, Instagram live. Now, are there equivalents for Android? Yes, there are and I don't know who makes them, but there's quite a.
Few companies very well on Androids as well. I use them on my Android. It works very well. Good.
Excellent. Yeah, great.
So this is the. Is a mic anything about video quality? I mean, how is there any app setting to change while we're doing a video for YouTube versus going out and all of that?
Yes. So it's really important that people first of all decide, okay, let's just say, for example, we're going to go to our menu and everyone should do this, by the way. So here's the homework for everybody. I want you to all go to your settings and go to something called camera. Now this is the same for Android and iPhone, there's always settings somewhere. And for iPhone it's camera. And in camera you will see something called formats and frame rates and all this stuff. And what I'd like to tell people is that if possible to use 4K at 30 frames per second. Now there's quite a few options. There's 720p, 1080p, there's 60 frames per second, 30. And you could a lot of people get confused with this. Now the reason why I suggest 4k at 30 is because 30 frames per second is very forgiving if we're a little bit shaky with our hands. Now, 24p looks more cinematic and it's more, more Hollywood looking, but 24p I find has a little bit more shake to it and it's not as even. So I like to say to people, use the 4K and use 30. Now what does 4K mean? Well, 4K is simply double the resolution of our normal 1080p standard resolution. Now if you run out of space on your camera or you know, something like that, don't worry, just use 1080p, that's perfectly fine. However, 4K will give you that extra what we call future proof. And that future proof is that everything's going 4k anyway. So why not start now shooting in 4k? And that will help you repurpose your videos for the future.
Got it. I just did that. Awesome. And now, any tips while I'm taking my phone and making a vlog, sit in my car, come out, run with my dog, go to the ocean, go for a swim, come back while my camera is going through all of this. And I'm creating a blog, which, you know, it's supposed to be a reality TV kind of, you know, atmosphere. So any tips while somebody's doing that?
Yes. So one thing that I noticed, and it really bothered me is that if I'm doing a YouTube live or a Facebook Live or an Instagram Live, I was always concerned that the quality wasn't so good, and it was just not nearly as good as the quality of me filming myself and then posting. Now, here's the problem. You will always get better quality if you film yourself first, then later you post it to Facebook, Instagram, YouTube. But I do understand that a lot of people in certain circumstances want live, and I totally appreciate that. So all we need to do is just to make sure that we have good. Like on my phone, which is with Telus here in Canada, I know that I have three out of four bars. Okay? That means that my signal strength is okay. But if you go down to two bars and signal strength, your YouTube live, your Facebook Live, your Instagram live is not going to be very good. It's going to be choppy, it's going to look pixelated. And that's why I really advise if you don't have full four bars of service on your mobile device, then you just say, okay, well, look, I'm gonna have to just record myself and then after the fact, upload it to social media. And because you know, if you do that, it's gonna be perfect quality.
Got it. Got it. So now can we just switch? We have about 10 minutes left. 13 minutes. Can we switch to a little bit of the dslr?
Oh, I'd love to.
Awesome. So this is. So I just. I just. I left it back in the office and I couldn't go back to the office for a couple of weeks. Finally got one of them back to the office. The other one is with my team trying to figure it out like many other people. I've got the Canon 5. This is the Canon 7D, and I've got. So I just got the new cam link to the cam link so that now I can do my videos instead of this webcam. I can do it from here. However, the Problem that I have is that I've got only this lens.
Yeah.
And so this dense doesn't give me the depth that I need.
Yes. Is that a 50 millimeter?
This is 50. That's right.
Okay, 50 millimeter F1.8.
Yeah.
Okay, so the problem, and this is not insurmountable, but the difficulty with the 50 millimeter is that it's probably only going to capture your head because 50 millimeter is on your camera, which is what we call an APSC camera, meaning the chip is a little bit smaller than a full frame. And by the way, I've owned the 7D in the past, so I know what I'm talking about here. If you can move your camera further away from you, it's gonna be a little bit awkward. But that would allow you to get, you know, more progressively more and more into frame. Now, the reason why I think that that lens could actually serve you well is because it. The. The widest aperture is f 1.8. That is actually quite outstanding. And that means that the background is going to be blurred, but your face will be perfectly sharp. Now you say to yourself, well, why would I want the background blurred? Well, not. You don't want it completely blur, so it's just like a big mess. But you want enough blur so that it's pleasing. Now, people. Yeah. Separate it. So, for example, if you put that on, if you do a test later today, for example, what you're going to want is a tabletop tripod or a normal sized tripod. And I would suggest that if you get a friend to focus for you so that your face is sharp, but the rest is blurry, I think an F2.8 or an F4 is going to look amazing for you.
So the 2.48 and the 4 is the aperture that I can set from here.
So you would set it within your camera. For example, all aperture settings you would do within the camera, you would go to something called av. Look at the top of your camera and on that dial you're going to see an AV at the very top. You don't have to turn it on. It's all right.
I don't have to turn it on. Okay, so AV is an AF with the AF on.
No, take a look at that little circular dial, the physical dial on the left hand.
It has an AV.
Yeah, AV. That AV represents aperture priority. And if you turn it to AV and you go to f4, then you will.
Yeah, I've got AV, but how do I go to f4 now?
Okay, f4 is within your menu, you're gonna have to actually do it within the camera itself.
So I just put it on. Just take one second. Put it on.
And by the way, each camera is different. So what I explained to you will be different for people who have Nikon or Sony or Fuji. But here's the thing, is that it's still true that you would. F4 would be a very good way to separate you from your background in aperture priority mode.
Got it. So you just saved me $399 for a new lens.
Oh, you don't need new lens. That lens is amazing that you have there.
Thank you so much. Because I was like, you know what? When am I going to get this set up? Because every time there's like, something missing. Oh, my God, the HDMI cable doesn't fit in. So back to Amazon. Get something else done. So.
I know the feeling.
You know what I'm saying? I'm sure you got every gadget on the planet right now.
Like, you know, the problem is, is that during COVID a lot of us experience what's called retail therapy. Retail therapy is like, oh, I feel like buying something right now that I don't need.
Right, right, right.
Yeah.
I've come in here and then. So how do I find the F4?
Okay, so if you're in aperture priority now, do you see on the back screen or the top screen something called F, A little F and then a number.
Something.
Oh, you have to put your lens on first.
Oh, and that too has become a problem because since I took it off yesterday, I don't know how to put it back on.
Okay. Very easy to take your lens off. Look for a little dot on your lens. On the back part of your lens.
Right.
You see a dot?
Yeah.
Or do you see it on the exterior? And then match it. Match it up with the dot on your camera.
There's no dot over here.
Is there a dot on. On the. See that red dot there? On. I see your. I see the dot. It's red on the lens. Take a look at your lens.
Is that the dot or is it dirty? Oh, it's.
No, it's white where your index finger is. Flip it over. I could see it there. Do you see that red dot?
Oh, yeah, the one over here. Okay, okay, okay.
Red dot should meet either a red dot on your camera or it's a white dot. I forget. There you go.
That's why you need a mentor for everything.
Yeah.
Okay, got it.
Okay, so now you should see on. On either your back screen or your top screen. An F. The little like F as in frank. And a little number next to.
F 1.8.
Perfect. Okay, you're all set. Now, in order to Change that F 1.8 to F 4 with your thumb, I'd like you to move the thumb dial. It's a physical dial that you can move left or right. It's a little bit higher and. Or it's sometimes your finger dial and depends on which camera model is. But when you move that dial, it's going to go from 1.8.
Just remains on the. On just daylight shade.
Yeah. Okay, try. Try your forefinger. Your forefinger, which is on the front of the camera. And there should be a little dial up there.
Yeah, there is.
Okay, move the dial and I want you to tell me if the F number is changing.
It's gone from color temperature to auto to daylight. It's just. It's just revolving.
Oh, yeah. You're in white balance. I'd like you to go to auto for white balance. So flip. When you're changing that, go back to auto, which is a.
Okay, one second, auto.
More from Avi
The strongest mindset doesn't begin with meditation. It begins at home. Before you conquer the wor

The strongest mindset doesn't begin with meditation. It begins at home. Before you conquer the wor
Your mindset isn't something you fix once. It's something you train every single day. Just like yo

Don't build a company just because your friends are. Build one because you're ready. A startup is
Everyone dreams of becoming the boss. Very few understand what that really means. The moment you b
Most entrepreneurs say, "I don't have time for coaching." The truth? You don't make time for what

Over hiring doesn't always solve problems. Sometimes, it creates them. Having a small buffer in you

"The highest-paid" isn't the goal. The highest-value is. People often ask why premium mentorship co
The founder will always be a bottleneck... at some stage. The goal isn't to pretend you're never th
People ask me how I stay consistent with my morning routine while traveling across countries and tim
People ask me how I stay consistent with my morning routine while traveling across countries and tim