How to Grow Radishes: A Step by Step Guide
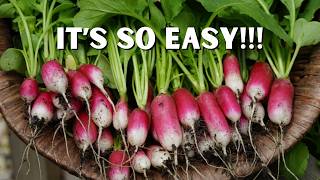
A concise, practical how-to YouTube tutorial by Nicole Johnsey Burke that teaches beginners to grow radishes from seed to harvest. The video emphasizes radishes as an easy, fast-growing crop suited to cool weather, gives direct-sow planting steps (shallow trench, "two-fingers" spacing, ~½" cover of compost), germination and early-care care (water daily if no rain; hill/shoulder soil at ~10–11 days), harvest timing (leaf count, shouldering, and testing by feel), and simple culinary uses (raw with butter and salt, butter boards, quick refrigerator pickles). It is part of an Easy Gardening series and promotes an Easy Garden Kit with additional guides and recipes.
Chapters
If you've ever said, I kill every plant, then this one is going to prove you wrong. With just one packet of seed in just one month, you're going to feel like a gardening pro. In this video, I'm going to give you the step by step to go from seed to harvest with one of the easiest plants you can ever grow in the garden. Now, this easy plant I'm talking about today is radishes. I'm sure you've heard people talk about radishes being an easy to grow plant, but I'm going to be honest, the first few years that I tried to grow it, I didn't have a lot of success. So in this video, I'm going to give you a few short tips that I've learned over the years that make this a no fail plant. Radishes are in the brassica family alongside huge plants, things like broccoli, cauliflower, cabbages, and kale. But radishes are these tiny little plants that grow these nice bulbous roots that are so good for us and can be enjoyed in so many ways. Now, if you're already thinking, Nicole, I don't want to eat radishes, like, I've tried a couple from the grocery and ah, not good. Don't worry, at the end of this video, I'm going to give you my favorite ideas and uses for this plant and you're going to be snacking on radishes in no time, I promise. So radishes love to grow when it's cool outside. They do not like hot weather. And for a lot of us, we actually have a lot of weather throughout the year when radishes thrive. So if you live in a hot place, you want to think about growing radishes like throughout the winter, starting around October all the way to March. If you live in a cold place, you want to grow radishes in the early spring and in the fall, so twice a year. And then if you live in a mild place, you can grow it almost from like January to April, and then you can do it again from like August to November or December. So lots of time in the year for almost all of us to enjoy radishes. The cool thing about radishes, too, they don't just grow for a lot of the year, but they grow so easily from seed. So we have this whole package called the Easy Garden Kit. And one of the requirements for these plants is that they had to grow from seed that plants directly in the soil. So radishes, you would never want to start indoors. You don't need to have lights and heat mats and all that kind of stuff. It's so easy. You just take the seed, put it right into the soil. So to plant these seeds, all you need is the soil to be workable. So at the beginning of the spring, spring, like, very, very early in the springtime, if you've got 2 to 3 inches of soil that you can get a rake through and the soil is loose enough, you can plant radish seeds. And then if you're heading toward fall or the cooler season, in the middle of the summer, you just want to be in, like, a shaded area where the soil is getting some shade from taller plants. And usually this can be accomplished with things like these carrots I've got growing here, or if you had bush beans or peppers, that'll give enough shade and coolness to the soil for radish seeds to go in the ground. So we're talking early, early in spring, and then also very early on in the fall season, you can get these radish seeds into the ground. And they are so easy to plant. So radish seeds are very tiny. They look like little pebbles, and they're pretty easy to spread out. And that, I would say, is one of the things that I really messed up at the beginning is I didn't take time to spread out the seeds when I planted them, and then I would run out of time to come back and thin them, and I would end up with just these spindly little radishes. Some people will grow a whole bed of radishes. And that's another mistake. I would say don't make that mistake, because who wants like, 100 radishes at once? Not me. Okay? I just want, like, three or four, maybe five or six at the most. So you don't want to dedicate an entire bed to radishes. I think that's a total waste of space. And I'll show you in a second of ways to use them up. But you really don't need to have a ton, and you definitely don't want a ton all at once. So instead of planting a whole bed of radishes, what I do is I just come along the side of the bed like this. I actually take our little weeding knife, and this is what I use to make my little trench for planting. And you just want to make a nice little trench. You want to have a soil that's nice and loose. I make a soil blend of compost, topsoil, and sand. I'll put a link or you can watch the video after this. It's all about my soil blend. That's the perfect kind of soil you want for growing radishes, because it's nice and loose, and you need these roots to be able to kind of dig down and make their way into the soil. And then my rule of thumb for radishes is two fingers. So literally, I put one radish seed down, two fingers in between, and then I put the next radish seed down. And I know right now it's going to feel like, do I really want to take my time to space these seeds out? And trust me, yes, you want to take your time, because it's heartbreaking to thin the seeds, and it's also just something that oftentimes you're not going to have time for. So just in this short little period, like just dropping these seeds down here, I've already put 10 in the ground, and I'm not going to have to come back and thin these like I'm one and done. So put these in about two fingers in between each one. And you definitely want to go for this idea of having it right alongside the edge of the bed. It's pretty perfect for making the most of your space and not ending up with too many. So after you do that, you want to just cover up your seeds. And this is the second mistake I made, not being sure that the seeds had really nice soil contact. I used to grow these radishes where the radish would end up growing above the soil. I'd have this weird little spindly red thing and then really nothing under the soil, and then leaves. And what it told me is like, oh, this thing is trying to grow this nice root and. But the root actually isn't under the soil. Has this happened to you? So what I've learned to do is to give the seed really good soil contact. So at this point, I like to cover it a little bit with compost. You don't want it too deep. So just about a half an inch of compost on top. Water it really well in, and then you're on your way. Now you're going to get little sprouts popping up in, like, five to six days. These things are super fast. Don't let the seeds dry out. You don't have to overdo it when it comes to water, but just if you're not having rain, just come out and put a little bit of water on your seeds every morning. Within three, four, five days, you're going to have tiny sprouts, and then about at day 10 or 11, this is the critical time. So if you've planted it the way I teach you, with two fingers in between, you don't have to worry about thinning, which is so nice. But the thing you do need to make sure is that there's good soil contact around the base of the plant. So you want to come in here and you can actually just take a little bit of soil and do what we call hilling. And that's where you're just going to take the soil and you just push it up against the edge of the plant, right to the shoulder. This is what we call the shoulder of the plant. Whereas the end of the root and then the top of where the leaves start to grow, just want to be sure that soil is totally covering that. Otherwise, what happens is you end up with this really thin radish and you feel like a failure. I've been there. So if you do that, that's literally the only thing you gotta do to take care of this plant. You don't need to fertilize it, you don't need to thin it. If you planted it the way I teach you, and then just making sure that all of the root is completely covered with soil, you're good to go. So you're almost to the finish line. You just got about another week or two, and then you're ready for the fun part, which is the harvest. This video is part of our Easy Gardening series, where we're on a mission to debunk the idea that you have to have a degree in horticulture or live on a huge farm in order to have success in the garden. So once you finish watching this video all about this easy, easy plant, go check out the other videos in the series to keep going. Now, a lot of people ask the question, when do I know if these radishes are ready to go? It's like, you know, a guessing game because all the growing is happening underneath. One quick tip is just checking the growth above the soil. So you should have three, four, five, six leaves that are coming from each mature plant. That's going to be the first sign that these radishes are ready to harvest. But then the next sign is what we call shouldering. This is where the radishes literally start to pop themselves out of the soil. You'll start to see the. The tops, the shoulders of the root start to come up to the surface of the soil. If none of that is happening and you're just growing very impatient, just take your finger, go around the edge of the radish. And you should feel whether or not the radish is starting to feel thick enough to be worth harvesting. And then, worst case, just pull one up as a test. You can always eat the leaves, eat the little baby root, but it's a good way to just start to test whether they're ready or not. Now, here's where I would say the most difficult part comes in, and that is catching the harvest in time. I have made the mistake too many times of leaving the radishes in the ground because I wanted to video it or photograph it or make a YouTube about it. And when I finally go to harvest the radishes, they are way too big. And let me tell you, if you haven't liked radishes before, it could be that you're just eating radishes that are too old. So you. So you definitely want to err on the young side when it comes to harvesting the radishes. Get them when they're just starting to be the right size. The flavor is not nearly as peppery or spicy, and the fibers in the plant are much less woody. It's just a nice crunchy feeling to the vegetable rather than it feeling like you're eating bark, which definitely will happen if you leave them in too long. All right, once you've got them harvested, you want to either store. Store them away dry with a little bit of soil on them if you can't deal with them right away. But if you're ready to deal with them right away, then we want to go ahead and figure out how we're going to use the radishes. And I've got some great ideas for you. So a super yummy way that I recently learned to eat radishes is just raw with some salted butter and some sea salt on top. And it may sound really weird, but it is really delicious. So the simplest thing is just bring it in, clean it up, cut it up, put some butter and salt on it. So good raw. The other way I love to use it is in, like, spreads and sauces. So we've done a couple garden parties. We'll make a butter board, and the radishes look so beautiful on the butter board. And then they also compliment. They give you more of a crunch to the board versus the softness of, like, herbs and flowers that are also on the dish. And then my favorite, favorite way is to easy pickle them. I just do a simple pickling recipe with some vinegar, salt, and water. I put that in the fridge. I don't even can them up and preserve them. You could do it that way, but I just put them in the fridge. I eat those radishes like they are gone in about, you know, I don't know, five to 10 days. So delicious, spicy, crunchy and so good for you. So those are my favorite ways to use radishes. If you've got some other ways that you love to eat them up, tell me in the comments. I've got 10 recipes for radishes in this Easy Garden Kit recipe book. This comes with the whole Easy Garden Kit that includes step by steps 10 build a raised bed to use my soil recipe. It's got planting plans and growing guides for all 10 of these plants that grow super super easy from seed. This is a great thing to give yourself to start your own garden or it's a great gift to give someone else that you're trying to get into the garden. I'll link the Easy Garden Kit right below this video. Radishes of course are included, but so are nine other varieties that all grow directly from seed in the garden super easily. Now I made another video all about another easy to grow plant and I'll put that right here so you can check it out right now.
More from Nicole
Propagation is the secret to turn 1 oregano plant into 100 that’ll last forever! #garden #herbs
Plant some garlic this fall and you’ll never run out. Just follow these steps #garlic #gardening

Head to Gardenary.com to try out my FREE custom planting plan creator #garden #gardendesign #plants

Frost is coming so harvest all your tomatoes and make this soup🍅#garden #recipe #tomatosoup #tomato
Say bye to grocery store herbs this winter if you harvest and dry some of your own👀#garden #herbs
Can you grow your own Ube?! Let’s see if I grew anything besides purple vines🍠#garden #ube #plants
If your garden didn’t turn out how you wanted, it’s time for a fresh start😌#garden #fallgarden

Turns out you don’t have to sit at a desk all day…you can stay in the garden☀️#garden #meme #9to5

Do NOT buy soil with artificial fertilizers if you want a natural, organic garden😬#garden #soil

I wasn’t meant to send emails or work 9 to 5, I’m meant to stay in the garden all day🌿#garden #meme