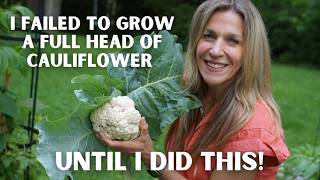
Nicole Johnsey Burke explains how she finally succeeded growing cauliflower and teaches viewers her step-by-step approach: choose the right timing for your climate so plants experience highs around 45–65°F for roughly 60 days; plant cauliflower as starts (not seed) and give each plant about one square foot; prune lower leaves weekly for pest control; feed every two weeks with worm castings or mushroom compost; optional blanching/tie-up showed little benefit in her trial; harvest in about 60–90 days when heads are ~6–8 inches wide, cutting the head off with a hori hori and using greens and the remaining plant for succession planting.
Chapters
Cauliflower is all the rage right now. We got cauliflower wings, cauliflower, rice, cauliflower, pizza, cauliflower, everything but cauliflower. In the garden, it's a different story. It is hard to grow cauliflower, but this year, I think I finally cracked the code. So in the next few minutes, I'm going to teach you everything I've learned from trying to grow cauliflower for many, many years in the garden so that you can keep up with your cauliflower hyper fixation. Let's get started. Cauliflower is in the brassica plant family. If you are familiar, that's going to include things like kale, broccoli, arugula, radishes, mustards, all those really healthy for us, leafy greens. Cauliflower is in the same plant family. Now, this plant family is interesting because you have your really quick producers like radishes and arugula. They're done in like 40, 45 days. And then you have your very long producers like Brussels sprouts, that are going to take like 120, maybe 130 days in the garden. Cauliflower is pretty, pretty close to Brussels sprouts when it comes to demands in the garden. It needs a ton of space, it needs a ton of time, and it needs a lot of attention. Cauliflower is picky, but for good reason. So most of us don't necessarily live in a place that has 100 days where the highs are between 45 and 65 degrees. So we're going to have to all adjust to where we're growing, and I'm going to show you how to do just that. So if you're in a hot climate, you want to put your cauliflower as a plant into the ground right around October or November. This is when the soil has finally started to cool down and you have the chance to grow cauliflower all throughout the winter. If you're in a cold place, you want to start cauliflower very early in the winter indoors, and then move your cauliflower out into the garden, really as soon as that soil can be worked. If you're in a mild climate, this perhaps could be the trickiest places to grow cauliflower, because you have spring pretty early in the season, and your temps warm up a lot faster than they do in mild climates. So in this case, you want to get your cauliflower planted as a plant as early in the spring as possible. So getting this timing right, where you have these high temperatures 45 to 65 for about 60 days, that's the key. So check out your attempts and adjust as needed. Temperature is so important for this picky plant. Now, there's one thing that some gardeners swear by, which is tying up cauliflower to blanch the heads. So I actually did a little experiment, and I left side of my cauliflower open and I tied a couple of the other ones up. So this is one that I tied up to see if I could end up with a nice, tighter, wider head of cauliflower. And I'll show you the results for that at the end of this video. So now that you know when to plant, let's cover planting, tending, and harvesting so that you get a ton of cauliflower in your own garden. First planting. I recommend putting a plant into the ground. Going from seed to harvest is just going to take way too long. So either grow your own starts indoors in the coldest parts of the year, or buy from a local nursery that's got great organic plants. Now, cauliflowers can literally take up an entire raised bed if you let them. And we're not going to let them. You want to give each cauliflower about one square foot in the garden space. When I planted out this garden, I've already harvested a few of these cauliflower. I planted eight cauliflower right down the middle of my garden. And. And that wasn't the only thing I planted in my garden. Right. I've got carrots and lettuces. I've got cilantro, I've got onions, I've got peas on the trellis. So many other plants surrounding it. So give your cauliflower one square foot. That is it. Now, once you get this planted, you want to keep it watered and keep it protected, especially if your temps are too hot or too cold, especially in those first few weeks of growth. And then we come to the tending part. So. So as your plants grow, you're going to notice that these leaves want to completely take over the entirety of your garden. You'll see that I've been cutting off leaves for weeks on these plants. So had I let these plants do their own thing without managing them, these leaves would currently be covering every other part of growth in my garden. I cut the leaves for several reasons. First, for pest control. So leaves that are the lowest to the ground, those are going to be the most likely to have pests or disease. They're the oldest leaves on the plants, and. And they're the most likely to create a bridge for pests to climb from the soil into the plant. So this is something we want to avoid and we can do it easily just by breaking off the lower leaves of a plant on a regular basis. So once a week I come along each of these plants and take off one third of the leafy greens surrounding the plant. Now, everyone wants to know, Nicole, can you do something with that? That seems such a waste to just cut it off? I mean, I swear I showed this on Instagram and the only question I got was, well, can you eat that part? So, yes, you can eat this part. Treat it like a mustard green, a collard green, cook it down southern style greens. You can make little wraps with these. I'm not promising this is going to taste like chocolate cake, but yes, you can definitely eat it. All right, so cutting off the leaves, that is one of the most important things you can do. And then this is a heavy feeder, so I like to come in and, and every two weeks, add a little bit of earthworm castings underneath this plant or a little bit of mushroom compost. If you want to know how I create an organic soil in my full mix, I'll put a link to that right below this video. Then once I've done that, I'm basically ready to just watch and get ready to harvest this cauliflower. The goal we're going for here is a nice tight head. And when you harvest, it is completely up to you. If you want just a few stalks of cauliflower you can harvest earlier in the season. If you know the temps are about to get really hot or really cold, you can also go ahead and harvest. Or you can push your luck and wait until you get this nice grocery store size head so that you feel really proud when you cut it down. The longer you wait, though, buyer beware, the more likely it is that there's pests or disease or something else that's going to get to your cauliflower before you do. Now, I promised you I'd show you the results of tying up a cauliflower head versus keeping it exposed. So here you can see I actually tried to tie this one up, but I wasn't successful. So here is what an exposed cauliflower head looks like. You can see, see we're starting to warm up here. So this floret is starting to separate a little bit. Generally you want a much tighter floret, but that's what it looks like. It's getting a little bit of discoloration, but for the most part, especially down here, you can see this nice white floret, which is just what we like, it looks pretty picture perfect down here. Not so much here. So let's check out this one. So I tied this one up probably, I think it was three weeks ago. This is one of the tasks we have in our planners. I'll put a link to that right below this video. And you can see this one kept a lot more of its leaves. The idea with tying this up is to get a tighter head and also to get a wider head, so you want to kind of blanch it out, and that's why you tie it up. So let's see. Well, I don't know about y', all, but it's not looking very different to me. So we've done. We still have a little bit of a white head right here at the top, but. But the florets are still starting to break out, and we have a little bit of discoloration. I don't know about you, but to me, doesn't really seem worth it. Not that it was that much effort, but I'd say, at least for this little science experiment here in my own garden, I wouldn't say it was worth the effort. So somewhere between 60 to 90 days, your cauliflower is going to be ready to harvest. You want to look for a head that's about 6 to 8 inches wide. Mine isn't quite that big, but it's big enough. And honestly, we're running out of time. If you wait too long to harvest your cauliflower, you're going to see the floret head start to separate and discolor. It's probably upping your chances of pests and disease. As soon as the head is big enough 6 to 8 inches wide, or you start to see signs that the head is starting to pull apart, it's time to grab your hori hori and harvest. So I love to come right underneath the floret and just harvest the head first. So I'm going to do that to start the harvest process. And you just do a little bit of sawing. Getting my arm workout today. And there you have it. This beautiful cauliflower floret ready to be eaten. Greens. Make a little salad saute with them. And my favorite way to use this cauliflower right now is pickling them. So I've been cutting them up, putting them in jars, and putting a little pickling brine on them, and, man, they are so delicious. So once you've harvested this, you can absolutely make use of the rest of the greens. And then what I like to do is just cut the plant all the way down to the base. That's making room for the next set of plants that I'm going to grow in this space. It's the end of spring now, so I'm closing up this planting area for cool season time for a little bit more sowing. And now. Ta da. I've just opened up a brand new spot for a warm season plant so I can come in and replace this with eggplant, with a squash, with a zucchini, with okra, anything that loves to grow. As the temperatures get hot, I've now just opened up a new space for that plant. Harvesting this head of cauliflower is great, but the good news is, even if this failed, this entire raised bed is not just based on the success of a couple of cauliflower plants. I'm growing cauliflower among all these other plants. So even if it doesn't work out perfectly and I have to harvest a little early, I still call this a success because I'm growing this alongside so many other plants that I get to enjoy along the way. I'd love to teach you how to plant this way if you want to learn how to pack in more plants, more variety, and have a healthier garden. I'll put a link to my planting method right below this video. So cauliflower, we're all eating it. And now you know how you can grow it too. I'll see you next time.