Chiropractic Clinical Series: The 4 Crucial Tools in Your Imaging Software.
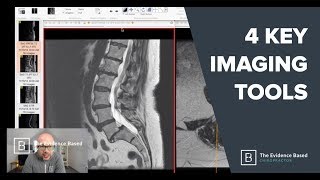
A short clinical tutorial by Jeff Langmaid (YouTube) introducing four essential imaging-software tools every clinician should master: measurement, contrast, magnification, and scout lines. The video demonstrates these tools in a screen-share using Osirix (Mac) and recommends RadiAnt/Radiant Viewer for PC, emphasizes using a consistent viewer rather than disc-default software, and previews upcoming MRI-focused clinical videos.
Chapters
Hello and welcome to a new clinical series of videos that I'm going to be doing. This is the first one, so if you like it, comment down below, give a thumbs up, all that fun stuff. But today we are talking about the four key tools that you need to have command knowledge of in your imaging software. We'll go through them one by one. I'm going to screen share as well so you'll be able to see my screen, my imaging software. We'll talk where things are, how to use them and why you need to know about them one by one. We'll also try to keep this short to make sure you can get back to doing what you do best. We just see patients. So those four key tools are measurement, contrast, magnification and scout lines. Measurement, contrast, magnification and scout lines. That will get you 98% of the information that you need. Still rely on your radiologist to do those advanced reads. This does not replace that whatsoever. But when you open up an MRI or a CT scan, specifically MRI in practice, I do not want your palms to be sweaty and you to get super anxious. And you can eliminate a lot of that anxiety by doing a few simple things. Number one, make sure that you are opening up in your software. So probably people out there, how many people you stick in the disc and whatever software comes with it is what you utilize. That is a recipe for disaster because all the software is, is slightly different. Sometimes there's like a grid of 16 pictures. You can't make it go to one, it goes to 32. Using different imaging software all the time is a not a good way to go about looking at images. So there are two software packages, two pieces of software that make it really, really easy. If you are a PC person, then Radiant Viewer, I believe it's free, I'm a Mac guy, we'll talk about that in a second. But Radiant Viewer is or should be or can be your go to imaging software. If you are a Mac person, then Ocirics, that's what we're going to look at today. Ocirics is the best tool on the market. They have a free version and a paid version. If you're not a radiologist, the free version is going to more than likely be absolutely fine for you. But make sure that you are consistent. Way too many docs open up the images in whatever software is on the disk. That is a recipe for inefficiency and a recipe for disaster. But the four key tools that I think all of us need to have command knowledge of be Aware of understand are measurement, contrast, magnification and scout lines. And I'm gonna switch over and go right in to my viewer here. Let's see. Cool. So this is my viewer. So this is Ocirics, right? Ocirics is a Mac based program. It's a tool set. It's an imaging software. It is completely free. They do have a paid version, but you can use the free version. And when you open it up, this is what you should anticipate seeing is just what you see here on the left hand side of the screen will be all of the different images that you have lined up in your cue. So whatever's on that disc will show up on the left hand side. Biggest thing to keep in mind is you want to match like with, like to start, right? So you look at your T2 images and you drag over a sagittal or a lateral. That's usually where most chiropractors are. Like, I feel great, I can look at this all day long. But, but also grab those axials. And the axials are where many docs that I talk to get a little bit anxious, to say the least. So grab your sagittals or your laterals and then your axials, which are on this side of the screen, right? And you can already see here the scout lines. One of those four key tools. Measurement, contrast, magnification and scout lines will give you, if you're not a radiologist, 95, 98% of the information that you need. So when you look here, we already have our scout lines. Most imaging software, including Ocirics, allow those scout lines to come up. And what do the scout lines do? They just rectify one image against the other. So as you go through and look at the images themselves, you can move the image. And of course, as you well know, the scout lines will then move in accordance with where you are. So scout lines are key just to understanding your spatial area in space, I guess you could say. Right. You want to be able to rectify left versus right, up versus down in what segment you're at. So scout lines enable you to do that super easy. That's one of the key tools. The other three, measurement, contrast and magnification are all located in the same area in almost every software package you open up, all you have to do is go to the middle at the top and you will see a cluster of tools at the middle of nearly every single radiology software. At the top of it you will see this cluster of tools. In that cluster you will find 99 out of 100 times you will find your measurement, your contrast and your magnification tool. And they're pretty obvious, right? Your magnification is usually the little magnifying glass. Measurement of course, looks like a little measuring tape. It's hidden behind something on my screen right now because I'm doing picture in picture. And then your contrast as well allows you to go up and down with the contrast of the image as you can imagine to make sure that you are in line with what you want to be doing. I'm going to try to switch over there. Cool. So if we go to a measurement tool, you can see simply here. Measurement tool allows you to measure what's going on. So you're able to just drag and drop and measure the distance between two items. Very important when you're measuring canal space. Anything sometimes measure the ivf. But specifically related to central stenosis or a spondylon measurement is clutch. You can see how that happens right there. Again, right at the top of your tool set. What else do you have? Magnification, the little magnifying glass. Very obvious, very easy to use, but very important. Again, you can use these in combination. This allows you to get in really, really detailed or pull back out magnification. Pretty self explanatory in contrast. Thankfully the days of throwing up hard images and shooting them poorly, knock on wood, are over. So contrast allows you to change things up and not be at the whim of a single static image. Right. You're able to see all of these things. All of these tools are to enable you and help you to see what's going on with every individual patient at any given time. So again, I recommend big recommendation right off the bat. Make sure that you are using a consistent software. Radiant if you're a PC person, Ocirics if you're a Mac person, are two great programs to utilize that. I believe both have free versions. Don't use the software that comes on each individual disc or you will be confused and it'll be inefficient. Secondarily, those four tools, scout lines enable you to rectify one angle, one plane of motion or plane versus the other. Scout lines are super important for that. They're essential. Number two, magnification allows you to zoom in and out of that picture. Those are going to be these next to it clustered at the top. Magnification, contrast and measurement. Contrast, brighten and darken that image so you can see what's going on. And a measurement tool specifically related to nerve compression, disc heights and spondies. Is a key, key tool to be able to accurately read pictures and not stress out about it. So this is the first of a series of clinical videos. I'm going to break down some specific images over the next few weeks. I'm going to talk about compressive pathology. We're going to go into disc heights. If this is something that you'd like to see more of, give me a thumbs up, give me a comment. I would love feedback. As far as how valuable is a clinical series to you and for me that it lays out over the first month, I think the clinical series, we're going to do a monthly topic. We're going to wrap it around MRI and imaging review. So I'm looking forward to it. Those are the four key tools again. In short, measurement, contrast, scout lines and magnification are the four key tools. Three of those four are in the top middle cluster. When you open up most imaging programs, Osiris and Radiant, if you are a Mac or PC person, best programs to utilize. Jason, thanks for tuning in. What were those two software recommendations? I got you right there and I can drop a link down below as well. Osiris is what I use. That's Mac based, Radiant is PC based. Please make sure that you are not at the whim of every disk that you put in or else it will be inefficient, it'll be confusing and believe me, I've been there where I have 16 boxes on my screen. I think I'm going to the 2:1 and it goes to 32 boxes. It's not fun, it's frustrating and it's going to make you close it and rely on the report. I know we can do better. I think we all should be looking at the imaging because we have the luxury of seeing the patient. The radiologist does not. Typically we see the patient, we see the functional aspects of what they're going through. And correlating that again, people are not their images. The images are an interpretation of what's going on on the inside. It's our to delineate what matters, what doesn't matter, and give our patients the best course of action. And to do that, we have to be able to look at the images efficiently. We have to be able to understand what's going on and we have to be able to manipulate the images to see what we need to see, to discover what we need to discover in these four tools. Measurement, contrast, magnification and scout lines are where we all need to start. So I kept it at just under 10 minutes. I can't believe it. Under 10 minutes. That's a clinical pearl in the first of the clinical series on MRI coming at you over the next month. I hope you guys have a great day in practice. Thanks for tuning in. If this was valuable, give a thumbs up, give a like, or give a comment and then I'll know I'm on the right track. Hope you have a great day. Bye. Bye.