Understanding Lumbar Spine MRIs: A Step-by-Step Breakdown
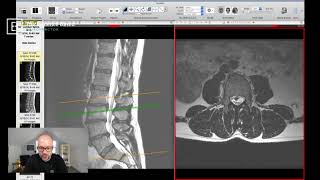
Jeff Langmaid walks through reading a lumbar MRI, showing how to organize the images and spot key findings. He identifies an extruded disc at L2-L3, a bulge at L3-L4, and moderate-severe central canal stenosis at L4-L5, then connects each to what you'd see in the patient's exam.
Questions this video answers
December 18, 2018.
An individual in his 70s.
L2–L3 (extruded disc).
L4–L5 (moderate to at least moderate-severe central stenosis).
L3–L4 (ligamentum flavum hypertrophy).
Chapters
Hello and welcome to week number two of our clinical series here on the evidence based chiropractor. Today we're going to break down a lumbar spine MRI of an individual who is in his 70s. He's got some disc challenges, some stenosis. We're going to look at it, break it down together. I'll screen share in a moment. As always, this does not replace your neuroradiologist read, make sure you're getting those. But the goal of this clinical series, specifically with MRI is so that when a patient comes in and hands you a disc, you don't feel like you just have to rely on the report. I want to make sure you feel comfortable and confident to pop that disc in, scan through it, scroll through it, identify some things and be able to have a great conversation with your patient in the process while also giving them the best information. So that's what this clinical series is all about. As I said, this is week number two. If you missed out on week number one last week we went through all of the different key tools. We went through magnification, scout lines, contrast measurement. So if you need to check that out, look back at the evidence based chiropractor Facebook page. Or you can check it out. I have it as an independent video on YouTube.com the evidence based chiropractor. So you can also check it out there. But today we're gonna talk lumbar spine. I'm gonna go to a screen share right now and we can kind of dive right in. So we're gonna screen share there. Alright, looking good. So what we have here, I talked about it last week a little bit. My favorite viewer is Ocirics, the Mac based program. Radiant could be your PC based program. But when you bring up your images, what you'll notice are those key tools are all going to be up at the top here. So as we talked about, you have your contrast that I'm pointing to right there. You have your magnification, you have your measurement and we can already see that the scout lines, the orange and the green lines are already there. Now on the left hand side of the screen when we go over there, what we notice is a listing of everything on this disc. Now I don't have this as a disc, I have it anonymized data that's been uploaded into my system. But you'll notice we have our T2s, right? Our sagittal sag T2s, we have our sagittal T1s. And then you're have your axials and Your stir images as well. What I like to do from a musculoskeletal standpoint, as a practicing doc, grab your T2s and bring them over. That's the easiest place to start. And when you're trying to get musculoskeletal, you're trying to see what's going on with the, you know, ultimately our, our spinal column, so to speak, the vertebra, the discs, the nerves. Check out the T2 images first. I like to drag always the same, right? You want to be consistent. So I drag my sagittal images on the left hand side of the screen and my axials on the right. So that's just simple setup and kind of getting started there. But let's dive into these images. So when I take a look at my sagittal cut, the first thing I want to do is be in the center. And I know I am because I can see my scout line over here. That green line is right down the middle, which means I know on the left hand side of the screen I have a nice center cut. What do I see? Well, L5s1, not too bad. Four, five. We have some challenge on the disc. We have a bulger herniation at the backside. Same at 3, 4, same at 23 and 23 is even skidded down the mountain there a little bit. So there's a little bit of an extruded disc. It's broken the line or the margin of the end plate up there. So a couple things just off the bat. First, slice that we can see that way. Now if we want to dive in and see, okay, what's going on on that central canal. Looks like the disk is getting in the central canal up at 2, 3, maybe a little bit at 3, 4 and also at 4, 5. The way to go about that is to go back over to your axial images. Your axial images are then going to give you the ability to scroll up and down in a way. There we go. Maybe does it want to cooperate with us here? There we go. Okay, so when we scroll up and down, we're going to notice at L4, L5 there will be compression. Now you can see our green line. Our scout line right now is just inferior to the L4, L5 disc space that's on the left hand side of the screen. On your right hand side of the screen, you will notice that the canal is wide open. This is our spinal canal. Right? It's wide open. We can see those individual nerve roots are those little black ants, as I call them, right there. So we all know that. Pretty easy. But watch what happens if this wants to cooperate with me now. Watch what happens when we get up into 4, 5. Yowzer. Look at that disc space. I'm going to look at your right hand side of the screen. I'm going to open it up and close it down. You can see how dark that gets around the spinal canal when we get right down in there with my mouse, I'm talking about this triangle right here. There's been some triangulation of the canal that is dim and much, much smaller than when we pop it open by going a little bit down. So there is unquestionably at L4, L5, some amount of central stenosis or compression. But let's keep going up and see what else we notice as we continue to ascend. We get beyond that four or five disc space, maybe. There we go. Pops right open. Looking great as we'd expect. Let's get towards that 3, 4 disc space. A little dim there as well. We at least have some abutment. We definitely, as you can see right here, have some pretty significant ligamentum flavum hypertrophy. That thick black V right there is ligamentum flavum hypertrophy. And that's pushed up right as I view that push up. So you have not only the disc kind of the ceiling falling down, but the floor going up. And the central canal is sitting there trying to. Trying to breathe. Inevitably, in this case, as we continue to go up, if I go the right direction, lo and behold, when we get beyond the disk space, Ah, pops right back open. Big white triangle. That's what we're looking for. Wide open. And let's get into two, three. Get up to two, three. Ooh. Okay, there we see our extruded disk coming into the picture, right? That black circle right there is the bottom of that extruded disk that we see at L2, L3. Let's continue to go up and see what else we find. We continue to go up. We see some amount of compression in the Central Canal at 2, 3 as well. Is it as bad as 4, 5? Not to my eye by any stretch, but this is where you want to piece together anything that you see on the images and of course, your relevant clinical findings as you go through the examination and what the patient's describing to you in terms of symptomatology. The images show every single thing that's not perfect. Our job as their physician, as their chiropractor, is to determine what. What are the problems amongst all of these not perfects. So when I look at this, specifically when I look at the central canal on this, today's clinical pearl, today's clinical case series, we just looked central canal, got our bearings a little bit. Pretty straightforward and pretty simple. But what we find is an extruded disc at L2, L3 that we saw right there. But it did. Oops, let me get my mouse in the right place at 2, 3, right there. But it did not cause a significant amount of compression in the central canal, which is good for this individual. When we went down to. Let's see if my computer catches up with us here at 3, 4, as we continue to go down there, there certainly was a disc bulge at L3, L4, it's a slice we're on right now. And there is some amount of compression, but it's pretty minimal as well. It's definitely not going into your moderate severe or severe compressive territory in the central canal. Because we can see there's still a pretty good amount of white space while not being perfect. One thing we did notice was ligamentum flavum hypertrophy. That was pretty significant at L3, L4, but there still was some breathing room. And as we get down to 4, 5, look at this canal tighten up. We're looking great, Looking great. Oh, boy. So when we get down to four, five, we see a pretty significant amount of compression on the central canal. I'd say without measuring it, just eyeballing it, that's probably into at least moderate, moderate severe central stenosis at L4, L5, which, when we look through again, just the central canal on today's episode, that is the most relevant finding or the most severe finding that we see. L2, L3, as we looked at our laterals again, we did have an extruded disc and there is some compression, although it's not that bad. Three, four, we have ligamentum flavum hypertrophy. You can almost see that coming in the backside right there. But we additionally had a disc bulge. Degenerative change at both levels. But four, five was the troublemaker. Four, five is giving this individual some pretty significant compressive pathology, which is very likely going to lead to what neurogenic claudication. When we see the pipes being shut off, so to speak, or we see that significant amount of compression on the spinal cord and that amount of spinal stenosis, what that's typically associated with is neurogenic claudication. So those are the hallmarks of that, is that bent forward posture that's literally opening up the canal for an individual. They do not like extension, somebody that's dealing with central stenosis. So bending forward is typically relieving, bending backwards into extension and absolutely exacerbates the symptomatology. Secondarily, some key questions that I've always asked individuals who may be suffering from central stenosis, how is your endurance? And for somebody suffering with central stenosis, that gets right to the heart of it. They're going to say it stinks. What they're going to find is they used to be able to walk a mile, then it was a half mile, then it was a quarter mile. Now they can barely get to their mailbox before they need to squat down or take a seat and then get started all over again. That diminishing endurance is, is a classic sign of spinal stenosis. And if it's somebody that may be going to the grocery store after their appointment with you, ask them, hey, do you need a cart? If you have a cart in front of you, can you go all day long? But if I take that cart away, are you looking for a seat or a chair? If the answer to that is yes, there is a high probability that central stenosis is at least part of their problem. And being able to dive into the images, as we did today, analyze what's going on, find out what are those not perfects and what are the problems, is a key component to being the best doctor you can be for your patients. If you look at the report, a report on something like this would have said, at bare minimum, degenerative change. L2, L3, L3, L4, L4, L5, L5 S1, disc bulge at 3, 4, disc herniation at 4, 5, extruded disc at L2, L3. Based upon that alone, you might have guessed that L2 L3 might have been the problem child with the extruded disc at that location. But being able to pop in the images, look at your axial cuts, and determine, hey, four or five looks a lot tighter than some of those adjacent levels, at least in the central and central cord, as we talked about today, is an important part of being able to guide your patient. Additionally, it's also important to be able to help guide them if they are going to seek concurrent care outside of your office, if they're going to get care elsewhere, you want to be able to give them the best information. So not only they have good information going into other doctors, but they can ask relevant questions, which is also supremely important. So looking at images like this, identifying areas where the central cord or the spinal cord may be tight, where there might be stenosis is a key part. That's why it was week two of our clinical series. If you like these videos and you'd like to continue to see more of them, I'm happy to dive deeper where I'm going to go into a variety of different topics. But give me a comment or a thumbs up, let me know that I am on the right track by providing this information. I think it's interesting, I think it's relevant clinically, but I want to make sure that you do as well. So leave a comment below, give a, like, give a thumbs up, whatever the case may be that lets me know that I am on the right track. And if you have anything you'd specifically like to see coming up in the next few weeks, be sure to let me know and leave a comment down below. Otherwise, we are going to look at some foraminal stenosis probably next week. We're going to look at pars defects. We're going to look at post surgical cases. I have a series of items that I want to dive through over the next six to eight weeks, just breaking down MRIs clinically, tying it to what you see day in and day out of practice. And I've been there where somebody popped in a disc and I got sweaty palms immediately, like, please don't call on me. I look good at the lateral and the sagittals with those axials. I don't know what to do. So I'm trying to break it down, make it simple, make it easy and give you some good information moving forward. Joe, thanks for hopping in and giving the thumbs up. I appreciate that. Hope you guys have a great day and I will talk to you soon. Bye Bye.