How To Start Day Trading For Beginners In 2026 (FULL COURSE)
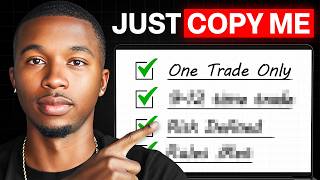
The video delivers an exhaustive, step‑by‑step curriculum for beginner day traders. It begins by outlining a detailed backtesting checklist—recording win/loss outcome, tick count, risk‑to‑reward ratio, entry time, day of week, trade direction, and a brief rationale for each trade. The presenter recommends using spreadsheets or specialized platforms such as TradingView’s replay feature and the FX Replay service, noting their pros and cons. The lesson then shifts to live‑trade journaling, emphasizing the benefits of tracking the same data points plus instrument, position size, risk amount, expected profit, entry criteria, market conditions, and post‑trade adjustments. Automated journal tools like WAGMI Trader are highlighted for reducing manual entry. Next, the concept of funded prop‑firm accounts is introduced: traders pay a modest fee to access large virtual capital, must meet profit targets without breaching loss limits, and can keep a high percentage of profits. The speaker warns about common pitfalls, outlines risk‑management guidelines (0.5‑1% per trade, max daily loss, trade‑count limits), and presents his own prop‑firm, Edge Funder, describing its instant‑funding, multi‑account linking, TradingView integration, and fast payout policy. The bulk of the content then details how to construct a disciplined trading plan, covering trader type identification, allowed trading windows, instrument and strategy limits, risk rules, entry/exit criteria, news‑event handling, mental‑state rules, and a concrete consequence system for rule breaches. Finally, extensive psychological advice is provided: adopting a probability mindset, avoiding fear of loss, reading the plan daily, using alerts, higher‑timeframe views, visual tweaks (Heikin‑Ashi, black candles), and managing physiological cues (heart rate) to stay rational. The video concludes with a call to community, mentorship offers, and motivational encouragement. Overall, the content blends instructional, persuasive, and motivational tones to equip beginners with practical tools, risk‑aware funding options, structured planning, and mental‑discipline techniques needed for sustainable day‑trading success.
Chapters
By the end of this video, you're going to know everything you need to know to become a profitable day trader. Even if you're starting today as a complete beginner, I'm going to take you step by step through exactly what day trading is, how to read charts, mastering candlesticks, choosing the right platforms, and using the exact strategies that I use every day to print money. I'm even going to show you how to use other people's money to trade with so you don't have to risk your own. Now, this full course is going to be packed with more value than what most people charge hundreds, if you not thousands of dollars for, and I'm going to give it to you for $0. But first, who am I? Well, my name is Juvier, and I've been day trading for over 8 years now. And honestly, day trading has completely changed my life. I was able to buy my first home for over a million dollars. I bought my wife her dream car. I bought myself my dream car. But most importantly, I gained financial freedom, time freedom, and location freedom. I can literally live wherever I want to. I can buy anything that I want to, and I can take care of my entire family and all of my friends without having to worry. Over the past 8 years, I've been able to consistently make over 6 figures every single month with day trading, and that's honestly the main reason why I'm making this entire course completely for free. And I'm not holding back any information at all. I'm going to give you guys all the sauce you need because I truly believe that you and every single person watching this deserves to learn a skill that can not just set you free, but set your entire family free to live their dream life. Now, I'll be honest, I remember when I first started day trading, everybody made it way too complicated. I had watched this one guy on YouTube when I was first trying to learn, and every single thing he said sounded like Chinese. He overcomplicated it way too much to the point that I almost quit. I actually did quit for a little bit, and I went and I tried dropshipping, Amazon FBA, affiliate marketing, Airbnb arbitrage, and I just wasted time and I lost money in all these other avenues because I was turned off by how hard trading seemed. But after nearly a decade of mastering this craft and helping over 24,000 people learn how to successfully trade, I found a way to package all my information in a way that is extremely simple. Simple enough that even a 10-year-old could learn it. And I know that because I've actually taught a 10-year-old how to start trading. So with that being said, if you're over the age of 10, you stand a pretty good chance. Now, it's important that you understand that trading is not a get-rich-quick thing, and I don't want you thinking that it is, because it honestly took me over 3 years to get to the point that I'm at now. But if I had this video when I first started off, I would have saved myself years of losses, sadness, loneliness, and trial and error. Now, with that being said, grab yourself a notebook, grab some water, grab your favorite snack, because over the next few hours not only will you and I become best friends, but you'll embark on a journey that can completely change your life. So first of all, what even is day trading? So in simple, day trading is the act of buying and selling something in a short amount of time. Now you might've heard like your parents or grandparents or aunts, uncles, whoever it is for you, talk about buying a stock or buying a crypto and holding it for months or years or decades at a time and just kind of praying that you make money over time. That's not what we as day traders do. Most of the time we're getting in and out of trades within a few hours. We're not holding it for days at a time. And what that allows us to do, it allows us to make money a lot faster. It allows us to not have to have as much money to start off to be able to make a decent amount of money. It also allows us to make money regardless if the market is going up or the market is going down. You've probably heard of things called like recessions or bear markets or like market crashes, when like all stocks drop down crazy or all cryptos drop down crazy, if you're just buying and holding those stocks or cryptos, you're losing money. But us as day traders, we can actually make money when the market is going down or if the market is going up because we're allowed to profit on the price dropping of an underlying asset, whether it's a crypto or a stock. And we're also able to profit on the price of the underlying asset going up. Now I know what you might be thinking, that this is like too good to be true, or you've probably seen it online, people making a couple thousand dollars in a few seconds, or me making a couple thousand dollars in a few seconds. You might be thinking it's kind of too good to be true, but it's not. Now, before we hop into the juicy stuff, I want to just make sure that you guys understand what you're getting into. A lot of people ask me why day trading. First of all, it's because it provides time freedom. I can literally do it whenever I want to. It provides location freedom. I can literally do it wherever I want to. Like right now I'm in Dubai. I've been in Dubai for 3 months now, and I'm still able to trade and make the same amount of money, if not more, as I was making when I was living in the US. It also gives you financial freedom because you have the opportunity. And I put— I say this not lightly. This is something that once you learn it, this is what it starts to feel like. You have the opportunity to start printing money when you take the time to learn this skill and you show up day after day. I've been able to get to that point where I feel like I'm printing money from my laptop in the middle of the frickin Maldives at, I don't know, 12:00 in the afternoon. So that's why I personally love day trading. And then there's the flip side where people ask, is day trading even legit? And all I can say to that is I've been able to provide for myself, not just provide for myself, but be able to live a life that I never even thought possible, buy things that I didn't even think regular people would be able to buy. I thought it was just for like rappers or athletes or things like that. And I've been able to stay at the same hotels and same resorts that millionaires and billionaires are actually staying at. And it's all because of day trading. So yes, it's legit. The money is real. It's not just numbers on a screen. Now, as I mentioned earlier in the video, a lot of people think you need a bunch of money to start day trading, and that's not true. Later on in this video, I'm gonna show you how you can actually get into day trading and use other people's money to trade with so you don't have to risk your own. But realistically, getting into this, you can start day trading with $50. You can start with $100. You can start with $200. It's completely up to you. And like I said, later on in this video, I'll show you guys exactly how You don't even have to risk your own money. You can trade with other people's money and still profit. Now, if you think all this sounds too good to be true, trust me, there's more. People think that I sit at my computer for 30 hours a day and I'm always looking at charts. I have 30 million screens. That's not the truth. The honest truth is that I am trading for maybe 45 minutes out of the day max. Like, there are days like yesterday where I was able to make over $8,700 in a matter of a minute and 17 seconds. What do you think I did after that? I went back to sleep. But in all honesty, you really don't need much time at all. I teach people, and you're going to see inside this video, I teach people how to trade in less than an hour a day of work. So if you're someone who has a job or if you're someone that's in school or somebody that's busy, you can still do this. And one of the coolest parts is you don't need any crazy equipment. As long as you have a laptop that has working internet, you're good. You don't need a crazy gaming computer or crazy expensive PC or 30 million TVs and monitors. As long as you have a laptop or PC or even an iPad, you are going to be solid. You can also trade from your phone, but I wouldn't suggest that for a new trader because it's a little bit harder to learn because it's such a small screen. But you technically could also trade from your phone. I have a lot of students that literally only trade from their phone. Now, with all this being said, trading is not as hard as most people think it is. Honestly, one of the hardest parts of day trading is the fact that you're kind of alone because it's just you and your computer. I highly suggest for every single person right now, take one second to share this video with either a friend or a family member so that you both can learn this at the same time and hold each other accountable. Because I promise you, trading with somebody else is a lot less lonely. I traded by myself. I didn't have anybody to talk to about it for about 2, 2 and a half years, and that really made it a lot harder. So that's why I suggest right now, if you have a friend that you're thinking about, or a relative, or somebody that you know will lock in with you, share this video with them right now so you guys can learn this together and hold yourself accountable to getting good at day trading. Now with that being said, let's start the process of changing your life. All right, so first things first, we need to understand that there are multiple different markets that we can trade in. There's the futures market, there's the forex market, the stock market, the options market, and the crypto market. Essentially, these are all just different types of trading that we can do. You've probably heard of crypto. You've probably heard of, you've probably heard of most of these honestly. And they all are very similar, especially due to the fact that once you learn one, it's very easy to learn the other. Like for instance, I started off when I first started off trading crypto and I started trading Forex, but then about 5 years in or 6 years in, I transitioned to trading futures. Mainly. And doing that transition, it was extremely smooth. It's not like I had to learn a whole bunch of new things. It's just some terminology that's just slightly different. And I'm saying that to say that in this video, we're mostly going to go over futures because that's what I trade most of the time. It's also what I think is the easiest, uh, kind of market for new traders to get into and to learn. And then also the skills that you learn trading futures is so easy to integrate into any of these other fields. So we're going to be talking about futures mainly inside of this video. Like I said, you could take that knowledge and go into the forex market, options market, crypto, stock market, whatever it is. And I've successfully killed every single one of these markets. All right. So as I mentioned, we're mainly going to be talking about futures. So I did want to go over the top 4 main things that most people trade. Now, you'll hear me say tickers or instruments. That's simply just the underlying asset that we are trading. But essentially, those are just all tickers. Those are the symbols that we're trading. And here you can see contract, which is simply just the full name for all these things. So like NQ is the NASDAQ, ES is the S&P 500, YM is the Dow Jones, GC is gold. These are just the ticker symbols for it, or the abbreviations or smaller versions of it. Now you'll see over here we have margin. This shows you how much money you need inside of your account to open up one contract. We're going to go over contracts, what that means, what that looks like later on in this video. But just keep this handy and keep this in mind. If you want to open up one NQ contract, you need $1,000 in your account. But you'll see here we have these MNQs, or these micro versions of the original ones. The micro versions are essentially the same thing as the regular ones, they're just cheaper, right? And you'll understand this a little bit later on, but each of these tickers you'll see we have a micro version of it. So NQ, we have MNQ. ES, there's MES. YM, there's MYM. GC, there's MGC. And you choose what you want to trade, whether the, the original contract or the micro version, Depending on your skill level, I suggest for most beginners to start on micros of whatever they want to trade, but not just your skill level, also how much you want to risk per trade and how much you have inside of your trading account. But that's what margin is. Then you'll see here tick size. Think of this as the increments of which each of these move in. So like NQ isn't going to go from $100 to $101 to $102. It's going to go from $100 to 100.25, to 100.5, to 100.75, to 101, right? That's the increments that it moves. And it does the same thing with ES here. You see it moves in 0.25 increments. YM is going to move in 1 increments. So it will go from like 100 to 101 to 102 to 103. And then GC will move in 0.1 increments. So it'll go from 100 to 100.1 to 100.2 to 100.3. That is the, the tick size is the increments of which each price of these tickers moves in. Now you'll see here tick value. This is simply showing you that for every tick movement, that's worth $5. If NQ moves from 100 to 100.5, it moved 2 ticks, right? And each tick value is worth $5. So if it moved 2 ticks, it moved $10. If you open up a buy and it went in profit 2 ticks, you'd be up $10 right now. You'll see on MNQ the same thing. If it went up 2 ticks, instead of it, um, instead of it being $5 per tick value, it's 50 cents per tick value. So you'd be up $1 if it moved 2 ticks. Now ES, you'll see, is different. Even though the tick size is the same, the tick value is different. So if ES moved from 100 to 100 $12.75, it moved 3 ticks, right? And let's say you bought and it moved 3 ticks. You'd be up $12.50 times 3— 3— $37.50. You'd be up $37.50 if it moved 3 ticks. That was quick maths, or was it? I don't know. But you'll see here on MES, each tick value is $1.25. On YM, each tick movement is worth $5. Each tick movement on MYM is $0.50, and gold, each tick movement is worth $10, and each tick movement on MGC or micro gold is worth $1. So this is a great chart for you to keep in mind because later on we're going to show you how to manage your risk and things like that. And this is great for you to have to be able to, uh, see all that right in front of you. All right, so now that we understand futures contracts, there's something else very important that you need to understand, and that is trading sessions. As you'll see here, there's really 3 main trading sessions. It's There's the London session, there's the New York session, and there's the Tokyo session. Now I put here exactly what times those sessions are from, but first you have to understand why we have these trading sessions. So essentially we as day traders or retail traders, we don't really move the markets. No matter if you open up a trade with $10,000, $100,000, even $1 million, you're not moving the price of anything that you're trading most of the time, right? Unless you're trading like some super, super small cryptocurrency, which most of us are really not. If you're trading any of the tickers we just talked about, NQ, ES, YM, GC, no matter how much of your own money, unless you have billions of dollars, you're not moving the market. The banks are moving the market. And there's different sessions depending on which banks are kind of in control or which banks are actually working. Think of it the same way of like a regular 9 to 5. You know, if you go into your bank right now, it's gonna be people working from 8 till 5 PM. Same thing when it comes to these major traders, these hedge fund traders, just these people that have access to so much money that are actually moving the market. This is when they're actually trading. So the London session, and this is all in Eastern Standard Time, the London session, and when the London traders are trading, it's from 2 AM Eastern Standard Time until 12 AM Eastern Standard Time. New York session is from 8 AM to 5 PM. Tokyo is from 7 PM to 4 AM. Now it's important we understand this because certain sessions are going to have more movement and certain sessions are better to trade if you're trading specific things. All the tickers we just went over, NQ, ES, YM, and GC, they're all going to have the most movement or volume during New York session. Now, the second most volume or most movement session is going to be London session. Then the third is going to be Tokyo session. But if you're trading Forex, which as I mentioned, most of us are going to be trading futures based off this video, or the information I'm going to go over is futures in this video. But if you are trading Forex, there's certain pairs that'll move the most during Tokyo session. Those pairs include like GBP/JPY or USD/JPY or JPY/USD. So things like that is going to move most of the time in Tokyo session. But for the most part, all the things that we're going to go over in this video, they're all going to have the most volume in this New York session. Now you're also going to notice something. There's an overlap between New York session and London session because New York session starts at 8 AM. London session doesn't end till 12:00 AM. And this overlap is when there's the most amount of volume and oftentimes it's the best time to trade. So from 8:00 AM up until 12:00 AM, when both London session and New York session are open, most of the time that's the best time to find trades because price is moving super fast. There's a lot of volume, there's a lot of opportunities. So just keep that in mind. All right. Trading sessions is locked in. Next thing you need to understand is that there's multiple types of analysis. Most people think that you just look at the charts and that's how you tell what price is going to do. But that's only half the picture. There's fundamental analysis and there's technical analysis, which is the charts. Fundamental analysis is news. If you did not know, news events heavily affect the markets. If you think back to like when COVID happened, the market absolutely tanked. When you think about when Trump started imposing like the tariffs and stuff, markets absolutely tanked. When you hear that inflation goes down, markets skyrocketed. So all these news events affect the markets. So us as traders, we have to be aware of them. It can also be like smaller things, like if you're trading Tesla stock and on the news Tesla car blows up or something, right? That's going to affect the price of Tesla and Tesla's probably going to go down. So you need to be aware of that and you need to kind of keep your eyes to the ground and understand, or your ears to the ground, whatever that term is, I don't know, to know what's happening on a worldwide at scale. In a second, we're gonna go over where you find the news and which news events you should pay attention to. But then also there's technical analysis. So technical analysis is kind of what you've probably been used to where you see all these charts with all these different colors and shapes and things like that. I'm gonna clarify all that. It's not as complicated as it seems, but technical analysis is charts and price action. Uh, price action simply is like all those candlesticks or the things that you see on the charts. That's essentially what technical analysis is. So in order to be a good trader, You have to understand fundamental analysis and be aware of it, and you have to understand and be good at technical analysis. All right, so how do we find fundamental analysis? This website is honestly all you need to find the major news events that's gonna happen. It has like all the planned news events. Now, I can't give you a crystal ball that tells you if like a Tesla's gonna blow up tomorrow or if we're gonna have another pandemic or something like that, unfortunately, but you just have to kind of be aware of things that are going on. But this website right here called forexfactory.com, will tell you all the major news that is planned to happen because all these news events will affect the markets. Now, there's a lot of things kind of going on with this screen here. Don't get intimidated. Just focus on this little part right here. And you really only have to focus on the ones that have a red folder and is USD. So you'll see like other ones that's like red folder and CHF, which is other currencies, meaning other countries are having big news events. But if you're trading futures, like we're going to be talking about in this video, mainly All of these news events will do absolutely nothing except for the USD news events that are red folder. And you'll see here it has the date. It'll also have the time when it's coming out. So essentially how I like to look at it is at the beginning of the week or every day before I hop onto the charts or I start looking for trades, I come to this website. I look to see if we have any planned news and I'll kind of just plan around that. I'll go forward and see if there's any news, um, on the next day or for the week. Uh, you can actually go forward to whatever date. So let's say we want to go to Monday. If this thing will ever load, then it would show me. But nonetheless, how I like to trade it essentially is if there's a news event happening at, let's say, 7:30 Central Standard Time, right? Or Eastern Standard Time, right? I personally just won't enter a trade 5 minutes before or 5 minutes after that trade because with these news events, it can make price spike up crazy or spike down crazy. And depending if I'm in a buy or sell, it could really destroy my trade. So I like to just stay away from it. I don't like to trade the news. There's a lot of traders that will trade the news, but at that point it's just gambling because we never know what the news will do. And even if let's say the news comes out great, sometimes the news will come out great and the markets will still sell, or sometimes the news will come off bad and the markets will pump. So it's really just, I don't play that game of gambling. I just give myself about 5 minutes before the big news event and 5 minutes after the big news event before I allow myself to actually enter into any trade. As I mentioned, we only care about the news events that are red folder that say USD next to it. Now that doesn't mean that the yellow photo ones or the orange photo ones won't affect the market. It's just going to be very slight. Like it's not going to do anything crazy, but these big news events that's USD and red, I tend to just stay away from. All right. So we've gotten all like the main important things that you need to know out the way. Let's hop into more so some of the more fun, juicy stuff. So trading platforms, everybody thinks you need 100 million different trading platforms and you're going to get super confused. You only really need 2 if you're going to start off trading futures. And that's why I like trading futures. The first one, and this is really no matter what you're trading, is you're going to need TradingView. TradingView.com is where we're going to look at charts. That's where we're going to plan out our trades. That's where we're going to do our technical analysis. That's all done on TradingView. And then to actually enter our trades, we need something called a broker. A broker essentially is, let's say, your bank account, right? It's like a bank account that you keep money in, and that's where you're actually executing trades on. That's where you're actually entering into buys or entering into sells or something like that. Because on TradingView, you can't do that. You have to have a broker because TradingView only lets you plan out your trades. You don't actually enter any trades on TradingView, but there's a workaround to be able to enter your trades on TradingView once you connect your broker. But you need to have a broker first. And the broker that I recommend is called Tradovate. It is the only really futures broker I've ever really used. Most of the time it's very simple, super regulated, uh, nothing crazy about it. Um, I don't have like any special codes or nothing like that. It's just the platform I've always used. So TradingView essentially is the first one you need and Tradovate. Keep in mind, I'm going to leave links in the description for all the different websites and stuff you need. So you don't have to go back to the video to find it. You'll have all the information to all the different websites and things that you need, but let's dive into how to actually use Tradovate and how to actually set it up. So it makes sense. All right. So when you create your Tradovate account, I'm not going to walk you through how to create your Tradovate account. Created multiple accounts. They're going to ask you for some information. They do need like personal information, um, and things like that just because it is a regulated broker. So fill out all that information, wait to get approved, uh, create your account, and you're going to get brought to this page right here. You're going to see live trading, you're going to see, uh, simulation trading. If you don't see market replay, that's perfectly fine, um, you have to add that on afterwards. But, uh, live trading simply means that's your live trading account, that's the account that you're actually going to have real money in to trade with, but they also have this cool thing called simulation funding, which is fake money. It's a demo account that essentially allows you to practice trading without risking your own money. So let's just go into access simulation. I'm going to show you guys how to use this platform or kind of what this platform does, what it looks like. Keep in mind, some of this stuff might not make sense to you until later on inside this video when we go over it. But I know as soon as you open this, you're going to be like, what the heck is on my screen? This looks absolutely ridiculous. I'm there with you. Trust me. This looks ridiculous. It's super overwhelming. What you're gonna want to do just to start off is just exit out all of these different tabs. So just press the X next to all these different things that you've seen popped up. It might look a little bit different for you, but same thing. You want to close everything out until it's just like a black screen. It might be white depending if you have dark mode on or light mode on, but it doesn't matter. Just get everything off of your screen here. Then press this top left corner. Press add modules, and this chart right here, just drag it, click it and drag it and drag it onto your screen. You're going to see this pop up, and this is where you'll type in whatever chart you want to look at. So for this example, let's just put in NQ, which is one of the tickers that we went over earlier. So NQ, you'll see all these things pop up here at the top. You're going to see your charts, which don't worry if none of this looks unfamiliar to you. We're gonna go over all this. This is all gonna seem super familiar and super simple to you by the end of this video. But I just want you guys to understand exactly what you're looking at when you are on this platform itself. So here at the top, you're just gonna see what time it is. Here you're gonna see your account. Right now you see we're on the demo account because we clicked that simulation funding. But if you were on your live account, you'd see your live account information here. And then you see equity, which is simply how much is inside of your account. On this demo account right now, it's only $50,000 in there. Well, not only, $50K is pretty good, but it's fake money, so it doesn't matter. Here you'll see your open P&L. So if you were actually in a trade, you would see this being moving. You'd see it up money or down money depending. And we'll go over an example here in a second so you see that actually move. Then here in the top left corner, you see what symbol you're on. You see what ticker you're actually looking at. You'll see the price that it currently is right here.. You'll see the bid and the ask, which is essentially the price that people are willing to pay for it. Most of the time you just have to worry about the actual price that it's at right now. The last price right here, looking at the bid and the ask gets a little bit more beneficial when you're a little bit more of an advanced trader. But I don't want to overcomplicate things too much with things you don't need, right? Then you'll see buttons here. Buy market simply means you're entering for a buy. So that means that you're simply betting on price or assuming that price will go up. Sell market actually means that you're entering for a sell, which means that you're assuming that price will go down. Now, a lot of people get confused and they think you actually have to have whatever, some NQ to be able to sell. But that's the cool thing about day trading. Even if you don't own any of this underlying asset of NQ or whatever, you can still sell at market and make money based on price going down. So that's what these two are, uh, the buy bid and the ask sell. That you don't have to worry about that right now. You'll just mainly focus on buy market and sell market. Then you'll see this number 1 here. If you remember before when we were talking about contracts, right? And we were talking, we went over the margin and stuff like that. And I told you guys, for example, with NQ, you need $1,000 to open up 1 position on NQ. Those are called contracts. You need $1,000 to open up 1 contract on NQ. Here, this allows you to change how many contracts you want to open up. And you remember in the example I told you, per tick value, let's say on NQ, it's $5 per tick value. If you have 1 contract, if I had, if I open up 10 contracts on NQ, I change this number to 10. Each tick value is now worth $50 because I have 10 NQ contracts. So this right here is simply where you're able to change how many contracts you want to enter into the trade with. We'll get into why that is important later on, because that lets you adjust your risk or be able to plan out how much you want to risk per trade or how much you want to make per trade. Obviously the more contracts you enter a trade with, the more money you're risking, but also the more money you can make. Then you'll see here exit at market and close. This button is kind of like your fail safe. If you just want to exit out your trade right where it's at, you can just press this button here and it will take you out of the trade instantly. But you'll see under here, under ATM, you'll see it says off. ATM allows us to put a stop loss and a take profit. These are extremely extremely important things when it comes to trading. A stop loss is essentially you put an order in or allows you to put an order in that if price touches this, get me off the trade, save me from losing too much money. Stop loss essentially stops you from losing more money than you plan on losing. Meaning if you have a stop loss, I don't know why my charts are tweaking out right now. Meaning if you have a stop loss, you can have it set. So if price goes below a certain area or goes to a certain point, it'll automatically get you off the trade. And at that point, you won't be risking any more money.. And we'll get into how to choose your stop loss and things like that later on. But you need to understand what a stop loss is. A stop loss, like I said, is taking you out in the negative when you're losing a trade. It's protecting you from losing too much more. A take profit is the opposite of it. It's saying, okay, when it hits here, I'm okay with this profit. Take me out the trade and I'll just take that profit. And I'm good with that. Right? So that'll automatically get you out of the trade in profit. But what you're going to have to do, and we're talking about this later on, is set up an ATM. Now we'll go over this a little bit later on inside the video on how to actually do that or what settings to actually put. But this is where you will do it when we do go over that. And then you'll see over here, like I said, this is the chart. You'll see over here a couple tools or a couple things to look at. Here you can zoom in, you can zoom out. Here is the time period, meaning the timeframe that we're looking at. We're gonna go over that a little bit later on inside the video. Here you can change the type of chart that you're on. Right now we're on candlestick charts. These are what these little candlesticks are. Like I said, we're gonna go over that in a second, but you can click this and change this to a line chart instead. But this is another type of chart. Essentially, this is just where you can change your chart to, uh, different types of graphs. Here you'll see your chart settings. So you can change a lot of things on here. You can play around with it if you want. Um, chart configuration. This is if you want to put, um, different things on your chart as far as different indicators. We'll go over what indicators are a little bit later on, but this lets you, uh, kind of change them. You'll see right here, we have these two indicators down here. If we wanted to take it off, we could just hit this little garbage button and you'll see they will disappear. And now we only have our candlesticks on our charts currently. Here you'll see indicators. Like I said, we'll go over that later on, but this is where it allows you to put indicators on your chart. And then here's a template. So if you want to save how your chart looks, because you can change the color of these candlesticks if you want to. Like there's some people that do white and blue, there's some people that do gold and white, and you can change it to whatever color you really want. And then it allows you to save it as a a template so that every time you open up your chart, it'll look the exact same. So that's something cool as well. And then this just lets you change kind of what you're on right now. You see a crosshair right now, you see where I'm moving my mouse is this little crosshair. That's essentially what this is. Here's a data box, which just shows you a bunch of data about the ticker that you're on right now. You don't really have to worry about that too much. I don't really use that. Here's drawing tools, which is something that is used a lot. So this allows you to draw on your charts. Let's say you wanted to draw a, line on your chart, you can do that. You can draw a, let's say, rectangle on your chart. You can do that as well. This is just your drawing tools if you wanted to plan out your trades on Tradovate. But as I mentioned, that's what we're going to use TradingView for, to plan out our trades. But Tradovate does let you plan out your trades and draw on your charts from here as well. I just personally think TradingView is a lot more user-friendly. It looks a lot better. Yeah, it's just a better platform to use to plan out your trades, if I'm being honest. So that's all the things over here. And on the right side over here, you see the price. So you'll see right now the market is currently open. You'll see that right now 1NQ, uh, the price of it is $24,802. Now if you guys remember, that doesn't mean we need $24,000 to buy this contract. We just need $1,000 inside of our account to buy the contract. But this is the price of it, meaning if we had entered for a buy right here at, let's say, 4,801 and price went up to 24,902, for example, we'd be in profit however many ticks that is, cuz remember it moves in 0.25 increments. But that's essentially what this price scale is. It's just showing you what price it is. Now there's something very important that you do have to do when you, uh, first do set up your account that is not automatically done for you. So what you're gonna have to do, because you're gonna notice when you first open up your charts, your price is going to be delayed, meaning right now it's $3.51, but it's probably going to show you price that was happening at $3.30 or $3.20 because it's delayed. And the reason for that is because you need to buy market data. Now, how you do that here in the top right corner, go to application settings. Here you're going to see your account and stuff like that, all different accounts you have, the live accounts and things like that. You'll see subscriptions, exactly what you need. To be able to use the platform itself, Tradovate itself. See your profile, your preferences, security and privacy, add-ons. Remember I talked to you guys before about having the market replay. This is where you'd actually be able to do that, but you don't need to worry about market replay right now. There is one thing that you do want to look at that is TradingView. Remember I told you, you'll be able to connect your broker to TradingView to trade straight from TradingView. This is how you do it. You come on add-ons., and you would, um, add this add-on TradingView, and that would allow you to actually trade straight from TradingView. So if you did want to do that, which I personally suggest, it just makes things a lot simpler and easier, especially as newer traders, then make sure you put that add-on on. Then there's also a couple free add-ons that you should just come in here and activate, like the Tick Stream, Group Trade, Free Indicators. As you see, all these are free, so you should just add those on. Because they are free. This one as well, advanced charting. Just add them on because they are free. Order flow is free as well, so you might as well do it. Under subscriptions, you want to scroll down to market data. Remember I told you guys when you first create your account, you will have to get market data. This is how you do it. You'll come in your settings, like I said, under subscriptions, scroll down to market data, and you're going to look for this one, CME Bundle. Right now you see I have Level 2 market depth. You don't need that, that's just more advanced. Just go to the CME bundle one. I forget how much it is a month. It might be like $7, $8, $9, $10, $11, $12 a month. I don't know, somewhere around there. It's nothing too expensive, but you need to get that. That would allow you to have the market data on, um, Tradovate. So you have real-time data and it won't be delayed. You cannot trade with delayed data because you'll be planning your trade out when you think it's right here, but it's really up here, and everything just gets messed up. So you need real-time market data, and that's how you do it. Get the CME bundle one. You'll see a bunch of different options, but get the CME bundle one. That's the one that I recommend. But essentially, that's most of the things that you need to understand when it comes to using Tradovate. All right, now let's talk about how to use TradingView. It's very, very similar. What you're going to want to do is create your account. Like I said before, you can subscribe so you have different things. It does allow you to pay like a monthly fee so you have different features and things like that. You should be able to get like a 2-month or 2-week free trial or something. I don't know. Don't hold me to it. You can try, you can use the free version if you want, but you just won't have access to certain things. But most of the things we'll go over right now, uh, you should have access to on the free version. But when you come to TradingView and you first create your account, you'll kind of be brought to this main page. This might look different. It might not be S&P 500. It might be something else. But what you wanna do is hover over products and press SuperCharts. This is going to take you to your charts, right? This is the same kind of charts that we just saw on Tradovate, but, um, this is on TradingView. And I'm going to show you guys how to use this platform. It's a lot of similar things, but it makes it a lot easier, honestly, than trading straight from, uh, Tradovate. So up here in the top left corner, this is where you're going to choose what chart you want to look at. Right now you see we're on just the Bitcoin chart, so we'll just keep it on this for the example. Keep in mind, your charts might look a little bit different, uh, it might not be black in the background, but mine is on dark mode, so it's black in the background. You can change all that in the settings and I'll show you how in a second. But like I said, top left corner is where you choose whatever symbol you want to be on. If I click this, I can choose something else. If I want to go to a different chart, let's say I want to go to Solana USD, if I want to go to NQ chart, I can do all that. But right now we'll just stay on the Bitcoin chart. And here you'll see timeframes, which like I said, in a second we're about to go over and why this is so important, what all these things mean.. But here you'll see your timeframes. It might not have all of them populated. It might just show one and then you'll be able to hit this dropdown to search a bunch of other ones. The way I have them all up here already is because I already know I use like the 1-minute timeframe a lot or the 5-minute timeframe or the 15 or 30. So I just favorited it by pressing the star thingy and you'll see it populates it up here. So it's easy to go to. But if you want to do that, you could do that as well. That's just timeframes here. Same thing, you'll see candles or whatever chart you wanna be on. If you wanna be on the line chart, you can click that. If you wanna be on this chart, you can be on that. But we'll just stay on regular candlestick charts for right now. And then you'll see the indicators button, which is similar. You're able to just essentially put indicators on your chart. We'll go over what indicators I personally recommend later on inside of this video. Here, you'll also see indicator templates. If you always use the same indicators, you can set a template. So they always show up on your charts. I don't really do that realistically. Then you have add alerts. This is something cool about TradingView that we'll get into later on inside this video. I know it's a lot. We're gonna get into later on this video. This video, as I mentioned in the beginning, is, well, this entire course is, is completely packed with a lot of information. So, um, we're gonna get into a lot of other things later on in the video, obviously, but alerts is super cool because it allows us to not have to sit here at the charts. We can get alerted when certain things are happening that way. When it's happening, we can come and look at our charts versus us freaking peeling our eyes to the charts here for 30 hours a day. That's how we want to do. And then we have this replay feature. This is essentially used when we want to practice our trading. It's something called backtesting. I'll show you how to use it again later on inside of this video. But that's essentially all the things over here on the left side. This is all our drawing tools. These are all just tools that we'll use to draw on our charts. If we want to draw lines, we could do that.. If you want to draw a ray, we can do that as well. If we want to, we have a bunch of different things that we can draw on here. Most of the time you're going to figure out which ones you use very often, and then you're able to do the same thing that I showed you over here about favoriting the time frames. You can also favorite what drawing tools you usually use. That way you don't have to sift through here and find through here all the time. That's why you see mine are hovering over here, because these are all the tools that I use most of the time. I'm going to go over all these tools in a second, but essentially how you'd favorite it is, let's say you always use the trendline tool, you just press the little star next to it and it'll be added to your little favorites box up here. That's a bunch of drawing tools. Uh, here you have like a ruler where you can measure to see how big of a move it was. It'll show you how many ticks it was. If you guys remember, we talked about ticks. It'll show you it on this little measuring tool, but there's also something else that I use that shows it a lot cleaner. You can zoom in, there's a magnet chart, there's a bunch of things over here that you can play around with. But then over here you'll have a watch list. So if you don't have a watch list yet, I think when you first create a TradingView account, they'll have a default watch list of a bunch of stuff. You can kind of delete all that and make your own watch list. If you know you're only going to be looking at and focusing on NQ, ES, YM, GC, or whatever it is that you're going to be focusing on, just add it to a watch list so it's here As you see, most of the time I trade NQ, I trade ES, I trade YM. Um, and I also have the micro versions on it. You guys remember we talked about that previously. So I also have the micro versions of each 3 of these, um, over here on my watch list as well. So it's easy for me to go through to each and every one of them. Now, if you guys remember on Tradovate, you had to buy the market data subscription. It's the same thing that you have to do on TradingView. But if you have Tradovate and you bought the market data on Tradovate already, and you connect your Tradovate to TradingView, you'll automatically get the market data on TradingView as well. But let's say you did not want to connect your Tradovate to TradingView. How you would go about doing that is over here in the top left corner, you'd press your, uh, profile. You'd hover over your name right here. You're going to go to settings and billing. You can see a new tab pop up. And then you're gonna wanna go to, I believe, Subscriptions here. And under Subscriptions, you wanna do the same thing. You wanna get the CME Group Bundle. And right now you see it's $7.45, so you're able to just get that. Then you'll have real-time market data. If you don't do that, you'll notice next to a ticker, if you're on NQ, you'll see over here it'll be like a yellow D icon. That means that your charts are delayed, meaning you're about 15 minutes behind.. And as I mentioned, you can't trade like that. We need to have real-time market data. So that is essentially how you get it. Get the CME Group Bundle 1. There's a bunch of options it's going to show you, but I'm telling you the CME Group Bundle 1 is the way to go. But that's essentially how to use all these different things on the chart. Now, how do we connect our Tradovate to this account? Let's say we did want to connect Tradovate to it. How you do it, a quick way of doing it, you'll see these buy and sell buttons up here. You can just press it and this broker kind of tab will pop up. As you see, you can connect a bunch of different brokers to TradingView, but you'll see here we have Tradovate. So what you'll do is you'll just click Tradovate here and then it'll open up your information for you to actually log into it. I don't want to press this because then it's going to show like my broker information, but when you press that, it'll just have a pop-up box where you'll put in your username and your password. The same one that you use to sign up on Tradovate. But yeah, you'll be able to log in and choose if you want to be on your live account or your demo account, which is that simulated account. But there's also a cool thing as well. I mentioned to you guys on Tradovate they have simulated accounts or demo accounts, but TradingView, they have it as well. So if you're a new trader and you're not thinking about going live yet and you don't want to pay for the Tradovate subscription because Tradovate does have a monthly subscription, I believe it's like $99 a month. Um, but you don't plan on trading your live money, which I don't personally suggest for new traders to go straight to trading their live money. We'll get into this later on inside the video. I'm going to give you guys kind of the plan of action that I usually give my students that I've seen the most success with without them having to lose a bunch of money. But as a new trader, you should be on a demo account. But if you don't want to trade the Tradovate demo account, or if you don't plan on trading live right now, TradingView actually has this paper trading, uh, platform right here. So you technically, when you're first starting off, Don't even need Tradovate. You can just press paper trading right here and you see I could press connect and now I'm actually able to trade. Let's say I wanted to enter a trade right now. I could just press buy right here. You'll see a little trading panel pop up and we'll go over all this means in a second, but I just wanna show you guys how it works. If I just press buy, you'll see I'm actually in a trade right now, but this is on a fake account. It's on a demo account. And that's really good to have because you can just practice trading without risking your own money and you can do it all from TradingView. Now I mentioned before, when you connect your Tradovate to TradingView, this will all look the same. You'll be able to trade the same way that I'm showing you guys that I'm in a trade right now. You'll be able to do the same exact thing, except you'd be doing it from either your live Tradovate account or your demo Tradovate account, all connected through TradingView. Let's exit this out really quickly. Let's just press close position. I wanna show you guys how to actually set up trades and things like that. But first let's go over some of the main tools that I personally use and what they do. Right here, This is just like a path icon. When I'm doing my live trades in the morning with my inner circle and I'm going over my charts and what I want to happen in trades and stuff like that, I use this a lot. Um, there's also this crosshair, which is really what you're on most of the time if you don't plan on drawing anything. I have my eraser tool. I have my line tool, which lets me just draw a line. I have my box tool, which I use a lot as well. I have this line tool as well. It's just a free moving line. And you can find all of these under all these different panels right here. Right. Then you have this little brush thingy that I use. This just lets you draw anything you want to draw on there. Another line chart. And then— or sorry, another line drawing. And then we have these long and these short position tools. These are really the ones that I wanted to get into. So you guys understand what they are and how to use them. You'll find them right over here. You'll see long position and short position. I told you guys we use TradingView to plan out our trades.. And how we plan them out is let's say we want to enter a trade for a buy, right? We then click on our long position tool right here. And let's say we want to enter a buy right where price is at. We click wherever— after we clicked our long position tool, we click wherever price is currently at, and you'll see this box pop up. Remember we talked about stop losses and take profits? Stop losses means if it gets here, take me out the trade at a loss so I don't lose even more money. Take profit is when it gets to this area, take me out the trade, let me lock in my profits. I'm good with this profits, right? This box pops up on a long position tool because it helps us plan out our stop loss and our take profit. So if we, we can drag this along, you'll see this white line, the separation between the green and the red. That's your entry, meaning this is where you enter that. The bottom of the red box would be where you're planning your stop loss to be. Now keep in mind, Nope, this drawing is just a drawing. This doesn't actually enter us into the trade. This is just planning out our trade so we can see it. But let's say we wanted our stop loss to be down here, meaning if price got all the way down here, get us out the trade because we were probably wrong, um, and we don't want to lose even more money. So let's say we're planning for our trade to be there, we'd put our stop loss right there. Same thing with our take profit. We're like, okay, if it hits here, I'm cool with this profit, take me out the trade right here. Now you'll see a bunch of numbers up here and right here and right here. There's only a few things you need to keep keep in mind. So when you're on futures, this middle number is going to be the amount of ticks. It makes it super simple for you to calculate how much you're risking per trade or how much you'd make per trade when you use these long position tools or these short position tools. Keep in mind, uh, short position tool is just the opposite of it. So let's say we entered right here, uh, our stop loss would be above our entry because that's where we want to get taken out of the trade at a loss. Because remember, if we're entering for a sell, we're assuming that price is going down. And if, if price is going down, that's when we're making money. So that's why our take profit would be below where our entry is. But nonetheless, back onto the numbers. So the middle number right here on the top is the tick amount. The middle number right here on the bottom is also the tick amount right now. Like I said, it's very simple to use this to calculate how much you'd risk per trade or how much you'd actually make per trade. Let's say we entered right here and our stop loss is down here. Whatever this number is right now, this is a huge number. Let's just imagine this number is a lot smaller. Let's just imagine that number is 100, right? We'd be able to be like, okay, if we enter with 1 contract on NQ and we know that with 1 contract each tick is worth $5, all we'd have to do is multiply this bottom number by $5, and that tells us how much we'd risk if price hit our stop loss. If price hit our stop loss, we would risk $500 with 1 contract on NQ. So we can go into that knowing, okay, I'm okay losing $500. Now obviously That's extreme. You don't have to risk $500. You can go to micros, and that same $500 risk would actually be $50, because remember, the tick amount or tick value is 50 cents versus $5. But yeah, this is how we plan it out, because we'd be able to understand and see, okay, our stop loss is down here, it's a 30-tick stop loss, whatever it is. 30 times 5 comes out to 150. But yeah, essentially that's how you do it. You'd multiply the tick amount by the tick value of whatever it is that you're looking at. In this example, let's say it's NQ. And then if you only entered 1 contract, it would be based off of $5 or whatever the underlying tick amount is. That's why that chart is so important to have so you can plan out your trades. And keep in mind, you get much faster at doing the math and stuff like that the more you trade and the more you do it. But that's essentially what you need to know as far as the long position tool and the short position tool. So you can plan out your trades and understand how much you are risking based off of the tick amount and how much each tick is worth, because you know how much each tick is worth based on what ticker you're actually trading. Now, you'll also see numbers down here. You'll see open P&L. You don't really have to worry about that because like I said, we're not actually in a trade. It's just planning out a trade. Right here, you need to focus on risk-to-reward ratio. This is very important, and we'll go over this more in depth when we're going over the different strategies later on inside this video. But risk-to-reward simply means that if this says risk-to-reward 1, That means the amount that we're risking, that's the same amount we're going to make. Meaning if it hits our stop loss all the way, we'd lose $100. That also means that if it hits our take profit all the way, we'd make $100. Now, if this goes down and let's say our, um, the number goes to a risk to reward ratio of 2, that means the amount we're risking, if it hits our stop loss, let's say in this example we're risking $100. If it hits our take profit, we'd make 2 times as much we're risking. We have a 2:1 risk-to-reward ratio. So we're risking $100 to make $200. And this can obviously be changed based on your stop loss. You see the number goes up based off your stop loss and your take profit. It's simply just showing you how much you'd make compared to how much you're risking. More examples of that later on when we're going over the different strategies, because some strategies I always go for 1:1, meaning I always go for however much I'm risking, that's how much I'm also willing to make. And then there's other strategies where I need at least a 2:1 risk-to-reward ratio because I want to make at least 2 times as much money as I am risking. Now, that's how you use these long or short position tools, which is very, very, very important when it comes to planning out your trades. Now, I've told you guys I'll show you how to actually enter trades here on TradingView. And keep in mind, it's going to be very similar on Tradovate, but I do suggest for most people to just kind of trade straight from TradingView, especially as new traders.. It just makes it so much simpler and so much easier. So when we're on our account, we're able to have this trade planned out as we see here. And let's say this is the exact trade we want to, we want to trade. A simple way to actually execute this trade where our stop loss will be in place and our take profit will be in place based off of our drawing that we planned out is we can right-click on this right now and we can press this button called Create Limit Order. And you'll see if I drag this to the side, we have this order panel pop up. I'm gonna break down exactly what all this is. It's not complicated at all. But you'll also see here that we have our entry point right here. You'll also see our take profit area right here and our stop loss area right here. It actually shows you how much dollar amount you're risking per trade. Now, some brokers will do that. Some brokers won't do that. Some will just show you like where your stop loss is. It won't show you how much you're actually risking, but some will. But in this case it does. But what we need to worry about, 'cause we're not actually in this trade yet until we press buy here and confirm it. There are 3 different types of orders, right? Meaning we have a market order, which simply means wherever price is currently at right now, that's going to get us into the trade, right? Then we also have a limit order. A limit order simply means if price is above where we're trying to get entered into— as we see, price right now is up here, right? I know we haven't went over candlesticks and stuff like that yet. We will in our next session, uh, or in the next part of this, but price currently is up here. If we want to get entered in when price drops back down here, we'd use a limit order. But if price is still up here at this green area and we want to get entered in when price buys all the way up here, we'd use a stop order. Limit and stop orders would get us into trades automatically when it hits those specific areas, depending if we wanted to fall back first before entering us into a trade or buy up first before entering us into a trade. But market orders, like I said, those are going to get us in the trade no matter what. So here on the order panel, let me break all this down for you. Units is simply contracts, right? You know, we talked about on Tradeavate, we have the contract amount that we are currently using, but here they just have the wording under units. So what you can do here is just choose if you want one contract, just press 1.. It'll also show you your different exits, meaning your take profit and your stop loss. So this is the price of where your take profit is at right here. And this is the price of where your stop loss is at. You'll see it checked on and checked off. If we switch back to limit orders, you'll see it actually pop up here and populate. It'll also show you it down here as far as your, um, risk amount. So right here you see the risk. You're risking $162 on this trade if it hits your stop loss, you'd lose $162. The reward right here, you'll see, is $325.75, which means if it hits your full take profit, you'll make $325. So, uh, you don't really have to worry about any of this other stuff as far as like the time in force and things like that because we are day trading. So you're kind of going to be in and out these trades within the day. But simply what time in force means is that if you set this limit order here— because remember, if I press buy right now we're not in this trade. We're only going to get entered into this trade when price sells back down and taps here. I can show you an example of it. If I just— for this analogy, I just bring my limit order right here. We'll see if it taps us in. Okay, boom. So it tapped it. And now, as you see, we're actually in the trade currently. And you know we're in the trade because we see our profit and our loss going down or going up, right? So, uh, let's exit this back out. And if we press exit right here, we're actually able to just close the position. But you will see here our stop loss is up— our stop loss is down here, sorry, and our take profit is up here. So if it taps any of these, it'll take us out the trade. You can click and drag these as well. So if you wanted to move your take profit here, you could do that. As soon as it touches your take profit, it'll get you out to trade automatically. I want to see if it'll do it so you guys can see it. I'll drag this down here. All right, so we hit our take profit, and as you see, it automatically took us out the trade. So that's Essentially what it will do for both your take profit and your stop loss. But if we open this back up, so we right-click on it and press Create Limit Order and have this tab pull back up. As I mentioned, you have the limit order and the stop order. Keep in mind, it's flipped reverse for if we enter for sells, meaning if we want it to sell right here and let's say price is currently up here, we would use a stop order if we want price to get us into a trade when it sells down further. So if we wanted to get us into the trade sells down further, we use a stop order. If you want us to get into a trade when price buys back up first and then get us into a sell, we'd use a limit order because we're looking for sells. It's flipped, um, from what we talked about if we're looking for buys. But that's essentially how you use the trading panel right here. It's very simple to use when it comes to TradingView. It can be a little bit more complicated when you're trying to trade straight from Tradovate. That's why I suggest for new traders, to trade straight from TradingView. And it might seem a little bit overwhelming, but I promise you guys, when you take a break from this video or you finish this video and you go and try it out for yourself and you do it for a day or so, it's very simple. You get very fast at doing it. Like right now, most of the time I can enter my trades pretty fast. Like I literally just do something like this. I'll change this and be like, I want 2 contracts and I'll just enter the trade. Like I am able to do it very fast because I've done it so much. Um, and you'll get to that point as well, but that is how you actually enter trades. Now I told you guys you can change all these different settings on your charts, and we never went over how to actually do that. So what you're able to do is right-click on your chart here and go to settings, and you'll see a bunch of different tabs here. If you want to change the color of your candlesticks, you can change them. You'll see the body, the borders, and the wick. This all has to do with candlesticks, which we're about to go over in a second, but we can change the color of our candlesticks if we want.. As you'll see, if we want to change it to our bullish candlesticks, which are the candlesticks that go up, if we want to change those to orange, we can do that. If we want to change it to white, we can do that. We have full control over basically everything on the chart. If we want to change the canvas, like the background, if I wanted the background to be like a different color like this or something, I could do that as well. But I don't want that. But yeah, you have full complete control over changing all that. Here inside of the settings once you right-click on the chart. But that's essentially how to use TradingView here and Tradovate. So now let's hop into these bad boys right here, these candlesticks, and break down exactly what they are so you can understand it. Because trust me, it's not as complicated as it seems. I will prove it to you. All right. So candlesticks, this is going to clarify and make you guys understand the charts in the simplest way possible. I made myself a nice, beautiful drawing here, and this was like one of the most like complicated things that when I was first starting off learning how to trade, people overcomplicated this so much. It's super simple, and I'm going to prove it to y'all. I've literally taught this to like a freaking 10-year-old, and they completely understand it. So if you're over the age of 10, as I mentioned before, you stand a pretty good chance. So when you see these different candlesticks, we call them— these, we call them candlesticks. You'll see this thick part, which is called the body of the candlestick.. Then you'll see the skinny part. That's called the wick of the candlestick. You'll see them. They'll be all different shapes and all different sizes. Most of the time by default, they'll be green and red. As you see on our charts here, they're green and red. But as I mentioned, you can change those. The color of them does not matter once you change it. So these green candlesticks are bullish candlesticks, meaning that these are candlesticks that went up. The red candlesticks are called bearish candlesticks, meaning these are candlesticks that went down. Now you'll see under here, we have different times. If you remember when we went over the charts and how to use TradingView and Tradovate, we have timeframes up here. These timeframes up here that you see, the 1M, that simply means it's on the 1-minute timeframe. 5M or 5 minutes means we're on the 5-minute timeframe. We have the 1H, as you see here, that's the 1-hour timeframe, 4-hour timeframe, 1-day timeframe. We have all these different timeframes. And all those mean is that it's showing us the candlesticks in that interval, meaning every— since we're on the 1-minute timeframe right now, every single candlestick we see here tells us what happened during the period of 1 minute. So every minute a new candlestick is going to print. In our— my drawing here, my beautiful, amazing drawing here that I made, you see we're on the 1-minute timeframe. This is the 10 o'clock candlestick, meaning this candlestick is going to tell us everything that happened from 10 o'clock to 10:01. Once 10:01 starts, we'll have a new candlestick. And this candlestick, as you see, is the 10:01 candlestick. It's telling us everything that happened from 10:01 to 10:02. Then we'll have a new candlestick at 10:02, uh, so on and so on and so on. If we were on the 1-hour time frame, each of these candlesticks would tell us one thing that would happen during one hour. So for example, this could be the 10 o'clock candlestick, this would be the 11 o'clock candlestick, this would be the 12 o'clock candlestick, so on and so on, depending on whatever time frame you are on. Now I mentioned that it's going to tell us what happened during that time interval, whatever time interval we're on. And right now, for this example, we're on the 1-minute timeframe. The way it's telling us and how it's telling us the story of what's going on is with the body and the wick. So the bottom of a bullish body, that's the open, meaning at 10 AM price was down here. And you'll see if it aligns up, let's say price was down here, over here on the price scale, you'll see exactly where that price is. So at 10 o'clock on the dot, Bitcoin was at $67,873.89. That's the exact point that it started at, at 10 o'clock, right? Now the top of the body of a bullish candlestick is where price closed at, meaning that's where price ended at. So at the end of 10 o'clock, at 10:01, price ended up here. And you'll see the price of it is $68,219 in this example., right? So we have the open, meaning that's where price started at, and the close. Then you see we have these wicks. These wicks are telling us everything else that has happened throughout that time. So price could have started here and price could have ended here, but all throughout this 1 minute, price could have been all down here. The low of it was all the way down here, meaning throughout this entire candlestick, the lowest price went was all the way down here, and the highest price went was all the way up here. But throughout this entire period, it was all throughout this entire candlestick.. But this tells us the open, meaning where it started at, the close, where it ended at, and where price has been all throughout it. Then you'll notice here on our next candlestick, this bearish candlestick. The reason it's a bearish candlestick is because now the top of the body is where price started at. Remember, on a bullish candlestick, the bottom is where price started at. The top of the body of a bearish candlestick is where price started at, and the bottom of it is where price ended at. Meaning that price started up here and it ended lower. That's why it's a bearish candlestick. Now, the wicks work the exact same, meaning this is the highest where price was, and this is the lowest of where price was throughout this entire candlestick. So that's telling us that picture, but it's telling us that price is lower than where it started at throughout this 10:01 candlestick. And then you'll see the next candlestick at 10:02. It started down here because every single candlestick is going to start at where the last one ended. So here we closed up here, meaning we ended right here. So that means this candlestick started up here and then it ended down here. If it ended down here, the next candlestick had to start there and the next candlestick started here and it ended up here. And the wicks is telling us the exact same story. So that's essentially what candlesticks are. It's simply just telling us what has happened throughout whatever time interval we are on. And later on, we go over strategies and things like that. You'll see why we need certain timeframes and why we'll go to lower timeframes or different or higher timeframes. But that's all candlesticks are. It's simply just telling us where price started at, where price ended at, where it was throughout the 1-minute candlestick or the 1-hour candlestick. Now to see that on the actual charts, let's, let's go to the 1-hour timeframe, right? You'll see here we have all these different candlesticks. We have this candlestick right here. If we remember our analogy, the green candlesticks, the body of it, the thick part of it, that's where price started at. So price started here, price ended up here. But throughout this entire 1-hour candlestick, price was up here and price was also down here. And then the next hour candlestick started and it started up here and it ended down here. And the wicks tell us where it's been. And you'll see all these candlesticks are just simply telling us a story. So let's say for this analogy right now where we actually are, Price started right here. And if we look at the— if we put a line here, we can see where price actually started at $66,646. Then it ended up here at $66,909. And you'll see this active candlestick is happening. You'll see this countdown right here, meaning, um, since we're on the 1-hour time frame, this candlestick will not show a different candlestick until 23 minutes and 35 seconds has passed. And then once 23 seconds and 30 seconds has passed, a new candlestick will print and we'll see exactly where the body of the candlestick is and, uh, where it closed at, the wicks as well. And that'll print our new candlestick and that will tell us the story of what happened during this 1-hour candlestick. And then obviously same thing no matter if we're on a 15-minute time frame or 4-hour time frame. One thing to keep in mind though, if we're on a 1-day time frame on the, um, if it says D, it's just a 1 Uh, it's the daily time frame, meaning each of these candlesticks is telling us what happened during one day. But if we draw a box around this, right, we can draw a box around this, um, because we know throughout one day, obviously we can go to the 4-hour time frame and we'll see a bunch of different candlesticks. Now this is telling us the same exact thing that happened on that one-day time frame, but we just can see it more in detail because we went down to the 4-hour time frame. So instead of us just seeing all what's happened during one day. We can see what happened in 4-hour intervals, or we can see what happened in 1-hour intervals. And this is all still inside of that one daily time frame, right? Same thing if right now we're on the 1-hour time frame. We can draw the box from this hourly candlestick right here, and we can go to a lower time frame to find more detail about what has happened. Because in 1-hour time frame, we're obviously going to have 4 15-minute candlesticks inside of it. So you'll see from the start of 1 o'clock right here until the end of the candlestick, we draw this box right here. You'll see we have these 4 candlesticks inside of it. 1, 2, 3, 4. This is showing us that these 4 candlesticks is still building out that 1 hourly candlestick that we just went over. We're just seeing, okay, at 1 o'clock on the dot, it was like this. And then at 1:15, it was like this. Then at 1:30, it was like this. This, then at 1:45 was like this, versus us just seeing the whole picture of what happened during 1 hour. Now obviously we can go a lot lower, we can go to the 1-minute timeframe and see all the different candlesticks throughout that entire 1-hour period to see obviously every single thing that has transpired during that 1 hour in a lot more detail. But essentially this is still just building out that same 1-hour timeframe that we just looked at, right? Like I said, we'll get into that a little bit more in detail if I can —find back where my drawing was. Oh, right here. We'll get into that in a little bit more detail a little bit later on when we go over the different strategies and stuff. But I just want you guys to understand that although we're on the 1-hour timeframe, there's still 60 1-minute candlesticks inside of this if we went down to the 1-minute timeframe. All right. So I mentioned to you guys that candlesticks are basically telling us the story of what happens. Now we can use this story and we can use the different shapes and sizes of the candlesticks for us to predict what will happen next. Right now we're about to go over my 3 favorite candlestick patterns that kind of help us have a good estimation of what will happen next. It's basically telling us, okay, will it go up or will it go down next? Now, as all things with trading, nothing is 100%. So if you see this pattern, it's not 100% it's going to do it. It's just very likely that it's going to do it after you see this pattern. For example, the first pattern I like to go over is a bullish engulfing. Simply what a bullish engulfing is, It's when we're going down and we get a bullish candlestick, which if you remember from our previous section, we talked about bullish means price is going up, bearish means price is going down. If we get a bullish engulfing, the candlestick engulfed means it's bigger than the candlestick before it. If we were selling down, we got a big green candlestick that's bigger than the red candlestick before it engulfed it, or I like to say it ate it. When I see a candlestick like that, most of the time that means it's going to start going up. As you see, after we got this bullish engulfing, this candlestick ate the candlestick before it, and now it started going up. I love bullish engulfings. When I see them, it is a good sign that price is about to reverse and start going up. Now there's vice versa. We have bearish engulfings, which is the exact opposite. The candlestick— and keep in mind, we're looking at the body of the candlestick— if we're going up and then we got a bearish candlestick that ate the candlestick before it, or had— it was bigger than the candlestick before it, engulfed the candlestick before it. And as you see, once that happened, market continued to sell down. So I look for these different candlestick patterns to help me decide if I'm going to enter into either a buy or a sell based off of some other things, based off really the strategy that we're— that I'm trading. And we'll go over that, like I said, later on inside of this video. But these are good tails, the bearish engulfing and the bullish engulfing. Now, my favorite candlestick pattern of them all is the doji candlestick. A doji candlestick is simply a candlestick. It doesn't matter what color the candlestick is, but the body of it is super, super skinny. As you see in this example, the body of it is skinny, but the wicks are long on the top and the bottom. The reason why I love doji candlesticks is because it shows uncertainty. Meaning if the body is small, we already understand candlesticks. We know the open and the close is the body, right? So if the body is small, that means the open and close is very, very, very tight. And then wicks are high on the top and the bottom. That means price tried to go up. Price also tried to go down, but it couldn't. It kind of stayed exactly where it was at when it first started off. That shows uncertainty. So when we see prices going up a lot and then we have a doji candlestick that shows uncertainty, Most of the time that means, okay, that whole thing with price going up is about to end. It's about to reverse, right? And as you see in these examples, price was selling down. We got a doji candlestick right here and price started going up. What happened? We were going up, we had a doji candlestick right here and price started going down. So I personally love seeing doji candlesticks when I'm looking for reversals. And like I told you, it's just when the body is skinny, but we have long wicks on the top and the bottom. Preferably the wicks are equal size, meaning the top and the bottom wicks are equal size. They don't have to be exactly equal, but you don't want one that's super, super small and then one that's super long. Um, you kind of want them both long, um, in retrospect to the other, right? So these are my top 3 favorite, uh, patterns. We can actually see them live on the charts here. You'll see them multiple times. So we have this bullish engulfing here. We got that price started going up. We can see multiple different examples of all these different candlestick patterns if we just really zoom out. Right. So you see, we were— we started buying up here. We got a doji candlestick, price sold down, price sold down. We got a doji candlestick, price started going up. As I mentioned, it doesn't have to be a perfect candlestick where the wicks at the top and the bottom are the exact same size, but you want to see both wicks on the top and the bottom. If we come over here, we see we have a bearish engulfing. Price was going up, then we got a bearish engulfing, price started going down. We can see another example right here. Price was going down, got a bullish engulfing, price started going up. We're going up here, we got a doji candlestick, price started going down. Another bullish engulfing right here. So you can just see and look at your charts and see multiple different examples of this. And you'll also, as I mentioned, you'll notice that it doesn't always happen. Like, we can probably find a doji in here where price did not end up reversing. See, Price is coming down. We had a doji, price started going up. We see we also had some more dojis, but price continued to go up. So like I said, it's not 100% foolproof, but a lot of times if you combine candlestick patterns with other strategies that we're about to go over inside this video, it'll give you a higher win rate and allow you to be right more times than wrong. All right. So now it's time to master technical analysis as a whole. We went over charts, we went over candlesticks, went over timeframes, went over all these different things. But now it's time to kind of put it all together to understand market structure, to understand technical analysis holistically. Remember I told you guys the two main types of analysis is fundamental analysis, which is news, and technical analysis, which is kind of what we've been going over the past, uh, few sessions or so. There's three main things you need to understand when it comes to the market and how price moves. So there's bullish market structure, which simply means that we're creating higher highs and higher lows. What does that mean? So we know price never just goes straight up. If you think that price just always goes straight up, you're completely wrong. Price just never goes straight up, and price just never goes straight down. What it does is it'll go up and down a little bit, up, down a little bit, up, down a little bit, up, down a little bit. That is bullish market structure. It's creating higher highs and higher lows. All that simply means is that this high is higher than this high, meaning that this high created a higher high, then the high after it created another higher high. So it's creating higher highs and it's also creating higher lows, which simply means that this low is higher than this low, then this low is higher than this low. So it's creating higher highs and higher lows. That is bullish market structure, meaning the market is going up. And then you'll see vice versa when the market is overall going down, it'll go down a lot, up a little bit, down a little bit, down a lot, up a little bit, sorry, down a lot, up a little bit. And in this trend to the downside, you'll see we create a high here and then another high right here. But this high is lower than the previous high. Same thing with the lows. So this low right here and this low, this low is lower than this low, meaning it's creating lower lows and lower highs. So that's something you need to understand. And when you're looking at the charts, you need to realize that the market is always going to create higher highs and higher lows if it's trending. That means if it's bullish, the market is trending to the upside. If it's bearish, the market is trending to the downside. Then there's also something called consolidating markets. That just means that there's no clear direction of where the market is actually going right now. So it could be going up, down a little bit, up, down a lot, up a lot, down a lot, up a little bit, down a lot. Like it could just be consolidating. Meaning that it's just trending in a range. It's just staying kind of in one type of range. It doesn't have— there's no clear winner. Like, buyers aren't clearly winning and sellers aren't clearly winning. So the market's just staying really within a range. That's a consolidating market. Now, the reason you need to understand this is because certain trading strategies, especially ones we're about to go over in a second, certain trading strategies work better in trending markets. And that could be bullish trending or bearish trending markets.. And then some strategies work better on consolidating markets and then vice versa. There's a lot of strategies that don't work very well with consolidating markets or consolidating market structure, but they work amazing with like trending markets, like a bullish market structure or bearish market structure. And then there's obviously the flip side of it. So you need to understand these things and know what type of market we're in, whether we're in a bullish market creating bullish market structure or bearish market creating bearish market structure. Lower lows, lower highs, higher highs, higher lows. You need to understand all that so that when you're looking at the charts, you know exactly what you should be looking for. Because there's one tip that I'll give you, and we'll dive a little bit deeper into it later on, but you always want to trade in the direction that the market is going. You never want to try and guess because the market's going up. You never want to try and guess and be like, this is the top, I'm just going to sell because it just has to go down now. You never want to do that. That is never the way of trading. You have to trade in the direction that the market is going. We talked before about trading sessions, about the fact that we don't control the market. You opening up a buy with $10 million— if you had $10 million and you opened up a buy, you're not moving the market. You can't control where the market goes. It's the hedge funds, it is the algorithms, it is the banks that have billions and billions of dollars. So for you to win in trading, you have to trade and be on their side. You can't try and go against them. You have to trade in their direction. So that's why we need to clearly identify, are we creating bullish market structure or bearish market structure? So we can know to look for either buys or sells, or if we're consolidating, how can we play this game? How can we still win in these consolidating markets? Now, I showed you guys some drawing examples of different markets, but if we just go on a chart here, we can actually see it live in person. So if we're here right now on the 4-hour timeframe, it doesn't really matter what timeframe you're on. You can kind of just see it happening. And I'm just going to mark off some highs. I'm going to mark off some lows, right? So we have a high here that was created, and then we have a low created right here. And then we see another high created right here, and we see another low created right here. We see a high created here, another low here. What do you see? What is the pattern you see? This high and this high, this one is lower. And then we had another low, meaning we're creating lower highs. And then also, what are we doing at the same time? This low is lower than this low, and then this low is lower than this low, meaning we're also creating lower lows. And then what do you see on the chart here? We are overall trending to the downside. This is showing us that we're in a downtrend or a bearish market. Now you'll see throughout this bearish market, you'll see times like this where price kind of just ranged. It didn't really have a clear direction. It was trending to the downside a little bit., but it was really just ranging. You see, it went up, down, up, down, up, down. Like it's just ranging, right? This is an example of a consolidating market. We can see multiple different examples of that here as well. We can see in this instance, right, price didn't have a clear direction. Price was kind of just chilling inside of this range this entire time. It was just consolidating inside of this range the entire time. And then if we zoom out, we can see in this analogy, we're creating a low, then a higher low, then a higher low, while also at the same time creating a high, a higher high, and a higher high than that. We can see all these different examples where price is clearly in an uptrend here, and then it flips. And we can actually look at it vice versa, because after we had price going in an uptrend, we see now it flipped and price started going in a downtrend. If we draw it out exactly how we did on the drawing, Right, price went down, up, down, up, down, up, down, up. This is creating bearish market structure. Same thing with here, price went up. Now you can see, obviously this is like, um, it can get a little bit choppy when you're looking at it, but if we look at the overall highs and the overall lows, meaning we don't have to pay attention to all these different little small highs and all these different, small lows. Now you can, but it can get a lot more confusing if you just like look at the main highs and the main lows, meaning price was continuously going up and then it started going down, and price continuously was going up and then it started going down, and then price continuously was going up and then it started going down. If you look at that, you can clearly see that we are creating higher highs while also creating higher lows, and this is telling us that we should be looking for buys because the market is overall in an uptrend.. Now it doesn't matter what timeframe you're looking at. As I mentioned, if you go to the hourly timeframe, you can still see the same exact thing. You can see here we're clearly trending to the downside. Um, here we had a little period of trending to the upside. So you can see it no matter what timeframe you're on. Um, you just need to be able to look at it and to see the bigger picture and know overall, okay, are we trending upwards or are we trending downwards? That way, you know, which side of the market you should be on. One of the biggest things you need to understand about technical analysis is that it is simply predicting what price will do based off what it has previously done. Technical analysis is really all about just looking at patterns, finding patterns, and waiting for those patterns to repeat themselves. We went over the candlestick patterns. We went over, okay, most of the time when you see a doji candlestick, price is about to reverse, or most of the time you see a bullish engulfing, we're about to start going up. These are all just patterns, and patterns are, are the basis of technical analysis. One of the biggest patterns that you're going to see and notice in technical analysis is something called support and resistance. It's the foundation of almost every single strategy. We're about to hop into strategies in a second here, but it's the foundation of almost every single strategy that you see in this video that you would have seen on every other YouTube video. It is the, it is like the backbone of technical analysis overall. And a lot of people overcomplicate it, but it's very, very, very, very simple. All support or resistance is, is simply places where price previously got to, and either the market thought it was too expensive or they thought it was too cheap and the market went in the opposite direction. Meaning, let's imagine this red box right here is a support zone. Support is always below where price is at. A good analogy that I use to remember it, uh, the difference between resistance and support is support is a floor. Support, just think of something supporting price up. Up. And then resistance— think of resistance as a roof. Think of you trying to break through a roof but it keeps resisting. That's the same thing. So let's imagine this yellow line is price. Price will tap into support zones and it will start going up. Same thing vice versa with resistance zones. Price will tap into resistance zones and start going down. Now why does this happen? Let's use the analogy of right now because I'm on Ethereum chart. It doesn't matter what chart you're on, support resistance is essentially the foundation of it and can be used for it. It is literally the strategy that I have used from the start of my trading that has made me the millions of dollars that I've been able to make with trading across all different industries. But the reason being is, like I said, with the analogy or the example that we're gonna use for now is Ethereum. Imagine the price of Ethereum down here at this red box is $1,000, right? And imagine the price of Ethereum up here at this red box is $2,000. I told you guys before when we talked about trading sessions that we don't move the markets. The big banks do. The big private equity and hedge funds do, right? So when they find something is too expensive or too cheap, they will buy it up. For example, this is Ethereum. The yellow line, the price of this is Ethereum. Every single time Ethereum gets to $1,000, it's super, super cheap. So everybody buys it. And when everybody buys it, it makes the price go up. You can think on a regular scale. Imagine right now iPhones are what, $1,000? I don't know how much they are. Let's say they're $1,000. If you went to Walmart tomorrow or Target tomorrow and an Apple iPhone was $200 instead of $1,000, you would buy it up because you know the actual fair value for that is $1,000. And then same thing when it comes to, let's say in this same exact example, if a phone was, $2,000 or it was selling for $2,000 and you had an iPhone and you only bought it for $1,000, when everybody else was buying for $2,000, you will probably sell it at $2,000 and so would everybody else. And that would cause the price of it to go down. So bringing a bit of this back to our Ethereum trade here, every single time price gets to like $1,000, and this is all example numbers, but every time Ethereum gets to $1,000, everybody thinks it's super cheap, so they buy it. When everybody buys it,, it makes price go up. When Ethereum gets to $2,000, everybody thinks, dang, that's mad expensive, I'm just gonna sell all my Ethereum. When everybody sells all their Ethereum, that causes price to go down. And it just keeps doing this, keeps doing this, right? Now it'll be times when, okay, really, like, $1,000 is not that cheap anymore, so everybody won't sell it at $1,000 and it'll break through that. That is called a breakout, and that's a breakout of a support zone or a breakout of a resistance zone. But right now, let's, let's go back just for a second. So the way we're able to use these support or resistance zones, we're able to see, okay, at $1,000, right, most of the time when it gets to this price, it starts going up. So me as a trader, as soon as it gets to $1,000, I can look for certain patterns, whether it's candlestick patterns or different market structure patterns, that tell me, okay, this, it's good, it's at $1,000, and then I saw this candlestick pattern, I should probably enter a buy because it looks like it might reverse. For example, if it touches $1,000, which is a support zone, and I see a doji candlestick and I know it's been trending down to the $1,000 and I see a doji candlestick, which means indecision, and that price is about to reverse, I can enter for a buy and then that buy would allow me to make money as it goes up. Same thing, vice versa with sells. That's how we as traders trade support or resistance. We're able to identify the areas where price has previously reacted to or previously sold off of or bought up off of, and then we're able to position ourselves to wait for extra confirmation to enter into a trade. What I don't want you to do though, and I find a lot of new traders doing this, is they'll have their support and their resistance zones drawn up, and as soon as it taps into, let's say, a support zone, they'll enter for a buy because they just assume it's going to go up. I mentioned to you guys before with candlestick patterns, the same thing with support or resistance. It's not 100%. It doesn't mean just because it's bounced off of here the past 20 times, it doesn't mean that this time it's going to bounce off of there still. It could break through and have a breakout. That's another type of strategy that we'll talk about a little bit later on. But nonetheless, that's why we wait for extra confirmation. And that's why later on in this video, I'm going to go over what confirmation I look for for my support and resistance strategy., but that essentially is support and resistance. Now I mentioned we do have breakouts, right? We'll have breakouts where price will break above, let's say, a previous resistance zone. Let's say in this analogy, it buys up, breaks out of it. Now you could either take a breakout, but you also have to realize that support or resistance zones, when they're broken out of, they'll always or almost always get retested, meaning broke out of this resistance zone, it'll— price will come back down to retest that previous resistance zone in this analogy, and it'll treat that previous resistance zone as now a support zone and it'll buy off of it. Same thing with the support zone. When it breaks out of it, it'll break out of it, it'll break that support zone, and then it'll come back up to retest that previous support zone and it'll treat that support zone as a resistance zone and sell off of it. This is called a break and retest. This is another one of the strategies that has printed me money. This is one of my favorite strategies to trade, which is that break and retest off of a support and resistance zone. So once you understand that concept of what support or resistance is, and then understanding and realizing that when it breaks out of it, there's also a play that you could take after it comes and retests it and it flips it, that's a very valuable skill to know. Now obviously this is all drawings and this is all not fake, but this is just drawings. But we can see it here live on the charts. I don't have anything currently drawn up on the charts, but if we just zoom out and look, right, what I'm going to do, I'm just going to draw boxes around certain areas and we're just going to see how price reacted to it when it got to that same price point. Because remember, candlesticks is simply telling us where price has been and the story of it. So we see here price got to this area, right? Let's zoom in and look at this. Price bought up here and it sold down very heavily. What we're looking for with support or resistance zones is we're looking for price to buy up to an area and then sell off very hard, or sell down into an area and buy off very hard. In this example, we see price bought up to an area, then it sold off very hard. What happens if we drag this across? This is that same area. We're just using this box tool to mark off the area. If we drag this across, what happens when it taps into that same area? Price was all the way down here. It bought up back into that same area. And what did it do? It sold off. We can look on the bottom right here. Price was selling down heavy. As you see, price was selling down very heavy. It got here, then it started buying up very heavy. This is the lowest point away. If we drag this across, what happens? Price respected this support zone here. It respected it here. It respected it here as well.. And then you'll see here what happened. Price broke through it, came back up into that previous support zone as the break and retest. And then what did it do? It sold off. This is what you're going to see. You're going to see this pattern happen time and time again. We have this zone right here. Price bought up very quickly, sold off very quickly. If we drag this across, what happened when price tapped back into it? It sold off again. We can see up here price bought up into this area right here. It sold off heavily. What happened when price got back into the same general area? It sold off again. There's something you have to understand, though. This is the perfect example. Price doesn't always stop exactly at where it stopped at before. That's why when I'm drawing my support or resistance zones, and I'm going to show you in a second how we— how I draw them, I use boxes. You'll see a lot of traders come on here and they'll use lines like they'll draw their lines like this. And use that. But a lot of times price— well, almost all— every single time price never just stops exactly at the same point that it stopped at before. Sometimes it'll stop a little bit before it, sometimes it'll go a little bit above it, and then it'll react. For this analogy right here, or this example right here, if I had just used a line and drew off right here, right, instead of having this box, we would have seen price bought up here So down, and then what happened? It never tapped that line again. So we would have never even known that we could have entered a sell at this point. So that's why I use boxes when I'm drawing off my zones. Now, how do I actually mark off my zones personally? So, um, this is how I mark off my zones and how I kind of know what a zone is versus just using a line or just drawing a box any type of way like this or something. Um, there has to be consistency with it. So how I like to do it is, okay, I see price sold down into an area and then it started going up. What I'll do is the lowest wick in that drop to the downside, I'll start my box there, and then I'll drag it to the highest body before it started going up, the highest body of the candlestick. So in this analogy, you see it sold all the way down here, so that's the highest wick, and then the lowest body is on this candlestick. So I drag it until it gets that candlestick. And then what I do is I just drag it across and I just wait for price to react to it at that point. And as you see, it reacted to it here, here, here. Then what happened? Broke through it, came back to retest it, and sold through it. That is essentially how I draw my zones. And I can draw this multiple times. Here you see price bought up into this area. We'll take my box out here. I'll draw it from the highest wick to the lowest body since I'm drawing a resistance zone right now. And then all I'm doing is dragging it across, and I'm simply just waiting for price to tap back into that area. What happened? Price came, tapped back into that area, and sold off. This could have been a nice selling opportunity off this resistance area. Now you're going to see multiple different examples of this. You're going to see it all over. You're going to see these break and retests happen. You just need to get good at seeing and spotting these actual resistance and these support zones. And like I mentioned to you, the main thing we're looking for is big rejections away from areas. You don't want to get distracted with things like this, right, where price got up here, it bought up into this area, it got here, and then sold off a little bit. That's not a good support or resistance zone for me. I want to see big rejections. So for example, This is a big rejection. Price got down here, then it rejected heavily off of here. So then I would drag my zone across and I'd wait to see if price tapped into here again. I'm not sure if it did. Oh, it didn't. See, perfect example. It just broke through it. I mean, it bought off of here just a little bit right here for a little bit. You could have made some money here or right here when it, uh, bought off of it again. But the main setup I probably would have taken is when price sold and broke through my previous support zone. And then what did it come do? Broke through it, came back up to retest it, and then sold off. I would have taken that break and retest. But as I mentioned, you're going to see this example happen so many different times. You just need to get good at spotting these support and these resistance zones. So what I would do as good practice is I would zoom out my charts. And keep in mind, I like to draw my support or resistance zones on higher time frames, like a 4-hour time frame or a 1-hour time frame. I don't really draw it on like 1-minute time frames or 5-minute time frames. Reason being, and this is something you have to understand, the lower the time frame, the more price lies. Because, and you remember my analogy where I showed you we have a daily candlestick, but that has 24 hourly candlesticks in it, it has however many 1-minute candlesticks inside of it, that can show you a lot of noise, right? But a 4-hour time frame support or resistance zone is really going to show you the real zones. It's going to show you the strong zones. That's not saying that a 1-minute support or resistance zone would not work or it won't be respected. It's just I would always trust a 4-hour timeframe support or resistance zone or support or resistance zone drawn on the 4-hour timeframe. I would trust that over one that was drawn on the 1-minute timeframe or the 5-minute timeframe or the 15-minute timeframe.. I'll always lean towards the hourly or the 4-hour timeframe when I'm drawing my support or resistance zones that I'm looking for trades off of. So I'd recommend the same for you as new traders. So like I was saying, a simple way of getting good at drawing support and resistance zones is just to zoom out on your chart here, um, on the 4-hour timeframe and just look to see where price pivoted at, right? Take out your drawing tool if you want to, just look where price pivoted at. Okay. Price pivoted here. It pivoted here. It pivoted here. Pivoted here. We have all these different big pivot points, right? And then once you mark them all off very simply like this, and then you can zoom in a little bit, right? Zoom in a little bit and then get good at drawing your zones. So you draw it from the highest wick to the lowest body, right? Just like this. And you'll see this example, price sold down, came back up, retested it, right? So you would zoom in Good at drawing your boxes, the highest wick to the highest body, drag it across. As you see, that would have tapped into it. We could have sold on this trade to the downside, could mark off this one as well. I think we marked off this one as well. But this is essentially how I suggest for people to get good at finding support or resistance zones. Now you can get a lot more intricate and a lot more detailed, um, once you become a little bit more comfortable with finding these zones where you don't have to look for the complete obvious ones like the ones that I marked off, you can start paying attention to, okay, um, we had this zone right here where price bought up to and sold off very heavily. I could have taken this trade, or I could have taken the trade right here where it got back into that same area, right? But as a new trader, I do suggest for you to get good at marking off the obvious support or resistance zones before you start trying to go and find every single support or resistance zone. Because what I don't want you to do And this is something that I fell victim to in the beginning, is I had 300 billion support and resistance zones on my chart. I was marking off literally everything. And when I marked off everything, I did not know what action to take because I literally would have zones at every single part of my chart. And that was a complete mess. So you don't want to do that. You want to just focus on the obvious support or resistance zones and then focus on getting the support or resistance zones that you're looking for on that specific day. Well, we'll get into what that looks like, um, in a little bit from now when we start going over my different strategies. But as I mentioned, support and resistance is literally the foundation of trading. It's the foundation of technical analysis. It's something that you really need to master regardless of what strategy you're going to trade. All right, now it's time to talk about our little sidekicks right there. We have these sidekicks that we have in trading, and they're called indicators. Indicators. I know I've mentioned it a few times when we went over how to use Tradovate, how to use TradingView, but now we're going to dive into what they are, how they help us, and I'm also going to give you guys my top, uh, indicators that I personally like and also like the main ones that a lot of people use. So, um, here in the indicators tab you can actually see a bunch of different indicators on TradingView. It's going to look very similar on Tradovate. It won't have as many indicators on Tradovate, but on TradingView there's a bunch. If we go Technical, you can see like it just keeps going. Like there's so many different indicators that you can find, this indicators that other people have created and things like that that you can put onto your chart. But nonetheless, indicators essentially just compile data on the charts that we can actually see, but they formulate it into different ways. So there's like hundreds, if not thousands and thousands of indicators, but a lot of them can be foolishness. Like, you'll see a lot of new traders come on here, and I want you guys to avoid that. A lot of new traders will come here, and you'll look at their charts, and they have 13 million indicators, thinking that the indicators are some magic weapon that will help them become profitable and make money. That's not the case. Indicators will not save you. They're simply, like I said, sidekicks. Batman does not need Robin, but sometimes Robin helps. But Robin ain't stopping Bane by himself. That's all I can say. So same thing when it comes to indicators, it's just there to help us, help us give us more confidence in a trade that we're trying to take or help us see other sides of what the market is doing. Right. So there's a few indicators that a lot of people use. A lot of people use one called the moving average, right? So if you come on here, you'll press it on indicators and you'll see this blue line pop onto your charts, right? This blue line right here is that indicator that we just had added. And you'll see in the top left corner, that it populated over here, the EMA. You see 9 close. You can press this button right here to hide it if you want. You can go to settings here. You can look at the source code if you want, or you can press remove here and delete it off your chart. But any indicator that you add will be here in the top left corner. So if I add, let's say, this, or if I add any indicator really, it'll all pop up over here. But let's go back to the indicator that we were just talking about the EMA. This is actually one of the indicators that we'll be using for the strategies that we're about to go over. But let's just press it here. You can go over the settings. I'm going to show you guys the main settings that a lot of people use. So if you go in settings, you'll see this pop up under length. Essentially what the EMA is, first of all, before we get into this, what the EMA is, this blue line is simply just telling you the average price of where price has been throughout whatever period we're on. So this blue line right here, you'll see it is at, um, 195329. That's the price of where this indicator is. That's simply saying that over the last 9 candlesticks, this is where the average of where price has been. And you'll see it changes and things like that. And if we go to different timeframes, because it's going based off of the last 9 candlesticks right here on the 4-hour timeframe, it'll show this price.. But if I go to the 1-hour timeframe, it shows a different price. If I go to the 5-minute timeframe, it'll show a different price because it's always going based off of the last 9 candlesticks on whatever timeframe you're on. It's always going based off of the average of the last 9 candlesticks. But, uh, what you can do inside the settings is you can change that. So if you don't want it based off the last 9 candlesticks, then you can put it to like the last 50, which is what a lot of people will do, or they'll do the last 100 candlesticks.. And simply the main purpose of the EMA is to tell us and show us simply what direction the market is going. Because if overall our candlesticks are below the EMA, that's telling us clearly that we're in a downtrend. So we should really be looking for sells. Now, same thing, vice versa. If on average the, the EMA, because remember, that's telling us the average of where price has been. If our candlesticks are above the EMA, meaning it's above the average of where price has been, we're in an uptrend. So we should be looking for buys. Now, like I said, a lot of people play around with the length as far as 150, 30, but the main 3 ones that people use is those 3, the 30 EMA, which is showing you the average of the last 30 candlesticks, the 50 EMA, or the 100 EMA. So that's just something to keep in mind. That's what the EMA does. Now, a whole bunch of other indicators here. We have a volume indicator. So if we just go to volume right here, we type in volume, press volume, you'll see a pop-up on your charts below here, a bunch of, uh, different graphs. Some are red, some are green. Simply what that is telling you is, um, it's showing you how much volume, how many people are actually buying versus how many people are actually selling at that time. So when we see big green bars it's always aligned with the candlestick above it. So any of these, these graphs is always aligned with the candlestick above it. So this big green one is aligned with this candlestick, but you'll notice here we see big green bars. We're also going to see most of the time big green candlesticks. Same thing, vice versa. If we see big red bars, we're also going to see big red candlesticks right here. So this just helps us see the volume of what is actually happening as far as how many buyers or how many sellers are actually working at in that candlestick and who's actually winning in that. Because you have to remember, every single candlestick is buyers and sellers going against each other, or bulls and bears going against each other. That's why you hear us say like bullish market or bearish market. Bullish market just means that the bulls are winning. The bearish market simply just means the bears are winning. But that's essentially what the volume indicator does. I don't really use the volume indicator much at all. The main indicator that I really use is Kill Zones. This indicator is absolutely amazing and it's so simple. All it does is show us the trading sessions and it's great for a strategy that we're about to go over in a second. I know I keep saying that. Trust me, we're about to go over in a second. But trading sessions are arguably one of the most important things that you need to understand so you know when volume is actually happening, you know when you're going to see big moves or when you should be trading. And what Kill Zones does, you see it populated like this yellow line and this white line. This shows me clearly that this is when London session started. The other line for me, because based off my settings, it shows me exactly when London session started. The white line shows me exactly when New York session started. Now by default, this looks a lot different. So like if I reset my settings here on all of this, you'll see that um, it looks completely different when you first turn the indicator on. But if you want it to look like mine, because it shows the red graph over here as well, which is Tokyo session, which we went over, but I don't really trade Tokyo session, so I don't care to see it on my chart. You'll notice by the end of this video that I don't like having too many things on my chart. I like a clean chart and not being distracted by too much stuff. But so if you want to kind of copy my settings here, when you put Kill Zones on your account, just copy my settings that you see here. Under Style and under Input, and that will allow it to populate and look the exact same as it looks right here on the chart. So this is an indicator that I actually keep on my chart 24/7. So it just allows me to easily see when London session started and when New York session started. Now, like I said, there's a bunch of other indicators that a lot of people use. So there's the VWAP indicator, which is very similar to the EMA. It's essentially just showing you when you should be looking for buys or sells. How most people use it is if price is below the VWAP, um, I'll show you guys my settings for that as well. Usually I'll go to settings under style and I'll turn off all of these and only keep the VWAP on. But if price is below the VWAP, I'll be looking for sells, or if price is above the VWAP, I'll only be looking for buys. That's how most people trade it. So that's just another indicator for you to keep in mind. But I want you guys to truly understand this. We've went over a couple indicators. I've showed you which ones I really use a lot and which ones I don't. But you have to understand that indicators is not going to tell you the whole picture. And also, it's not something that you should just fully rely on. It has to be combined with the other things that we talk about inside of this video and the other things that we're going to talk about inside this video. Oh, another indicator that a lot of people love as well is this relative strength index. How people use this is, you see it populates down here at the top of this. When price goes outside of this, that most of the time means it's overbought, meaning that it's too expensive and it's probably going to reverse. And when price goes below it, that usually means it's too cheap and price is going to reverse. So as I mentioned, it's completely aligned. As I mentioned with the other type of indicator, the volume indicator, the candlesticks above it are completely aligned. So if we zoom in here here, and we look at price was selling down right here, and then it got to this point right here, started getting it in this area right here, and it started consolidating or chopping around. If we look on the RSI at the same exact time, we were outside of it, meaning it was oversold, meaning it's probably going to reverse. And as we see, it got outside of here, that's when it started consolidating, and then it started reversing. We can see another example example right here, right? Price was selling down. You see on the RSI, it came outside the RSI and then it started buying up because it had to go back into the RSI where it wasn't oversold. Now, as I mentioned, it's not foolproof, but it is something that you can add as a confluence. You see price sold down here, it's outside the RSI, and then it started going up. So this is another cool indicator. I use this a lot when I'm trading stocks. If a stock is super oversold,, I'll look to buy it. Um, but most of the time I'm looking to buy it and hold it for like months and stuff like that. I'm not looking to day trade it. Um, but this is another indicator that a lot of people use, day traders as well as, um, people who hold trades a little bit longer. But indicators, as I keep trying to mention, they're not foolproof. They're not something you should 100% rely on. They should just be something to add on top of what you're already doing or the strategy that you're already trading. And please Don't fall into the hype of having 300 indicators on your charts thinking that it's going to help you. I promise you it's going to hurt you more than it will help you. It'll confuse you way more than it will provide clarity. So just be aware of that. All right. So we're about to hop into the super fun, the super juicy stuff, the strategies. We're going to dive into my strategies. I'm going to give you guys my top 3 strategies. I'm going to break them down for you guys so you guys understand not just how to do them, but why they work. I'm going to show you guys a bunch of examples of them so you guys can see what's good examples, what's bad examples, the times you should take it, the times you shouldn't take it. But you have to understand that a lot of these strategies work, and even ones you'll see like on social media and things like that, a lot of them will work, but they'll work for specific people because everybody has different personalities. Everybody has different risk tolerance. Everybody has different schedules.. So you have to figure out what type of trader you are first before really diving into any strategy. What I suggest is the 3 strategies we're about to go over. I suggest you try all of them out. I suggest you backtest all of them. I'm going to show you how to backtest in a second and what that is. I suggest you backtest all of them and then kind of feel, feel out which one, okay, this one makes most sense, or this one I understand the most, or this one fits my schedule or my personality the most., and then only focus on that one. I don't want you to get confused and find 100 million strategies, cuz that's one of the biggest pitfalls. And the reason why it takes people years to get profitable day trading is cuz they have one strategy. They do good with it for 2 weeks. They, they, they study it, they practice it, they get really good at it for about a month. Then they have a 2-streak losing streak or a 3-day losing streak, or they lose for a week, right? And they're like, this strategy doesn't work anymore. I'm throwing it out. I need to find something else. Right. And they wasted all that time trying to learn that strategy just for no reason. And all because they had a little bit of a losing streak. You have to understand in trading, you're going to lose. I've been trading for over 8 years and I lose. I go on losing streaks. I literally was just on like a 3-day losing streak, maybe like 3 weeks ago or something like that. Then you also go on winning streaks. Like right now I'm on a 6-trade winning streak right now, I believe 6 trades. So it's just going to happen. But just because you're on a losing streak doesn't mean your strategy is trash. You should switch. As I mentioned, when we're— when we go through these 3 strategies, pick one, test them all out, but pick one that you're really going to focus on. And once you pick that one, don't deviate from it for at least 6 months. Just master that one strategy. You're going to lose. You're going to have losing streaks, but I promise you, You're going to get profitable faster learning one strategy versus trying to switch to another strategy, thinking that it's better than a strategy you've been trading. That's not a thing. Most of the time, that's not a thing. Sometimes your strategy does suck, but the strategies I'm going to show you are proven strategies that I have not only gotten success with, but all of my students have gotten success with as well. But there's one thing you need to understand first. You need to understand what type of trader you are. I mentioned there's 3 main types types of traders. There's swing traders, there's scalp traders, and there's intraday traders. A scalper is someone who wants to be in and out of trades very quickly. There's someone who's okay taking multiple trades a day. There's someone who doesn't care about sitting in front of their desk all day waiting for setups because they just want to get in a trade, be in it for a few seconds or like max 5 minutes or so. And then there's intraday traders. There's, there's pros and cons to each. Like a pro to scalpers is that um, you get an adrenaline rush, you get to enter a lot of trades every single day. But the con to it is that you have to be sitting here looking at the charts because you can miss your setup by literally 1 second and then you're not able to trade it. So you have to be here sitting in front of your desk to trade. But then there's the other type of trader, there's intraday traders. Intraday traders, that's what I am. I trade and I'm in trades for roughly anywhere between about 10 minutes all the way up to maybe 3 hours total. Now for me, I love that because it fits my personality. I can get into a trade and I don't have to sit there and look at the charts the entire time I'm in the trade. That just means that I get in a trade and by the time it hits either my stop loss or my take profit, it's usually within 10 minutes or about 3 hours or so. So that's intraday trading. Somebody that more so wants to get maybe 1 or 2 trades a day. You don't need to take freaking 10, 15 trades a day. And then there's swing traders. Swing traders are more long-term traders, so they'll hold trades for days at a time, really probably like 4 hours all the way up to like, it could be days, it could be weeks, it could be months, but they're never really holding a trade for less than like 4 hours or so. That's a swing trader. Now the cons of that is most of the time you're going to take a trade maybe like once a week, maybe twice a week, which can be a pro and it can be a con for some people. If you're someone who doesn't want to sit at your charts every day or look for setups every day, swing trading could be for you. But if you're someone who wants a little more action, swing trading might be a little bit boring for you. Um, but it's more passive because you don't really have to do much all the time. You're kind of just waiting for your setups to happen every few days or so. Um, so that's the 3 types of traders. So just figure out for you, based off of your personality and based off of your schedule and things like that, which one you gravitate towards the most. All right, so here is the first strategy. This is a scalping strategy. It's my favorite scalping strategy. I call it the HSS strategy, which stands for the Hybrid Super Scalping Strategy. It is a simple 6-step checklist that once you follow it, this thing has absolutely printed me money. Now, as I mentioned, all the strategies we go over are trades that I take live every single day inside of my inner circle. Now, I mentioned my inner circle. If you don't know what my inner circle is, it is where I help traders become profitable. In it, we have live trading every single day, Monday through Friday, from me and other profitable coaches. Every single trade that I take and every single trade that the other coaches take is sent out in real time as well, so you can take our same trades, the exact entries, the exact exits. You don't just get to follow our trades, but we also teach you exactly how to trade how we trade so you can do it for yourself, because the whole goal is for you guys to be able to do it for yourself, not just follow somebody else's trades. So on the live calls, we're answering questions, we're mentoring people, we're coaching people, we're walking through strategies, we're giving you reasoning for why we're looking for certain setups, why we're entering certain setups, why we're not entering certain setups. In the Inner Circle, you also get access to our dedicated trading psychologist who helps you master the mental game of trading. As we literally just went over, it's 80% psychology when it comes to trading. So it was very important for me that I did include a trading psychologist inside of my Inner Circle. I essentially made the Inner Circle to be everything that I, I wish I had when I first started off trading to allow me to get to the point that I'm at now. Much quicker. So if you're somebody who's actually serious about trading, regardless if you're a complete beginner or you're an advanced trader that's just trying to get better, the Inner Circle is something that'll be of value to you. So click the link inside the description down below to have the opportunity to join my Inner Circle, to be able to elevate your trading and be able to get help to get to the point where you want to get to, coming from people who are at the point that most people want to get to when it comes to trading. But anyways, this This is a strategy that absolutely kills it for not just me, but all of my students as well. It's one of our favorite strategies that we trade together. Now it's 6 steps. It's the first step is the chart setup. And then we're looking at market structure. Then we're looking for pullbacks. Then we're looking for our entry. And then we talk about the stop loss and the take profit. I'm going to run through all of these on the checklist. Then I'm going to show you it on the charts. I'm also going to show you a bunch of examples as well. So you know what it looks like actually on the charts. So the first step is on chart setup. We actually need to switch from regular candlesticks to Heikin-Ashi candles. And how you do that, I told you guys over here, the dropdown, instead of being on regular candles right here, you'll switch to Heikin-Ashi candlesticks. Now I'm going to be 100% honest with you, you don't need to understand anything about Heikin-Ashi candlesticks to do this strategy, but I will run through a quick, um, kind of breakdown of what Heikin-Ashi candlesticks are. But then on the chart setup, you also need to to put an indicator on. You just need one indicator, and that is the EMA. We've talked about it in the section before. So you'll come on here and just, you'll click indicators and just type EMA. You'll click moving average exponential. You'll see it pop up over here. It'll say EMA 9 close. It needs to be the 100 EMA. So we'll go into our settings right here, and next to length, we'll change that to 100, right? Boom. So now we have the chart set up. Now we need to get into the actual strategy itself. Um, and like I said, I'm going to go over Heikin-Ashi candlesticks and what that looks like in a second, but I want to show you guys the basis of this strategy and the foundation of it. So we mentioned earlier inside this video that the market just never goes straight up, right? And the markets just never go straight down, right? The markets will always go up, down a little bit, up, down a little bit, up, down a little bit. That's in an uptrend.. Now, when it's going down, it'll go down a lot, up a little bit, down a lot, up a little bit, down a lot, up a little bit. And when price is going up, then it has these little pullbacks to the downside. Those are called retracements, right? When we know that the market is overall going up and then market has retracements, we know it's going to sell down for a little bit, but then it's going to continue going back up. This strategy helps us catch it right here before it starts going back in the overall direction. Same thing vice versa. When it's selling all the way down and it has a little bit of a session where it goes up, we're catching it right before it reverses back down to go in the overall direction. This strategy is helping us do that. Now, how it is helping us doing that, we're using market structure and we're also using that EMA. If you remember, we talked about the EMA helps us determine if we should be looking for buys or if we should be looking for sells. If we come back to our checklist here, we're saying we're only taking buys if price is above the 100 EMA, meaning if the candlesticks are above the 100 EMA, we're only looking for buys. If price is below the 100 EMA, we're only looking for sells. And then step 3 is we're looking for clean pullbacks. These are the pullbacks I told you guys. These retracements are the pullbacks. When we're going up, then down a little bit, that's a retracement before it starts going back to the upside. So we're waiting for a clean pullback. And what determines a clean pullback is we're waiting for at least 2 of the opposite color candlesticks in the pullback direction. And clean means there's no wicks on the top if we're looking for buys and no wicks on the bottom if we're looking for sells. Now, what does that mean? So we're overall going up. If we're overall going up, that means we're having green candlesticks going up. So a pullback would then mean we need to see red candlesticks. And remember, we need to see clean red candlesticks in this buy analogy. So we need at least 2 red candlesticks that have no wicks on the top, right? Now, what does that look like? Because we know we talked about candlesticks before, um, regular candlesticks before, but these are Heikin-Ashi candlesticks. The difference between Heikin-Ashi candlesticks and regular candlesticks, the wicks work the exact same, meaning where you see these wicks That's where price has been throughout this entire candlestick. Same thing when it comes to the timeframe. And I don't think I mentioned this, but this strategy is only done on the 1-minute timeframe. You don't need any other timeframe. It's only done on the 1-minute timeframe. But nonetheless, these candlesticks, these Heikin-Ashi candlesticks, the only difference is the body of the candlestick is not showing the open and the close. It's not showing the beginning and the end of each candlestick, meaning where it started at and where it ended at. It's showing the average of where price has been. So on a bearish candlestick here, a red candlestick here, the start of it, the top of it, that's just the middle of the candlestick before it. We don't really care too much about the top of a bearish candlestick. Same way we don't care too much about the top of the body of a bullish candlestick because that just always starts in the middle of the candlestick before it. If we see this candlestick, it started in the middle of this candlestick. Candlestick. This candlestick is starting in the middle of this candlestick, but the bottom of a bearish candlestick and the top of a bullish candlestick, that's showing us the average of where price has been. So throughout this entire candlestick, price could have been down here. It could have been over here. It could have been up here. It could even close like this candlestick is the 5:04 candlestick. At 5:05, price could have actually closed down here., but this candlestick would still look like this because the average of where price has been is right here. That's the difference between regular candles and Heikin-Ashi candlesticks. But, um, going back to our checklist here, as I mentioned, we need at least a pullback of 2 clean bearish candlesticks when we're looking for buys. Clean meaning there's no wick on the top, just like these candlesticks right here have no wicks on the top. We need to see at least 2 of those for our pullback to be valid. If we see a candlestick like this that has a wick on the top and the bottom, that won't tell us that we are having a clean pullback. We need to see at least 2 of these clean pullbacks to the downside. Now, vice versa, if we're looking for sells and we want to see a bullish pullback before we continue in sells, we want to see at least 2 of these candlesticks, candlesticks that have no wicks on the bottom, just like this one and just like this one and just like this one. So that is what clean pullback looks like. Now, what are we looking for for our entry criteria? In order for us to enter, we need to have had— I don't know why this fly is flying around. It's trying to learn how to trade too, I guess. Anyways, in order for us to catch an entry after we've had the pullback, for us to know, okay, when we had this pullback, we already identified we're having the pullback. For us to know when this is about to reverse, we're waiting for our entry criteria.. And our entry criteria is a doji candlestick. We've went over doji candlesticks already inside of this, um, entire course, but that's what we're looking for because doji candlesticks signify that price has uncertainty and it's probably about to start reversing. So if we know price has been going up the entire time and then it sold down for a small retracement, but the overall trend is up, right? We know if on that small retracement, that small pullback, we get a doji candlestick, stick, that's probably a good sign that price is about to reverse to continue in the overall direction. So we're looking for a high volume doji candlestick. Now doji candlesticks look the exact same as they do on regular candlesticks as they do on Heikin-Ashi. So you'll see doji candlesticks here. They're the exact same where we have a small body, but wicks on the top of the bottom, preferably as equal as possible. Possible size wicks on the top and the bottom. That's what we're looking for. And you see I mentioned here we need a high volume doji candlestick. All that simply means is the size of the doji candlestick itself has to be bigger than the size of the last 1 to 3 candles. So if it's bigger than any of the last 1 to 3 candles, then that is considered a high volume doji candlestick. And like I said, we're going to go over examples of this in a second. And then for our stop loss, it's very simple. When we enter for a sell, we're placing our stop loss right above the candlestick that we enter on, right above that doji candlestick. So as soon as that doji candlestick closes, as soon as that 1-minute candlestick closes and it's a doji, we're entering the trade, right? It's a high-volume doji, we're entering the trade. And then we'll place our stop loss right above the doji that we entered on if we enter for a sell. If we enter for a buy, that would be flipped. We place our stop loss right below the doji candlestick that we entered on, and then we're going to aim for a 1:1 risk to reward ratio minimum. If you remember, when we talk about take profit and risk to reward ratio, when we're using the long position tool, we want the risk to reward ratio to be at least a 1. So we drag our stop loss below the candlestick that we entered on if we enter for buys, and then we're just dragging this take profit until this says at least a 1.. Now you can hold it longer for like a 1:2 or a 1:3 risk-to-reward ratio. One of the coaches inside the Inner Circle actually does that. He holds it for a 2:1 versus a 1:1 risk-to-reward ratio. But just be aware the win rate will drop a bit with this strategy. I've had a win rate of high 70s, sometimes low 80s, meaning I'm winning roughly like 80% of the trades that I take when I use this strategy.. But if you go for a 2:1, that might drop down to like low 70s or high 60s on the win rate. But you'll— you will be winning 2 times as much as you're risking each time. So it's just personal preference if you just want to be in and out of the trade as fast as possible, or you want to hold it a little bit longer. But we went over the checklist. Now let's see this in like— see it in motion, right? So in order for us to be able to look for buys, we need to first see market structure above the moving average, right? So here we see price broke above the moving average and then we had a pullback. We can't enter on this first pullback because this isn't creating market structure above it. If you remember, we talked about market structure. That's simply it creating higher highs, higher lows, or lower lows and lower highs. If we're looking for price to create market structure above the EMA, we want to see it start creating higher lows above the EMA. So this full first pullback would be it pulling back for the first time above the EMA. So once we've had market structure, boom, we know we're looking for buys. Next, we're just looking for a pullback, right? A clean pullback, at least 2 candlesticks of the opposite, uh, direction. So here we see price bought up, we had a pullback here, right? We only had 1 clean candlestick though, that's not a valid pullback. We would ignore that. We see price continue buying up. And then we had another pullback. This time we had 2 clean candlesticks. So this is a valid pullback. And then at that point, after we saw our pullback, we got our pullback. We're then waiting for a high volume doji candlestick. And what do we have here? A doji candlestick where the size of it, if we just plot off how big the doji candlestick is, it's bigger than the candlestick before it. It's also bigger than the candlestick before that one, and it's also bigger than the candlestick before that one. That is a high volume doji candlestick. Now keep in mind, it doesn't have to be bigger than all the candlesticks before it. It just has to be bigger than at least one of the last three candlesticks before it. It's just in this example, the size of this doji candlestick is bigger than all three of them. It looks like it's actually bigger than all three of them combined. But once we have that high volume doji candlestick, then in this instance, since we're entering for a buy, we'd go ahead and get our long position tool here. We'd click right at the top of the doji candlestick because that's our entry. We drag our stop loss below the body of the candlestick like we talked about inside the checklist for buys. Our stop loss goes below the doji wick. That's where we'll place it. And then we're going to drag our take profit until this says risk to reward ratio at least a 1. Here, as you see, it hit a 1:1 risk-to-reward ratio. And then what happened? We would have entered the trade here and we would have won the trade right here because it would have went up and hit our full take profit, and this trade would have won us money. If we look on our long position tool, we can see this is 53 ticks. If we had just taken one contract on NQ, this would have made us $250 within the matter of 8 minutes, right? Which is pretty good. Now keep in mind, this strategy, most of the time you'll hit your take profit within 3 to 4 minutes. Most of the time, sometimes it'll be a little bit longer depending on what time it is. I personally like taking this strategy between the hours of 9 AM Eastern Standard Time all the way up to about 12 PM Eastern Standard Time. That window right there usually has the most volume and the most opportunities present itself. Um, so that's usually when I like taking the trade.. But this is just one example. We can look at multiple other examples. So you'll see here, we created market structure below the EMA. Right now we're below the EMA. This is the EMA right here, this blue line. We're below the EMA. And then what did we get? We had price create bullish momentum here, started going to the upside, had a nice pullback, but it didn't give us a doji candlestick. It gave us one right here, but this candlestick right here invalidated the trade for me because I don't like seeing candlesticks that have small wicks on the top or on the bottom before we get our high volume doji candlestick. So if I get a low volume doji candlestick first and then a high volume doji candlestick after, I don't take the trade. I want to see it go from, um, being in bullish momentum to then having our high volume doji candlestick. So I wouldn't have taken this. Same thing, we had price sell down here, then it started buying up for our pullback, and we had a low volume doji candlestick, so I wouldn't have entered it. But then we had another pullback here, right? And then we had a high volume doji candlestick because this candlestick is bigger than the candlestick— not the candlestick before it, it's bigger than the candlestick before that one, and it's also bigger than the candlestick before that one. So this signifies acts as a high volume doji candlestick. So since we're looking for sells here, we would then press short position at the bottom of the wick would be our entry. And at the top of it would be our stop loss. And then we drag this until it's at a 1:1 risk to reward ratio, as you see right here. And as you see, this trade would have won literally the next minute. So we would have won this trade within 1 minute. And again, this is 56 ticks. It's always going to be different, but this is 56 ticks. So this would have made us a little bit over $250 as well. If we use just one contract, you'll see a bunch of these examples all over, but that is essentially how you do my hybrid super scalping strategy. This checklist right here, follow it to a T. Do not deviate from it. If you change anything on it, it can mess you up badly. That's why when I'm trading this strategy, I just follow this exact checklist., and I don't make any changes. All right. So this strategy is my London support and resistance zone strategy. It combines a few things we've already talked about. We've talked about the indicator Kill Zones, which shows us the different sessions that's happening. It also combines understanding sessions, which we've talked about sessions, specifically the London session. And then also is heavily reliant on support and resistance. It also talks about in here, you're going to see we need to understand market structure, which we've went over as well. Remember, the higher highs, the higher lows, lower lows, lower highs, things like that. So how this strategy works, we first need to have that Kill Zones indicator on our charts. And I only care about London session and New York session. So if you want to copy my settings again right here, you can just copy them under inputs and under style so that it will look like mine. But what I'm looking for is seeing what the market did during London session. I want to see what the London banks did. I want to see what the London hedge fund did. I want to see their price range and I want to see the highs and the lows that they created. The reason being is the high point of the London session and the low point of the London session are both great support and resistance zones for when New York session starts. It usually likes to come and tap into either that high or that low and bounce off of it. For example, right here. So we can look at when the London session started, which is this yellow line. And keep in mind, I do this all on the hourly time frame. This is more of an intraday strategy. You'll be in and out of the trade within— it could be like 20 minutes, but it could also take a few hours as well. But you're never holding the trade longer than that, so it's not a swing trade. But like I said, first step is getting that kill zones on, and we're on the hourly time frame. And what we're— this fly is still here trying to learn. This is crazy. Anyways, what we're looking for is the high point and the low point, and we're drawing those zones the same way we draw our regular support and resistance zones that we just went over in the previous section or one of the other sections. So for example, yellow line, that's where it started. White line, that's when New York session starts. So we want to see what happened from the yellow line up until that white line. We don't want to see anything else that happens after that white line. So we draw our support zone same way we draw before, from the lowest wick to the highest body, just like this. Then we also want to do the resistance zone at the top of the London period., right? Remember, that's from 3 AM all the way up until 8 AM. This is on Central Standard Time. So that's 4 AM Eastern Standard Time all the way up until 9 AM Eastern Standard Time. So we'll mark off that high point up here, right? So from the highest wick to then the lowest body, and we'll drag that across. And what we're looking for at that point— I'm just going back in time here— what we're looking for at that point when the market starts New York session we want to see price tap into either that recent low or that recent high, and we'd wait for an entry criteria. Now I'm just going to show you a quick example of what entry criteria is for me. So let's say we're looking for price to bounce off the London low. It's a support zone at the London low. We know that price has to be trending to the downside, right, to tap into it, right? So we're trying to downside, we're making lower lows and lower highs. As soon as it taps into that either support zone or the resistance zone— in this analogy, we're looking at a support zone— as soon as it taps into it, we're then looking for a clear sign that the market is about to reverse. And a clear sign is if price breaks above a most recent high. So in this analogy, the most recent high is right here, right? That's the most recent high. That's the highest point. And then price tapped into our zone. After price tapped into our zone, I'm then waiting for price to break that most recent high, and as soon as it breaks that most recent high, I'm entering into the trade. And then I'm going to put my stop loss below the most recent low. In this example, the most recent low is right here. I'm going to put my stop loss right below there. And then for my take profit, I'm not targeting a specific risk to reward ratio. I'm targeting recent high points. So I could either target this recent high point for a full take profit, or I could target this one, or I can target up here. Obviously this is all in an analogy, but that's how I look for my target. I'm not just going straight for risk to reward ratio. I'm looking for price to tap into these recent highs after we got our confirmation that price is going to reject off of here based on it, um, breaking a most recent high point like this. Now I gave you this drawing so you see what it looks like, but let me show you it on the actual charts. So. In this example, this is actually a trade that we had taken live inside the Inner Circle. So what we're going to wait for is for price to tap back into either the high or the low. In this analogy, you see we tapped into the low, but it sold too far down from it. So I wouldn't then look for sells at that point off this zone. I'd then be looking for buys because it already broke through here. It kind of invalidated this support zone, which is perfectly fine. But if we fast forward here, we can see price actually came and tapped act into the resistance zone, the high point of the London session. And then all we're doing at that point, we're going down to the 1-minute time frame to then look for that shift of market structure. And that shift of market structure is simply price breaking below a most recent low in this analogy, since we're looking for sells. So right now we saw prices going down, we create a high here, low, then it started kind of trending to the upside, a little bit of consolidation to the upside, created the low right here and then started buying up, right? We never created another significant low. It really just chopped around a little bit, like right here and right here. We never created another significant low. So right now the most recent low is all the way down here, but we'll see after it tapped into it if it creates another low that we can look for an entry based off of. Perfect. So here it created another low price, sold down, created this low point right here.. So instead of this being the most recent low, now this is the most recent low because we actually had a decent pullback to the downside versus kind of what we've seen over here, which is just like one red candlestick to the downside. We saw one big drop to the downside and price continued down and then bought up. So now this is the most recent low. So because we've tapped into our zone, tapped into the high point of London session, and we see we've created a new low, So now we can plan on entering the trade if it breaks this low. Now I don't know if it's actually going to break the low here. We'll see. It did break the low. So with our example, as I showed you, we'd enter the trade as soon as it breaks that low. So as soon as it breaks it, we'd enter the trade and we put our stop loss above the recent high. The recent high point is up here. The recent high is also up here if you want to do that. But just for this analogy case, we'll just use this high up here. And then for our take profit, we want to target recent low points since we're looking for sales. So we know our most recent low that we were looking for an entry at was right here, so we could just target down here. And as you see, this is actually a pretty big trade. This is a 6:1 risk-to-reward ratio, meaning if I risk $100, I'll make $600, or if I risk, um, $1,000, I'll make $6,000. But let's fast forward this and see how this plays out. Boom. So as you see, it ended up hitting our full take profit here, and this trade ended up taking 1 hour and 40 minutes. This is 614 ticks. So if we use 1 contract, this would have made us over $3,000 on this one trade within, um, an hour and 40 minutes, all by following this simple strategy that we just went over.. Now there's multiple examples of this. We can look at the day before it right here. Let's, um, rewind this. And this is a little bit of a different example because we have the low created here and we have the high up here, right? This is the London low and this is the London high up here. What happened though? Price broke through the London low. And if you remember when we talked about support or resistance, we know that support zones end up turning into resistance zones when they get retested. So price broke below it, then price came up and retested it. We trade this the same exact way. So because this is the retest of a support zone, we're now expecting this to act as a resistance zone and sell off of it. So as soon as it taps into it, I go down to my 1-minute time frame to see if it breaks any recent lows, and it already kind of did break a low. So we'll Rewind this. So we see here price going up, right? Up, down, up, down, up, down. It's creating all these different lows. Then it comes up here, creates another low right here, and then buys up, right? So in this example, we have many lows. We have low here, low here, low here, another low right here. This is the most recent low. It's tapped into our zone. Now we're looking for price to break above a most recent low. So let's see if we get an entry and a break above the most recent low. Right here. Let's just wait to see if we get one. So we did. So we got a break here. We would have entered as soon as it broke it, put our stop loss above the high, which is right here, and we could target any of these recent lows. We can target this low right down here. And as you see, this is about a 2.8 to 1 risk to reward ratio, meaning that I would make 2.8 times as much as I was risking. Let's see how this plays out. Boom. And as you see, this hit our full take profit within a matter of 1 hour and 50 minutes. And this would have been 174 ticks. So a little bit less than around $900 that we would have made on this trade right here. Sorry, a little bit less than $1,000 that we would have made on this trade right here within an hour and 51 minutes, all by following the same exact strategy that we just went over.. And you'll see this example multiple times. You can see right here as well. If we marked off the London high right here, the London low would be right down here. It didn't really create a support zone. It kind of just bought up the entire London, but it doesn't matter because price ended up breaking the London high here when New York session started, right when the white line started. And then it came back down to retest it right here. So this would have been a break and retest entry, and we can go back in time. See what this would have looked like. So we see here that price was trending to the downside after breaking our break and retest. It was trending to the downside. It started making some, uh, lower lows and lower highs right here, right? And then it tapped into our zone. The most recent high after it tapped into our zone is right here. So we have to wait for price to break above here to enter us into the trade. So as we see, it broke it right here. We would have entered into the trade right here. Would have put our stop loss below the low, which is right here. And then we could have targeted the high. This is the most recent high up here. We could target that for a 1-to-1 risk-to-reward ratio. And we can see how this would have played out. So as you see, this ended up hitting the entire take profit. We probably could have held this trade a little bit longer, but we don't want to be greedy. This is about a 1-to-1 risk-to-reward ratio, meaning we would have won 1.1 times as much as we would have risked. This is almost 300 ticks here, so that would be a little bit, uh, under $1,500 that we would have made with this trade, and that would have been in a matter of an hour and 14 minutes. So as you can see, this strategy is very simple. You don't have to like get good at— even though I suggest you get good at finding support or resistance zones, but you don't have to get good at it because all you're doing is marking off the London lows and the London highs. And waiting for these opportunities to present themselves. Like, you're literally— you're not thinking about anything. You're just marking off the low of London, the high of London, and then waiting for price to tap back into either that London low or that London high. And then once it does that, you're going down to the 1-minute time frame and you're looking for your entry criteria, which is simply the market structure shifting. So instead of it being in a downtrend, creating lower lows, lower highs, instead it starts breaking those lower lows and lower highs and going up, that is your signal. And then obviously vice versa if you were looking for sells. So that was the support or resistance strategy. Now for my third strategy we're going to go over inside of this video. This is honestly one of my favorite strategies to trade regardless if I'm trading futures. It works amazing with crypto. It works absolutely amazing with stocks as well, whether you want to trade it intraday or swing trade it, it doesn't really matter. I love this strategy. It's one of the main strategies I use whenever I'm trying to swing trade, or if the opportunity, uh, occurs when I'm trying to look for an intraday trade as well, I'll take this setup as well. And this strategy is called the Squeeze Strategy. It's done primarily on the 15-minute time frame and the 5-minute time frame. And essentially what it is— we haven't really talked too much about trend lines in this, um, entire course, but Essentially what trend lines are— so I mentioned to you guys, obviously we know that price goes up, down, up, down, up, down. I did a horrible drawing just now. Let me redo that. It goes up, down a little bit, up, down a little bit, up, down a little bit, up, down a little bit, right? This is an uptrend. Now we can use these trend lines to— I call it in simple terms— connect the dots, connect the lows. So we see we have a low here, a low here, a low here. We'll just draw a line that connects all of them. And what ends up happening is sometimes these trend lines can actually be used as support or resistance zones because price continues to come down to this trend line and it will continue to bounce off of it. It'll continue to bounce off it, continue to bounce off of it. Now, me personally, I've never traded trend lines as support or resistance, meaning I don't enter buys when it taps onto these trend lines and treats it like a support zone or resistance zone. I've always traded them taking break breakouts. And you remember I talked about breakouts before when it comes to regular support or resistance, where when price continuously respects the zone and then it breaks out of it, we would then look for a retest, right? But there are times when you could just take that straight breakout of that zone and actually take a trade. I do have one of the strategies inside my Inner Circle, I go over that strategy as well, just that breakout strategy itself when it comes to regular support or resistance, because a lot of times you can take that opportunity as well instead of just waiting for the retest, because as I mentioned to you guys, the retest does not always happen. So taking that breakout can allow you to make some money, uh, for that day if you wanted to. But we're not talking about that right now. Essentially, we're looking at breakouts of trend lines, but not just any type of trend lines. So we know markets always create these higher highs and these higher lows when we're in an uptrend, right? Now we know that when price is in the uptrend, price will continuously make higher highs and higher lows. But there are times when price will make lower highs as well as higher lows, and that looks something like this, where you see we're making continuous lower highs while also making continuous higher lows. And this, if we look at it and connect the dots on both the top and the bottom like this and like this, it's forming a triangle, or I call it a squeeze. And this is the setup that we're looking for with this specific strategy. We're looking for times when price is creating lower highs and higher lows at the same exact time. Because what ends up happening is, as it's creating these lower highs and these higher lows, price is continuously respecting these areas, right? Creating these lower lows— sorry, these higher lows and these lower highs at the same time. And it's squeezing it into tighter and tighter ranges. What ends up happening is when it breaks breaks either of these ranges, it'll usually break it very strong, and you can catch that breakout and make a lot of money, whether it sells to the downside or buys to the upside. So how do we capitalize on this? I'm going to show you guys it inside the drawing as far as my entries, what I'm looking for, but then I'm going to show you some real examples on the charts. So when price starts to make these— when price starts to trend, right, when we start noticing it happening, we see some lower highs being created and higher lows being created. We want to see at least 2 rejections at the top and the bottom. So if we see this high and this high, if we're able to connect 2 high points at the top trend line, that's great. But we also need to have 2 taps at the lower trend line as well, because I wouldn't take a squeeze on a time where price just created 1 high and 1 low for something like this, right? I would not, I would not look for a squeeze like this.. I need to see at least 2 rejections at the upper trend line and 2 rejections at the lower trend line. It has to look something like this. And then I'm not just taking the trade as soon as it breaks out of the trend line, because same thing when it comes to support or resistance with trend lines, price can go a little bit outside of it and that still classifies as it respecting it. Price can go a little bit above it, price go a little bit below it, but it still is respecting it. What I'm looking for, for the extra confirmation to actually enter into the trade is I am looking for price to not just break out of the trend line, but break a recent low, or the most recent low, or the most recent high. Same thing that we were just looking at in the other strategy. For example, with this setup right here, right, I wouldn't just enter the trade as soon as price breaks above this trend line. It would need to break above this trend line and break above this recent high. So I would get entered into the trade entry as soon as it breaks above this recent high. And then what I'm doing is I'm putting my stop loss below a recent low. Keep in mind, I'm looking for these— I'm looking for this squeeze to actually happen on the 15-minute time frame. But once I'm getting close to an entry, I'm going down to the 5-minute time frame for my actual entry. But nonetheless, I'd enter as soon as it breaks above a recent high and breaks outside of the squeeze. My stop loss would be below the recent low on the 5-minute time frame. Like I said, we'll go over a real-life example of this in a second. And then we're just targeting recent highs. We could either target that recent high, or if there's someone up here or one up here, we could target that. I don't have a set risk-reward ratio that I'm going for, but most of the time I don't like to take anything less than a 2-to-1 risk-reward ratio trade. But there are some exceptions, like if it's an absolutely beautiful setup, I'll take it if it's like a 1.8 or something like that. But that is essentially the squeeze strategy. That's exactly what we're looking for drawn out. Now let's look at the actual charts. So on our 15-minute time frame here, let's delete all this. Now I have a really, really clean example here. Now you can do this on regular candlesticks or Heikin-Ashi candlesticks. It does really matter. I personally believe it's a lot easier to see these rejections on Heikin-Ashi candlesticks rather than on regular candlesticks. Let's rewind a little bit. So as we see here, we can see a squeeze is happening. We're creating lower highs, right? And also creating higher lows, right? Now this is— you can see this, but if you go to Heikin-Ashi candlesticks, it makes it just a little bit easier to see it because we have all these differentiating colors. Um, so it's really up to you, but like I said, I think it's a little bit easier to see it on Heikin-Ashi candlesticks. But nonetheless, we see it right here. Um, we'll do this example on regular candlesticks, but we see it right here. We see price has at least 2 rejections at both the upper trend line and the lower trend line.. We see 1 right here, 2 right here, 3 right here at the top. We see 1 on the bottom, 2 on the bottom, 3 on the bottom, 4 projections on the bottom. Then what we would look for is either a break of this low since this is the most recent low, or this high since this is the most recent high. Now we'd go down to the 5-minute timeframe when we know we're looking for a setup. Keep in mind, the further it gets into the squeeze, the more likely we're about to get a setup. So right now you see we're getting closer into our triangle. Closer into our squeeze area here. So now we just wait to see if we get an entry. Let's just fast forward a little bit. So we didn't quite break the low yet. This looks like it broke the high. So we would have entered as soon as it broke the high. We'd put our stop loss right below the most recent low. The most recent low was right here. And then we would target, let's say, this recent high up here. Let's say we're just targeting this recent high. So we would enter the trade as soon as it broke this most recent high right here. This is our entry. We're entered into the trade. We can fast forward, see how this plays out, and we can see that it ended up playing out and hitting our full take profit. I'm pretty sure it ended up going even further as well, so we could have held this trade a little bit longer. Um, I don't know, it doesn't matter. I mean, we could have had it to, I guess, closer to this high over here. So for about a 2:1 risk-to-reward ratio on this specific trade.. Now that's one example. Let's go over another example because I want to make sure you guys really understand it. And we'll do this one on Heikin-Ashi candlesticks so we can see what that looks like, right? So here in this example, we can clearly see we have one rejection here, two rejections here, three rejections on the upper trend line. Here we have one rejection, we have two rejection, and this is the third rejection right here on the lower trend line. And as you see, uh, well, technically this is we only have 2 rejections on this trend line due to the fact that this would be our second trend line rejection, um, and we'd be looking for a break of it. And we see on this candlestick here, it looks like it's about to break it. Well, right here would be the break of it. So as soon as it breaks below this low right here, we'd get entered into the trade. We'd put our stop loss above a recent high point. This is the most recent high point over here. We could target this low right here, but that is a bit, um, this risk-reward ratio is a pretty trash. So let's just try and target a zone over here or something like that. Um, this is a 1-to-1, so let's just see how this ends up playing out. So that was the entry right here. We're now— we now would have been inside of the trade, and we can fast forward and see that this trade would have ended up winning, um, here on the 5-minute time frame. But keep in mind, I saw this setup on the 15-minute time frame. So we had 1 rejection, 2 rejection, 3 rejection on the 15-minute time frame, and 2 rejections on the lower trendline on the 15-minute timeframe as well. But like I said, we enter on the 5-minute timeframe. But as you see, this trade would have won. We would have won ourselves a quick 1-to-1 risk-to-reward ratio. Could have held it a little bit longer and made some more money, but we're perfectly fine with taking that 1-to-1. So as I mentioned, essentially the strategy is simply waiting to see lower highs and higher lows being created at the same exact time, and then taking the breakout as soon as breaks not just the trend line, but also breaks either the recent high or the recent low. That's when we're taking our entry. All right. So those are the 3 strategies that I really suggest for new traders to test out and try for themselves. See if it fits their personality, see which one gravitates or they gravitate towards the most, which one they understand the most. Um, I told you guys it's the same exact setups that I trade live in my inner circle every single day. If you want to get access to the inner circle, like I said, I'll leave a link for inside description of this video. But I told you guys you need to test out these strategies. I've mentioned backtesting a few times inside this video. Now I'm going to show you guys exactly how you backtest. One of the most important things you need to do as new traders— think of it like this— backtesting to traders is like practice is for athletes. If you're a basketball player, you're trying to get good at playing basketball, but the only time you play basketball is when you have a game You're going to suck compared to someone who plays basketball every day for hours a day, no matter if they have a basketball game or not. Same thing when it comes to backtesting. You need to put in the time to backtest. I want you to think right now, I don't know what field you guys are in for work, or if you work, if you do anything right, whatever hobby you have right now, whatever skill you think you're good at, I want you to rewind to the first day when you first started doing it and think about how much you sucked. Compared to how you are right now. The only reason you got good at it, whether it's your job or a hobby or career, whatever it is, the only reason you got good at it is because you put so much time and repetition into it over the last months or years or however long it's been. Same thing when it comes to trading. This is a, a career that you need to put time into. You need to work towards it. You need to get familiar with the charts. You need to get familiar with being able to spot support or resistance. With spotting these trends, with spotting these squeezes, with spotting all these things on the chart. And the fastest way to do it is with backtesting. Reason being is if you're coming on the charts every single day and just looking for your setups, yeah, maybe you'll find 1 or 2 or maybe even 3 opportunities a day, but that's only 3 reps that you get to get in every single day. It's going to take you so long to get to a level of understanding where you feel confident in your trading. But with backtesting, you can actually trade or take hundreds of trades in one day. Therefore, excuse me, therefore getting you more familiar with the charts much faster versus you trying to just do it in the live markets. So what is backtesting? How do we do it? And then we're going to go over also the best practices when it comes to backtesting, because as I said, with backtesting, you need to track things. Trading is really all about data. It's all about patterns, as we've mentioned before.. But in order for you to understand the patterns and know the patterns, you need to track what you're doing. Because right now, I promise you, if you start trading, maybe you remember the trades you took yesterday or last week, maybe 2 weeks ago, but you cannot tell me the trades that you took a month ago, 2 months ago, 3 months ago. And if you don't have that data, if you don't have that tracking, you can't learn from it. Um, so it's important that we do track these things. But first of all, let's just go over how to actually backtest. If you have TradingView, and you have— you've purchased the, um, I forget what plan you need to be able to have this replay feature. I'm sure you can go to the website and see, but you'll have this replay feature right here. You've kind of seen me using it a little bit going over the strategies, but essentially what it is is when you press this, you're able to actually like go to any point. Let's say I want to go right here, and it would delete all the other candlesticks in front of it. And what that allows me to do, it allows me to trade as if I'm trading at this time right now and I can't see anything else that happens. So it allows me to not cheat. Now, if you wanted to backtest regularly, you could come here and be like, oh yeah, this is, um, this is a resistance zone right here, and I would have at this point taken a sell right here and made some money when it sold down for a little bit, or I would have taken this breakout right here. But the only reason you're saying you would have done all this is because you already see what actually happened. With using this replay feature, it forces you to actually do what you would actually do because you don't know what— like, I don't know what's going to happen after here. I haven't memorized the charts to know exactly what would happen after. So that's why this replay feature is super, super cool. But all you do to use it is, like I said, the first time you press it, you'll see this blue line pop up and you'll just click wherever on the chart. Now realistically, what I like to do, I like to just scroll back and sometimes even just close my eyes so I don't see anything and there's no possible way for me to cheat. And I'll just go back to a random time and I'll click on it. So I don't know where I'm at. I don't know what price is about to do next. And then once I'm there, I would start looking for my strategy or I'd start setting up my charts the same way I set it up. One of the main things you have to remember when it comes to backtesting is you want to backtest the same exact way that you actually would trade, meaning you want to backtest the same pairs or the same instruments that you would actually trade in the live market. You want to use the same strategies that you would actually use in the live markets. You want to be trading at the same time that you'd actually be looking at in the live markets. Like if you're backtesting, you're backtesting what's happening at freaking 4 AM in the morning, knowing you're not going to be trading at 4 AM in the morning. That's just pointless. You want to be trading the time when you're actually going to be trading. Like for me personally, most of the time I'm trading from around 8 AM Eastern Standard Time all the way up to about 1 PM. Eastern Standard Time. That's when I'm looking for setups, or that's if a setup happens during that window, I'll take it. That doesn't mean I'm kind of sitting there the entire time. So I know my time window of when I actually will trade. So when I'm backtesting, I'm only looking at that time window. So let me run you through a quick example of kind of how I do this. Um, having the Kill Zone indicator on is cool because it allows us to see, okay, when does New York session start? And as I mentioned, that's really when I start trading. So most of the time I'll use that replay feature and just go to— I'll click a random white line because that I know is the start of New York session. So click a random white line. Let's say we're doing the London, uh, low and the London high support or resistance strategy. So this is the London high right here. We'll mark that off. Right now we don't have a London low, um, as far as our support zone, but we can mark off the London low right here. And then I would mark it up the same way that I would mark it up in the live markets And then what I would do is, um, you can go down to whatever time frame you usually look for entries on and use these tools over here to fast forward. There's a couple tools. The select bar tool down here, that brings up that blue line that allows you to go back some more if you wanted to. Or you can press this play button, which would just automatically make the candlesticks start playing. If you see here, it just automatically starts playing. Then you have this one right here, which just lets you skip forward one candlestick at a time, which is most of the time what I end up using. Because as you see, using this fast forward button, it was kind of fast and I would have— I missed— I literally missed the entry that I would have taken for the London high reversal strategy that we went over. But anyways, I'm just showing you guys. Then this 10x that you see here is simply how fast that play button will go. So I can move it to 1 and it'll go a lot slower. If you see here, I press play and now it's just doing one candlestick at a time. And then this right here, this is when you press this button, it'll jump to real time. Now I suggest for you to keep this— if you click the number right here, it might look different for you. I have it to auto select interval, meaning when I go to the 15-minute time frame, if I press skip, it's going to skip forward 15 minutes. If I'm on the 5-minute time frame and I press skip forward, it's just going to skip forward one 5-minute candlestick. But if you don't have this auto selected on, it would not update automatically. It would do it based off of of, let's say I go to— I'm on the hourly time frame, I can make it every time I press the skip button, it'll go forward a 10-minute candlestick. So you see, I won't see a new candlestick, it'll just show me the price action in each candlestick. I recommend having it on auto select interval. But let me rewind to another random time here so I don't know what's going on. Let's just go right here, and then let's do this analogy or this example as if I'm doing the London, high and the London low, uh, strategy. So let me mark off my London high. Let's mark off my London low. And then let's go down to the 1-minute time frame because I know I'm looking for entries after the— on the 1-minute time frame after it taps into my zones here. So right now, if we go to the 1-hour time frame, it's still in that zone. So if I fast forward here, I'm waiting to see, okay, at this point it's breaking through the high. But remember, with the strategy, I can wait for a break and retest. So let's just wait to see if we end up getting a retest. Let's just get forward. Okay, so we did get price to retest here, and now we have to wait to see if we get an entry, because remember, for this strategy, we need price to then break a recent high. And right now, the recent high is up here, so I put an entry here, stop loss below here. And let's say if I do get that entry, our target this high point over here. So let's just see if this ends up playing out. This is exactly how I backtest. And that would have been an entry. We just would have got entered into that. Let's fast forward. Let's put this faster. Boom. And this trade would have ended up winning. And I just keep doing this over and over and over again. So if that's the strategy I'm looking for, I'm literally backtesting the same exact way that I'd be trading live inside the markets. I traded the same exact way. I waited for my retest of it. I took my entry right when it would've actually entered into it. Now keep in mind, I'm just using this drawing tool. I'm not actually entering into trades, but that's where the whole list that I have right here comes into play. 'Cause I shouldn't just take these trades and go onto the next trade. Once I take the trade, I should track the data on it so I can build data on that strategy when I'm backtesting. So I listed here for all of you guys, if you wanna screenshot this or write this down,, to be able to know what you should be tracking when you're backtesting. Every single time you take a trade, you should track, was this a winning trade? Was this a losing trade? Or was it a break-even trade, right? Also, did I win or did I lose the trade? Also, you want to track how many ticks you won on that trade, or you could track the risk-to-reward ratio. So for in this example, if we go back for this trade we just took, the amount of ticks we won was 36 ticks. Or I could write— realistically, I do both. I'll write how many ticks it was and I'll write the risk-to-reward ratio. So I'd write 36 ticks and 1.67 risk-to-reward ratio. So we want to track that. And then the next thing we want to track is what time of day it was. When did I actually take that trade? And then also what day. So this trade was actually taken on a Monday and I took it, what, at around— I entered into the trade at around 8:18. In the morning. So I'd write all that down. And keep in mind, you could just write this down on like in a notebook or on a notepad or on a spreadsheet. I have a lot of students that write it on spreadsheets. So that's something that you could do as well. But you just wanna have it available for you. Then you also wanna write, was it a buy or a sell? Meaning, did you enter for a buy or did you enter for a sell? The reason you wanna track that is 'cause you'd be surprised. There are a lot of traders that only buy or only look for buy setups no matter what. And there's also a lot of traders that only look for sell setups. Reason being is some people realize after having so much data that they're just better at seeing buy opportunities, or they're just better at seeing sell opportunities. So they'll just focus on that. But if they never tracked that, they would never know that. They would never know that they're better at buying or better at selling, or they would never know that their best trading day is a Tuesday, or their best trading day is a Wednesday between the hours of 10 AM and and 4 PM or whatever that hour range is. That's why we need to track all these things. Now, I didn't mention here, but you need to track why you think you won or lost each trade. So like for this example, you could write a quick— just, it doesn't have to be super long, it could just be one sentence that's like, I believe, I think I won this trade because price was going up, we were in an uptrend all of London session, then price broke above London session at New York and it gave me a break and retest and I entered into it. I believe that's why I won it. Or if I say, if I lost a trade, I could be like, I think I lost a trade because I entered too early. I didn't follow my entry criteria. My take profit was way too big or my stop loss was way too tight. You would just write things like that. But you wanna track that as well 'cause you might start seeing patterns. You might start seeing patterns that's like, okay, most of my losing trades is because I had too small of a stop loss. Or most of my winning trades is because I waited for this, this, and this to happen. Versus entering after just seeing this. So you want to track all that and compile all that data. And then after every single trading backtesting session, as y'all saw, I went through this one trade in what, like 3 minutes, right? So I could literally— and if I sit here for an hour, I can get 20, 30 trades in. If you stay here for 2 or 3 hours, you can get 100 trades in. And that's 100 reps of you practicing your one strategy and getting data on that one strategy. So now you can see how valuable backtesting actually is. And realistically, it can be very fun. Like, I used to, when I first started off trading— I wouldn't say to do this, but when I first started off trading, I was obsessed with it. I was spending like freaking 10, 11 hours a day backtesting. I'm talking about, it was so bad. I— there's only so far back that TradingView lets you go. I maxed it out on like every single ticker. It was bad. It was, it was like when I closed my eyes, every single time I closed my eyes, I would see candlesticks. That's how much I was staring at the charts. Now, I don't suggest you doing that. That might have been a little bit overboard. But if you can get an hour or 2 hours in every single day, you'll just notice how fast you progress when it comes to understanding the charts, understanding the strategy, understanding and being able to spot these support zones or spot these HSS strategies or spot these squeeze setups. Or whatever it is that you are actually trading. So it's extremely important that you do put that time in to backtest. It's one of the most beneficial things you could do as a new trader to be able to start seeing results much faster. Now, this was all— all this replay or backtesting was done straight from TradingView charts. There is another platform that I like a little bit more than TradingView for backtesting if you have additional funds. It's called FX Replay. .com. As you see here, FX Replay, it essentially works the exact same as far as the replay feature on here. If this will load— yeah, it essentially works the exact same as the replay feature on TradingView. So I'm not going to go over how to use their platform because it literally works the exact same. The charts look the exact same. But the thing I like about FX Replay is that it'll track a lot of the things for you. You can actually enter the trades as well, so it'll track your wins, your losses. It'll track how many ticks you won, what was your risk-to-reward ratio, what time you entered the trade. The only thing you have to manually put in is that whole sentence of why you think you won or lost each trade. And FX Replay actually lets you go much further back. Like, you'll know, or you'll see if you put a lot of time into backtesting, that you'll kind of get maxed out on TradingView as far as how far back you can go. Like if I go back here and go to the 1-minute time frame, you'll see the data point is unavailable, meaning it doesn't let you go that far back. But I'll be able to go that far back on FX Replay. So if you have additional funds, this is another cool platform. I'm not sponsored by them or nothing like that. It's just literally the platform that I use to backtest most of the time. But like I said, it literally works the same exact way as TradingView, how I just showed you guys with the replay feature, the select the bar. The play button and the skip fast forward. So just keep that in mind as well. All right, so we talked about backtesting and we touched on how to like track your backtesting overall, but you also need to journal your actual trades. You need to journal your live trades and keep track of it. So we're about to go over how the best way to do this so that you can gather as much of the right data as possible to be able to learn from that data to become a better trader overall, not just backtester, because Again, backtesting is just for us to get comfortable to actually trade in real life, but we need to journal our real-life trades as well. So why is journaling, um, or what is journaling? Journaling your trades involves keeping a detailed record of each trade that you make. This typically includes the date and time of the trade, the instrument traded, the entry, the exit points, the size of the position, the risk amount, and any reasons or strategies behind the trade. Now, this is some of the benefits of journaling your trades. It gives you a track record. It helps you maintain a detailed record of your trades, including profit and loss, win rate. And these are both things that can be valuable for analyzing your performance over time and just giving you tips on how you can grow, how you can scale from there. Another benefit is the analysis. So you shouldn't just be writing down your journal and journaling your trades, but you should be reviewing them. And by reviewing your journal, you can identify patterns in your trading behavior. You can learn from your mistakes, and you can refine your strategies by the data that you see in your journaling. Journaling can also help you manage emotions like fear and greed by allowing you to reflect on your decisions in a more rational way. A lot of times when you're trading, sometimes let's say you took 3 trades in a day, and let's say you, you won won one trade and then you lost two trades, and those last two trades have you feeling really, really bad. But if you zoom out and look at the entire trading day, you could still be net positive because that first win inside the beginning of the day. So journaling allows you to have that emotional control to be able to reflect back on the bigger picture of your trading. Even if you have like two bad trading days in a week and then like you feel really bad about it, but then you look back at your journal trades for the past week and you see how you're still profitable on the week. That's just extremely beneficial and helpful. Now, accountability— it also holds you accountable for your trades. So, um, you're just more likely to stick to your trading plan if you know you have to record every single trade. You know you have to write down, oh, I took this trade and this is why I took this trade. But then if you already know you took this trade for no apparent reason, you're thinking in your mind, dang, I gotta actually write this trade down, or figure out some reason to say why I took this trade. Just make up something. It just helps you hold yourself accountable knowing that you have to write that down, you have to journal that, and you're gonna have to read that back over, um, every single time you review your journal. Um, it also helps with improving your trading. So journaling can help you improve your decision-making process by forcing you to have reasons for entering or exiting a trade. It can help in development of new trading strategies by providing insights into what works and what doesn't You'll see a lot of patterns in your journal trades where you might see, okay, every single time I take a trade, I close that at 2:1, but 90% of the trades I take, I could have held it for a 4:1. And that just allows you to now look at each trade and hold it to a 4:1, which in turn allows you to make more money. But you would've never known that if you didn't journal your trades to be able to see the patterns, to be able to see the different improvements that you could make. With your strategy. By journaling your trades, you can assess whether you've been effectively managing your risk exposure or not, because in your journal you're going to be tracking how much you risked, how much you lost. If you see huge spikes on random days, like usually you lose $200 but then randomly you started losing $800 per trade, you would be able to see, okay, I'm doing something wrong here, I need to dial it back. It's also a very, very valuable learning tool. So it helps you understand different market conditions and how various factors influence your trades. So in your journal, you'll be able to see, okay, on news days, I lose trades most of the time, or on Tuesdays, I lose trades a lot. So I should just avoid news days. I should avoid Tuesdays. And you could just learn from those things. It just, like I said, um, lets you find valuable learning opportunities from the trades that you have already taken. So this is how you properly journal your trades, because you need to journal specific things that allow you to track the right things. Now keep in mind, uh, later on inside of this session, I'll tell you there's a way that you can track it automatically. Uh, we'll get into that later on inside this session. If you wanted to, you could write this all down in like a spreadsheet or on a notebook or just in your notes tab on your phone or something. It doesn't really matter as long as you have it and you can find it. Um, that's fine. So the first thing you want to track is what day you took that trade and what time you entered the trade. Next thing you want to add on is what instrument you traded. You want to track what instrument you traded. You also want to track the direction of the trade, whether you went long, you went for a buy, or you went short, went for a sell. Also track the size of the position you took. So if you took 1 contract, 2 contracts, 3 contracts, 4 contracts, you want to track that as well. What is the amount of money that you risked on the trade? So if the trade had hit your stop loss, What was the risk amount that you went into the trade with? You wanna track that. And then also track what was your expected profit that you expected to make on the trade if it hit your full take profit. You need to track what strategy you use. This is gonna be helpful because you're gonna see you have a better win rate with certain strategies, or you, you make more money with other strategies, and this will help you narrow down, okay, let me stop taking this other strategy and only focus on this strategy because it's my best performer. You also want to write down your entry reasoning. For example, did you enter based on break of the trend line or break of a recent high or low, or because you saw a doji? You just want to write that down so you can see. Also track the outcome, obviously, like did, did it hit full take profit or, uh, did it hit your stop loss? Did you make money or did you lose money, essentially? Also write down how you manage the trade. Like, did you make any changes to the stop loss? Did you take partial profits out? Did you hold the trade longer than your take profit? And then write down why you did any of these changes if you made any of those changes as well. Um, you can write down the overall market conditions as well, as far as like, was it news events happening? Was any huge volatility as far as any huge amount of volume? Was it slow? Was it chopping around? You can write all that down so you can see, um, just patterns in, okay, if I take this strategy during super high volume days, it usually does better, or it doesn't do as good. I should avoid it on high volume days. So you want to write that down as well. And then your reason for the trade. So that was your rationale that comes down to your strategy and your entry criteria put together. And then this is huge. This is important. You need to write down why you think you won or why you think you lost each trade. Like I said before, that could just be one quick sentence that's like, I think I lost the trade because I entered too early. I think I won the trade because everything aligned and I also waited for this extra confluence, right? Or also waited for this extra break of structure or whatever it is, right? Just write down why you think you won or lost each trade. And that's essentially all the things you need to track. Now I know it might seem like a lot, but there are platforms out there who will track most of it automatically. You can just connect like your account, whether it's a prop firm account or a, live account or a demo account, no matter what it is, right? You can connect it to the account. I'll leave the automatic trading journal that I suggest and the one that I use in the description of this video. It's called WAGMI Trader. Like I said, I'll just leave a link for it in the description of this video if y'all want to use that one. It's literally the one I've used for majority of my trading career, but there are other ones out there as well that you could check out if you wanted to. But like I said, those automated trading journals will track majority of them. You will have to manually put in why do you think you won or lost each trade? What was like your rationale for moving your take profit or taking partials? Just things like that. But the rest of the things it'll track as far as what time you entered, what day it was, how much you risked, how much you won, how much you lost. It will track all that other thing. So it's super beneficial to have those automated trading journals helping you out. And then never forget to always review your journal. I suggest at least once a week Maybe on like Saturday, just go back and review your journal for the week. And then every like once a month or so, let's say at the end of the month, review your journal for the last month or the last few months. That's just going to allow you to actually see the data and learn from the data and then adjust and be able to grow and improve from the data that you've seen in your journal. Because it makes no sense to journal all of this and then never look back on the journal. All right. So we understand strategies. We understand how to backtest those strategies. Now, the next step is is putting some money behind it. How are we actually going to use these strategies to make money? I hinted to you guys earlier that I would tell you guys a way that you can actually use other people's money to trade with, leverage other people's money, because I know realistically most people don't have thousands, if not hundreds of thousands of dollars to get started with day trading. And then it's going to be extremely hard for you to make some decent money trading if you only have a few hundred bucks. But good for you, I have a solution. There are these things in trading, specifically day trading, called prop firms or funded accounts. Essentially what funded accounts are, they are companies where you're able to go to them with, let's say, $300, $400, $500, $600, and you pay them like $600, for example, or let's use $500 in this example for easy numbers. You'd pay them $500 and that would allow you to take a challenge. Simply what that challenge is, That is you having to prove to the prop firm or the funded account company that you know how to trade. And how you do that is you have to hit certain profit targets without losing a certain amount of money. That's how most of them kind of work. So you pay $500, you take this challenge, you trade this account. And let's say for this example, when you pay the $500, they give you a $100,000 account to trade with. You have to get it to $104,000 in profit. If you do that without losing, let's say, make $2,000 first, then you get funded. Once you're funded, then they'll give you a fresh $100,000 account, and the profits you make on that account, you get to keep a percentage of it. So you don't get to keep that $100,000, but with that $100,000, you can now trade with that, and all the money you make on that, you get to keep a high percentage of it. Most of the time, you'll keep like 80 or 90% of it. So if you bring the $100,000 real account after you pass the challenge phase, if you bring that $100,000 real account to, let's say, $10,000 in profit, you're able to take out $8,000 or $9,000 and that goes directly to your bank account. You can use that to buy sneakers, pay rent. I don't know, put a down payment on a Lamborghini or something. I don't know. It's up to you. But that's essentially how they work. Now, the cool thing about prop firms is let's say you pay that $500 and you don't pass the challenge, you don't hit that profit target and make that certain amount of money. To prove to them that you know how to trade, but instead you lose $3,000. You don't owe them $3,000, so you're not out of pocket $3,000. The only money you're out of pocket is that initial fee that you paid in the beginning to take that challenge, to basically prove to them that you know how to trade. So as you can see, this can get to the point where you can leverage other people's money drastically, because if you had went by yourself and used that $500 to and put inside of a live account, you would be able to open up, um, one ES contract and be able to take one contract and maybe make— if you're good enough, maybe make a few hundred dollars a week. Versus if you took that same $500 and purchased the funded account, and then now you're trading with $100,000, if you just make 1% on that account per trade, you're making $1,000 per trade. Let's say you took 20 trades or you won 20 trades inside of the month, you'd be walking away with $20,000 off of a $500 investment. You're all in for $500. You don't owe them $4,000 if you lose the account. You don't owe them any of that. If you lose the account, if you blow the account, which is how we say it, meaning you hit that max loss amount, then all you'd have to do is reset the account. You can do that by paying another couple hundred bucks or so to actually reset the account. That's essentially how prop firms are. And that's honestly the route that I suggest for most people to go with. Now, I'm going to be honest. The goal for every trader should be to have a live account, but the route that I suggest for all my students to go and the way that they have seen success with it is by using the prop firm, making money on the prop firm, taking payouts from the prop firm, and using that to fund their, their own live account versus you taking out of your life savings out of your college tuition, out of your rent money to load into a live account, use it to purchase a prop firm, trade their money, take the payouts you make from their accounts and put that into your live account, if that makes sense. So that's essentially what prop firms are. Now, what are some of the benefits of prop firms? So obviously the first big main one is that they give you capital. As I mentioned, you don't have to risk your own life savings. You don't have to risk your rent money. You don't have to, do any of that. They give you capital to trade with. Another good benefit of it is that they force you to have risk management because in order for you to prove to them that you know how to trade and pass that challenge before you actually get that real funding, in order for you to do that, you have to follow their rules. A lot of them will have different rules. And I'm as far as like, you can't lose a certain amount in one day. You can't lose a certain amount over the course of the entire account. You can't hold the trade too long. You can't take more than whatever amount of trades per day. Like, they have a certain amount of rules set in place already that are great for a new trader to have kind of forced on them, for lack of better terms, just due to the fact that us as traders, sometimes when we first start off, we can know we're not supposed to risk too much. We could know we're not supposed to take 100 trades a day, but we're the only person that is in the room. We don't have no boss. We're the only person here in front of our computer.. So we'd have to be the one that holds ourself accountable. And a lot of us don't do that very well. So, but trading on a prop firm forces you to do that. So that's another great benefit of prop firms. Another great benefit is it allows you to use other people's money to make money. And I know you guys have heard this multiple times that all rich people use other people's money to make money, even in different industries. If you think about real estate, if you think about investing in other businesses, everybody always uses other people's money to make money, whether that's you going to the bank, and taking a loan out, or you're getting other investors and things like that. It's always better to use other people's money to make money. Hence the reason why this is a huge benefit with prop firms. Another benefit is you don't have to risk your own money. As I mentioned, you're capped on how much money you lose, no matter how much money you lose in the account period. The only amount out of your pocket is that initial fee that you paid for the prop firm challenge to be able to take the challenge. Now, another benefit is if you fail the challenge, as I mentioned, you could just reset it. Like, you literally could just pay a few hundred bucks to reset it and start all over again and try again. Most of them don't have any issues with you resetting it multiple times. Like, you can reset it 10, 20 times if you wanted to. Now, hopefully you don't, because you do have to pay for those resets, and I don't want you guys just throwing money away. But there's usually never a limit on how many times you can reset an account. You would just keep getting these accounts until you've passed it, and then you can start making money and taking payouts on it. Now, it's not as easy as that, right? Because there are so many problems that I see people run into. Keep in mind, I've been doing this for a super long time. Prop firms weren't super big when I first started off, so I was never heavily in prop firms. Now I'll trade prop firms as well as my live account. But over the past 8 years and having taught thousands and thousands of people at this point be able to be profitable traders, I've been able to compile a bunch of tips that actually allow you to make money with prop firms versus you just continuing to lose money by buying accounts, resetting accounts, resetting accounts, resetting, resetting accounts. That's not what I want for you guys. I want you guys to be able to get these prop firms and actually be able to leverage it to make money versus just you continuously putting money into the prop firms and losing your money on the prop firms, even though you're not losing it in the trades. So I put together a couple of tips for you guys. That when followed drastically increase your chances of actually making money with prop firms. So the first thing is to not trade your funded account every day. This funded account, a lot of times, and I'm talking specifically in the challenge phase, because as I mentioned, you always have to go, or most of the time you have to go through challenge phases, meaning you pay that fee and then you have to make a certain amount of money proving to the prop firm that you know how to trade., and then they'll give you that actual account to trade with that you can actually start taking withdrawals from. But you shouldn't be trading that account every single day. You should only be trading it when the best setups happen. So after you've done your backtesting, after you've done your testing of all the different strategies and you know what strategy you're gonna stick with, you're gonna be able to see and spot, okay, this is a perfect version of that strategy, or this is not so good of a version of that strategy. I should probably ignore the setup when that happened. Happens, or I should definitely take the trade when this happens. So you're going to see different patterns and you have to be mentally strong enough to understand that you shouldn't trade that funded account every single day. You should only trade it when you see those optimal setups when it comes to your strategy. Now, another tip is a lot of people, they see the $100K account, they see the, the $150,000 account, and they just want to risk $300,000 per trade. Like they want to open up 300 contracts and just try and pass the challenge in one day, which most prop firms don't allow you to actually do. There's certain rules where you have to have a minimum amount of trading days. You can't make too much money in one day, like consistency rules that just show that you're a consistent trader versus you just getting lucky one time and opening up a big trade and hitting that profit target. A lot of prop firms, you can't do that. But I'm saying all that to say, a lot of people will come into this and see these huge account sizes. And just risk way too much. And then they wonder why they keep failing the accounts and keep blowing the accounts and keep having to reset and buy new accounts. This chart right here, this is what I've used and I've taught to my students that if you abide by this, your chances of not blowing your account drastically increase if you stay with these limits. So the limits is to risk about 0.5% to 1% of your account on each trade. So most funded accounts allow you to purchase like a $25K account or $50K account or $100K account or $150K account. Keep in mind, all of these will cost different prices depending on whatever prop firm you're trading at. So if you want to start small, you could get $25K accounts because they are cheaper than obviously like $150K account. But just keep in mind, you won't be able to leverage as much or make as much on the smaller accounts as you would on the bigger accounts. I mean, a $25K account, you can still make a decent amount of money on. Nonetheless, with all that being said, if you are trading on a $25K account, I always suggest for people to stay under $125 of risk per trade. And earlier inside this video, or inside this course, we've went through how you calculate your risk when you're looking at the tick amount, then you're multiplying that by how much each tick is worth, whether you're trading NQ or MNQ or ES or MES or whatever you're trading, right? So you need to do that calculation and make sure that you're adjusting the contract amount with your stop loss. So each trade, if it hits your stop loss, will be less than $125 per trade if you're on a $25K account. And that'll be $250 per trade if you're on a $50K account. It'd be, uh, $500 per trade if you're on a $100K account and $750 per trade if you're on a $150K account. Now I know these numbers might look a little bit low to some people. I don't know, but think about this. Do this math right now.. So I've went over this a few times on my YouTube channel, but let's just imagine you have a $100K account and you're risking $500 per trade, right? And let's say on average you're hitting a 2:1 risk-reward ratio trade, meaning every time you lose a trade, you're losing $500, but every time you win a trade, you're winning $1,000 because you're always winning a 2:1, meaning you're winning 2 times as much as you're risking. Now imagine you took 20 trades in a month, right? You took 20 trades in a month. Let's say you had a 50% win rate, meaning you won one trade, you lose one trade. So you won half of the trades that you took. So if you had 10 losses, that means that you lost $5,000, but then you also won 10 trades, and each trade that you won, you made $1,000. So at the end of it, if you subtract your total profit with the total losses that you had, you come out net $5,000 on that account. And that's all with only taking less than one trade per day, risking $500 per trade. And you have a $100K account that costs you $500. I keep that in mind. This costs you $500. And in one month you made $5,000 on it with a 50% win rate, which is not a high win rate at all. So if you just put that into perspective, you can see how fast this scales. Then a little bit later on inside this video here, we're going to go over how you can scale that even faster and you'll just see how crazy it all kind of happens. But if you are a more experienced trader, if you're not a new trader, which I'm assuming most people watching this video are new because this is like a beginner's course, but you can risk a little bit more. I would say max you should risk on a trade is about 2% of the entire account size per trade. But that's more aggressive. You're going to blow more accounts, but obviously you can end up making more money.. But like I said, that's really for more experienced traders only. So that's not you, you're just starting off. Give yourself, give yourself some time. Now later on in this video, we're going to go over a trading plan and why it's so important, but you need to have a specific trading plan for your funded account, meaning you need to have a set of rules. You need to have a max amount of trades you can take per day or per week. You need to have a max amount of money you're allowed to risk per trade, which we just went over here. You also need to have structure on what strategy are you going to trade. Because as I mentioned, you shouldn't be trading this account every day. You shouldn't just be taking random trades on this account. This is the account that you should be using when you're most confident in the setup. Now, keep in mind, no matter if you're the most confident, no matter if everything aligns with your setup and your strategy, you can still lose. But you're going to understand as time goes on that there are times when certain things happen that make it more probable for you to win your trade than it is for you to lose it. You're supposed to take these trades and use the funded account on the times when it's the most probable you will win it. So, um, choose the most consistent of your strategies. So if you've been testing and you like, like 3 strategies or so, choose the most consistent one. And you should be able to easily see which is your most consistent strategy because you should be journaling your backtested results as well as your actual live traded results., which we'll get into later on inside of this video as well. So you need to create an altered trading plan specifically for your funded account rather than what you have for your live account. Now, a huge rule here that you need to follow is don't trade your account every day. Now, this is probably the 18th million time I've said this, but specifically I'm mentioning here, only trade the A+ setups. I need you guys to really, really understand this because you're going to get to the point where you get hype about having a $100K account and you're like, I just want to trade this. I just want to make money. I just want to make a couple thousand dollars real quick. But those are not the best setups. You need to take the A+ setups. The A+ setups are when everything aligned. Take, for example, with the Hybrid Super Scalping Strategy, the HSS strategy that we went over, there was a 6-step checklist. If one of those things is not ticked, that's not an A+ setup. Every single thing needs to happen correctly in the checklist for it to be an A+ setup with the squeeze strategy. If you're trying to take the squeeze strategy but there's not, for example, 2 rejections at the top and 2 rejections at the bottom, there's only 1 rejection at the top but 2 rejections at the bottom, and you're trying to take that setup, that's not an A+ setup because everything did not align. Wait for the A+ setup to happen. Like, just trust me, you will save yourself a lot of money and a lot of headache. Now There are a bunch of different prop firms out there. You can search prop firm, you're gonna have like 100 million of them out there. And honestly, some of them are pretty scammy. Some of them are good as well, but there are a lot of ones that are scammy, meaning you guys have to be aware of this. During that challenge phase, there will be a bunch of hidden rules and a bunch of hidden things that you would've never even thought about that would cause you to lose the account. Because with prop firms, a lot of them make majority of their money when you as a new trader come on there and you think you're good and you keep blowing your accounts and keep paying them money, you keep paying them that $500, that $500, that $500, that $500. So that being said, they're incentivized to make you continue to fail these accounts by adding some crazy rules in there. But as I mentioned, excuse me, there are some pretty good ones. Now, this right here is the best one, the Edge Funder. I might be a little bit biased. 'cause this is my prop firm. I did start this prop firm for a couple reasons actually, because I was kind of tired of a lot of the scammy prop firms. Like a lot of them as well, like you'll pass the challenge and you'll get on that live account and you'll request a payout and they just wouldn't pay you out. Like they would claim you did something wrong or something like that. Like so many of my students were getting scammed. So many of them were never passing their challenge phases. So many of them just continued to blow their accounts because of some ridiculous rules that some prop firm had. So I decided to actually build my own prop firm and I made it completely different. I'm obviously a trader. I help thousands of traders literally every single day make money trading. So I know what's good for traders. And that's why I made this prop firm. I made it with all the things that I personally would've wanted in it. The first thing, there's no challenge phases, meaning it's instant funding. You've heard me talk about this entire section that you need to pass the challenge phase first, and then you get the account to trade with that you can actually make money. With my prop firm, The Edge Funder, you do not have any challenge phases. When you pay that, let's say, $500 fee and you get that $100K account, you instantly are able to start making money. Like, you don't have to jump through some crazy hoop first to prove to us that you know how to trade and then get on that real account to then hope you get a payout. With The Edge Funder,. It's instant funding. As soon as you get the account, you're able to trade with it and start making money. With the Edge Funder, you have multiple accounts. Meaning if you remember on the example over here where I said risk $500 per trade, what you're able to do with the Edge Funder on, let's say, the $100K account. I don't know why I'm pointing with my finger like y'all can see, but what you're able to do with the Edge Funder is you're able to have 5 accounts. And what you can do is you can link them all together. So when you take one trade on one account,, it'll automatically take it on the other accounts. So you're technically doing the same amount of work. You're taking same one trade, you're risking $500 per account on one trade, but now you have 5 accounts total. So in that example where I said if you took 20 trades with a 50% win rate, you'd come out net positive $5,000 at the end of 20 trades. This using multiple accounts and having them all linked together, 5 accounts total, you then make $25,000. Within the 20 trades by doing absolutely no more work. You just link those accounts together because when you took a trade on one account, it took it on the other account. So that's another cool benefit with the Edge Funder that you're able to leverage and scale by having multiple accounts linked together. A cool thing as well that you can't do with a lot of other prop firms is that with the Edge Funder, you can trade straight from TradingView. Now, I know a lot of people get really confused with having a bunch of other platforms. A lot of prop firms force you to be on these other platforms that you've never seen before or don't even know how to use. I literally just went over a whole section of TradingView. We've been using TradingView throughout this entire video, so you understand how to use TradingView. So with my prop firm, you're actually able to trade straight from TradingView charts. You don't have to learn a whole new platform. You don't have to do any of that. You could trade the same way you've been trading and learning on, uh, TradingView, which is super cool. Now on to one of the most important parts. Payouts. I mentioned to you guys, sometimes with prop firms, it sucks. It really sucks. As people spend so many days, so many weeks finally getting to that payout period where they're actually able to request the payout, they'll request the payout from the prop firm and the prop firms will just deny it and they never get paid. I have multiple people that I know who have built their accounts up to take out $20,000, $30,000, $40,000 payouts. They requested it. They instantly got denied and they never got paid their money. With the EdgeFunder, you follow all of our rules and you're able to request a payout. You're going to get paid out as soon as you request it. You're going to get paid out within 2 hours on average, meaning you do everything you're supposed to do. We actually have never denied a payout that has came through when they've done what they're supposed to. Like, I don't care what the amount is. I don't care if it's $10,000, $20,000, $40,000. We've literally never denied a payout. Out as long as you follow the rules that we have on our website, which are very, very simple rules. And as I mentioned, you're going to get your payout on average within 2 hours, which is super dope. You don't have to wait around to actually get paid out the money that you earned. With the Edge Funder also goes up to $150,000 accounts. So you can get $25K accounts, $50K accounts, $100K accounts, $150K accounts. So whatever your risk tolerance is, however much you want to be able to risk per trade, or however much capital you want to deploy to purchase these funded accounts, you have a lot of different options. So that's super cool. I'll leave a link for it inside the description down below for the EdgeFunder. But since you've made it this far in this video, I can tell that you're very serious on getting started trading, whether that's you're on the demo account right now or eventually graduating to get a funded account. I've made a discount code specifically for the people that watch this video specifically at this time. If you use code JUVIER25, you'll get 25% off every single new account that you purchase. So if you get 10 $100K accounts, you can get 25% off of each and every one of them using that code right here, JUVIER25. As I mentioned, I'll leave the link for the Edge Funder inside the description of this video. So as you can see, using and leveraging prop firms can be an extreme hack to making a lot of money, even if you don't have a lot of money. Like I mentioned, you can get these $100K accounts or $150K accounts with $500 and then leverage that to make $5K, $10K, $20K, whatever it is, right? Depending on how obviously good you are at trading and your risk management and things like that. But it just allows you to leverage your money a lot better than you'd be able to leverage it if you just loaded a few hundred bucks into a live account by yourself. Uh, so it's definitely something you'd want to look into and consider when you're actually trying to take trading seriously. So I just mentioned briefly about having a trading plan for prop firms. And I told you guys I would get into more depth about what a trading plan is and why it's important. Now trading, we all wanted to get into trading for the financial freedom, time freedom, and location freedom. It's absolutely amazing. You have no boss, you can do whatever you want, but that is the biggest problem. You have no one looking over your shoulder. You have no one making sure that you're doing what you're supposed to do. So you have to be that person, and the best way to do it is by creating a trading plan. That's really why having a trading plan is so important. It's a set of rules that you give yourself that you force yourself to abide by, and I'll give you guys the best practices on how to do that. But a lot of people talk about being consistent in their trading or being consistently profitable. The only thing you can do that allows you to be consistent with your trading is having a consistent routine and a consistent set of rules that you're following when you're trading. And that's what a trading plan is going to do. So, uh, let's hop into this. I made this spreadsheet, um, just so you guys have a little bit more, I don't know, knowledge on it. Or I really— so I didn't forget my thoughts because I feel like sometimes I forget my thoughts and there's a lot of valuable things I want to talk about when it comes to having a trading plan because it is one of the most beneficial things that you can do as a trader if you You actually want to see consistency with it anyways. So having a trading plan helps you have defined risk management strategy that will help ensure that you don't expose yourself to extreme risk on a single trade or over time. And I'll show you how that, uh, kind of works in a second. Having a trading plan, it also promotes consistency in your trading decisions, which is crucial for measuring performance and success over time. You need to trade like a robot. You need to trade the same exact way every single day, day after day. That's the consistency that you're going to need, and a trading plan helps that. Having a well-structured trading plan reduces the emotional and impulsive decisions, which in turn helps you make reasonable and logical decisions in trading. A lot of times, a lot of people will treat trading like it's gambling, and I'm not sure if any of you guys have ever gambled before, but you're not making logical decisions. You're going based off of emotions feelings. With trading, you cannot do that. You have to make logical decisions, and you really can't think too much. You have to do exactly the same thing over and over and over again, and having a trading plan forces you to kind of do that. It also allows traders to set clear, achievable goals and work consistently towards achieving them. Having a trading plan streamlines the trading process. It makes it way more efficient, less time-consuming, and more stress-free, and it does that because you're doing the same thing over and over again. You don't have to think, okay, am I entering the trade here or am I entering it here? Am I risking this much or am I risking this much? Am I taking these amount of trades per day? Am I hopping on the charts at this time or this time? You don't have to think about all that because it's already in your trading plan, therefore making it way less time-consuming and a lot more stress-free. It also gives you a lot of confidence because traders with a solid plan often have much more confidence in their decisions which can lead to better trading outcomes. And the reason you have more confidence is because when you're doing the same thing over and over and over again, you can see the results over a long period of time, and that builds up confidence versus if you're consistently doing new things each and every time, you never truly have confidence because whatever you're doing hasn't been tested or tried over a long period of time. It also helps with discipline because following a trading plan requires discipline. Which is a key attribute in trading, avoiding to, or helping to avoid rash decisions based on market noise or your feelings. Now let's get into how you build your trading plan. There are a couple things you need to put in there, and we're going to go over that right now. The first thing is you need to identify clearly what type of trader you are. We went over this earlier inside this course. You could be a scalper, a swing trader, or intraday trader. You need to clearly identify which one of those you are. You also need to put a window for when you're allowed to take trades. I've told you guys a few times in this course that my window for the most part is from around 8:00 AM Central Standard Time to 12:00 PM Central Standard Time. For you, it could be something else. Now that doesn't mean you have to be looking at the charts between whatever timeframe you make. That just means if a setup happens, you can take a trade during that period. If it's outside that period, you cannot take a trade. That stops you from just randomly, I don't know, playing Call of Duty at 4 o'clock in the morning and you happen to have your charts up and you get bored and want to enter a trade. That just stops you from doing things like that. In your trading plan, you also want to put what instruments you're allowed to trade. Now, for new traders, I do suggest for you to focus on one ticker. If it's NQ, if it's ES, if it's YM, if it's gold, whatever it is, I suggest for you to focus on one ticker. The reason being is because each ticker or each instrument has different personalities. It's very hard to learn the personality of all of them at the same time versus if you have individual time where you're spending months learning this one and then you move on to another one. Same way with like dating or something like that. If you're dating 30 different girls at one time, I don't know, maybe some of y'all could do it. I could never do that, and I'm married, so I definitely could never do that. But you would forget the names of the one person, you forget the birthday of another person, you'd mix up stories with another person. It's the same thing when it comes to trading. You're never going to be able to see the true emotions and the true way that each and every ticker moves, what time it moves the most, what news it reacts to the most, what strategy works best for it. You're never going to be able to truly understand that unless you can focus on one at a time. Now, max, max, max is two that I would suggest, but if you can just stick to one, that would be best. Next thing you want to write down is you want to define what strategies you're allowed to use. Again, you want to limit this one. I suggest max 2, but if you can stick to just one, that's even better. If you could just master one strategy, just do that. But in your trading plan, you need to define what strategies you're even able to use. That stops you from having a bad day one day trading the squeeze strategy, knowing that that's the strategy you're supposed to trade, but you had one bad day So you're like, okay, tomorrow I'm going to trade this strategy and this strategy. Or you just stumble on a random YouTube video that's like, this strategy has a 300 million percent win rate and it'll make you $500 billion in 2 days. And then you try and switch to that strategy. Like, it just stops you from doing that because same thing, once you learn a strategy and you learn the personality of that strategy, you're going to learn how to trade it in different market conditions. You're going to learn how to trade it on different instruments at different times of day, what what time of day is the best to do it, what day of the week is the best to do it. Uh, so you need to just define one that you stick with. You also need to set certain risk management rules, meaning how much money are you going to allow yourself to risk per day max, and how much money are you going to allow yourself to risk per trade max. That stops you from being able to just lose way too much money in one day. Also define the max around the trades you're allowed to take per day. You want to have this clearly defined. Like for me, Most of the time I don't take more than 2 trades per day, but my max is 3. Reason being is if you're just allowed to take 50 trades in a day, one day you're just going to go on tilt, meaning you're going to lose one trade, you're going to try to enter another trade to make that money back, you're going to lose that one, and then you're going to lose the next one. You're just going to spiral out of control, and that's how people blow accounts and lose insane amounts of money. So have a clear, defined amount of trades that you're allowed to take per day. Another good thing about that is, let's say you have 2 trades that you're allowed to take per day max, and you know that that's your rule, you're going to look at every trade like, okay, is this an A+ setup? Is this a trade that I want to use one of my trades on for the day, right? Um, so it helps with that as well. Um, next, you want to clearly set your entry criteria for entering trades, meaning if you're using the support or resistance strategy, for example, your clear entry criteria would be that it has to break above the most recent high. Or has to break above the most recent low, or it has to have a doji candlestick. Whatever it is for you, have that clearly defined. Again, this stops you from just randomly entering trades when you're bored. Also set rules for trading during high news volume events. As I mentioned to you guys, for me, when it comes to any planned news, I don't take a trade 5 minutes before or 5 minutes after any, uh, red folder news. So just clearly define whatever that is for you. Now, trading is a huge mental game. So you need to create mental rules for before, after, and during each trade. Meaning if you just broke up with your girlfriend or you just found out that your girlfriend cheated on you, you probably should not be trading. You're not going to be in the best mental state to make logical and good decisions. If I don't know, God forbid, your dog's leg just got broken or something, or they fell off of a cliff or something. I don't know. Something— if something crazy happened, that made you mad or sad or angry, you probably shouldn't be trading. So just clearly define that if you're not in the right mental state of mind, how many days you have to take off or how many hours you have to take off, just whatever it is for you, just clearly define that because things like that will happen. And those are days when you can lose a lot of money. You also want to create clear defined exit strategies, meaning, okay, am I always going to exit at a 1:1 take profit or 2:1 take profit? Or am I always going to target recent highs or recent lows. Whatever it is, just clearly define it, because what you might end up doing— and I don't want you to do this— a lot of people get into trading and they'll see, they'll have their trade set up. Like, let's say this is their entry. They'll have their take profit up here, their stop loss down here, right? They entered here, but as soon as it gets up here and they see positive $400, they close it out because they're like, oh, $400 sounds nice. But over time, you're actually cutting yourself short, because if you don't let it hit your full take profit a lot of times you're missing out on extra money. So that's why I say create clear defined exit strategies. When— clearly define when you're able to exit your trades early. When are you able to hold your trades longer, right? So just clearly define that so you have that as part of your trading plan. And this is the most important one. This is the absolute most important one. And that is have a consequence for breaking any of your trading rules. your trading plan. I mentioned in the beginning of this section that with trading, it's a you versus you game. It's only you sitting here. There's no boss. There's nobody holding you accountable. And that's the problem. You need to hold yourself accountable because believe it or not, I promise you, I've worked with thousands of people one-on-one. Losing money is not enough of a consequence for you to stop making the same stupid mistakes. Most people know what they're doing wrong. They know they're taking too many trades. They know they're risking too much. They know they're moving their stop loss when they should not be moving their stop loss, causing them to lose more money. They know all these things, but they just can't stop doing it. And you're a new trader, you're gonna get to that point. Like, come back to this video in 2 weeks, I promise you. Come back to this video in 2 weeks, you're going to see you keep making the same stupid mistakes that is going against your trading plan, the trading plan that you built out. You keep not following it, and the reason being is because you have no real consequence. No matter how much money you lost, no matter how many accounts you've blown, you will continue to make the same mistakes. What works is having a real-life consequence that you can actually feel. Something like, and this is why I usually suggest do it, find out what it is for you. But this is what I usually suggest: an ice bath, a cold shower, run 3 miles. Just something that you can feel and something that you would absolutely hate. I always say this. I say it has to be something bad enough that it gives you soft PTSD. To the point that let's say your trading plan says you can't take more than 3 trades a day and you already took 3 trades and you're hovering over that buy button to take your 4th trade for the day and break your trading plan. You should flash back to the last time you broke your trading plan, flash back to that cold shower you had to take, or flash back to that 3-mile run you had to take and take your finger away from the button and never break your rules again. That's how bad it should be. And you know you more than I know you. So a cold bath might not be that bad for you or ice bath, might not be that bad for you. A 3-mile run might not be that bad for you. But find something that you absolutely hate. I have people inside my inner circle who have to take— there's one person, he's crazy. He has to— he built some concoction. It's like, it's some nasty concoction, some oil and some nasty thing. And he has to take a teaspoon or a tablespoon of like that disgusting concoction every time he breaks his rules. He broke his rule one time, he's never broken it again. In. So it needs to be something like that. Don't make it something easy that's like, do 20 jumping jacks. No, that's not hard. It needs to be something hard where if you break a single one of these rules that you set for yourself, you have to instantly do that consequence. You can't be like, oh, I'm going to do that tomorrow. I'm going to do the consequence tomorrow. No, as soon as you break the rule, you have to go do that because that's the price that you had to pay to break your rule. But Nonetheless, that is how to build a trading plan, and that's why it is so important, and that's how to hold yourself accountable to it. That last part, the consequence, is the most important part. All right, now this is the part that most people skip, but I promise you, if you skip this part, you will— I promise you, bro, let's listen to me. I was in your spot. Psychology was the— I skipped it every single time in every YouTube video I watched. I But I promise you, if you skip this part, you will come back 3 years from now after you've been struggling for 3 years. You'll watch this part and everything will change because this was the missing piece. This was the missing piece. Don't skip it. Psychology is the biggest part. The mental game of trading is the biggest part of trading that holds people back. In this video, throughout this entire course, we went through every strategy that I use. I use these same exact strategies, I trade them the same exact way, and I print money day trading. The problem is you'll come on here, you'll try the strategies, it'll do good, you'll mess something up mentally, and you won't make money with it, and you'll think that the strategies are broken. But it's not that we're using two different strategies. We have two different levels of psychology and two different levels when it comes to this mental game. So I'm going to give you guys the exact tips that catch you up to speed with my level of psychology and my mental game when it comes to trading. So you don't have to go through those 3 years that I had to go through and most other people have to go through. So you're still listening. So you're here. That's good. Let's get into psychology. Um, so why is psychology important? As I just mentioned, realistically, it's the biggest part of trading. And you can have your checklist strategy. You can know exactly what you're supposed to do, but the psychology kicks in and you start overtrading. You start skipping out on steps with the strategy. You start risking more than you're supposed to risk. You start entering trades too early. You start being too scared and entering trades too late. You end up doing all these things that mess you up. Having a strong psychology or having a strong psychological just grasp on your— the whole mental part of trading, that's what's going to allow you to be able to trade stress-free and be able to actually see results with your trading. So in my honest opinion, day trading is 80% psychology. This entire course has been for a few hours, right? I've taught you guys essentially everything you need to know within a few hours. If you could just replicate like word for word, bar for bar, exactly what I do, you'll be able to do the same results that I'm able to, well, maybe do similar results to what I'm able to do.. But the hardest part, like I said, is the psych— the hardest difference, or the biggest difference, is the psychological part of it. It's all mental. Like, trading is all mental. You'll see as you get more into trading. But that's one opinion that I have. It's 80% psychology. Another opinion that I have is that once you're profitable on demo, you already know how to trade. Reason being is because when you're on a demo account, a lot of people will make money consistently on a demo account. The reason is because they don't care about the money. That's not real money, so they're gonna do what supposed to do. They're not going to overtrade. They're not going to risk too much. They're not going to be scared to enter trades because it's not real money. So they're not thinking, oh, if this trade actually wins, or if I enter a trade right now, I'll actually make $1,000. Or if I enter this trade right now, I'll actually lose $400. So I won't take the trade. On demo account, you're doing exactly what you're supposed to do. And then as soon as they switch to a live account, they think they're doing the same thing, trading the same strategy, but they're not. They're overtrading because they're now thinking, oh, if I actually make money, I can take this money out and buy some sneakers. Or if I lose this trade, that's my rent money right there. So they start second-guessing themselves. A lot of things change. So I say this to say, if you're profitable on demo account, that means you already know how to trade. The only problem is that now you're not mentally strong enough to have those same results and see those same results in a live environment. But after this section here, you should be pretty set. But once you start focusing on psychology, day trading becomes much more profitable and much less stressful, and it's a lot easier. And having a trading plan and things like that helps out a lot, which we'll get into here. And we just went over having a trading plan, but we'll get into how it helps out. But that helps a lot with making it a lot less stressful and a lot more easier.. But let's get into some psychological, uh, tips. First of all, mastering psychology is different for everyone. So we all have different personalities. We all will struggle with different aspects of trading mentally. There are some people who are super impatient, so they enter trades way too early. There are some people who are scared, so they'll always hesitate on trades. There are some people who just want to make as much money as possible, as fast as possible. So they'll over-leverage. Like, we all have different personalities, so you just need to understand that for yourself because you're going to struggle with different aspects of the mental game when it comes to trading. And, uh, why is mastering your psychology so hard? So it's really so hard because, as I mentioned before, it's a you versus you game. You don't have a boss, which is the coolest thing about day trading, but it's also one of the biggest drawbacks or the biggest challenges is because you have to rely on yourself to hold yourself accountable. And a lot of us, even if you think you are, you're not as disciplined as you think you are. But that will change. So that's why really mastering it is so hard. Most people really only struggle with 2 to 3 things max. And the crazy thing is that they already know what they are struggling with. I just talked about this in the previous section. Most people that I work with, 99.99999% of people that I work with, I've worked with, they come to me and they say, I keep overtrading, I keep overleveraging, I keep doing this. They know what they're doing wrong, but they just can't stop. And like, you have to realize that if you know what's wrong, you know how to stop doing it, and you're fully capable of— like, you're physically capable of stopping this from happening each time, but you don't do it, you're just not mentally disciplined enough. But we'll get you there. So yeah, let's fix your psychology.. So one of the first tips I can give you is to think in terms of probabilities. So understand that while trading method can have a high probability of success, it does not guarantee success in every individual trade. Think of it as rolling a dice or flipping a coin. So if we have a coin, we all know there's heads and tails. So technically you have a 50% chance every single time of landing on heads and also landing on tails. But if you right now flip a coin 10 times, I'm 90% sure that you won't land on heads 5 times and you won't land on tails 5 times. Now, how is that possible? Because probabilities are over a long period of time. You're only going to see the actual probability over a big test amount. I think that's the right way to say it. I don't know. Over a long— I don't know why I can't get this verbiage out. You're only going to see the actual probability the more times you do it. Meaning you're probably not going to see that 50% probability happen when you flip a coin 10 times. You might be closer to it at 100 flips. You'll probably be right at 50% on 1,000 flips. So the same thing when it comes to trading. Don't look at each trade as if you're going to win it because you have a 70% win rate, right? Or don't look at the past 10 trades and wonder why you didn't win 7 out of the past 10, even though it's supposed to have a 70% win rate. Over the past 100 trades, then you'd start seeing that 70% win rate. But the problem is most traders don't survive to get to that 100 trades because they blow their trade, they blow their account before they get to the 100 trades. So just realize and to think in terms of probabilities, think of it as flipping a coin or rolling a dice. Probabilities happen over a long test. I don't know why I can't get the word over a big test pool. I don't know. You know what I'm trying to say, though. Also understand that there is not a direct relationship between trading patterns and the outcomes of individual trades. I mentioned this a little bit earlier. Everything can align. It can be an A+ strategy. Everything can look beautiful and you could take the trade and you can still lose. And that's fine. That is perfectly fine. When you come into trading and we're going to talk about this in a second, when you come into the day, your trading day, you should not come into it hoping you win every single trade. Or thinking that you had a successful day when you've won every single trade. No, you should come into it with the mindset that if I followed every single one of my rules today with my trades, this was a successful trading day because that's all you can control. You cannot control if you won or lost any individual trades. The only thing you can control is that you gave yourself the best chance of winning each trade. And the only way you have the best chance of winning each trade is when all things align and when it is an A+ setup. Now, um, you need to develop a carefree state of mind in trading. Now keep in mind, this does not mean to be careless, but rather trading without the fear of losing, as fear can cloud judgment and lead to poor trading decisions. I mentioned there's a lot of people that they are super unconfident with their trading. That causes them to enter their trades late or not enter their trades at all, just to see it go and hit their full take profit. So you need to get out of that mindset of being scared of losing. Losing is part of trading. You're going to lose. I mentioned earlier, I still lose. You're going to go on losing streaks. You're going to do all that. You cannot be scared of losing. It is the, it is the business expense that you have to pay in this business called day trading. So don't be scared of losing. It is a part of trading. The next thing is that you have to have a bulletproof trading plan, which we've literally just went over. So by now you should already have written down your trading plan. You should already know what your trading plan is, and you should have that consequence. I'm talking about you. Now, here are some actionable steps, right? And one of the first actionable steps is for you to read over your trading plan every single day before you enter a trade. Now, I suggest reading your trading plan every single morning before you get to the charts. And then also reading through your trading plan every single day before you enter a trade. What I used to do, I used to have a little Post-it note stuck on my screen. That way my rules are always there and I can't say, oh, I forgot I wasn't supposed to take 13 trades today. I was only supposed to take 3, 'cause my rules are right there. So same thing for you, just read through it every single day. Also, what helps out a lot, what I found that helps out a lot is creating a personal plan of the trade before it happens, meaning you have your overall trading plan but also have a set plan for each trade. So if you enter here, if it goes up here, you can be like, I'm allowed to take partial profits here, or I'm allowed to do this, or I'm allowed to do this. The reason being is you create these rules and this, this kind of plan for yourself for that specific trade each time. It helps you to be making the most logical and the best decisions. Because what ends up happening is once you get into a trade, once you enter a trade, you always get stupider. I've never met a single person that entered a trade and got smarter. Every single person, once you get into a trade, you stop thinking logically, you start thinking emotionally. So it's best to have a plan and a set of actionable steps for that trade, have that set out before you even enter the trade, because you know you're still thinking logically. Logically at that point versus when you're in the trade and you start thinking emotionally and irrationally. Another cool actionable tip is once you enter a trade, switch to the higher timeframe. Reason why that can help is because if you're on a lower timeframe, you'll see a lot more of the noise. This is not for scalpers. This is more like intraday or swing traders, but you shouldn't stay on lower timeframes because if you enter to buy and you see one 1-minute candlestick that's going red and going against you, you could potentially get scared and exit the trade when if you were looking at the higher time frame, you'd see it's still obviously going up. So switching to a higher time frame could be super beneficial, uh, for that. This is a huge one for me, uh, and a lot of my students actually, is imagine that your stop loss is money that you already spent to enter the trade. Meaning as soon as you enter a trade, just automatically assume that you lost $300. Or $400. Like, you paid $300 to get into that trade versus thinking in your mind, okay, if I enter this trade, I'm risking $300. No, you lost $300 already. Just put that into your mind that you already lost it. It's not yours. That will stop you from making more irrational decisions as far as moving your stop loss to give it more room and causing you to lose more money than you were supposed to. Um, it just stops you from making a whole bunch of bad decisions. So just imagine that your stop loss was the price that you paid. Next is to realize that win or lose, as long as you followed your trading plan, your rules, it was a good trade. I talked about this a little bit earlier. As long as you follow your trading plan and followed your rules, you did a great job regardless if it won or lost, because you don't control if you win or lose any single trade. You can only control if you set yourself up to be in the best position possible to win that trade. So be proud of yourself. Be happy that you followed your trading plan and you followed your trading rules. I'll be honest with you guys. When I first started off trading, I used to carry a little notebook around inside my pocket with like a to-do list every single day. And every single day on my to-do list, I'd write win my trades, right? And I realized that that was so pointless because no matter what I did, I couldn't control that. And that didn't determine if I had a good day or not. I switched it from instead of me writing, win my trades for the day, I switched it to follow my trading plan. Every single day I would check that off on my to-do list. Every single day I followed my trading plan. I did good today regardless if I won money or lost money. I did good today because I followed all of my trading plan and I followed all my trading rules. Another cool tip is to walk away from your laptop or your PC after you entered your trade. And then you can use the alerts feature on TradingView, which we went over before. Uh, if you use the alerts feature to be able to notify you at key levels, like if you have multiple take profits set, or if you have like your stop loss set and your take profit set, you can set alerts at it so you can still be notified when price does hit those specific areas. But walking away from your PC slash your laptop helps you to not let your emotions get in the way and make you make more irrational decisions once you're in the trade. Similar to going to the higher time frame, it just helps you not be as stressed. Another tip that will help you not be as stressed is once you enter a trade, you can switch to Heikin-Ashi candlesticks, or you can change the color of all your candlesticks to black. What that does, both of those, that just allows you to see the overall what direction it's going without seeing those little like red candlesticks that's going against you. If you're in for— if you're in buys, or if you're in for sells, seeing those green candlesticks that are going against you. So both of those kind of help you with that as well. And then lastly, you shouldn't— you should not feel your heart racing before or after entering a trade. If you do, close the trade and re-enter when you calm down. You'll make better decisions. You shouldn't press that buy button and start feeling your heart pounding. Like, that That's a clear sign that you're doing something wrong. You're over-leveraging, you've taken too many trades, you're not confident in the setup because you didn't follow the rules, um, and you skipped out on a rule. That's just a clear sign that you did something wrong. So close the trade out until you've calmed down and assessed why you're feeling that way, whether it's because you didn't enter correctly or you're risking too much or whatever it is. If you feel your heart racing as soon as you enter a trade, close the trade out. I promise you, you'll start making better, much better decisions. And that's realistically a lot of the psychological tips that I can give you that if you adhere to these and if you need to watch this part back again, honestly, you probably need to watch back a lot of the video again. It just helps make sure it's ingrained inside of your mind. But this is definitely one you should watch back and really make sure it's engraved into your mind. That way you don't have to go through the mistakes yourself to learn all these lessons that I just went over. You can take it from me who had to go through the mistakes for 3 years just so that you guys can have a head start to get to where I'm currently at with trading. All right, so I mentioned before that trading can be extremely lonely, and I highly suggest you take the next 3 seconds and just send this video to a friend or a family member that will lock in on this journey with you to help you stay consistent.. Trust me when I say you'll appreciate having someone else that can relate to you during your trading journey. Now, if you want to get personalized one-on-one help from me to guide you through all these aspects of trading that we talked about inside this video, no matter if you're a complete beginner or you've already started trading, click the link inside the description of this video to have the opportunity to join my inner circle, to get access to me and mentorship from me, mentorship from 4 our other profitable coaches, have the ability to follow each and every one of our trades so you can enter the same trades that we take every single day, access to our trading psychologist, really just access to a community that will hold you accountable, that'll help you grow and get profitable a lot faster than doing it on your own. So if you're someone that is serious about trading, like I said, hit the link inside the description of this video to have the opportunity to join my inner circle. Now I'll be real, I poured I put every single bit of information that I have into this full course, and I actually look forward to all the amazing testimonials and the amazing messages that I'm gonna get from people just like you telling me how this video completely changed their life, or even that this was the start of them learning the skill that completely changed their life, their family's life, and allowed them to live their dream life. This is not just about learning a new skill, it's about setting yourself and your entire family free. It's about giving you that financial freedom, that location freedom, and that time freedom to finally live the life that you've always dreamed of and the life that you deserve. I'm so grateful that you entrusted your time with me today to learn this insanely valuable skill. I'm extremely excited for you to start this journey, and I genuinely look forward to the day that you drive past me in the Lamborghini because you stayed disciplined, you followed your rules, you applied all this information and it allowed you to reach your goals. With that being said, I'll see you guys in the next video, and until then, let's keep milking these markets. God bless.