I Tried Every Scalping Strategy and This is The Easiest One
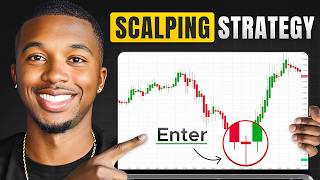
Josiah Stewart presents the Hybrid Super Scalping Strategy, a 1-minute method using Heikin-Ashi candles, a 100-period EMA, and a six-step checklist to identify high-volume doji entries. He claims the strategy generated several thousand dollars in minutes on live trades and requires a minimum 1:1 risk-reward ratio for consistency.
Chapters
I've tried every single scalping strategy that there is, and this has to be the easiest one. And I'm not kidding. This thing has been my most consistent scalping strategy for years. And the crazy part is that the rules are so simple that once you see it a few times, you'll wonder how you ever traded without it. At least I did. Now, it's important that you understand that trading is not a get-rich-quick thing. And honestly, it took me over 3 years to get to the point that I'm at now. But if I was to start trading all over again, this is the exact strategy that I would use. And that's because I just need to follow a simple checklist and then wait for one candlestick to show up, and then I enter my trade. So let's walk you through what I call the Hybrid Super Scalping Strategy, or the HSS strategy, that I use every day. And then also I'm going to show you some real live trade examples so you can actually see it live in action. Let's get into this. All right, so here we are on the charts. As you can see, it is a simple 6-step checklist that I use to trade this strategy every day across multiple different markets. Now, the main purpose of this strategy is catching the momentum that the market is already going in. For example, we all know that the markets never just go straight up or straight down. The markets are going to go up, down a little bit, up, down a little bit, up, down a little bit. And obviously we can see by looking at this, we know the markets is ultimately going up. So we just need an opportunity to hop into it, and that's where this strategy comes into play. When you see these little pivots where price ends up going down or against the trend, where you see these little pivots, we call those retracements. We're entering in these trades as soon as price starts making this retracement and shows the first sign of it continuing in the overall direction. And that 6-step checklist that we're about to go over helps us do exactly that. So let's go over it really quickly. I'm going to show you exactly— I'm going to go through the 6 steps, and then I'm going to show you it on the charts. And then like I said, I'm going to show you guys an actual live trade so you guys can see it live in action to see how it works and things like that. So first step is the chart setup. So you need to be on Heikin-Ashi candlesticks, and you only need one indicator. That's one of the things that I personally love so much about this strategy is that it's super simple. You don't need 100 million different indicators. You you really only need one indicator and to turn on Heiken Ashi candles. Now, how you do that— hover over here on TradingView or whatever platform you're using and hit the little dropdown. And instead of being on regular candles, you want to switch over to Heiken Ashi candles. You're going to see why that's important a little bit later on inside of this video. Now, the next step for the chart setup is come over here to indicators, and we need to add in an indicator called the EMA. So you'll see this indicator on basically every single platform you could find. Just go to indicators and type in EMA, and you're going to see moving average exponential. Just click on that. You'll see it'll pop up on your chart. If you're using TradingView like I am, it'll pop up, up here in this top left corner. But what you're going to need to do is go to settings, and you're going to need to change one setting in here. So under inputs, next to length, you see it's default on 9. We actually need to change this to 100. That way we're on the 100 EMA like is on our checklist. Now you don't need to change anything else. I personally go to style though and change the color of it to white. That's just because I'd rather have a white line on my chart versus a blue line or something like that. So I change my color to white, but honestly that doesn't matter as long as you change the length to 100. So having the— being on Heikin-Ashi candlesticks and then having your indicator, that's really all you need. Now it's the steps to actually wait for this setup to happen. Now keep in mind This entire strategy is done on the 1-minute time frame. You don't need to draw support or resistance zones. You don't need trend lines. You don't need to go from the higher time frame down and stuff like that. You stay on the 1-minute time frame. You wait for these things that we're about to go over, and you enter the trade. And that has paid me a lot in the past few years using the scalping strategy. So like I said, step 2 is we're looking for market structure. What that simply means is that we're only taking buys if price is above the EMA. And we're only taking sells if price is below the EMA. Remember, the EMA is that indicator that we just put on our chart. Now here you see that we must form market structure first, so we can't just enter when prices breaks above the EMA. We need to see a higher low be created above the EMA because that actually tells us that price is trading above the EMA and trading in the direction. And, uh, vice versa, if we're looking for sells, we need to see lower highs below the EMA. Now if this doesn't make sense, Trust me, we're going to go over it in a second. You're going to see it on the charts. But the main purpose of the EMA indicator, as we mentioned inside the example, we all know price doesn't just go straight up or straight down. It goes up, down a little bit, up, down a little bit. We obviously see this is in an uptrend. Using the EMA indicator, which you're going to see on our charts, is really just a white line. When it's— when price or candlesticks are above the EMA, that's telling us that ultimately we're going up. So that's why we're only using the EMA to tell us the direction that we should be looking for trades in. Because we want to trade in the direction of the market. We don't want to guess where the market's going. So as I said, we need to see, uh, price above the EMA for buys or price below the EMA for sells. Next step is we're waiting for a clean pullback. That clean pullback is what we see here. So price is going up, this retracement that we talked about earlier, that's a pullback. So that's what we're waiting for, a clean pullback. And the description of a clean pullback simply means at least 2 of the opposite color candlesticks in the pullback direction. So if we're looking for buys, we want to see at least 2 candlesticks going against the trend. And clean means there's no wicks on the top of the candlestick if we're looking for buys, or the bottom of it if we're looking for sells. Now like I said, I'm going to show you this on the chart because with Heikin-Ashi candlesticks it's a little bit different than regular candlesticks. So if you're used to regular candlesticks, this is just something that you'll, uh, see when we go over the live examples. But like I said, step 3 is waiting for a clean pullback, waiting for our retracement to happen, and then we're looking for our entry signal. Our entry signal is telling us, okay, the pullback is over, it's time to hop into the trade now, and it's time to follow the trend. So what that looks like is we're looking for a high volume doji candlestick, and we're entering that candlestick as soon as it closes. Remember, we're doing this all on the 1-minute time frame. So as soon as that 1-minute doji candlestick closes, we're entering into the trade. Now, what is a doji candlestick, first of all? And you'll see it on the charts here in a second, but I just will give you a quick example. A doji candlestick is simply where we have a skinny body with long wicks on the top and long wicks on the bottom. This type of candlestick right here represents uncertainty. So we know if we've been going up and then we started going down, and then we have uncertainty at an area, that's telling us that it's very likely that we're about to continue back in the overall direction of where the market is going. So that's why we're waiting for these high volume doji candlesticks to happen. And like I said, you'll see real examples of this instead of this— I don't know, this looks like a jellyfish— um, instead of this jellyfish example that you see here. So that is our entry signal. As soon as we see that doji and it closes on the 1-minute time frame, we're hopping into the trade and we're always putting our stop loss below the doji if we entered for a buy. If we enter for a sell, we're putting our stop loss above the doji, so above the candlestick that we entered or below the candlestick that we entered. Like I said, you're going to see this in a second. Now, take profit, we're always going for a 1:1 risk-to-reward ratio minimum. Now you can go, and I have tested it with a 2:1 risk-to-reward ratio or 3:1 risk-to-reward ratio,. It does work, but my win rate drops pretty drastically with this strategy. Going for 1:1, it really averages like mid-75, sometimes 80% win rate using this strategy. But holding it for a 2:1 or 3:1 risk-to-reward ratio can bring that down to like a 50 or sometimes high 40% win rate, which is still profitable. But if you're the type of trader that would rather get in and out of trades really quickly and just take your wins, then just go for a 1:1 risk-to-reward ratio and you'll be solid. I switch it up most of the times. I'll go for either a 1:1 or 1:2 depending if I see a lot of volume in the markets. But we've went over this checklist, now let's see what the heck this actually looks like on the charts, right? So we're on Heikin-Ashi candlesticks. These are what Heikin-Ashi candlesticks look like. If I'm being 100% honest with you, you don't need to fully understand everything that Heikin-Ashi candlesticks do, what they mean, and why they look the way that they look. The checklist that I've made, the one that we just went through, has honestly taken a lot of the guesswork out for me and a lot of my students, so that this strategy is pretty much as simple as it can get when it comes to trading. Now, this trade right here was actually one of the trades that one of the coaches inside the Inner Circle had taken. If you don't know what my Inner Circle is, it is where you can learn how to trade exactly how I trade. You can watch me trade live, you can watch all of our other coaches trade live as— this strategy as well as many other different strategies. We have a trading psychologist in there to help you master your psychology when it comes to trading. We basically give you everything that you would need, everything really that I wish I had when I first started off trading, along with the knowledge, the mentorship, and as I mentioned, the ability to be able to take the same exact trades that I take and our 4 other profitable coaches take every single day. If that interests you, hit the link for it inside the description down below. For the opportunity to join the inner circle. But here we are on this first example. So I just want to go over this quick example on the charts, and then we'll go over the live trade, and you guys will see me take this strategy live and make a couple thousand bucks in a few minutes, which is always cool. But as you see here, this white line is the EMA that we put on. This is the 100 EMA. So we can see obviously we're above the EMA right now, which means we should only be looking for buys. So since we're above the EMA, we have that checked off on our checklist. We're looking for buys. Next thing is we need market structure above the EMA, because as you can see right here, price was kind of going up and down through the EMA at this point. As I mentioned, we don't just take the trade as soon as price breaks above the EMA. We need market structure to be made above the EMA, or vice versa if we're looking for sells. We need market structure to be made below the EMA. Now, what does that look like? It literally looks exactly like this, where price came up here through the EMA and made a new low right here, still above the EMA, and then it continued up. Once this part happened right here, that was it creating market structure. So now it's game on. Now we're just waiting for our entry criteria. So as step 3 said, we're waiting for at least a clean 2-candlestick pullback to the downside. Here you see we're having a pullback, and these are the candlesticks that I'm talking about where we have no wicks on the top of the candlestick. Now keep in mind, this is vice versa. If we're looking for sells, we want to see pullbacks that have these, uh, type of candlesticks with no wicks on the bottom. But since we're looking for buys, we want to pull back to the downside. We want to see at least 2 of these candlesticks, the ones that have literally no wick on the top but wicks on the bottom. And as you can see, we have 1, 2, 3, 4 of these, which is great. We need a minimum of 2, so that's checked off. We checked the third part off on our checklist. Now all we're waiting for is an entry. If you guys remember, an entry is simply a doji candlestick that's high volume. This is a doji candlestick, as we mentioned, small body with big wicks on the top and on the bottom. This is an indecision candlestick, which tells us that price is about to reverse. So once we see this, we're entering into the trade for a buy. So we take our entry right here as soon as this candlestick closes. Remember, we're putting our stop loss right below the candlestick that we entered on since we're in a buy, and we're adjusting this until this risk to reward ratio says at least a 1 to 1. So we can adjust it till it says a 1 to 1. And as you can see, we had a little bit of drawdown. Usually, if I'm being honest, this trade hits within a few minutes. But this time price was a little bit indecisive and it ended up hitting within 17 minutes, which is still not a crazy amount of time. Uh, like I said, usually you're in and out within a few minutes, but this trade, as you see, hit absolutely beautifully for our 1:1, following that same exact simple strategy that we just went over, the same checklist that we just went over. Now keep in mind, when I say high volume doji candlestick, it simply means that the doji candlestick, the size of this entire candlestick has to be bigger than either the candlestick before it or the candlestick before that one. And as we can see, if we draw a box around the doji candlestick, that the size of this box is bigger than this candlestick, and it's also bigger than that candlestick before it. So we entered into the trade with this example right here. We have the same thing. We're above the moving average. We made market structure already. We have our doji candlestick. We would enter right here, stop loss right below here. But if you look at the size of this doji candlestick, it's actually not bigger than the candlestick before it, but it is bigger than the candlestick before that one. And that's still classified as a high volume doji candlestick. So I would still take this trade. We'd enter into the trade, stop loss below where we entered at, take profit going for at least a 1:1 risk to reward ratio. And this trade, as you see, ended up actually hitting within 4 minutes, which is usually the amount of time that it takes for this scalping strategy to hit. Simple as that. So now that you understand the checklist, you know what to look for, let's go over a live example so you guys can see this live in action and you know what it looks like in real time. All right, now we just need to wait for a pullback here, see if we can get an entry here. All right, looks like we're getting an entry here. Order filled. A minute stops above the doji, and I'm going for 1:1 here. We're up $1,200 right now. We're up $3,000. This is pushing pretty nicely. Nice, we're $4,000 here. A lot of good volume, 5,000. A lot of volume in the markets right now. I think I'm gonna just get out of 1:1 though. I don't think I'm gonna hold it for 2:1 because I don't know if price is gonna reject off this, uh, 4-hour zone right down here. So I'm gonna just take a 1:1. Hopefully we hit it on this candlestick. Here we go, we're up 7,000. Come on, give me my money. Order filled. Boom, beautiful. Beautiful. $7,300 in a matter of 3 minutes. This strategy is freaking disgusting. Now as you can see, I followed the same checklist. I waited till we're above the EMA, I waited for my pullback, I waited for my doji, I entered, and I profited. Now if you want to make this way easier, inside of my inner circle you get to see us trade this live every single day. You get to see our exact entries, our exact exits, the mindset behind them, and you get to get help from multiple different coaches as well as our trading psychologist. As I mentioned earlier in this video, I'll put a link for it inside the description down below. Now I'm going to be honest with you, this is a great strategy, but it's only one part of the puzzle. The next part is knowing how to scale it into real income even if you're starting with a smaller account. And that's why I put together this video right here that shows you step by step on how to leverage prop firms the right way, utilizing this strategy to be able to turn it into real income. So click this video right here and you'll learn everything you need to know on how to implement it. I'll see you there.