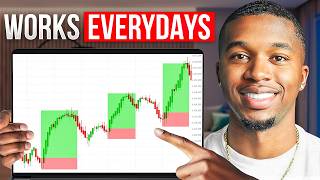
The Strategy That Made Me My First $1,000,000 Trading
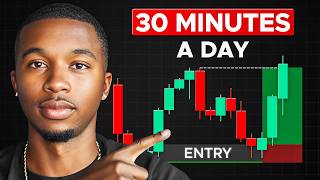
In this tutorial, Josiah Stewart walks viewers through the day‑trading system that generated his first million dollars over eight years. The core of the method is trading only when price touches carefully drawn support or resistance zones on a 4‑hour chart. Zones are defined as rectangular areas covering the highest wick to the highest body (for resistance) or the lowest wick to the lowest body (for support), rather than precise lines. After a zone is touched, the trader switches to a 1‑minute chart and looks for a confirmation: a break of the most recent high (for a long) or low (for a short). Entry is taken at the break, stop‑loss is placed just beyond the recent swing opposite the direction of entry, and profit targets are set at prior swing points, typically aiming for a 2:6 risk‑to‑reward ratio. The strategy is deliberately low‑frequency—often only one or two trades per day—allowing the trader to spend under 30 minutes daily by setting TradingView alerts on the zones. A “break‑and‑retest” variation is also covered, where a prior support or resistance is broken, retested, and then traded in the opposite direction. Finally, Stewart hints at scaling the approach using prop‑firm or funded accounts, positioning the method as a foundational piece to be built upon for larger capital growth.
Chapters
And let me be real, my strategy is boring. It only happens 1 or 2 times a day, and it makes me feel pretty lazy, but it made me my first $1 million day trading. So I'm going to show you the exact trading strategy that I've used over the last 8 years. And the best part is that it really requires no confusing indicators, no spending 8 hours looking at the charts, and it's great when I don't have a lot of time during the day. Now, please understand that day trading is not a get-rich-quick system, and it honestly took me 3 years to become profitable. But if had just focused on this one setup, I would have been able to get to where I'm at right now much quicker. So let's walk through how I trade very lazily. So the strategy that has printed me millions of dollars trading it over the past 8 years or so is support and resistance, but traded a specific way. So if you don't know what support or resistance is, it is like the foundation of trading. If you want to be a trader, you need to understand support or resistance. And good thing it's not that complicated. And even better thing, I'm the best person to teach it because I don't overcomplicate the things that don't need to be overcomplicated. Think of resistance as a roof and think of support as a floor. Pretend this yellow line is price or the candlesticks or whatever you want to call them. Every time it gets to this resistance zone, which as I mentioned, it's a roof, it bounces off it. It fails to go above it. It's a roof. It can't break above it, right? Same thing, vice versa with the support zone. Every time price gets to a support zone, it just fails to break below it. It just continues to respect this support zone and respect this resistance zone. And that's simply what support or resistance zones is. It is areas where price has previously rejected off of. So I know that, let's imagine that this is Bitcoin when it's $1,000, right? And then let's also imagine that this is when Bitcoin is $500. Using support or resistance, I can know that at $1,000, most of the time everybody sells their Bitcoin and it makes Bitcoin go down. Then I also know on the flip side, every time Bitcoin is at $500, everybody thinks it's super cheap, so they buy it and that causes price to go up. So me as a trader, I can look to understand and wait and see for price to come down to the $500 area, wait for a specific entry criteria, which we'll go into a little bit later on inside of this video, that tells me I should enter the trade and then enter it and catch the move as it's bouncing off of either the support zone or this resistance zone. Now, I mentioned that these roofs and floors are most of the time always respected, but there are times when price breaks above these resistance zones or below these support zones. And what that is, is we call a breakout. Now, a cool thing about a breakout is most of the time when price breaks out of, let's say, a resistance zone right here, it breaks above it. Most of the time it'll come back down and test that previous roof or previous resistance zone and actually treat it as if it's a support zone and it'll bounce off of it. Same thing, vice versa with support zones. If price breaks below a support zone, most of the time it'll come back up to that previous support zone and treat it as if it's a resistance zone or a roof, and it will sell off of it. So no matter what happens, no matter if price continues to respect a support zone a— sorry, a support zone or resistance zone, or if it breaks out of those, I know that with my strategy I'm able to capitalize on this. Now, this is the foundation of the strategy, and it's really the reason why this strategy to me is pretty boring and it's my laziest strategy, but it's printed me honestly the most amount of money out of every strategy that I trade. But it's just a lot of waiting because we know all during— in this area we're not doing anything. The only time we're taking action is when price touches our either resistance zone or touches our support zone. And then once it touches that area, we're waiting for a specific pattern to form and then we're entering into the trade. Now, in this video, I'm going to show you guys not just how I draw my support or my resistance zones, because a lot of times people draw it completely wrong and it ends up giving them false signals. And that's why they keep hopping into trades and keep losing.. But I'm going to show you how to draw them correctly, how to know and be patient enough to wait for entries using the exact way that I wait for entries that's allowed me to be able to consistently make profits with trading. And then also when to exit the trade, because the same way you don't just want to enter a trade, let's say for a buy, as soon as it touches your support zone, you also need to have an exit plan to know when you're getting out of a trade, because that's the only way that you're going to actually end up making money is when you actually exit the trade. I'm also going to give you guys a couple tips and tricks that allow me to trade this strategy even if I only have 15, 20, 30 minutes a day. So I explained what support or resistance is with obviously these drawings. Now let's go into the chart and see exactly what this looks like and how I spot valid support resistance zones and ignore the ones that are fake, the ones that won't actually help me profit. All right, so here we are on the chart. We're going to go over this example really quickly. This is one of the trades that I actually took live inside of my Inner Circle and sent it out to my Inner Circle. We're gonna go over this in a second, but I want to go over how I actually draw my support my resistance zones. So it's very simple. We come here on the 4-hour time frame and we're looking for areas where price has strongly moved away from at least one time, or we want to see where price has moved away from multiple times, um, in the same period. So for example, if we can just zoom out here and look at a couple areas, right? And I use a box tool, um, to draw my areas or my support or resistance. You'll see I draw it like this, right? You'll see some traders draw it with lines. The problem for me is that price never stops directly at a support or resistance zone. So let's say for this instance where we see price sold off heavily right here, some people would draw a line right here where price sold off and then look for price to tap that line to then look for an entry. But I've noticed and I realize that price never stops exactly at the same area that it stopped at before. So I like to draw a general area. So when I see a zone like this where price gets to an area and it sells down very heavily, I take out my rectangle drawing tool and I draw it from the top of the wick, the highest wick that I see. This is if I'm drawing a resistance zone. I'll show you guys an example of a support zone in a second, but I draw it from the highest wick all the way to the highest body. So in this instance, we're drawing it from the highest wick, which is up here, to the highest body, which is on this candlestick, and I'm just dragging it across. And honestly, this entire time when this happens, all I'm waiting for is price to tap back into this resistance area, and then I'm waiting for my entry criteria. And we'll get into what my entry criteria looks like, um, in a second here. But as you see, as soon as price tapped back into this same area, the same 4-hour resistance area, it sold off very heavily. This could have been a trade that we could have entered and made a decent amount of money. Uh, I don't remember taking this trade. I'm pretty sure I would remember it cuz this is a pretty strong drop to the downside, but that's just how I draw my zones. Another example would be right here where we see price sold down very heavily. Got to this area and then bought up very strongly. So what I would do is the same thing. I draw my box from the lowest wick, since we're drawing a support zone, to the lowest body, which is right here. Then I would drag it across and wait for price to get back in that area. And as you see, when price got back in this area, it ended up buying off of it, and we could have made money when price was buying off of this support zone right here as well. Now, as I mentioned, price isn't always going to respect your support or resistance zone to the T. It's never going to go exactly where it went before. Sometimes it'll go a little bit outside of it, and sometimes it'll only go into it just a little bit and then reverse off of it. That's why it's important, and that's why I personally like using these rectangle tools instead of just drawing lines on my chart as support or resistance zones. Now we can see this example multiple times. This is where price had one strong move away. This is where price had another strong move away. But I mentioned support resistance zones are also valid when they have multiple rejections at the same area. For instance, right here where we see when price got in this general area, we can see it happened multiple times. The first time being right here, it sold off, it got here again, sold off, it got here again, sold off, it got here again, sold off, it got here again, sold off. So on and so on and so on. So to me, this is also a valid resistance zone, even though there's no just one huge sell-off. You see multiple times where price tried to get in this area and it sold off. Now, this is also a perfect example of what we talked about before, where I told you guys when price breaks outside of a previous support zone or a resistance zone, it actually ends up treating that previous support or resistance zone as the inverse or the flip of it. Because if we drag this same zone that we just drew, if we drag it across here, you'll see what happened. This was previously a support zone. So I would have drawn my support zone literally just like this. We can delete this now. I would have drawn my support zone just like this because we see multiple times prices bounced off of it, came back down into it, bounced off of it, came back down into it. And as we see, we broke below it. And what did price do? It came back up to retest that previous support zone. And what did it do? It treated it as a resistance zone and sold off again. It got into that same area that was previously a support zone, and then it sold off, treating it like a resistance zone. Drag it across again. As you see, it got in the general area and sold off. Now you can see many of these examples and realize that here, like you see another example, price got in this general area, bounced off of it, came to it again, bounced off of it again, bounced off it, bounced off of it. And you can see just how powerful this strategy can be as long as you're being patient enough and allowing yourself to be bored enough to not trade in any of this noise, knowing that you're simply waiting for price to tap into your support zones or tap into your resistance zones, and that's when you're taking action. Now you understand exactly how I draw my zones. You understand what support or resistance zones are, but what does it mean to take action? When am I actually going to make money from this? Because as I mentioned, we don't just enter trades as soon as price taps into our support zone or taps into our resistance zone. That's not a profitable way of trading. If you do that, you're going to end up losing money. You need to wait for confirmation that price is still respecting your support or your resistance zone. Because if we had just, let's say for example, entered a buy right here because price tapped into our support zone, we would be losing this trade because we didn't wait for our entry criteria that confirmed that price was actually still respecting this support zone. It was going to bounce off of it. So with that being said, let's hop into exactly when do I enter these trades? How do I actually make money, not just draw these support or resistance zones on my charts just for fun? Now, keep in mind, I highly suggest all of you guys follow me on Instagram. I'll leave a link for inside the description of this video. Because on Instagram I drop a lot of tips when it comes to technical analysis, because there's so many different elements when it comes to technical analysis, from understanding the right candlesticks to look for, the time frames, when you should enter trades, how many trades you take, all that stuff. And I drop tips and tricks like that on Instagram. It's much easier for me to drop simple tips and tricks like that on Instagram versus making a whole freaking 30-minute YouTube video about it. So I would suggest that you all follow me on Instagram. And shoot me over a DM too. I love talking to you guys. Um, so I'll leave a link for my Instagram inside the description of this video. All right, so let's get into what I actually look for in order for me to take action, in order for me to actually enter a trade. And we'll use this example here, which is one of the setups that we talked about inside of my Inner Circle. So I mentioned that I draw all of my zones on the 4-hour time frame, and there's a reason for that. Main reason is because the higher the time frame, the less price lies. If you draw a support or resistance zone on the 5-minute time frame, sure, you can find a bunch of support or resistance zones, but will they be respected as much as a 4-hour support or resistance zone? Heck no. The higher the time frame— if you draw daily time frame support or resistance zones or weekly time frame support or resistance zones, they're going to be respected a lot more than lower time frame zones. And that's why I really like to draw my zones on either the 4-hour time frame or the 1-hour time frame. But most of the time I gravitate towards the 4-hour time frame. But for my entries, I'm not entering on the 4-hour time frame because if I wait for the 4-hour time frame, it's going to be too late. And honestly, most of the time the move will already have happened. So when I'm looking for entries, meaning as soon as price taps into my 4-hour zone and I know I'm looking for a buy if it's in a support zone, or if I'm looking for a sell if it's tapping into a resistance zone, I'm going down to the 1-minute time frame to see if price gives me a reason to enter the trade and shows me that it's still respecting this zone. Now, what does that look like? So let's go down to the 1-minute time frame. Let's go to when price first tapped into this purple box. Let's delete this drawing. This is the purple box that we drew on the 4-hour time frame. Here we're on the 1-hour time frame. I want you guys to understand something. You all know that price never just goes straight down and price never just goes straight up. Price goes down, up a little bit, down, up a little bit, down, up a little bit. It makes all these highs and lows and then lower highs, lower lows, lower highs, lower lows. It continues to make that, and this symbolizes a downtrend, right? So when we see price making a downtrend into our support zone, all we're looking for is price to tap into our support zone. And instead of making higher— lower highs and lower lows, we want to see price start making higher highs and higher lows. Now, what does that look like? Let's actually map this out for you guys. So you see price is up here, price sells down, price gets up here, price sells down, price goes up here, sells down, up, sells down again, goes up here, sells down, goes up here, sells down. Now, during this period, we're making all these lower lows and lower highs., but we're not taking any action. Remember, we're being extremely patient because we haven't actually tapped our 4-hour zone yet. The only time we're looking to take action is when price taps into our 4-hour zone, whether it's a support zone or resistance zone. And all we're looking for is for price to show us that it's changing the direction that it's going in after it taps into our zone. So like I said, we keep making these highs, these lower highs and these lower lows. Price taps our zone right here, makes a new high right here, sells down, and then we see price break above that most recent high, signifying that it's potentially going in an uptrend now. And that would be a good opportunity to enter. So if we map this out very, very plainly, just on a high-level map out, we can see price sold down right here, bought up, sold down, Bought up right here, sold down, bought up, sold down, bought up right here, and then sold down, right? So we have a high being made here, a high being made here, a high being made here, a high being made here, a high being made here. We tapped into our 4-hour zone literally right here, and all I'm looking for is price to break a most recent high, and then I'm entering into the trade. So this is the most recent high. We tapped into our 4-hour zone. I'm entering as soon as price breaks that most recent high right here. And once I enter, I'm putting my stop loss below structure, which simply means I'm putting it below the most recent low. And we'll go over a sell setup as well so you guys can see that. But this is what I'm looking for: price to break above the most recent high after it taps into my zone. I'm entering as soon as it does that. I'm putting my stop loss below the most recent low that price made before I had an entry. And then most of the time I'm targeting any of these high points. So I could target this high, I could target this high as well. I could target this high up here. Let's just say we targeted this high right up here. I believe that is where we targeted or somewhere a little bit lower, like right here. And if you drag it across, as you can see, this trade ended up hitting absolutely beautifully. This ended up hitting for a 2:6 risk-to-reward ratio. Now, the reason this strategy is so boring is because this entire time here, I'm doing nothing. I'm seeing price make all these moves. I'm seeing all these people on Instagram and Twitter making $50 million, and I'm just sitting on my hands because I know that I'm being patient enough to wait for my strategy. The only time I'm not sitting on my hands is once it taps into these support or resistance zones. Now, I know what you might be thinking because I did mention earlier that I can trade this strategy with 15, 20, 30 minutes of time in the day, and I don't have to sit at my charts every single day, all day, every day, I should say. And then you see all these candlesticks right here over the course of this entire period. It's like an hour and 40 minutes. So because I know that no matter what happens in this area, no matter what the candlesticks are doing all in this area, I know I'm not taking any action until price taps my 4-hour zone or my purple zone, whatever color your zone is. I can use these things on TradingView called alerts. You can right-click on your chart and press add alert. You'll right-click right above, or I like to right-click right above my support or my resistance zone. That way I can actually get alerted. It'll send an alert to either my phone, an email, and it'll tell me, okay, price tapped into your 4-hour zone. And I know when I get that alert that now I can go and look at my charts and look for this entry, because as I mentioned, I know I'm not doing anything until it taps into my zone. So what I'll do inside my mornings is I'll go to my 4-hour timeframe. I'll draw out my zones. That takes maybe 5 minutes for me to do. And then I'm setting my alerts. I'm walking away, doing everything else that I have to do. And then once my alert goes off, I look at my computer, I look at my phone, I see if it gives me an entry. If it gives me an entry, I enter into the trade. I place my stop loss and my take profit, and I walk away because I don't have to sit here and watch this trade go. I know it's either going to win, it's either going to lose. I know me gluing my eyes to the screen right now is not going to help the trade win even more or help the trade lose even less. Um, so that is one of the tips and tricks that allows me to trade this strategy in less than 30 minutes a day, honestly. So definitely, if you're somebody who's like works a job or is in school, or if you're a parent and you have kids and things like that, you don't have a bunch of time to sit at the charts, this strategy is absolutely amazing because you can use these alerts knowing when you're actually going to enter into these trades and when you're not. Now, we went over this example As I mentioned, very, very simple entry model we're looking for. Let's say we're looking at a support zone. We know price is making these lower lows and lower highs into our zone. We're simply waiting for price to break above a most recent, uh, high after it tapped into our support zone. As soon as it breaks above it, we're entering into the trade. Stops is below the most recent low, and we're targeting one of the most recent highs that we had. As I mentioned, same thing vice versa. If we're looking at a resistance zone, we know price will make, uh, higher lows and higher highs going into a resistance area. We're simply waiting for price to break below a most recent low zone, which is right here. As soon as it breaks this area right here, we are entering into the trade. We're putting our stop loss above the most recent area that it went before we enter into our trade, and then we're targeting the most recent low area. Simple as that. Now let's go into an example of a break and retest, because honestly, you trade the same exact way, the same way we just went over this trade, the same way we drew out this break and retest example that we just went over. It's the same thing except we're waiting for price to break below it retest it, then we're going down to our 1-minute time frame and looking for that same entry criteria that we just went over on this example right here. All right, so here we are. Keep in mind, this is on YM, which is a futures pair. This strategy, I've used it when I traded Forex, trading any pair on Forex. I've used it trading futures, NQ, ES, YM. Uh, I don't really trade it trading gold, if I'm being honest. Me and gold have bad blood. I do not trade gold anymore, but I've traded using basically every single pair that you can think of. I trade it with crypto, I trade it with stocks. But in this example, we're going to go over a futures pair called YM, and we're going to show you a break and retest. All right, so we're going to draw this the same exact way that we talked about, from the bottom of the body to the wick of the lowest body right here. We're just going to drag it across, and all we're doing now is waiting for price to tap into our zone. So let's fast forward, wait to see if we can get price to actually tap into our zone here. Boom, we now see price tapped into our zone right here. And if we look, we're creating these higher highs and higher lows that we talked about. So price bought up here, sold down right here, bought up here again, sold down right here, bought up right here Sold down again right here. So we created all these lows. We have a low created right here, we have a low created right here, a low created here, and a low created here. But right now, as I mentioned, we're looking for the break of the most recent low. The most recent low is right here, um, because as I mentioned, we're looking for an entry now, um, because it already tapped into our 4-hour zone. So as soon as price breaks below this, let's see if we get a break below here. All right, here we go. We got a break below it, so we would have entered as soon as it broke below it. We put our stop loss above the most recent high. As we mentioned, this is the most recent high, and then we're targeting any of the lows. As I mentioned, we have a low here we could target here. We have a low here we can target, or we can just target this low right down here. We'll just target this low, uh, for the sake of this video. Let's fast forward to see how this plays out. Boom, perfect. Price literally just rejected exactly off of here, as I mentioned. And the reason it did it is because we followed the same exact plan that we talked about. We had the break and retest, meaning we had a previous support zone that price broke below. We simply waited for price to come back up to retest this area and treat this previous support zone as now a resistance zone. As soon as it tapped our previous support zone, which is now a resistance zone. As you see, it tapped it here. That's when we had our eyes open, ready for our entry criteria, which is a break of a most recent low. This was the most recent low. We entered as soon as price broke below the most recent low, which is right here, and then we put our stop loss above the most recent high, and we targeted either one of the lows depending on how long you want to hold your trade. This trade actually ended up hitting within a matter of 15 minutes. So you could have had a 15-minute workday and been completely done. Now, this strategy sometimes only happens 1 or 2 times a day, depends if you're looking at multiple different pairs. But when you're patient and you're able to wait for your support or your resistance zones to be tapped, this strategy can absolutely change your life because it has changed my life drastically. This is the first strategy I use that actually made me profitable It's the first strategy I used that made me my first million dollars. I'm not saying it's going to make you a million dollars today or tomorrow, but it helped me make my first million dollars over the last 8 years. It's realistically the strategy that I'm probably going to end up passing down to my children at this point. But I'm going to be 100% real with you guys. This is honestly just the first piece of the puzzle. The next piece of the puzzle is being able to take this and leverage prop firms or these funded accounts to actually help you scale up your trading profits. And that's exactly why I made this video right here. I break down how you can take this same exact strategy that I've been using for the last 8 years, and we just went over— take that and scale it into actual income utilizing prop firms and using other people's money to make money with day trading. I highly suggest you watch it because it's honestly the next step. I'll see you there.