How to Run Instagram DM Ads in 2026 (Online Coach)
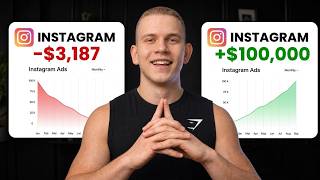
Maciej Choromanski walks through Instagram DM ads for fitness coaches: budgeting $100-$200 daily, targeting leads under $12 and calls under $150, and using Campaign Budget Optimization with broad Advantage+ targeting. He shows the exact Ads Manager setup, creative formats, and how to scale budgets 20% every 2-3 days without triggering algorithm resets.
Chapters
If you're an online fitness coach and you're not running Instagram DMs right now, you're literally leaving money on the table every single day. This is the simplest, most effective way to predictably book sales calls on autopilot in 2026. One campaign, one ad set, a handful of good creatives, broad targeting, and that's it. In this video, I'm going to show you the exact setup inside of the Ads Manager, the KPIs, the metrics that you need to hit, how much you need to spend to see results, and how to kill bad ads before you waste any money. So let's get into it. Now, how much do you actually need to spend on ads to make them profitable, to make good money? That depends on how much money you want to spend and how how much money you want to make. I'm going to explain all the metrics that you want to hit in a second, but at $150 per call with a 70% show rate, a 33% close rate, and a $3,000 fitness package, which is about an industry average, it depends on how much you want to spend. Let's say you spend $1,000 per month, you can hit a 6x ROAS. Now, as you scale, it's definitely going to start dropping, and this is not a guaranteed number. This is realistic if you have a good ad. And later in the video, I'm also going to explain the difference between the front-end ROAS and a back-end contracted ROAS because there is a big difference. But it's really up to you. If you want to hit $50K a month in revenue, well, you would need to spend about $11K on ads to hit that, right? Now, if you want to make $100K, you would need to spend about $21K. So obviously it goes up as you want to make more money. Now, if you want to make just $20K a month, you can spend $4K or $5K. Now keep in mind that this is only counting revenue from ads. If you also have an organic booking channel, which means you are posting organic content, for example, on Instagram, you have DMs that are— obviously this will be on top of what you are currently making. Or if you have a monthly recurring base of current clients that you have, this is going to be on top. As a good rule of thumb, if you sell $3K packages, I wouldn't spend less than $3,000 per month, which means about $100 per day. Like, this is like a good foundation because even if you spend $2,000 to acquire one client like that, you're still profitable. But if you spend $1,000 per month and you try to sell $3K packages, you just don't have enough data to even make decisions. And on Facebook, you are pretty much buying data with money. Before we get into the Ads Manager, I want to explain the entire campaign, ad set, and the entire ad structure. So we want to start with one campaign with campaign budget optimization on. You want to set the conversion event to engagement. And as far as this one ad set, you want to use broad targeting, Advantage+, minimum age 25+, obviously depending on your market. Value rules, which I'll show you how to set, and Instagram only, unless you also want to attract leads to different platforms, which I doubt you do. Keep in mind that post the Andromeda update, the creative does the targeting, which means if you have a good creative tailored towards a specific avatar, it's going to find that person even though, like I mentioned, we do broad targeting, right? Which might be counterintuitive. Like, I want to only attract my qualified clients, like qualified leads. Yes, if you do a good enough job with the ad creatives, which I'll give you the exact examples and the exact scripts that you can model off of in a second. If you can apply these scripts and talk to a specific Avatar, you are going to attract that avatar. But if you speak broad, you're going to attract the broad audience. Like I said, you want to give Meta diversity and let it find what works, what would resonate with a certain person. Meta has over 53,000 data points on every single user. It knows everything about you. It's pretty scary. But that means if you think you're smarter than the platform and you think that you will pick specific targeting and you will tell the platform what it should do, good luck. You know, I would rather give the platform great creatives so it can find the right person that this creative about this pain point would resonate with. Then I do a different creative about a different pain point. And then I give it to the platform so it can find the person that ad would resonate with. And that's how you need to be doing this post-and-drama ads. So we want to be doing video ads, which means talking head, different pain points of your avatar, direct to camera. Next, we have image ads. You can also try carousels. These are static creatives, usually natively created in the Instagram app. You can also use Canva for this. It's very, very easy. You can also use AI like Nanobanana to help you create some of these images. Now, that it also divides into low production and high production, which means low production is, to be honest, the easiest one to create and what you can start with to not overcomplicate it for yourself. But pretty much low production is you can go native into the Instagram app, create the image output, which I'll show you examples in a second. You can create it in the Instagram app. You can record a selfie with your iPhone, record the talking ad. You don't need any crazy cameras. You don't need to be in a studio. That's the low production ad. And these actually often outperform the polished ones. So that's why I'm saying that you can actually start with those. Now, as far as high production, now, like I said, since we want to give Meta diversity, ideally you actually do want to do low production and high production, but you can start with low production. So high production means professional lighting, edited, gives the algorithm a different signal. It's going to find people that would resonate with a higher Type of ad, right? Here, it doesn't matter if it's low, high. Every creative must call out your specific avatar. Generic ads attract garbage leads. Don't come to me, don't DM me after watching this video, after you run these ads, you burned money because you spoke up to busy professionals. No, that's not a specific niche. Busy moms over 40 that work in corporate environments, that's a specific niche. You call out those specific pain points, different pain points that that avatar has. You talk about different pain points in different ads, which I will show you right now. Here are the exact scripts and creatives that actually convert. These are templatized versions of winning ads from coaches doing $50K, $100K month. You want to just adapt them to your avatar. Again, you want to do variations of this. So the first one can be, I'm looking for 5. You've probably seen this one 500 times, but that's because it freaking works. So you want to call out a specific avatar, for example, high-performing career men, visual social proof. So a before and after of your clients, pain points as benefits. So for example, lose 20 pounds, eat out on date night, be confident shirtless, clear call to action, which means DM me ready, DM me transformed. Now one thing that I will add in post-production, the editor will add, be careful of the safe zones. If you add this call to action, as you can see right here, too low, it might be covered by the caption of the post and buy your profile picture. So it has to be higher because Meta also will add a call to action like learn more or send message. So if that covers your call to action, it will simply look bad. As far as video ad templates, there is a lot of different types of ads that you can run. For example, I'm looking for 5 client transformation story, direct ICP callout, and a green screen breakdown. Okay, so there's a lot of different types. You can stop this video and just check these templates. I don't want to stretch this video for too long, but pretty much the exact templates that you can follow, adjust them to your niche. You can throw this into Claude and any AI tool that you want to use, and pretty much it will rewrite it for you. There's life examples. So for example, I'm looking for 5, I'll show you one. I'm looking for 3 women over 40 who are struggling with belly fat that keeps hanging over their jeans, but they're too busy with work and life and kids to even think about going to the gym. If you want results like this, this, this, you can show before and afters without restrictions, endless cardio, or having to give up your favorite foods, DM me, transform, and also need the details. So this can be a talking video, this can be simply a selfie. You want to add captions, add the before and afters, and pretty much repeat it for all of these different posts. Now as far as the breakdown of how many images versus videos, this is really up to you. Images usually will attract cheaper leads, but literally sometimes the quality might be worse. The cost per lead will be lower, but the video ads will attract higher quality leads because they need to go through the full video to see the call to action and then DM you, right? Which means that there's more friction, but therefore the quality of the leads will be higher. So we usually like to do 60% images, 40% videos because it is just easier. But also if you don't have ability to record videos and you want to just launch these ads ASAP, you can also simply start with image ads. So create 8 variations of this image. So you can do, I'm looking for 5. You can do, are you a busy professional man over 40. So you don't need to start with, I'm looking for 5. Just do different variations that talk to different pain points. You can talk to AI tools to come up with different pain points that would resonate with your ideal client. Quick pause. If you want help setting up your ads, dialing in your creatives, somebody to just create all the creatives for you, give you the exact scripts tailored to your niche and getting your cost per call for under $150, making you profitable, click the first link in the description and book a call. There is a video of me explaining how the program works, how my company can help you with all of this and everything is fully done for you. You don't need to worry about setting any of this up. We create the ads, we monitor the ads, we keep you updated, we give you the data, we give you the reports, and we make sure that you're profitable. Again, check the first link in the description. Back to the video. So right now we are in the Meta Ads Manager. Now it might look a bit complicated at first, but it's actually extremely simple, and I'll show you step by step how to set up your first ad campaign. Now first, before you start doing anything, make sure you go to the settings in the Facebook Ads Manager and you link your Instagram profile, because we are going to be driving all the traffic to the Instagram page. So make sure that it's linked. Once you're done, you go to the main page and go to the campaigns right here on the left and click create. Like I said, we want to optimize it for engagement, so pick engagement Continue, you can just click Don't Show Again. Now for the naming convention, I'm not going to go into this too much in depth, but what we usually do is this naming convention: targeting, budget, date. So targeting, like I said, is going to be broad. If you do lookalikes, if you do retargeting, you would put that here as well. But in this case, we do broad. Budget, like I said, let's say you do $100 per day, and date is going to be pretty much today so you can identify it later. And you can obviously add any more notes right here that would help you kind of just understand what this campaign was. If you ever want to do multiple campaigns in the future, it might be helpful to add some notes for yourself. But if you don't, you can just leave it this way. Like I said, we want to optimize it for the campaign budget. Put the daily budget right here. This is going to be how much you are going to be spending on a daily basis. You don't need to change anything here. Next, then you click next, and now we are on the ad set level. Pretty much the way it works is you have campaigns, below that you have ad sets, below that you have ads, individual ads. And now we are on the ad set level. As far as the naming convention, we usually do this. So DM ads wave date. So for example, DM ads wave number 1, which is your first wave of ads. As far as the, the date, you would put the same thing pretty much. In the future, as you scale this campaign, you will want to duplicate ad sets, which means it will be helpful to put the date on the individual ad sets as well, so you can identify when this specific ad set was launched. So here by default is going to be message destination. So this is okay, but you want to click manual destination and you want to uncheck any platforms that you do not want to send leads to, which means you probably just want to send leads to Instagram. So if you have not linked your Instagram page earlier, it will probably prompt you to do it right here. So just link your Instagram, select it as the only placements. Performance goal, you don't need to change anything here. Now when you scroll down, first things first, we want to apply a rule set. Now a rule set is pretty much you tell the platform, for example, I am not willing to spend as much money if you show ads to people over 40. You can give the platform rules. So go to apply rule set. And here, as you can see, I have some created. And let me just delete one so I can actually add you more. So after you click add a value rule, you will see the screen right here. Now, like I said, you can pretty much limit who to show your ads to. So for example, age, you can limit based on different criteria right here. So for example, age, gender, or device platform, which means desktop versus mobile. You can do mobile operating system, which means iOS, like iPhone versus Android, location, placement. So what I would recommend is definitely do age. So pick age, select date range. So what you can do is pretty much here you want to select everybody who who you don't want to target. So let's say you work with women 35 to 44. You will select all of these different ranges, unclick. And next, if you target women, like I said, you can add another criteria right here and select gender and pick men. So keep in mind, this is exactly who you don't want to target. So then you want to select decrease bid. It might be on increase. Make sure it's decreased, which means you tell the platform, I'm willing to pay less if you show my ads to these people. And you want to decrease the bid. Usually we do 90%. Next, you can name the rule. It does not really matter. And click next, save, add the name right here. And then you pretty much just want to wait a second and then select rule from the dropdown right here, the one that you created. So you just select it and you're pretty much good right here. Next, for the budget and schedule, you usually want to set it up for midnight today so it has a nice redistribution of the ad spend throughout the day, but it doesn't really matter that much. Now, as far as audience, like I said, you want to use the Advantage+ Audience On, which means you give the platform complete freedom on who to show your ads to. As far as locations, this is important. You want to change it. If you're from the United States, it will be United States by default, but you want to I would like to do United States usually and make sure it's, in my case, I would like to do just United States. Now, besides that, you can do show settings. Here, what you can do is set custom audiences. But what's great these days, if you give platform enough freedom, it will actually retarget some of your organic audience, which means at first, as you start running these ads and you have a certain organic audience as well on Instagram, you will notice that a lot of people DMing you will be your current followers because this platform is going to find people that are most likely to convert after seeing this offer, which means most likely your current audience that is already following you. You don't need to really change anything here. For the age, I would definitely recommend to limit it. So like I said, if we work with women 35 to 45, we would select it right here. You just give the platform a bit of like a nudge who to show your ads to. Gender, definitely if you want to limit it, do women. And as far as detailed targeting, you don't really need to change anything right here. Now important for placements, you want to limit the placement. So as far as here, you want to uncheck all of these. You want to show more settings. And here when you click show more settings, or it might be showing it here automatically, you want to select manual placements. You want to switch it to Manual placements from Advantage+ Audience. And here when you scroll down, you'll see an option to switch to original placement options, which means like manual placement options. You want to click that because you actually don't want to place your ads on all of the recommended placements, which I will explain in a second. So when you scroll down right here, you want to go to devices, operating systems, doesn't really matter. For platforms, you want to deselect Facebook, most likely if you don't want to generate leads on Facebook. As far as placement controls, you want to go right here and most likely you want to deselect search results. As far as feeds, this depends. If you have your ads only in 9:16, you can also limit this. So uncheck all of these right here. This way you are only going to be showing your ads, your 9:16 ads formatted properly on Instagram Stories and Reels. You can leave these 3 options. But if you want to create 3:5 ads, which are like a more square format, you can also select Instagram feed right here as well. Here I would uncheck allow limited spend. I would exclude this and you are pretty much done with that ad set level. Now we get to the ad level, which is where you set up the actual creative and then you duplicate this ad to pretty much add more creatives. Next on the ad level for the naming convention, you would pretty much just want to again describe your ad, put image number, and then kind of a little bit of notes about this specific ad. So in this case, for example, I'm looking for 5, and here put the specific pain point so it's easy to identify which ad this was. For example, too busy for the gym, and then you pretty much put the date. Now when you scroll down, you go to create ad, you can disable this, and you go to ad creative. You set up creative, click image ad. Like I said, you want to mix image ads and video ads, but in this case you set up a specific ad, and then we are going to be duplicating this and replacing creative. So in this case, we want to have a 9x16 and ideally a 3x5 version as well, so we use placements for both stories and reels, but also feed. So let's say we start with this one, number 5. I'm going to click next. And here, as you can see, we have the 9 by 16. And here you can replace it right here, replace, replace it with the 3 by 5 version. You can either cut the previous one, or if you create this in Canva, you can do it that way as well. If you do it in the Instagram stories, then you'd pretty much just squeeze the text and then cut it so it's in this specific format. So after you're done with this, you can leave it original, original. Click next. And here is where you set up your body copy. Now, pretty much if you've been using Instagram, if you've been doing organic, the easiest way to understand it is pretty much These are like captions of your posts. So I'm going to show you a few examples right now. In general, you can add 5 body copies per ad. So again, we want to give the platform as much freedom as possible so it can find a variation of this ad with this specific body copy that would resonate with a specific person and would make them most likely to want to buy coaching, right? So that's why we want to use all 5 possible body copy variations. So there's a few different templates that we usually use with clients. I'm looking for 5 avatar callout with a note list, emotional slash identity hook, and a few different variations as you can see right here, and even a one-liner. So I'm going to link this document below this this video so you can check it out and kind of model off of this. You can use ChatGPT or Claude to just adjust it to your niche, but I'm pretty much just going to copy, copy it, go back to the Ads Manager. So here you want to pretty much just paste this, then click Add Next Option. Let's assume this is another variation. Again, you don't want these to be the same, you want to use the different templates, but just for the speed of this video, I'm going to paste the same ones. And like I said, you want to utilize all 5 possible variations. Next, you can uncheck this. By the way, if it ever prompts you to use any AI options, uncheck it because it will make your ads look really bad, or it will add music like a— the most cringe elevator music ever. Nobody will apply for coaching from that. So just uncheck any of that. For the call to action, we usually do send Instagram message. You can also do learn more. In this case, I'm going to send message since in the ad we have a call to action, DM me. That's why we want to have that set Instagram message. So you click next. It will even give you some variations of AI images. Let's just wait a second. It's going to generate a few different variations of your images. Some of them might actually be pretty decent, just in a different environment, as you can see. So you could potentially test them, but we usually don't use any of them. Click next. For the enhancements, like I said, disable all of this stuff. It might be on by default. Just make sure you scroll, scroll down and disable absolutely everything. Admin Music, click Done. So as you can see on the right, you will be able to see the previews of this, and you can even click Advanced Preview to see, for example, what it will look like on the feed, stories, um, slash reels, and it should load up right here. So after that, you can scroll down right here. As you can see, you will— you can also add the body copy variations right here if you have not done that earlier. Scroll down, make sure to disable all of these AI options. As you can see, Essential Enhancements, same thing, go to Edit, scroll down, and disable all of this stuff. You don't need it. Adjust brightness, like, I'm sure know that the brightness of your ad is good, right? You don't need AI to adjust the brightness. So make sure you disable it. Click save. 0 out of 6, 0 out of 6. Then when you scroll down, you can set message templates. So this is actually very important. You want to go to create new, edit template. And here you want to say, hey, DM me this word for more info on my one-on-one online coaching. For some reason, it's actually not letting me edit this, but here's exactly what you would put on screen. Pretty much you want to say, hey, DM me, transform the same word from your ad, by the way, it's very important, for more info on my coaching. And then you want to add an emoji of a finger pointing down. I'm going to put this on screen. Next for the pretty much remove them and only add one question, which is your keyword, which is, for example, in this case will be transform. This way somebody can click it very, very easily and then your automation can start messaging them. You pretty much want to set up a ManyChat automation and then it should be saying something along the lines of this after somebody DMs you this word, and then you can start conversations or your DM setter can start the conversation. We usually don't use the follow-up, so I'll just disable it. And you can save the template for yourself, you can rename it if you want, and just click save right here. Next, when you scroll down, if you want some more advanced tracking, you can set up URL parameters, which means UTM parameters, if that's what you want to do. If you if you want to set up a pixel on your website, which you probably don't because these are DM ads. So this is not really applicable most of the time. But if you're more advanced, you probably already know how to use this. Now, after you're done setting up one ad, like, fully with all the body copies, with, uh, with the images, with everything, with all the placements, with the message templates, you pretty much want to go 3 dots and duplicate. Make sure you again disable the music and duplicate it however many times you want, however many ads you have. So like I said, you want to start ideally with at least 8 to 12 creatives. So let's say we do 8, so I would duplicate it 7 times and click duplicate. Next, you pretty much want to just go one by one, and instead of Image 1, this will be Image 2. Then you can change this note. Let's say this is not I'm looking for 5, but this is I'm looking for 3. Let's say whatever the note about your ad would be, right? Change the date. You can get rid of this copy, and then you would go here, scroll down, and you pretty much just want to edit on the media, edit media, and change it to your different creative. So let's say we have this image. I'm going to use an image. Like I said, you want to use both images and videos. So as you can see, we have the image. This one is a bit of a, like, a higher production. It looks a bit more professional. Dave, for the feed version, you can click replace and then put that 3x5 AI version, this is what it's going to look like. Text, you click next. The body copies should be copied from the previous variation. The call to action should be good. Next, you don't need these unless you want to use them. Same thing. Next, you want to disable, as you can see, it might enable the music again by default, which you definitely don't want to use. Next, when you scroll down, make sure to again disable all of these AI enhancements if they are on. Now, if you want to use a video, so let's say you do a video, I'm Looking for Five, or one of the other ones that I mentioned earlier. Let's say I'm Looking for Five, add the title. You have to click the remove media to add a video and then click add media, add video, and that's where you would add your video. For example, this one, skip to continue. Here you most likely don't have different variations, so you can just keep this. Next, the body copies should be the same. Next, and make sure you disable all of the AI options again. And pretty much that's how you add videos, right? So you actually need to remove media, remove the image template, and replace it with a video, and everything else should be fine. And you pretty much just want to repeat this for the other ads until you have all of them set up. And then you pretty much want to click publish, preview to publish, and publish the whole campaign. If you previously set it so it launches today at midnight, you can click into the campaign. As you can see, you have campaigns, ad sets, ads. When you're on the campaign level, you'll see most likely your one campaign. You'll click into it. Next, you can see ad sets, which obviously we have just one. You can click into it, and here you can see the individual ads. So at first, it will be saying processing, then it will be waiting for approval. It will be getting reviewed by Meta for compliance, and then once it's done, it would pretty much go live tonight at midnight or whatever that date you set it to go live was. Now, keep in mind, before launching, you need to link your payment option. It will most likely not even let you launch this campaign before linking your payment option. Make sure you link a credit or debit card and it has funds there. It's not locked. It doesn't any limits because if for some reason the payment fails multiple times, Meta could potentially ban your ad account. So be careful with this. So that's how you launch your ads. As you can see, it's extremely easy, but what to do next? You need to be tracking everything and make decisions based on data. So cost per lead, you are aiming to get leads for less than $12. You are aiming to get leads for less than $12 per lead. It's very realistic. Cost per call, less than $150 per booked call, ideally per qualified call. Cost per acquisition should be about $600. It depends on your pricing package. If you charge $5K, you can spend significantly more. To attract that client. If you're charging $3K, about $600 would be the target to acquire one client. The math here, if you spend $150 per call and you have 4 calls booked with a 75% show rate, you're going to get about 5 showed calls. With 3 shows, if you close 1 out of 3, which is the industry average, that means you would acquire one client. That's where the $600 comes from, which means if you sell a $3K package, you would make 5x your money. If you sell a $5K package, you would make over 8x your money. Now, what should you be aiming for? Because there is a difference between a front-end ROAS and a back-end ROAS. Front-end is what you collected on the call and back-end ROAS is based on the entire revenue that you contracted with that specific client, which means including payment plans paid over time. And as a rule of thumb, it should cost you about 20% to 25% of your entire program price to sign on a client, okay? And as a target, 2 to 3x front-end ROAS is great, and the back-end would be 5 to 7x would be the target. Now, how can you increase the front-end ROAS, which means how much you actually collect and how much profit you kind of make upfront? This would be by utilizing financing options on Stripe, like Klarna, Affirm, Afterpay, Splitit. There's a lot of different providers for that. This way you can pretty much collect all the money upfront and the person can just split the payment, use a payment plan however they want using these providers like Klarna, Affirm, and the other ones. So how much to spend? We went over that earlier, but if you spend $3K per month, which is $100 per day, you're going to get about 250 leads, 20 calls, 5 to 7 closes. If you spend $4.5K, it will be about 8 to 10, and you want to scale it from here. And it all depends on how much you're spending. You're going to obviously sign on even more clients. I would recommend to spend at least $3K to $5K. Again, if you charge $3K, you want to be spending $3K per month. If you charge $5K for coaching, you want to be spending about $5K per month. That's because you need to give enough volume to the platform so it can have enough data to actually show your ads to the right person. Now you launch your ads, what do you do from here? First things first, you want to launch. So 8 to 12 creatives, like I said, at least, the more the better, and all calling out your avatar with different creative angles. From there, you want to monitor this on a daily basis in the Ads Manager. You can set up columns so it's more favorable, it's easier to see the right metrics. You want to track which ads are booking quality calls. You don't need to worry too much about the cost per lead as long as the cost per call and cost per sale is good, which means again, $1.50 per call and less than $600 $600 per sale. Now, if any ad hits 2x your cost per call KPI without booking quality calls, that gets killed. Which means at 150 targets, that means you kill at about $300 spent. In sophisticated markets, this can stretch to even more if you have a very, very like a narrow small niche. So what you will do is pretty much you would just go to the Ads Manager, you would see the amount spent versus the results. And obviously the results column shows how many people DM'd you, which means this is pretty much the leads that you got. You need to be tracking the cost per call separately. That's why it's so important to have a good tracking system. Now, if you've spent a lot of money and none of the ads brought you any calls, that means the creatives are the problem. So you would have to test new creatives and pretty much repeat the process from there and find which ad was the best performer and try to create more variations of that specific ad. Now, if by this point you are crushing it, the overall campaign is bringing you calls and you're happy with the results, you have a good ROAS on these ads, you want to scale winners. So now let's say you have 8 active ads and 2 of them are getting most of the spend. I wouldn't disable the other ones. You just want to double down on the winners. You want to be increasing the campaign budget by 20% every 2 to 3 days. And this allows you for gradual increases, keep the algorithm stable. Because if you do a big jump in spend, it's going to most likely reset the algorithm learning phase, and you will basically start from scratch. You can pretty much keep doing this, but over time you will experience— inevitably you'll experience creative fatigue, which means the ads that in the past have been performing well, now the performance started dropping. So what you want to do is you want to duplicate new campaign, put new ads in the duplicate, and pretty much repeat the pruning process. Don't add new ads into a campaign with proven winners. You can just keep that campaign running if you're comfortable with that. The performance has dropped a bit, but if it's still profitable, you want to keep running, duplicate the campaign, do some near variations of the best performers, which means similar ads to the best performers, and let them run and repeat this entire process. Keep in mind that this is not set and forget if you want to be profitable. It's an ongoing cycle: launch, monitor, prune, scale, test your creatives, and repeat. And that's how you scale. So that's how you launch and scale your first ads. Now, if you want help setting this up, first link in the description. The program is fully done for you. We will not teach you how to get clients. We will literally get the clients for you. We will help you come up with these ads, give you give you all the scripts, give you the image ads, create the image ads for you. And we have a great guarantee. So click it if you're interested. And like the video if you liked it, if you found it valuable. Subscribe to the channel, and I'll see you in the next one.