Learn how to install a Meta Pixel on your landing page or funnel, verify it with Chrome's Meta Pixel Helper, and set up event tracking so Facebook can optimize your ads and measure conversions. The video covers ConvertCloud, ClickFunnels, WordPress, and explains browser-based versus server-side tracking methods.
Chapters
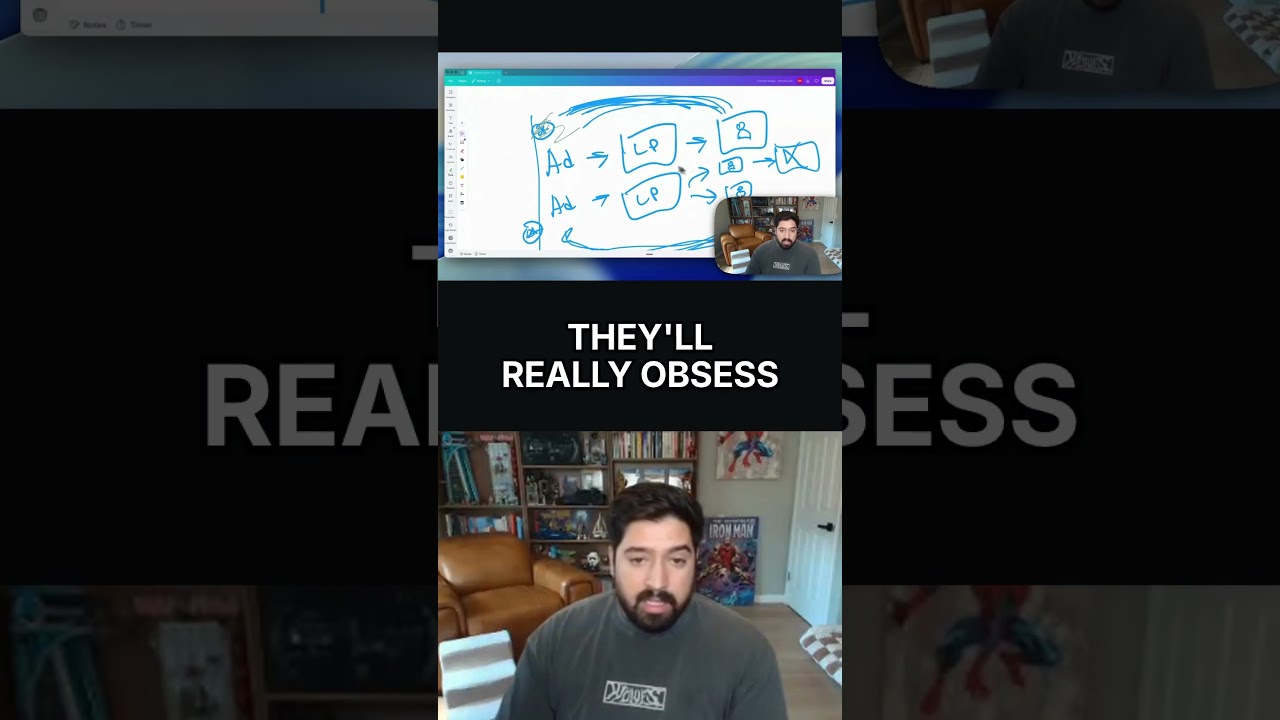
In this video, I'm going to show you how to set up your Facebook pixel on your landing page. So if you have a landing page that you're sending traffic to from your paid ads, whether that's a website or just a landing page, this video is for you. If you don't know what I'm talking about, come back to this page or this video once you actually have like a landing page set up. And if you need help with that, I'd really recommend if you don't have something like ClickFunnels, I'd recommend getting ConvertCloud. Gets you everything you need for a really good price for like $97 a month. You get a ton of pre-included templates that I include for you and it's free for 7 days. So try it out. If you don't have a funnel builder or a website builder, get this. It's got everything you need and you can go to convertcloud.io to actually get access to it. Now once you either have an account with this or you have a ClickFunnels account or you're using WordPress or anything like that, it's gonna be tough to make a video for every possible funnel builder or website builder out there, but the steps are generally the same. So what you should have done in the previous video is created your pixel. If you've done that, great. What you'll need to do at this point is find your pixel, and I've got a ton of them. Come on, where is the one that I want? Here. So you'll find your pixel. And once again, make sure that you are assigned to that pixel as well, very important. And also make sure that your ad account is connected as an asset to that pixel, right? Now once you do that, what you're gonna do is in the top right, click Open in Events Manager. And that'll take you here. And wait for this to load. And yours will probably look a lot different to mine. Mine is already receiving events. So this is what it will look like eventually. But, you know, kind of ignore this for now. What you'll do to get started is you're gonna hit Add Events, and you're gonna do Add a New Integration, and you'll do Meta Pixel right here, and you'll hit Setup. And then you're gonna hit Manually Add Code to Your Website, and you'll hit Get Started. From there, it's gonna ask you to do a couple things. So first, it's gonna ask you to copy this code. You're gonna copy that in your clipboard. And you're gonna immediately go to whatever platform you're using to create your website, landing page, funnel, all that good stuff. And you wanna put this code everywhere you can on every page that you have. So for example, if you're in ConvertCloud, you'll go find the page that you wanna add the pixel to. You'll then, and let me actually see if I have one that's Blank. Yeah, so let me, let me actually do a different one here. Let's do this one. So what you'll do is you'll then go to settings. Now at this point, your page should be built out and ready to go. If not, you'll have to come back to this step. But you'll go to settings and you're going to put this code in the head tracking code for the entire site. So you just need to go to settings, you'll paste that code in, and then you'll hit save. That will apply the pixel to all of the pages inside of that funnel. So like there's like 20 pages in here because I applied it here, it applied it to every single step inside of this page here. Once again, if you're using something like WordPress, it's gonna be in a different spot. You're just gonna have to Google where is, where to insert head tracking code on WordPress site, where to insert head tracking code on blank website builder, right? So that's just what you're gonna have to do. ClickFunnels, if you're using something like that, or LeadPages, it's very similar. So it'll be a little bit easier and more follow along. And then obviously if you're using ConvertCloud, you're in great shape because it's, it's really simple. So you'll go ahead and do that. Now what I'd really recommend you do is you also go to the Google Chrome Web Store and you download the Meta Pixel Helper. It's gonna make your life a million times easier when you're trying to figure out if this thing is actually working. So once you've dropped the pixel in, give it like 5 minutes and then open up the tab with the Meta Pixel Helper downloaded. If you've installed the pixel correctly, you'll know it's working because it's found the pixel and it's giving you a little tick mark. That's the first step to setting up your pixel. If you've done that and this is popping up for you correctly, you're off to a great start. If you have questions, let me know. Go on to the next video to learn how to set up events and what that means. And I will put the link to the Meta Pixel Helper Tool right below. Okay, now let's talk about setting up pixel events. So I'm gonna use a whiteboard here really quickly to kind of show how this works. What you're gonna do and how this kind of works is if you are running paid ads, you've basically got your paid ad right here. On Facebook, just excuse my handwriting. So you'll have your ad here on Facebook. And then this is if you're driving them to your website, right? So say you're driving them to your website here. Facebook is smart, but it can't always see or have visibility into what's going on in your website. And that's why you end up installing a pixel on here. Because the pixel is what can kind of cause that communication to go back and forth to say, hey, If someone has bought something on my website, tell Facebook so it can get me more people like that. That's really the purpose of the pixel. It's to optimize the algorithm so it gets you the best kind of people. And it's also to get you tracking so you can actually see, is ad 1 actually getting me sales or is ad 2 actually getting me sales? Now, how this pixel tracking is done currently, and this could change, but it's done in 2 different ways. It's done through either the browser. So just by installing the code on the browser and it's talking back and forth like that, or it is done through the server. So if you think about just like Wi-Fi, if you have a Wi-Fi server, it's kind of the same thing. I mean, I'm not going to make this too complicated, but here's kind of how it works. If you were to do it through— I'll get rid of this real quick. Let me redraw these boxes. And get rid of this. So if you were just to do the pixel on the website, which is, I think, standard practice of what you should do, the pixel's gonna be on both of your sites. And every time an action happens here, it'll send that data back. However, what'll happen is it'll send the data back once. Great. The next time, maybe it won't make it all the way. The other time it'll send it back. Great. The next time it won't make it. The next time it won't make it again. Then maybe it'll send it back perfectly. It'll send it back perfectly again.