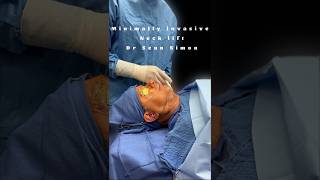
In this instructional video Dr. Sean Simon walks viewers through a minimally invasive, scarless neck lift performed under local anesthesia. He explains the use of the Precision TX laser and the MyElevate Suturaplatysmaplasty technique to achieve neck tightening without skin excision. The procedure begins with several 1 mm puncture incisions and a submental 2 mm entry, followed by local anesthetic infiltration and oral Valium for patient relaxation. Dr. Simon uses a clearing tool to separate the dermis, then a suture passer to encircle and divide platysma bands in a Gigli‑saw motion on both sides of the neck. He places permanent sutures that are anchored to the mastoid fascia and run beneath the dermis, creating tension that lifts the jawline and neck. Laser energy is applied to the superficial plane to promote collagen genesis and skin elasticity. The video shows immediate intra‑operative results, including enhanced jawline definition and removal of skin pleating within days. Post‑procedure, small incisions are closed, dressings are applied for 72 hours and maintained for several weeks, and patients are instructed on postoperative care. Dr. Simon concludes by inviting viewers to contact his office for consultations.
Chapters
I'm going to demonstrate in this video the minimally invasive neck lift. In this particular procedure, I'll be utilizing the Precision TX laser in addition to the MyElevate Suturaplatysmaplasty to perform a scarless neck lift under local anesthetic. I'm making several small puncture incisions. These are 1 millimeter each and will not require any sutures. This will allow for the passing of the suture. Initially, what I'm doing is using a clearing tool just to separate the dermis from the underlying attachments. At that point, I will use a suture passer to grasp and then lift up the platysma bands, which I'm doing in this, to place the suture below the platysma or deep to it, and then I'll pass it back superficial. So I've essentially encircled the platysma band on the left side of the neck, and then I will divide that with the suture in a Gigli saw type motion, which you can see demonstrated here. Now I'm doing it on the right side. The purpose of this is to divide those platysma bands, which is a big broad muscle of the neck, This will allow for much better lifting and contouring and tightening of the neck in this minimally invasive scarless procedure. Making a small submental 2mm incision to allow, and then as well as 1.5mm incisions just at the junction of the earlobe and the neck. Placing local anesthetic now. Prior to the placement of the laser energy, the neck has been infiltrated with local anesthetic. Again, this is all just under local anesthesia. Patients receive some oral Valium just for relaxation. The, uh, this, this point that in this case involved a little bit of liposuction, which was demonstrated there, and placing additional local anesthetic followed by laser energy into the superficial plane to allow for skin tightening and improved elasticity of the skin with collagen genesis. Utilizing a tape measure here just for the additional markings, you can see the lower border of the jawline being demonstrated, followed by, uh, placement of additional puncture 1mm incisions. In several different key locations to allow for passage of the suture and anchoring to the mastoid fascia, which is some tight fibrous bands behind the ear. I like to prep a second time prior to the placement of the suture just for extra sterility precautions. Now I'm placing the suture starting at the lower midline incision, passing it just under the dermis to the next point midway between that and the ear, and then followed that to the area of the mastoid fascia, at which point Those fascial attachments will be encircled with that permanent suture and then passed back along just inferior to the jawline to that middle incision and then back to the central incision. You can see the pulling effect and how it's anchored in those tight fascial attachments, which is key to getting that lifting effect. Suture is again passed towards the opposite side to the right side and then behind the ear in the same fashion was done on the right. And then once again pass below the jawline back to the center midline. At this point, both sutures are elevated. The patient's neck is placed in an extended position. You can see with tension placed on the sutures, excellent jawline definition being created immediately. Those pleating that you see underneath the skin will be gone within a day or two, at the most several days, and that's actually a good sign with regards to the tension. Suture is cut, and then it is— suture tool is used to make sure that it is buried, and the small incision under the submental area, or just under the chin, is closed with a tiny suture that is removed after a few days. Here you can see the immediate effect on the jawline and the neck compared to preoperative photographs. This just demonstrates excellent contour in this minimally invasive procedure that involves no skin removal and no scars. Again, additional photos demonstrating the, the pull in both a horizontal and vertical direction. Excellent jawline definition. You can see the border of the mandible, and then the dressings are placed. These are left in place for 72 hours and then kept in place as much as possible for several weeks. You can see postoperative days 3, already demonstrating a pretty dramatic effect from this minimally invasive scarless procedure. Please contact the office if you'd like additional questions, you want a consultation regarding this particular procedure. Thank you for your attention.