The INKspired Life
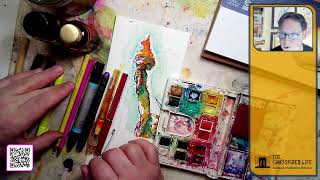
Artist Jason Nicholas colors a Statue of Liberty sketch live with inks, watercolors, and markers, explaining how each material bleeds and layers. He shares tips like using dirty water for soft edges and takes suggestions from regular viewers in the chat.
Chapters
Hey everybody, happy, um, Tuesday night. Hope you're doing well. It's March 5th. I am popping on here briefly. I'm just going to add some color to, um, the Statue of Liberty sketch I did last night. It'll be fun just to come on, throw down some color, have fun, and just be playful. Hope you guys are doing well. Let me know where you're watching from and how you are doing. Hey, Linda S is in the house! Linda, how you doing? Hope all is well. Oh, I love the flame color and of course all the greens. That's awesome. I hope you're doing well. It's always great to see you. Hey, Karen's in the house. Karen, great to see you also. Hope you're doing well. You guys are so fun. It's so fun when you pop on. So, this was a Statue of Liberty sketch I did last night and I thought it'd be fun just to throw some color on it today. So Linda loves the flame color. So here's the flame color. Let me put the cap on the bottle so I don't spill it. Karen, thank you so much. It's always great seeing you, and I always appreciate the stars that you send, so thank you. Means a lot. This is the color I use right here. It's called Inferno Orange. What a cool name. Let's try saying it differently. Inferno Orange. All right, wasn't deep enough. Anyway, it's a, it's a pretty cool ink. I'll zoom in here if you can read the— if you could read the label. Diamine. Diamine. Um, really, really cool. So that's what I threw down. There's actually like golden flecks in here. You can kind of see if I shake it. Look at that. It's beautiful right inside the bottle, right? But when it dries, there will be a shimmer to it. I don't know if you can see the shimmer yet. It might be hard to see, but yeah, it's a pretty cool color. Love it, love it. I'm not gonna add too much color to this. I'm going to leave the white that you see white, but I do want to pop in a little more, uh, some turquoise. I want to drop in some of this turquoise kind of thick in some places so it really pops out. Is it an ink? Yeah. So this is an ink. I totally— it's a great question. I bought it, I think, a couple of years ago. I think it's an ink. I'm going to say yes, it is an ink. I've had it for a while, but I haven't used too much of it. A little bit goes a long, long, long way. Oh cool, I sent that to you. Oh, Linda sent this to me. Linda, thank you so much. I totally forgot. This is courtesy of Linda. Yes, thank you. I totally forgot who sent that to me. Here it is. It's making an appearance. I'm so glad you popped on to, uh, to remind me. Totally forgot. All right, let's dip into the watercolor. I'm going to throw down some really thick— thank you for the thumbs up, that's cool. It's fun seeing those emojis fly across the screen. I'm going to really layer this on pretty thick. You can see it on my brush, not a lot of water. And let me zoom in, maybe zoom in, let's see. Yeah, go here. And I'm just going to— I want to dab in. I'm just going to dab in some of this turquoise. I just want it to be really punchy. That is my tech— technical artistic word of the day, punchy. I really want to just— I want the color to have a punch to it. Um, let's see, I'm gonna throw— it's kind of tapping it here and there. I don't want to lose what's underneath. And maybe I'll throw some in here. So my brain is just, it's just kind of saying, all right, put some here, put some there. It's kind of random, to be honest with you, where I'm throwing down this turquoise. And I feel like I do need some up in the flame area to contrast with this really cool flame that's happening. I'm going to water it down a little bit because I, I'm making it a little more transparent because I want some of the orange to show through the turquoise. And I'm just dabbing my brush right on the paper. So I think just by adding This is kind of making that orange pop even more. And I do want a little bit stronger, so I just grabbed some more of the Aqua and I'm just going to do that and we're going to let it bleed together. All right, that's cool. I don't want to overdo that. Let me zoom out. There you can kind of see what it's looking like. I kind of like it. I feel like I need to put some yellow right in the flame here. So are these really the colors that the statue— statue is? No, not at all. It's just my take on it. I just want to have fun, throw down some color. I'm going to dip in— what do I want to use? I want to use some of the Preppy Yellow. I— you guys know I love— maybe you don't know— I love this Preppy Yellow color, but I love it even more straight out of the tube. So I'm going to take it off, I'll clean my brush off. I am using dirty water. There's the color of the water. Dirty Water for me just helps kind of get that grungy look I like. It's a fun base to work with. I'm going to dip my brush in the tube and let's see if I can throw some down on here. I might even splatter some. We'll see. There we go. I just wanted to throw a different shade of yellow in here just to give a little depth to that flame. Kind of want to do a little thing at the top like that. Just a little— I'm loving it. Let's throw some of this yellow. It's really more of an orange yellow to me. I don't think I'm going to splatter any on this one. Let's see, I want to leave the white spaces white. Um, I don't want to throw, throw some down. Just pop some down in here, but you can't see that. My bad. There we go. So I have some of that yellow happening here, a little bit here as well, and I did throw some up in here. I think that's all I'm going to put on of that.
I'm going to put the, put the ink back in here.
This is a cool little piece. I think this this might have enough color on it, guys. I do feel like I need more. I think when it dries, what I'm going to do is I'm going to hit— I'm going to hit just kind of the middle of the flame, this area here. Let me zoom in. You could actually see what it's doing. It's looking kind of cool as it dries. There you go. Uh, hopefully you can see on camera, it's kind of cool the way it's drying. Some of that yellow pink I just put on there is pushing away that Inferno Orange a little bit and you're getting a hard edge around here which is kind of adding to the cool flame effect. After it all dries, I'm just going to come in with a yellow highlight and we're just going to really put some bright yellow on there but it's too wet to do that. Lemme know if you guys like this one. You like the Statue of Liberty? Is it cool? Notice I did a little trick here, a little behind-the-scenes secret. So if you're watching live, here's a bonus tip for you. You may share with your friends. There was actually more of a face to this. I cut it off. I didn't like it. Statue of Liberty face is hard for me to do. So, I literally just cut the paper, cropped it, and I love the way it's cropped. Everybody should know or be able to identify what this is based on the little bit of information we have. So, don't be afraid to crop those images. And just because a figure has a face or a statue has a face, you don't have to draw it. So, that's kind of my little cheat code. Hey, Eagle Scout Kiko, good to see you. Hope all is well. I'm assuming that you, my friend, are done with your chorus tonight. It's good to see you. D-Ray's in the house. D-Ray, great to see you. Cool is right. Awesome. So glad you popped in. Karen says, I love Preppy Yellow too. Oh, I'm so glad you love the Preppy Yellow. It is a fun, fun color. Normally I'll take it out and I'll splatter it all over. Really, really fun. I do love Preppy. There's one thing about Preppies I'm not too keen about, to be honest, is they're so— the plastic for me is so Maybe I'm really strong, but the plastic is really flimsy and I keep cracking my preppies. There's a crack right here, um, so the tube doesn't hold— the end of the barrel doesn't hold on to the front. So just be careful with your preppies, it can break really easily. I think it's a really cool sketch. Thank you, Linda. Karen says, I like You guys like it. I'm liking it too. I do want to come back in after it dries also. I'll take my Sharpie and I want to do some more hatching. I kind of— I tried to show some of the, the rivets here, the copper sheets. You can kind of see here some rivets happening just to show how, you know, this is put together with the sheets. Sheets of metal, right? I'm gonna pop outside my door. I don't know if I can do much more until it dries, guys. Let me— well, you know, I do have to throw down, uh, I've got to throw down some of my— people have called it my signature color because it seems like this neon pink is ending up— ends up somewhere on a lot of my sketches. So let's throw some of this neon pink on here. I have been working at an angle as well, so I just kind of have this propped up at an angle so the ink and the paint would run down. I'm going to move this for now and just go flat. Let's do that right now. We're flat. Throw down some pink. I'm gonna throw some down here also. I usually like it, like it in 3 places. So let's see, we have, um, 1, 2 Let's do 3. It's just somewhere right in here. Keep a little bit of a line. So we got 1, 2, 3. That's good for the pink. Ta-da! If I were to throw another color on here, I would throw some purple. And I love using the Pilot Varsity Purple. That would be cool. Maybe just to darken or shadow some areas on here. Pretty cool. Pretty cool. Hit me if you guys have any questions or comments. I'm going to wrap up in about a minute or so. I'm hoping it's dry so I can throw down some of that highlighter. Let me show you this closer. Let me see if I can get the lighting here. I want to— it does have a little shimmer to it, that ink. I could definitely see it here in person. I don't think the camera is really picking it up. Yeah, I'm not seeing it too much. By the way, you guys have been posting some really, really cool art. As always, Karen's had some really, um, really, really, really cool cool bird paintings. Yeah, it's still too wet. I can't really throw the highlighter on there. Yeah, really, really awesome stuff. Thank you guys for posting your artwork and sharing it. I love seeing what you're doing. Your creativity definitely helps to fuel mine, and hopefully I'm helping you guys fuel yours a little bit. This is a— oh, I picked up— I actually just picked up the purple pen. I wasn't even paying attention. So now that we have some, maybe instead of using the Sharpie, I'll just kind of use this purple pen a little bit here. I'm just kind of tapping it a little bit. Maybe I could pull out this— the hair here a little bit. I'll use it in here for the inside the crown. I'll throw a little touch of water and bleed some of it. It's actually bleeding. You can see it bleeding here. The torch right in here, it's bleeding. I think this is a hard one for the camera to pick up the lighting. You can see it there. See, I threw some here and some here. I do want to bleed this here a little bit. Let's hold it. Do not try this at home.
Hold—
holding this in. There you go. My hands are shaky, but that's cool. I think you got the idea. Just want to bleed it a little bit. Yeah, there we go. It was too, uh, in your face. I just wanted to leave it a little bit. These I don't mind because they're kind of shadows in the crown. The window openings are— I think I'm going to put the brush down. This is awesome. I am going to try some— I want to try a tech thing. I'm going to leave this here. Let me know, guys, should I— I'm kind of thinking of adding, um, blue in the background using Right here, I got it. I'm thinking of using this color for the background. Some Winsor Newton watercolor marker, and this is the cerulean blue. I like using it. So what do you guys think? Should I throw some blue maybe around this and pop it out a little, or leave it white? I'll let you guys put your thoughts in the comments. I'm actually going on Instagram. Um, I just want to check the setting. My camera software had an update, so I want to make sure it, uh, it's all working. I don't know, I can't check it. All right, you guys are liking this one, let me know in the comments. Should I throw down some of the blue? Well, I think I already decided I'm gonna do it. Blue complements orange, it does. So when blue meets orange, it says, hey, orange, I like the way your hair looks today. Nice shoes you're wearing. That's, that's my blue complementing the orange. Ba dum bum tsh. All right, let's throw some down. Here's how I like to work with these. One of the ways I like to work with watercolor markers. I'm not going to throw it right down on the paper because it's, for me, it's hard to spread it around, it kind of soaks into the fiber. So I like to take my watercolor markers, and I'm actually going to put some of this blue on the board, throwing it right down on this board. Let me just get some water on this brush. It's going to have some other colors mixed in, that's okay. And then we're just going to kind of pick up some of this And we're gonna, we're gonna throw it down on here. Again, there are some other colors mixed in and I don't mind. It doesn't have to be pure blue. And then I could come back, add some more in here. I could tap it on here if I want. Maybe get a little texture here. No one says it has to be—
I'm trying to get a good shot.
I think that's too far. Let's go back to this. There we go. And I'm just tapping down the watercolor marker. It's going to let it bleed a little bit with the water. We'll come back and we can just swirl it around. Just swirl, swirl, swirl. It's fun. Swirl, swirl, swirl. All right, cool. Um, let's throw some more on the board. We'll add some more on here. You can kind of see, you can get the gist of what I'm doing. Sorry, I do move my paper around a lot when I'm sketching. Hopefully I'm not making you guys seasick at home. I, I don't want to be too fussy. And overwork this. I want to have a real loose look to it. I think I'll bring some more down. We'll just kind of do this. I'm not going to do all this and leave this white. I think I'm just going to kind of bring it down near the crown. Hey, that made a rhyme. Bring it down near the crown. Let's do this. Getting silly, getting silly over here. I like, I like some of the yellow mixed in there.
It's looking cool.
I'm lifting, probably lifting up some of the paint on the board underneath, which I like. And it's not about being pure. It's It's about being playful. Let me know if you guys like the blue. Do you think the blue is helping to, uh, pop out the statue, the arm, and the flame area a little bit? I'm actually really liking it. Let me zoom in and show you what's happening here. Ta-da! So here's some of that color that mixed in, whether it's from the board, maybe it came from the dirty water, I don't know, but I like it. I like the randomness, which is fun for me. Um, I don't like this though. I'm, I am not liking this edge here. I gotta, I'm gonna soften it a little bit. So I'm just going to grab some more, I'll set down some more of the watercolor marker here and then let's grab some of that. I just want to soften this area a little bit. Just tapping the brush down. Yeah, I like that better. There we go. I'm liking that better. It just softened it up a little bit. I'll zoom out so you can get a better look at it as it's drying. Ta-da! Patty's in the house! Hello Patty, um, great to see you. Turquoise blue. I think it'll be cool. I like the blue. Awesome. Blue helped. Thank you, D-Ray. Karen says yes. Patty says evening everyone. Karen says hi Patty. Yeah, you guys are fun. I love, uh, reading what you're writing in the chat. There is one last thing. Well, there are two things. Let's see if the flames are dry enough to throw throw some highlighter in. Let me grab a better highlighter. This one's kind of shot. I need one that has more juice in it. So you're probably not surprised, but I'm using a Sharpie highlighter. I love my Sharpies. Anything Sharpie. Yeah, it's still too wet, so I can't add that yet. Let's see, let me see if I can throw some here. So I could throw some down there. Oops. I could throw some down here.
All right, cool.
Here's a really cool color combination that I, really love. I'll bring this up closer. I love taking yellow highlighter and putting it over the Neon Pink pencil, and you get a really awesome orangey pinkish color there, right here. I love that color. So fun. The other thing I did want to do besides that, the absolute last thing I would do is come back with— I think actually I would come back with a Lamy. I was going to say Sharpie, and I just want to pull out the edge a little bit, darken it. But I think I would take my Lamy because I feel like with the Lamy I can get a little more darker line or actually a little more irregular line because of the ink here. So, and I still wanted to have, I wanted to keep the sketchy look. So let's, let's do it. I have a scrap here. Let's make sure my Lamy's ready to go. I haven't broken out the Lamy in a while, but it— ink's coming out pretty good. I like it. And you know me, I could never resist doing a sketch of the Brooklyn Bridge, even if it's really super quick, super wonky. All right, cool. I just, just doing that quick to get the Lammy going. Bum, bum, bum, bum. All right, let's throw this down. I'm gonna hold my hand further away from the barrel so my wrist is looser. It's more floppy. I hope I'm not zoomed too close. Notice I am not trying to sketch exactly on the lines underneath. I'm going to pull out There is a thumb here. We're going to pull it out a little bit like that. And I think I just want to come around here.
There you go.
I just wanted to darken the edge a little bit, pull it out. And if I did want to soften— another reason I went with the Lamy is if I did want to soften that edge, I could come back with some water and just wet it. So let's say I wanted to soften here a little bit, maybe bleed it. The Lamy ink gives me that option. The Sharpie wouldn't let me. Soften the edge if I wanted to. So that was another reason I went down the Lammy path. All right guys, I think this one's finit, finisht, except for the highlighter. I don't know if you have any final questions or comments. I'm gonna wrap up. It is 8:37, 8:38. Um, I love pink and yellow together. Yeah, Linda, pink and yellow. Let's, uh, we're gonna put this side. Let's do a little pink and yellow on this rapid-fire bridge here. So let's just throw down some pink as we listen to some spy type of music because this is filled with intrigue. All right, let's just throw some highlighter on. No, the Lamy ink is bleeding. See, I'm so used to always starting with Sharpie, I forgot. So I bled some of the black up there. It's all good, we're just playing. But I got black on the highlighter. Dang nabbit. That's why I usually start with a Sharpie. Epic failure, but it isn't really because we can grab a neon yellow color pencil. Just mix Let's mix some colored pencil here. There you go. I'll zoom in so you can kind of see what's happening when I mix the yellow and pink. Oh, silly me. Hello, I just came up with the solution to this issue. Why don't I just throw down some colored pencil in here?
That's—
that is working. I'm getting the yellow I want. It's not as vibrant, but that's okay. We'll just kind of do this. Just kind of do that here. All right guys, there you go. We have a Statue of Liberty. Dire is waving. Hey, D-Ray is waving in Facebook land. Good to see you guys on Facebook. I heard Facebook was having some issues today. People were not able to get onto it. It was down. Yeah, so I'm glad people are actually out there. Glad I was able to get on. Hey, you guys are awesome. I do appreciate you watching so, so much. Let's just do a little lineup here of what I used tonight. I used to always do this. And I got away from it, but let's do it tonight. I like to kind of bring out all the stuff I had used in our sketch. Let's see, and you can really get a good sense of what a mixed media style architectural sketch looks like that I like to do. Got this, this, we have our dirty water there. I didn't use the red, I'm just, I just picked up the red, it was here. Um, this, this Pilot Red ink is incredible, love it. Who says you can't just throw down some red, right? Just don't go too cray cray. All right, there we go. All right, so now I have some red on there. What else did I use? Oh yeah, my watercolor. See if we can fit this into the shot. Sure we can. All right, all right, this is the family of stuff that was used tonight. We'll go through it all in case anybody's curious. Um, I did throw down some Apple Snail Ink. Which you can no longer get, so I am treasuring every drop of that. This was the Inferno Orange, courtesy of Linda S. Thank you, Linda. We have some of that. We have our bamboo brush, Pilot Precise Red, we have our Preppy Yellow, we use a Pilot Varsity Purple, Winsor Newton cerulean blue watercolor marker, neon pink and neon yellow Prismacolor color pencils. They're not watercolor pencils, just regular color pencils. We use a Sharpie highlighter. We use the Sharpie ultra fine. We use the ultra fine, not the extra fine. I did a little video on that if anybody's interested. I think it's on YouTube. Uh, Lamy pen with Lamy ink and watercolor here. Use mostly the turquoise and a little bit of this yellow orangey color. All right guys, that's a wrap. Thank you guys so much for watching. I appreciate you all so, so much. DRS says thank you, Jason Nicholas Nicholas. Jason Nicholas, enjoy your visit. Enjoyed our visit. Oh, I'm so glad you enjoyed it. It's great seeing you, D-Ray, Linda, Karen. Great seeing you guys as well. And Patty popped on too. I appreciate you all. Um, we need to do another Inkling Zoom session. That would be awesome. So maybe in a couple weeks. Take care, guys. Have a great, great night. Keep paying it forward. Use your creativity for positivity. Peace out. Peace and live creatively. See you soon. Take care. I'm gonna wave to the camera and then I'm gonna hit the finish button right there. Finish. Good night, guys. Take care.