The INKspired Life
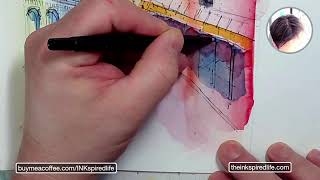
Artist Jason Nicholas sketches urban scenes live while explaining his mixed-media process: watercolor washes, ink outlines, colored pencils, and markers. He shares color-mixing tricks like making custom grays from blue and brown, and demonstrates how to capture architectural details while keeping drawings loose and expressive rather than photorealistic.
Chapters
Hey there, guys. Hope you're having an awesome Saturday. It's 12:15 PM here and just popping on, gonna do some sketching while I'm eating my lunch because I have some other work I have to do today. So I want to pop in and just get some sketching time in while I can. This— just want to show this before I move on to the thing I want to work on. This was just a sketch, just an ink sketch with a Sharpie that I did yesterday. And I wanted to add some color, so I broke out some of my colored pencils here. So these are Prismacolors. I love Prismacolor colored pencils, and I just thought it would be a fun way to pop on some vibrant colors. So I have some fluorescent pink and fluorescent yellow and chartreuse. Chartreuse is a color that I've I've come to actually really like in the past couple of years. I've never used it before then. So yeah, so here's a quick sketch. Just want to add some color, make it a little more vibrant. And I think it came out fun. Very, very loose. I threw some people in there just to maybe give some scale. This is the Bridge of Lions in St. Augustine. So I got some peeps kind of here walking along the bridge. So that was a fun little sketch to do. Hey Cameron, good to see you. Hope all is well. Cameron's in the house. Cameron, thank you again for, um, coming in the other day. That was awesome. I really appreciate it so, so much, and I hope you're doing well. So I'm going to pop these Prismacolors back over here, get them out of the way. This is what I want to work on just for a few minutes. Hope you guys don't mind if I eat a little bit while I'm sketching. Kind of multitasking. Asking. But, um, so this is a sketch based on a scene, a view I saw from the High Line in New York City. Really cool pedestrian bridge across here, kind of a perspective looking at the street in the background. And I'm just playing around with watercolor, so you just see a watercolor wash kind of here in the background. And I think what I want to do now is I want to take either a my Pilot Pen, maybe my Sharpie, and we'll just do some sketching on top of the watercolor background and add some little bit of detail to it. All right, there we go. Cool. Cameron said absolutely. That's so cool, Cameron, you're the best. So let's just sketch. I think I'm gonna sketch with my Sharpie because I might come back and add some more color wash on top of it, and I don't want my black ink to bleed, so I'm going to just sketch with my Sharpie here for a few minutes. So this is a very, very cool pedestrian bridge across here, and there's some detail, there's some windows on it. I am actually looking at a reference photograph of this bridge. I actually may even break out— actually, I might break out some fine liner pens, um, just because I want a thinner line. Let's see if this one works. Uh, it's not too thick. Where's my— oh, here it is. Here's a point— here's a 0.1, so I'm going to sketch some finer lines in here. We have these arch windows. So you guys know when I sketch, I'm not trying to replicate a photograph or a scene exactly. I'm just picking up some of the pieces, kind of just interpreting it into what I want it to be. So I'm not counting all the windows that are on this bridge. But I just like the shape. There are these cool arched windows. There we go. So we have that going on. I might break out my Sharpie just to pull out kind of the bottom of the bridge a little bit. That's where the bridge hits the buildings on the side. Cool. And this cap does not go with this pen, as I'm trying to put it on. Just figured that out. All right, there is a cool little detail, roof detail up here. Kind of comes up something, maybe curves up like that. We have some kind of finials or points going up there. So that would be the roof of that. And let's sketch in— we have a lot of windows. So a couple ways, I can either actually draw all the rectangles for the windows, or just kind of throw in some color. So good question. Actually, these I might actually wouldn't mind washing with some water. So I'm just gonna sketch these in. Let's see, where do I want to start? Let's just start over here. We'll just sketch these in kind of quick and loose. I'm not even going to sketch in the full shapes because the idea is I'm going to take a brush. I'll just take this brush here. Actually, let's use— I will use this one. I'll just bleed some of that, just bleed some of that ink just to create the idea of windows happening here. So let me just throw some of these on. Is this accurate? Nope, this is not accurate by any means. There are a lot more windows, they're more precise, but it's serving the purpose that I want to serve right now. So this is a, this is a sketch about building up different layers. So start off with a pen sketch, did some color wash And I'm going to add some more pen on top. And I'll probably add some more wash. I might even add some mixed media, maybe some color pencils in the end. There's this kind of overhang here. We've got the scaffolding happening down here. The Sharpie, the Sharpie does not want to work too well. There we go. So we have scaffolding. Scaffolding is everywhere in New York City. You can't escape it. Scaffolding is just— it's part of the urban landscape. And what I like about it here is I just kind of like the structure with the cross bracing. So we'll just show some X's, some diagonals in here. Create the idea of that kind of scaffolding happening here. And we actually have these metal— yeah, the Sharpie is not doing the best right now. We have these metal angles going back to hold that scaffolding in place. So we got some metal pieces like this at an angle. Boom! So you can see, as you're just adding more layers, it's starting to take on its own life just by adding that scaffolding. It's adding so much character. I think the Sharpie has seen better days, so we're going to put this off to the side here. And I got another one here. I always have the backups. Hopefully this one works. We have a kind of a modern-ish building happening here, and this has more of a, um, strip of windows, rectangular kind of strip, doing something like that. Then we have these awnings on this building here. And on this side of building, we have some arched, arched windows happening. Jason Nicholas, and then we have a cornice piece that comes across here. Some more arched windows kind of happening down here. And I'll sketch those in. Just trying to keep it quick, kind of keeping them loose. Trying to keep the idea of some kind of perspective happening. Is this wonky? Yeah, it's wonky. And you know what? I— that's the way I like it, so I'm cool with it. Are these arches perfect? Nope. We have some arches kind of happening there as well. The awnings hanging over. We have some doorways happening down here as well. So this, this line here is where the building meets the sidewalk. Let's sketch another line in here. And then let's, let's just show some doorways. We have some openings happening. Kind of down in here. And I am looking at the photograph. I just want to see where the heck they are. They're not really shown in the perspective view I have, so we're just gonna— we're gonna create our own doorways here, which is fun, right? Just make it up. We're making things up, just trying to capture the feel. I love this view. I think it's a view looking, um, it's in the Meatpacking District of NYC. I stood here for probably at least a half hour sketching on site. This view, I just love this. So I'm excited to go back to the High Line this spring and sketch even more. It's just a place that fascinates me in New York City. And I could spend hours just sitting there chilling out with a sketchbook. Good stuff. So I think you guys can see this starting to come together. I know I move the page around a lot when I sketch, so I'm sorry if my hand's in the way and I'm shifting the paper. Sorry for getting seasick at home, but it's just kind of the way I work. I can't I find it really hard to sketch keeping the piece of paper anchored down in one position. I gotta move it as I'm working on it. So hope that's cool with you guys. So what was fun about this is just starting off with, um, just a wash of these different watercolors and then adding color on top, adding the ink on top of it. I'm going to sketch a little bit of detail in these windows. I just want to give a little more to it. So I'm just going to sketch these kind of grill patterns, these muntin bars. I think they're called muntin, M-U-N-T-I-N, muntin. So these are mostly brick buildings here. Here, except for this one back here. Here's our sidewalk down here. Just gonna kind of make it go in the distance back there a little bit. Here's our sidewalk here as well. This building has some verticals. Let's take that fine liner pen, my 0.1. Just start with this and let's just sketch some of these. You could always make things darker, as that's something I've been learning lately, or using lately. Instead of going right to the dark lines first, I am turn— I am starting to start off some sketches with lighter lines and then adding the darkness, popping some things out. So I'll show you what I mean. I'm going to actually pop out the outline of these buildings. I'll do that now. Um, yeah, it's much easier to make things darker. So I kind of just want the edge of these to read the silhouette. So I'm going to use— that goes in the wrong— I'm trying to put the wrong cap on the wrong pen again. Uh-oh. I'm going to use— I think I'm going to use a brush. I think I'm going to use my brush marker. I could use a brush marker, but for fun, actually, let's break out a Flair pen. Let's try this Flair. So I'm going to take the Flair and I'm just going to trace this. Another great thing I could use would be my LAMY pen. It's not right here, so I'm just kind of grabbing and going with what's in front of me. Um, I just want to take this flare and I'm going to just trace this. It's kind of thin. It's not as dark as I wanted it, so let me break out the— I have a Tombow brush marker. These are pretty cool if you've never used them. Has a brush end and a kind of a fine end here, so I'm just going to take the brush end And I'm just gonna just kind of go over the outline here because I want to pull this silhouette out so it pops it from the background a little bit. I'm actually going to kind of go over the bridge, connect that back up through here. We'll connect these together, and then this building edge, which kind of sketch like that. So we have a real cool, just dark, bold line separating kind of the buildings from the background, from the sky. Um, I feel like I want to pop this bridge out a little more also. One of the cool things about these Tombows is they're, they are water soluble, so I could come in if I wanted to loosen something, bleed it a little bit. I could come in and bleed this. Say this building's in the background, I might just bleed that black ink a little bit just so the building kind of looks like it's in the background a little bit. So you can soften the edge if you want. Um, I really wanted this bridge to pop and there is some shadow underneath. So let's go across here and I'm going to actually go to the thinner end where the bridge hits the buildings. And I'm going to pull out kind of that a little bit more. So now you can see the bridge popping out. And I do want to soften the edge, the underside of the bridge here. But before I do that, I need to take it— hey, D-Ray's in the house! D-Ray, great to see you. So sorry, guys, I'm This is lunch, sketching and lunchtime, so I am indulging in some black beans and rice. I love black beans and rice. I made it when I was— learned to make it when I was back in college, back in Miami. I had a lot of Cuban friends in Miami, and I was lucky enough to be able to go to some of their houses for dinner. And get authentic Cuban food, and that's where I kind of learned to love black beans and rice. So now I make it on my own. It comes out okay. Um, that was one of the really cool things about going to school at the University of Miami is that it's such an international school. I got to experience all these cultures that were so new to me. Being here in New Jersey, a small town, you know, it was kind of, you know, was not sheltered, but I didn't know a lot about different cultures. So going to UM was really awesome. I had friends from Cuba, from— oh my God, where— uh, Malaysia, Cuba, Korea. Barbados. I can— there's so many other places, I'm drawing blanks, but people from all over the world. So that was really fun. You can see here I'm taking that black ink I threw down and I'm just kind of softening this building a little bit because it is in the distance. So I just want to get a little shadow to it. Camera says nice. Thanks, Cam. Hope you guys are enjoying this. I feel like, I feel like I want to give these arch windows a little more depth, and I think I'm going to do that with some watercolor. And I'm going to, I'm just going to use some of the blue in here. I think it's Ultramarine Blue. So I'm just kind of, see if we can move this here so you can kind of see what I'm doing. I'm just dipping my brush in some Ultramarine Blue. I just want to throw it on here. Maybe a little heavier. We'll see. There we go. Just kind of touch it down in places. Boom. Just create a little more interest with these arches I had. I do have to— I need this. Notice I'm not trying to fill in all this space where these arches are. I'm just kind of touching and dragging, touch and drag a little bit, get some more paint on there. Touch and drag. For me, it helps to keep the loose kind of look I like. I'm liking that. I'm actually going to take that same idea and bring it across the street and bring it across this street. I wish I knew what— I can Google it. I don't know what street this is here. 8th. Is this 8th Avenue? I don't know if this is 8th Avenue or— I have no idea. I gotta look it up. All right, so let's just throw some of that blue over here as well. Just— I know I have the black, the gray, but I feel like maybe popping some of this blue is gonna just tie these two sides together a little bit. I don't have to do all the windows either. I can just pop them in some, which I kind of like that look better, so I'm gonna do that. There's a lot of shadow underneath this overhang, so let's do that with— let's stick with the blue. So this is why I used a Sharpie down here, because I didn't want this black ink to bleed, otherwise it would have gotten too mucky. So I threw some Sharpie down here. I'll typically sketch with Sharpies to start off with them at least. That way I can kind of control where I want all the darkness to go. So I'm just throwing down some blue on there. It could be darker in places. I can mix a gray. I like to mix blue and brown to make my own grays. I can show you that if you want. So I have some blue here. I'm just going to dip in. I don't even care if I— I didn't even clean the brush off. Just tuck it in there. I'll do that a lot. I won't even clean the brush off in between going to colors. But you can see it's kind of mixing up a gray. I mean, I could throw some red in there if I wanted a touch of that as well. So it's fun to mix your own good colors for shadows. So let's just throw this on. So we are losing some of that scaffolding, but I'll come back with my marker or a pen and I'll sketch back on top and pull the scaffolding back out again. So don't be afraid if you're doing this, if you kind of are losing some of your line work, you could always come back and just go back on top. And I'm going to make this a little darker. So I'm just touching down some of that color here. All right, so there we go. Boom. And then same thing with these doorways. I'm going to do this. I want to make them a little more blue here. So let's pop that. So we got some openings happening. Now these awnings are actually— they look like they're— I can't tell if they're a lime green, light green, yellowish. So I'm gonna, I think, take some Sap Green paint in here. This— I have Sap Green, and we're just going to throw— pop out some Sap Green right on these awnings. And I'm going to switch to a square brush because I kind of want to keep it more square. So we have a square end. Hey, Deborah is in the house. Deborah, good to see you. Awesome. Thank you for popping on. Uh, so we got Cam, D-Ray, and Deborah. Always great to see all of you guys. So excited for your trip to help teach with my husband Johnny. We're going— oh, that's so cool. So Deborah, um, Yeah, thank you so much. So I'm going as a student. I'm actually going as a student to the workshop. Of course, I believe we're all teachers, so while I'm there, I'll share whatever wisdom I can, and I'd be more than happy to give any architectural sketching tips. As Roo knows that, I've mentioned it to him, but it's going to be incredible, an amazing opportunity. So I'm really fortunate to be able to take that time next week to do that. Roo has not only become a friend, but he's definitely a guru, a mentor to me in a lot of ways. So I'm very blessed to be able to meet him in person. Yes, that would be really cool. And I'll do some streaming, I'll do some live streaming there. I'm getting there a day early, so I might end up doing some sketching on location. So I might just do live streams. Um, I want to do some with the windows on this. I think we're going to go back to just my gray mixture, gray-blue mixture I have in here. It's more blue and put a little more brown in it so want to gray it up a bit. And then we're going to— I want to kind of add a little more depth to these here. I also want to add some more depth to the actual bridge, but I'm not— I don't know what color it's going to be yet. So I'm just going to touch this here. And I'm gonna just tap in a little more blue. So I hope you guys are liking this. I think it's coming along pretty nicely. I may have went a little overboard down here, but I could pull some of that back if I want. I do feel like this is missing a certain energy level. I should be, uh, should have done some splattering on here. We can always add that. And I'm trying to— and I'm controlling this a little too much. I want to be more looser. Let's break out some more of that red and throw some of that here. Cool. So the idea with this was just to start with the background with the kind of a rainbow of colors and add a sketch on top of it. So I'm just dipping into the red. I just want to pop some red out. Let's have fun. I'm being a little too controlling and that's not how I like to paint. There we go, just popping some of that red out. We'll splatter a little bit, grunge it up a little. That's cool, I like that. There we go, now I'm feeling it. I'm actually going to throw some of that red here. We have this piece. This is actually some kind of— looks like plywood actually across here. So let's kind of— I think we're gonna actually make that yellow. So let's just pop in some yellow for that plywood. I have a nice yellow vertical line here. I feel like I want another yellow here to kind of balance this, so we're going to make that yellow too. So I took some yellow and we're just gonna— boom. I actually like it because it's yellow over some red, so we're getting some oranges happening. I threw it down pretty thick. Which I actually really like. Very cool. So hope you guys are enjoying this. Hope I'm sharing some words of wisdom. That I didn't like doing, so we're gonna blot that out. Womp womp womp. We'll just pull that back. That would— no, that was not bueno. No bueno. Cool. So this is kind of where it's headed, guys. Zoom out a little bit and see it bigger. So it's not done. Just trying to think what the next thing I would do is. Hmm. There's actually— where's my pen? We actually have some diagonal lines happening up in here. So the next thing I probably would do is I'm gonna add a little more detail on this bridge. And then I'm going to throw in some hatching to add some, uh, areas of shadow. This bridge has a cool circle kind of in the middle. It's kind of a circle detail happening in there. This bridge also has— let's just sketch it in. Um, let's see, you got a line here, line here, some kind of a metal panel happening across the face of this bridge. So I want to throw that— and throw that in. My left hand is getting my— getting some paint on my palm. So it's not art unless you wear it. So guys, I am wearing it right there. This is now artwork. Boom. So now we have these vertical lines. So just by adding some of those little details, it's making this more cohesive. Um, I want to add a little more detail to these windows as well and sketch some lines quickly there. And we have some vertical lines going on in here. I'm actually going to rotate this a little bit. There we go. And even by adding these lines in the windows, it's giving this bridge a sense of scale. I don't have any people on here, I don't have any cars on here, and we have some, uh, kind of this going on here. Here's some cool brickwork. I'm going to pull out some of that brickwork just by doing some vertical lines over these windows. Just want to show that there is some kind of vertical brick there. I could even sketch— there's sills under these windows, which I could pop out a little bit if I want to. Just throwing some lines underneath like that. Simple. Boom. There we go. Some there. What else? We have, um, we throw some vertical lines here to show where the kind of the plywood boards are, just to give some scale to that. These are, these are beautiful brick buildings here. I'm, I'm not doing it justice yet. Got some horizontal lines on the window grills here. These arches aren't— I'm gonna just throw another line around these arches. I'm gonna use a, um, I'm gonna actually use my Flair. Let's break out the Flair pen for this. I want to give these arches a little bit of depth. So we're just going to take my Flair. Hopefully my hand's not in the way. And I'm just going to kind of go like this. Kind of draw up It's almost like a candy cane shape. We got kind of a candy cane thing happening here just to give these arches a little depth. You can probably see it better on the bigger windows here. So just by adding some lines there, it's creating a little more depth. Same thing with these doorways, we're going to just kind of pull them out a little bit. I want to pull the edge of this— these awnings out a little bit more, maybe curve them a little bit, give some energy to them. And I want to pull this edge out but not as dark as the top. So I'm just going to kind of do that, just pull that edge. And we have an edge back here. In reality, these buildings keep going on in the perspective, but I'm just kind of choosing to end— kind of end them here because I want to keep this yellow vertical stripe. It's almost like focusing back where there's kind of light happening back there. I do want to give some horizontal some verticality to this. So I'm gonna— I'm just gonna sketch some lines here. This will also help kind of keep it looking like a perspective. So we got some lines going there. I don't know what I'm gonna do with the brick yet. I think— actually, I lied. Here's what I'm gonna do for the brick. I'm going to keep the Flair pen out and I'm going to loosely hold the Flair pen towards the end of the barrel. I'm not gripping it tight, far here at the end, and I'm just going to kind of drag across and create some— the idea of brick. Um, this— so this is hot press paper, it's very smooth. I haven't used it too much, maybe this is the 5th time I've been playing around with it. It's very different. When I do— I have some rough paper here. When I do Brick on rough cold press paper, I think the texture of the paper really helps to— I don't know if it's showing through, but the texture of the paper kind of just shows through and the lines aren't continuous. So I like that broken look. So I'm hoping with the hot press we're going to get the same— it won't be the same. We don't have the texture, so we'll see what it looks like. Again, I'm going to hold it really loose and just see what happens. So I'm getting the horiz— the angled lines, they're not really horizontal, but getting the lines on there for the brick. Yeah, there actually, there are windows back in here too. Muchos windows. Let's just drag the brick through here. I kind of like that blank. I want to keep this area blank. I don't want to show the windows back here on the building because I want this bridge to pop out. If I start adding all the windows and details here, here, I'm going to lose that bridge, I think. So, as Beethoven comes on, what would Beethoven do? We'll just do this. There we go. I think that kind of works. So I just did the same thing on the other side. Again, just trying to create some— and I'm going to just throw in some vertical lines here, very randomly, just to create the idea that there's some kind of brick maybe on these buildings. So throwing down some texture. Do the same thing over here. This is a sidewalk, so I'm just throwing some horizontals, give the idea of depth going on with the sidewalk there. Cool. And I think the last thing I'm going to do before I sign off is I want to pull out this scaffolding. So we lost some of those lines. I'm going to— let's try it with the Flair pen. So let's take our Flair and I'm just going to pull out that scaffolding that we lost when we added the watercolor. I'm not even trying to trace on the lines that were there before. Well, I am, but not— I don't care if I'm not exact. You can see just by doing that, kind of pop that scaffolding out, and then we do have the— we have some diagonal bracing going on here and scaffolding work. You actually have some more horizontals back here. I'm just going to kind of finish these where they hit the sidewalk, just kind of terminate them a little bit. There you go. Let me zoom out, guys. So that is almost done, I think. Very, very, very close. Hope you guys enjoyed this lunchtime sketching session. Let me know in the comments if you have any questions or feedback's always appreciated. Deborah says, looks fantastic. Awesome, thank you. D-Ray says, adding vertical lines for a brickish focus. Mm, thank you, D-Ray, for, um, always appreciate your comments and kind of capturing what I'm saying. So thank you so much. It's actually really helpful for me to go back and look. And I'm sorry I'm talking with food in my mouth. Turning paper, turning, turning. Yeah, I have to. I can't, I can't work, I can't work with this anchor down in one position. It's so hard for me to do. So I'm always rotating this around just to make my hand comfortable. Sometimes in like these sketchbooks here, I'll do the same thing. You know, if I'm sketching on location or something, I can have it and I can, you know, move it if I need to. So It's just the way I like to work. So there you go. So there you go. Awesome. I'll zoom in and show you guys this before I head out. So a little closer. So here you go. I kind of like it. I don't know what else I would add, actually. I don't want to overdo it. And we'll show you zoom in some details, pan around a little bit. If anything, I might just pop out some colors a little more intensely. Like, I like the red up here. Boom. It's kind of— it's in your face red. In your face red. That's the name of the color. I just made that up. In your face red. I do like this yellow here. If I go closer, you can see— so when I go closer, you can definitely see how loose and wonky this is. I mean, look at those windows. They're not even near being completed-looking windows, but it's all I want to do just to show or capture the idea. It's all about capturing the idea or the feeling. At least for me it is. I actually like this. I like how this kind of bleeds off here, that purple. Alright guys, thank you so much for watching. I appreciate you tuning in on a Saturday afternoon. If you're watching the replay, thank you for watching the replay. Feel free to share this out, that would be so cool. And yeah. Have an awesome rest of your day. I'm sure I'll be on sometime this weekend again. Take care. Have a great, great afternoon. D-Ray, thank you. It was great seeing you live. Deborah and Cameron, great seeing you guys in here live as well. Cameron says have a good day. You too, Cam. Take care, guys. Peace. Live creatively. See you soon.