Daily 10-Minute Knee Routine for Pain-Free Knees
Victoria S. Dorsano shares a 10-minute knee-strengthening routine she developed after ACL surgery. Five movements target the tissues around the knee: tibialis raises, Patrick steps, split squats, couch stretches, and elephant walks. Do it a few times a week to build stronger, more stable knees.
Chapters
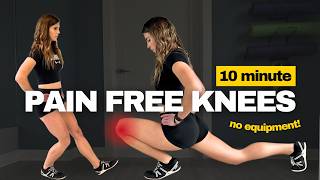
So a year after ACL surgery, I was cleared to do pretty much everything, but my knee still did not feel right at all. My knee would ache after just long days of standing, and it felt unstable during workouts. And the worst part was that I just couldn't trust it the way that I used to. So this 10-minute knee routine that I'm about to show you is what actually fixed that issue. No equipment necessary, just 5 movements that really made a huge impact. And to be honest, I still do this routine pretty much a couple times a week. So here's how it works. There's 5 exercises. You're going to want to do 2 sets of each. I'll explain why each movement matters while you watch the demonstration and you can follow along. This routine really works because we're strengthening the tissues around the knee through the ranges of motion that they actually really need, not just stretching them. And just a note, nothing here should cause sharp pain. If you're dealing with a recent acute injury, swelling, or recent surgery, then you're going to want to check with your PT or surgeon before doing these. All right, so the first exercise is tibialis raises. So for this one, we're going to do 2 sets of 20 reps. To set up tibialis raises, you're going to stand with your back against a wall, and then you're going to walk your feet forward about 8 to 18 inches away from the wall. So the closer you are to the wall, the easier it is. The farther away, the harder it is. You want to feel like you're in a slight reclined position. In this position, your heels are going to stay planted on the ground the entire time. Your legs are straight but not locked, and this position uses the wall as support so that you can really isolate your shins. So your tibialis is that muscle on the front of your shin, and while most people train their calves, the tibialis tends to get undertrained, and it's really your knee's first line of defense when it comes to, uh, protecting itself. So from here, lift your toes up towards your shins as high as possible. Think heels heavy, toes lifting. Pause briefly at the top and then slowly lower your toes back down. Control the lowering phase, don't just drop them. Every time you walk downstairs, land from a jump, or stop suddenly, your tibialis is working to control that force. If it's weak, all that impact goes straight into your knee joint. As you start getting closer to your full 20 reps, you should start to feel a burn building in your shins. That's exactly what we want, so keep your heels glued down and finish those up. Now that you finished your first set, shake out the legs for a second or two and then get back to it with round number 2. Great, now that your tibialis is awake, we are going to train the knee tracking and VMO strength with Patrick steps. For this one, we are going to do 2 sets of 10 reps per leg. For this exercise, you're going to need a low step or a platform, maybe 3 to 6 inches high works great. You're going to stand completely on the top of that step to start. One foot is gonna stay completely planted on the step. Your whole foot is gonna be in contact with that step. The other foot is gonna hang off the edge in front of you. Most of your weight should shift into that foot that is on the step. From here, you're gonna slowly bend the knee of your working leg and lower the opposite heel towards the floor. Your job here is to lightly tap that heel of the hanging foot and then return to the starting position. Again, the leg that is doing all the work on the platform never leaves the platform. Another key here is to keep your hips pushed forward, not leaning back as you're doing this movement. So think about keeping your upper body nice and straight. And what this does is it ensures that most of the work is being done by the muscles around the knee and we're not trying to compensate with the glute. This whole movement strengthens something called your VMO, which is that teardrop muscle on the inside of your quad, and it trains proper knee tracking. Continue with those 10 controlled reps on each side. Think knee forward, heel down on that working leg. As you're doing this movement too, make sure that your working knee is not bending in or wobbling out, trying to keep it as steady and stable as possible. Now going into set 2, you're going to feel that your knee is going to feel nice and warm. Now that is good because that means we are getting some good circulation to that tissue. You also might notice that one knee is going to feel significantly weaker or wobblier than the other one, and that's super, super common, especially again if you've had ACL surgery or some sort of injury. But even if you haven't, Your knee stabilizer muscles are learning to work equally on both sides with this exercise, which is why it is so, so great. This particular exercise was crucial for me post-injury. It helped me rebuild tons of strength and control in my knee and the muscles around my knee and just made everything feel so much easier and more stable moving forward. Great. Now we're going to be taking the knees over toes strength into a deeper range with the ATG split squat. Now with this exercise, we're going to do 2 sets of 8 reps per leg. Now if you're completely new to this movement, you may want to modify this by having something like a bench or a chair or something a little bit higher of a surface for that front leg. I'm going to demo the full version on the first set and then a modified version on the second set. So for the full version, you're going to set up in a split stance. You should have your feet hip-width distance apart. Getting into this position, your front foot is going to stay flat on the ground and your back leg is going to have the heel elevated. You're on the ball of your back foot. So here's a key difference between the ATD split squat and a normal split squat or lunge is that that back leg is going to stay relatively straight throughout the entire movement. It's not dropping down, you're not touching that knee to the ground. Instead, you're lowering down with that straight back leg, and naturally there's going to be a tiny micro bend in that knee but you're trying to keep that knee off the ground. As you lower down, your front knee is going to travel forward over your toes, and this is intentional. We're training knee over toe strength in that deep range. You're going to keep your chest tall and your front heel down to the best of your ability. Again, you might notice that that heel is going to want to lift up a little bit, and that is okay, but the goal is going to eventually be to try to get that heel down to the ground. If you're feeling any sharp or pinching pain in your knee joint, back off on the depth. You're going to want to go not quite as low in that movement until it feels pain-free to do so. Now, if you're noticing that your hip flexor of the back leg is the main limiting component here, then having something like an elevated surface is going to help a lot. So I'll show this in a second round of doing these exercises on each leg. As you can tell, this is a very deep mobility movement, hence why it's called ATG. It stands for ass to grass, and we are really getting deep into This mobility. It's definitely one of the most challenging exercises in this routine, so do not feel bad if you're like wobbling or feeling off and this is new to you. This is a more complex, uh, component of this exercise routine, but it does get easier after this, I promise. All right, so the next exercise we're gonna go to is the couch stretch with a little bit of lunge pulse here. For this one, we're going to do 2 sets of 10 per leg. To set up, you're going to face away from a wall or a couch, and you're going to want something soft to put underneath your knee, like a mat or just something cushy. Standing about a foot to a foot and a half away from the wall, you're going to get down on one knee, and then you're going to lift that back foot up and place it against the wall or couch so that your back knee is pressed very close up to that wall or just in front of it. Your shin does not have to be perfectly vertical. You just want to get your foot up on that wall or couch. Now step your front foot forward into a lunge position. Your front knee should be tracking over your toes. From here, you're going to slowly bring your torso upright, and this is where you're going to start to feel that hip flexor stretch in that back leg pretty intensely. The more upright you get, the deeper stretch you're going to get. Once you're as upright as you possibly can be, squeeze the glute on your back leg. That's key. That's going to really activate that stretch in the hip flexor. So think ribs down, glute tight. This prevents you from overstretching your low back and really puts more of the stretch into the hip flexor. From here, we're going to add some gentle, gentle pulses. So you're going to let yourself kind of come into that forward lunge and go down further in front of you, and then you're going press back up against the wall again. So you're going to oscillate between this kind of deeper lower lunge to more of that original couch stretch or wall stretch position. From here, we're going to aim for 10 pulses each side. Again, if you haven't caught the drift already, this whole process isn't about speed. It's about just gradually coaxing yourself into these positions and getting every joint kind of used to the process. Now when you start the second set, I want you to see if you can get a little bit more upright into the hip flexor position for that stretch and a little bit deeper into that forward lunge when pulsing forward. Even a year after my surgery, my hip flexors were still really, really tight from compensating and limping and sitting more and favoring one side. So this was a huge component that really helped my whole body start to feel normal again. And take pressure off of both knees. All right, so last exercise, we're going to finish with some dynamic hamstring mobility. For elephant walks, we're going to do 2 sets of 10 alternating steps. The setup for this is fairly simple. You're going to stand with your feet about hips distance apart, and you're going to make sure you have, you know, a little bit of a clear space in front of you to do a forward fold. Now, if you do not have really mobile, flexible hamstrings yet, you're probably going to want something like a chair or a bench in front of you and start there. I'm gonna demo the full version first, hands to the ground, and then I will demo a more adapted version, uh, the second round through. So you're going to want to hinge forward and reach down all the way to the ground in front of you. Start by keeping both legs slightly bent to start, and then from here you're going to slowly straighten one leg at a time, keeping your hands on the ground in front of you. So you're just alternating which leg is straight and which leg bends. Move really slowly and deliberately here. You should feel a deep hamstring stretch on whichever leg is doing the straightening. This would be called active mobility. You're building flexibility while maintaining tension and control through the movement as well. Now repeat this again for a second set. And again, if you need to adapt, having something like a chair or a bench or something in front of you that lowers a little bit of that barrier, lessens a little bit of that stretch to start with, that is a great way to go. Again, 10 alternating steps here. Don't bounce, don't do anything kind of like jerky. It should be a very smooth motion. And that's it, guys. 10 minutes. Your knees just got stronger, more mobile, and more resilient in just 10 minutes. The key here is consistency, starting to do this routine a couple times a week. Week will make a big difference. And over time, you can start to do this daily. If you want more knee and healthy joint resources like this, then definitely make sure to subscribe to the channel. And if you're looking for personalized coaching to help bulletproof your knees for life or for your sport, then definitely book a discovery call with myself or somebody from my team. We'll help put together a custom protocol just for you that not only addresses the training component but also the nutrition and recovery component as well. Link for that is in the description down below. And thanks again for moving with me today, guys. If you found this video helpful at all, please subscribe to the channel, give it a thumbs up, and I'll see you guys on the next one. Bye!
More from Victoria



3 things you should do to make sure you get the most out of your fish oil #legion