Yoga for the Ankles and Wrists - How to Do It
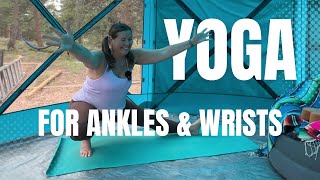
In this 60‑plus minute yoga class, instructor Angelica designs a session specifically for people who experience ankle discomfort from prolonged sitting and wrist strain from desk work. She begins with a warm‑up in Tadasana, emphasizing even weight distribution across the foot, grounding, and core engagement. Throughout the class she introduces a variety of standing, balancing, and floor poses—such as forward folds, runner’s lunge, triangle (Trikonasana), Malasana, Skandasana, and a modified pasasana—each framed with cues for ankle stability, toe alignment, and hip positioning. Angelica repeatedly stresses the concepts of tension versus compression in the foot and hand, teaching students how to sense whether a pose is limited by bone contact or muscle stretch. She offers prop alternatives (blocks, blankets, bolsters, chairs) and modification options for different ability levels. Mid‑class she transitions to a dedicated wrist segment, guiding participants through fingertip extensions, hand‑to‑hand stretches, circular wrist motions, and an advanced wrist‑opening sequence, all paired with breathwork (Ujjayi, kumbhaka, pranayama). Stress‑relief techniques such as full‑body shaking are woven in. The session concludes with gentle back‑bends, a Sphinx pose, supine twists, and a long shavasana, during which Angelica reminds students of the restorative power of the final relaxation. Throughout the video she promotes her private one‑on‑one yoga teacher training, books, and affiliate links, encouraging viewers to subscribe, like, and comment.
Chapters
Hello, welcome to today's yoga class. My name is Angelica. Today's class is awesome because it's a special request class. One of my students said that they were having some issues with their ankles from sitting in a cross-legged position all day long, and also some wrist issues from sitting at a desk and having to type and do work that involves the wrists all day long. So this class is special. It's going to be focused just on wrists and ankles. And I'm really excited for you to join me in the class. If you haven't yet, go down to the description, check out all of the cool things that I offer. I do, do private instruction, one-on-one yoga teacher training. No one does that. It's totally awesome. It's online. It's completely focused on your needs, your goals. Within 10 weeks, you could go from knowing absolutely nothing about yoga to being able to teach a full class and having clients because you've already taught a class to the public. And it's an incredible program. People are having lots of success and loving it. So definitely check that out in the description. I also have a couple of different books and I'd love to share with you. So let's get started. I'm glad that you're here. Join me on the mat.
¡Hola!
For today's yoga class, there might be a couple props that you want to have, but it's not a big deal if you don't have them. You can always just grab things around your house like pillows and blankets, whatever you have to make it work. You do not have to run out and buy all the things that I have. I've been teaching yoga for almost 20 years now, so of course I have a lot of stuff, and In all fairness, my friend gave me these for free. He makes these. These are called the 3 Minute Egg. It's, um, I think it's just the 3minuteegg.com. The link is in the description. I do not get a kickback if you buy them, but they are amazing and they're awesome. And if you can get a hold of some, definitely do. But a block will work, or just some books. A Mexican blanket. You can grab an inexpensive Mexican blanket that is really actually pretty good quality at the Travel J or at the Loves. Like, I'm actually I was pretty shocked, but you can definitely grab those there. And then if you want— this is my favorite. I do have the link in the description, and it is an Amazon link, so I do get a little bit of a kickback. But I love my bolster. It is life-changing. This one's nice and thick, so— and it isn't super expensive. But, um, these are the same bolsters that I used when I owned, uh, the yoga studios, so I stand behind them. They're incredible, and they work to lots of use. Like, they'll stay, they'll hold their shape, and fairly easy to wash because you can just unzip them. You know, getting it back in there, that's a little bit of work. Okay, so today we're gonna talk about ankles and wrists. So we're gonna start with some warm-up exercises to get the body warmed up and get ourselves ready for a little bit of movement. Coming on to your yoga mat. Spread your toes wide and ground down through the earth. And just— we're going to come into Tadasana, and that's the first pose that we want to work on. This is actually going to help to strengthen our ankles if we focus on the right areas. So you may notice that you have a little bit of tension here, right? And we want to make sure that the weight is evenly distributed on all corners of the foot. So that would be the heel and the pads of the foot. So as we ground down, make sure that— some of us kind of tend to lean outward and some of us kind of tend to lean inward. We want to have that right in the middle. And spread those toes as wide as you possibly can.
Good.
Grounding down through the earth. You're doing a great job. We're going to repeat what we just did on one foot on the other foot. So spreading the toes wide and grounding down, really work down through the heels and feel that energy go into all the corners so that we have nice even stance. Now we want to work on making sure that the weight is evenly distributed on both legs, so we're not one leg or the other leg, but actively Bringing the weight to both sides. Then from here, we want to make sure that our hips are not back or forward, but we're right in the middle, grounding down through the earth. I want you to feel your quadriceps engaged, so pull up right here. Great. Sometimes I close my eyes when I'm doing it so that I can really focus on the energy inside of me, the prana. Moving through my body, lengthening through the spine.
Good.
Relax down through the shoulders. Pull in through your core.
Nice.
Now we want to pull up through the base of our spine. We'll feel the glutes engage, we'll feel the core engage, and then just keep lengthening here. Make sure that we're still keeping even distribution of weight on both Good, you're doing great. Lengthen up. Good. Drop the shoulders. Then arms next to each other. Great job. Make sure that the shoulders are evenly in line, and it might for some of us feel like we're puffing our chest up because we're not used to standing straight tall. Tony Robbins calls this the 2 inches. So we have that 2 inches just lifted at the sternum. That gives us confidence and it builds our self-esteem and helps us to be strong in our pose. I like to spread my fingertips wide because I want every muscle in my body completely engaged.
Good.
And then lift the chin, look straight forward, and let's Breathe here. There's a lot going on in our body, and we just want to focus on all of those things.
Nice.
Let's take a few more breaths here. In through the nose, hold it at the top, and then out through the nose, hold it at the bottom. Good. In through the nose. Hold at the top, and then out through the nose.
Good.
Holding at the bottom, no air in there. Pull up as you inhale. Maybe start to bring your arms to the sky. Exhale, hands come to the heart center. Great job. Let's do it again. Inhale, pulling up, energy reaches up. Exhale, hands to the heart center.
Inhale. Exhale.
Inhale. Exhale. Nice. Inhale. Exhale. Good. One more round. Inhale.
Exhale.
Now I hope that whole time you were thinking about keeping the legs engaged. Keeping the core engaged, keeping the energy moving upward and downward so that we have nice firm energy on the bottom, nice air energy on the top. As we move through our poses today, I want you to take that awareness into every single pose and really think about your body and where each tiny muscular part of your body is in every single pose. Okay, we'll move on to the next pose. From here, we're going to go ahead and step one foot out and the other foot slightly behind. Now we want to try to work for both of our toes pointing forward, and if you have to have the back foot slightly turned, it's okay, but we want to work towards this both feet forward kind of movement in the toes. And as we do that, we'll turn our hips and look forward. We want to make our hips even. We're still focusing on this even distribution of weight on both feet and that the feet are completely ground down. Then from here, we'll inhale, lengthen the spine, and exhale, fold forward. Now the challenge here is to keep the ankles strong and powerful and to keep the weight evenly distributed. If you need to, you can grab some blocks or books and use them when we come into this pose in the forward fold. If we want to bring the hands down and your hands don't reach all the way down Maybe you use those blocks to keep you stable. Keep the spine nice and long. You'll begin to feel it a little bit in your hamstring as well, but what we're really focused on here is these ankles and keeping balance. So you want to keep that nice balance in the posture as we hold here and just breathe in and out through The nose. And picking up where we left off, it started to rain, so I had to switch locations. So we're just folding here and breathing deep in and out through the nose. You want to make sure that your hips are even, you want to look directly down at your big toe, and you want to keep your spine nice and long and really focus on both toes pointing forward if you can, and working on keeping those ankles in alignment and working on our balance here. Now the next thing we're going to do is we're just going to bring the back leg up to meet the front leg and bring the front leg back, switching sides. Now we're doing this on the other side. You don't have to come down onto the ground. You could do this with your hands on your hips, and in a lot of ways, hands on the hips is a lot harder to maintain the balance in the ankle. So if you want to make that harder, you can do that. You could also bring your hands behind your back and clasp onto opposite elbows or wrists if that works for you, or you can just bring your hands to the heart center and work on really keeping the spine nice and long. You'll see here that my lines are really nice and up and straight. I'm not hunched over anywhere. I'm not doing this number, and my hips aren't out. When I did my hips like that, it made it hard to balance, so my toes immediately tightened up. So I'm going to keep those toes nice and long. All right, let's go ahead and bring the hands onto the hips and slowly roll our way up. So that was just a little bit of challenging on the ankles. To help build some strength there in the ankles and kind of counteract what we're doing when we have our feet flipped back and under. We're going to move on to a balancing posture now. Let's take our toes on our right foot, spread the toes wide, and ground down through the earth. Then take the left leg and bring it up onto the right leg at any area that feels right to you, except for the knee. Let's just stay off of the knee. So either above the knee or below the knee. And then we want to focus on just building strength there in that ankle so that we start to gain some strength there, which is what's going on when we're having pain in the ankle, is that there's not enough of strength around all of that. So we're just going to hold this balancing pose for a few minutes, and it depends on— for not minutes though, um, it depends on, you know, what's going on in your life. Sometimes balancing is easier than other times, and I always say like focus on a point in front of you that's not moving and let that become your focal point so that you can really get into the balance. All right, we're gonna go ahead and just either bring your arms out, you can bring your arms up, you can bring your hands to the heart center, whatever feels comfortable for you. And we'll just hold this for like 15 seconds without talking.
Good.
Then go ahead and slowly release. You can shake that leg out. It should be burning a little bit. You should feel that all along here if you challenged yourself. Maybe you are feeling extra balanced today, I don't know. We're gonna switch to the other side, left side, and then bring the right foot onto the left leg, wherever it feels comfortable for you. Again, try not to put it onto the knee. You could even come all the way down here if you need to. You don't have to come up even this high. You can bring it all the way into your upper thigh if you'd like to, if that feels— if that feels comfortable to you. So I'm convinced that we have a ghost in our our campsite that we're staying at. So I'm always like, there's weird sounds happening all the time, and I see things out of the corner of my eye, so I'm like really convinced there's a ghost. All right, let's do 15 seconds of just focus. Find a point in front of you that's not moving and try to just focus on staying neutral. Alright, release and then shake that leg out. Perfect. That was really good. You did a great job. We'll do a nice forward fold. Inhale, lengthen. Exhale, fold. Reach down, just kind of shake the head out. Let go of any energy or tension. That's a nice counterbalance to the standing balance. And when you're ready, bring your hands onto your hips and slowly roll up to standing. Good. Another great pose to help build strengthen our ankles and stability and balance is going to be Trikonasana, or triangle pose. So we're going to take one foot and turn it out to the side. You want that heel to be in line with the arch of the back foot, and you want the back foot toes to be pointing forward, front foot toes to point towards the front of the mat. Hips are going to be squared off. Towards the side of your mat, and you want all of your body to be squared off. Bring your arms out to the sides. Now we're going to do something a little bit tricky. I want you to turn and look at your opposite hand than the hand that's going to come down. So we're going to look at the back fingertip of the middle finger and then shift the hip so that our hip is coming towards the back of the mat. And then I want you to reach forward as far as you can, and then just let that hand come down. Wherever that hand comes down, just leave it there and turn and look up at the sky. So now what should happen is our chest should still be open. See, if I was really focused on coming down to the ground, I would have to bring my chest down, and that's not what we want to do. We want to keep the chest nice and open. Breathe deep here, in and out through the nose. And let's work on balancing in this posture, evenly distributing the weight on both feet. We want to focus on even weight distribution in both feet. That's our main focus. Our main focus right now in this pose isn't bringing the hand to the ground, it's keeping an even amount of weight on both feet. So it's a little bit of a shift there, but we have something that we're working on. Try to keep a nice long line here with the arms. And then bring your top hand to your hip, turn, look down at your big toe, slightly bend the front knee, and bring the arm back up. Good, we'll switch sides. Point the back toe to the side of the mat. Shift your other foot so that now we're— front of our mat is a different size— side, different, different side. And then we're going to bring our arms out, shift the hip back, turn, look at the middle finger, reach, reach, reach, reach, reach, reach, reach until you can't reach anymore. Let that hand come down. Now take the top arm Bring it up towards the sky and turn and look up towards the top. Huh, good. Breathing deep here, in and out through the nose. I feel like it's always raining in Colorado. I do my makeup, I got my outfit on, I'm ready to film, and it's starts raining. Oh, but that's okay, that's why we got this tent. This is the yoga tent. All right, now we're gonna bring our top arm back onto our hip, turn, look down at the big toe, slightly bend the knee and bring it back up. Our whole focus is on evenly distributing the weight on both feet throughout the whole pose, throughout all of our movements. Turn that back foot towards the side. Inhale, reach your arms up. Exhale, fold forward.
Nice forward fold.
And release it. All right, bring the hands onto the hips and slowly again rolling up to standing. From here we're going to work into a lunge. I want you to take one of your feet and turn it, and then the other feet— the other foot and turn it as well. Okay, now If you need to keep both feet on the ground, that's okay, but I would love you to try coming into a runner's lunge because this is going to test the ankles out a little bit more. And keeping the hands on the hips, bend a little bit deeper into the front knee. Take the back leg knee and press it towards the sky so the back of the knee is pressing up towards the sky. Nice deep. Kind of have— we're gonna have this like bounce going on here. Good. And then if you want to, you can leave your hands on your hips, or you can bring your arms up, or you can bend them. And we'll just hold here, breathing in and out through the nose. You're doing great. Try to focus on that even distribution of weight, so we have the same amount of weight on the front foot as the back foot. And that's where we're really focusing on. These crows outside are like yelling at each other, and it's so funny because everyone says, "Oh, it must be so nice that you can film outside all the time," and I'm like, "It's so loud." What I wouldn't do to just have a dedicated yoga room in a house with a big nice wood floor, pretty background. I guess we always want what we don't have. All right, bringing your hands back to the heart center, straighten the front leg, turn the back foot, and now we're going to turn both feet towards the center. We'll release that. Inhale, lengthen. Exhale, fold, release. If you want, you can bring opposite elbows together. You could slightly bend your knees if you want to. I have mine straight because I'm trying to work on my hamstrings, but whatever feels good to you. And go ahead and release. Hands onto the hips and slowly roll your way up as we get ready to shift to the other side. All right, let's make that shift. We'll take the back foot— now it's the front foot. Turn both feet to one side of the mat. Find your balance, getting your even weight distribution on both sides. Take the back foot into a runner's lunge if you can. Bend the front knee. Try to focus here on bringing that even weight distribution, so you might have to like bring the hip a little bit under, press the back of the back knee towards the sky, bend into the front knee, just breathing here in and out through the nose. Maybe you bring your arms up. Maybe you keep them on your hips, whatever feels good to you. Let's just focus that entire idea of keeping the weight distributed on both feet. Good. Go ahead and release. Bring your hands onto your hips and straighten that front leg. Turn the back foot towards the side. We'll do a release and a forward fold, and then we'll move on to the floor and do some floor exercises that will also help us. Alright, inhale, reach. Exhale, fold. I also like to massage my ankles a little bit here, moving back and forth, just making some nice movements. One thing that I learned about yoga is that It's not as rigid as I once thought it was. There's no secret magic to it. It's really mostly about understanding your own body. All right, here is a more advanced pose that we're going to try, and if you want to try this, great. If you don't want to try this, that's okay too. You can maybe bring your hands onto the ground. Start to bend one side, and then other side. Heel comes up, toe points towards you. Good. We're just holding here. Now, if you want to take this to the next level, you can bring your hands to the heart center, focus on a point in front of you that's not moving. That's going to cause you to have to do a lot more stability in that ankle.
Good.
And we'll walk our way over to the other side.
You can keep your hands on the ground if you want.
Or focus on a point. Bring the hands to the heart center. This is actually called Skandasana. It's a variation of Skandasana. Takes a lot of balance.
Good.
And then hands down. And come back to the center. We're gonna walk our feet together. Heel-toe. If it feels good to you, you can keep your feet a little bit further apart or together. I'm going to work on keeping my feet together. Then I'm just going to bend both knees and sit back. And try to balance here. And I want to keep the weight evenly distributed on both feet again, right? So I'm back in this weight evenly distributed on both feet mode, and this takes a little bit of balance. Maybe you bring your hands to the heart center. If that doesn't feel comfortable, you can always bring your hands to the ground. And try to work on it here. And we want to try to work on— see how my knees keep wanting to come out? We want to try to work on bringing those knees more together because that helps us to keep the weight evenly distributed. It helps with the knees. So this could be really challenging for some of you. Another option, and this option is for my friend Kim because I know that she struggles a bit with this, so you could take a chair or a table or something that's near you and sit down, but hold on to the chair. And you could hold on at different levels. So if you're working towards getting down— because I know for her it's hard for her to get down, to sit all the way down— if you're working towards sitting all the way down, you can just hold on to the chair and move down as you get more and more comfortable with it to hold it right there. So that's another option. All right, we're going to move out of this variation of what's called pasasana and move into a malasana, which is a yogi squat. So go ahead and just bring your hands forward and walk your feet as far apart as you need to, to do a squat. So toes point outward, and then start to bend the knees and come down wherever feels good to you. You could grab that chair and bring it in front of you again if you want to. But here we have the absolute opposite movement on our ankles than when they're tucked under. So for a lot of people, this is going to feel like a lot of strain. And here's how you tell if this is just the way your body's made or if you can get deeper into this pose. So in our foot here, there's a concept called tension versus compression. So when we're looking at the foot— you go ahead and keep holding the squat, I just want to show you how it works. So when we're looking at the foot, if you're feeling it right here on the inside, if it's— you're bending forward and I'm starting to feel— I can't feel, I can't because I don't have tension, but if you're starting to feel like it's compressing right here and you don't feel more tension back here, that means that your bone is hitting your bone and you can't go any further than that. But if you feel back here what's called tension, that is the stretching of your muscles. So for me here, like right here, I feel compression. I feel it right here. But if I come like this, now I feel it here. So moving my torso slightly changed where I feel that. And you can make slight adjustments to your body to see where you feel it. And that's the cool thing about yoga, is that it's all about, like, feeling in your body where you're feeling things and knowing your own body. So that when you go to a yoga class, like, your teacher can't possibly— like, I can't possibly know what you're feeling because I'm not inside of your body. And even if we were together I can't really possibly know. But now I've just taught you a really good hack for knowing if you can get further into a pose or if it is compression versus tension and there's nothing that you can do. That's just the way your bones are made. For me, I notice if I bring my knees more in, I have compression, but if I bring them out, I have tension. So just starting to feel that inside of your body and knowing if you can come into a squat like this. Some people can come even way deeper than me, so just kind of how you're built. All right, now I want you to grab your bolster or pillows or whatever it is that you have that, uh, to support you. It doesn't matter if it's pillows or a bolster, and we're going to go ahead and kind of slowly come out of this Malasana, folding forward, releasing all that tension, and move over here to your bolster, having a seat onto the— now the nice thing about this is we can sit here in our Malasana with this bolster for as long as we want. And we don't have to do the upper body work. We can just kind of do the lower body work and move a little bit with it and see like what's good for us, what feels good. But we're gonna do something a little bit different than that pose. So go ahead and just lean forward and let the backs of your feet come onto the bolster. And you could come any variation of this. So I'm just sitting here all the way up. You could use a chair to help you get to this point if you need to. Drawing my knees together and creating almost a Barbie toe in my ankle and just breathing into the pose. Now, if that's too much for you, again, any level of this is okay. Just meditatively sitting with it.
And then go ahead and release down.
So know that, that for me, that's actually like super painful. Like, I can sit like this all day long, but the other way is like really painful for me. And so working your body in different ways actually helps long term, and not working into our areas of flexibility, but working into the other areas of our body so that we're starting to build strength in areas that we aren't already flexible. All right, next thing we're going to do is we're going to go ahead and do that focus on the wrists. So find a comfortable seat that works for you. Maybe that's on a chair, maybe that's on your bolster, maybe that's sitting on the ground. Just however you make a comfortable seat, it doesn't matter to me. Just find a comfortable seat and I'll meet you back there. Hello everyone, welcome back. Okay, now we're here in our comfortable seat, however that is for you. That might not be like this for you, it might be legs extended in Dandasana, toes pointing back towards you. That's also a really great way to sit, especially if we're working on our ankles. We want to take our hands and bring them in front of us and let the fingertips point back towards you. So now I have my toes and my fingers pointing back towards me. I'm dually working these. I'm just breathing here. Notice how everything is activated though. I'm not like— I have the toes pointing back towards me, the fingertips pointing back towards me. There's no rotation. It's nice and straight. If you see rotation in the feet like this, that typically means that your hamstrings are a little bit tight. So try to fight the urge and just try to work on it and feel it start to burn a little bit. In yoga, we call that concept tapas, where it's burning. Now we're going to take one hand, bend back towards us, pressing the bottom hand into the top hand. Good. Switch sides. And here is another place where we can feel tension versus compression. So when you see that when you do this bend back and you begin to feel it here or here, which would you guess was tension? Which would you guess was compression? If you guessed that compression is the upper part of the hand, then you were correct. Tension would be down here. You can feel the tension of the ligaments. You can feel the tension tension of the muscles. I can actually feel it all the way up here. Here is where we would feel compression. So over time, I don't feel a lot of compression there, so over time I should be able to bring my hand further and further back with more exercise. All right, let's go ahead and release and just shake it out. Something that's really great to do whenever you feel stressed or something happens that's upsetting in your life is to shake, like the whole body, like just shake. Because what happens when we shake is that we release tension in the nervous system and we let all of the hormones that have built up in our body start to release and go through. This is true for any of the stress hormones like cortisol or adrenaline, anything that's going through your body. And this is what animals actually do in in the wild when they're releasing any kind of fight or flight response. So a good shake is always in order. All right, next we're gonna do some circles with our wrists, just working the wrists here, starting to feel that. And then we'll switch the other side. I'm circling inside right now. We're gonna switch that on our next one. All right, circling outside. And it doesn't really matter if you start on the right or the left, it just matters that you switch it. Good. Now we're going to switch and circle outside. This is now my left hand. Awesome. Okay, now I want you to take your left hand and start to circle your stomach.
Good.
See if you can take your right hand and pat it on the top of your head. No, I'm just kidding. This is not yoga, but I'm always amazed when I can do it. Okay, that's just funny. Well, let's shake it out.
Good.
You're doing great. I'm so glad that you're here. Thank you for the idea. I love it. This is This is a great class. This is a lot of fun.
I appreciate y'all.
Okay, so now we're gonna do a little bit more advanced wrist work. You might want to skip this. You might want to, um, do it a little bit less, maybe not go as far into it, but it does really help and feels really great afterwards. At the time, I remember the first time I did this, it felt a little bit painful. If it feels like really painful, like stabbing, then stop. If it's throbbing a little bit, usually that means you can just work through it, but you know your body best, and I want you to do what's best for your body. Okay, take your props and move them out of the way. So just come to the level that feels is good for you. Don't feel like you have to go really deep because you see me doing that. I'm demonstrating for the whole, not for the one. All right, bring your hand onto the ground with your palm facing up. You'll take your opposite hand and you want to take it— it's going to go like around your wrist like this. Okay, so I'm doing— starting with my right hand Fingertips spread wide, palm is facing up. The left hand comes onto the right hand. I'm going to curl under the toes. Now this might feel like enough to you, and if you want to stop here, you're welcome to. But if you'd like to, you can start putting more and more weight on that and coming into this like downward dog pose, and that just really counteracts Good. And then come down. You can do that a few more times if you'd like to, just to start to feel it. You can just come right here, putting pressure onto the palm if that feels good to you. We'll go ahead and switch sides. So taking the left hand, right hand. I— this isn't as bad for me now, but the first time I did it, it really was like excruciating pain, and I was like, how? How? But it really is— it's better now. All right. One thing that really helps is to breathe in and out through the nose. When you're ready, go ahead and come down. So we really want to— whenever we're doing any kind of Shake it out if you'd like. Whenever we're doing any kind of work that is a little bit hard for us, beginning to feel that and immediately coming into the breath will really help you in the posture. So I like to just take it out on my breath. So when I'm feeling stressed in a yoga pose, I immediately go into Ujjayi breathing, which is in and out through the nose.
Deep inhale, deep exhale.
And we try to hold in between the inhale and the exhale. That's called kumbhaka and rechaka. So inhale, hold it, exhale. And exhale. Hold it. Great.
That's really good.
So, and then you just repeat that over and over again. And I was at the dentist one time and the dentist was like, "Are you okay?" And I was like, "Yeah, no, totally. I'm breathing right now. I'm doing my pranayama, so I'm good." Okay, next one we're gonna do is same kind of thing, but we're just going to point the fingertips back towards us, and we're going to do some cat-cow. Inhale. Exhale. Inhale. Exhale.
Inhale.
Exhale. And then if you want, you can keep with the cat-cow, or you can just start to sit back, and that'll put even more pressure there. We'll start to feel that counteraction on the wrists. And then slowly come up and release. That feels really good.
Maybe shake it out a little bit.
Movement out. I can really feel it right there. Yeah, more on the right hand than the left, and I think that's because I use my right hand more because I'm right-handed. We're gonna do some nice easy forward folds and then we'll finish up. All right, make sure that your toes are pointing back towards you and bring your hands next to you, like right in the beginning of your thigh. You want those toes to point back towards you and you want your spine to be really nice and long. This is called Dandasana. So we want to imagine that there's something behind us, and that's actually what we're pointing our toes into. So if it's helpful to come up against a wall, or in this case I'm going to use this bolster that kind of helps me to remember to point those toes back towards me, because that's the whole point of it. If you can, really try to keep the leg straight so that you're feeling it all along the bottom of the leg and the toes are pointing pointing back towards you, and the quadriceps are engaged. Now we do the upper body, pulling up through your mula bandha, so at the base of your spine, your pelvic floor. Inhaling up, and then first and second rib. Good. [FOREIGN] So now let's inhale, reach the arms to the sky, and exhale, just fold forward. Let your hands fall on your legs wherever they do. If it feels good to grab onto your toes, then definitely do that. Again, keep the toes pointed back towards you. Look at your toes. This is called Paschimottanasana. [FOREIGN] And then we'll slowly bring it up. You're going to keep your right leg extended now and bring the left heel into your right inner thigh. Again, we want to make sure that this toe is really engaged because that helps us to work on strengthening all along the ankle, but also these muscles all along the side, the IT band and all of that, that all helps with the strength of the ankle. And left knee is coming out to the side. We want to keep our L shape here. And our hips are kind of squared off, and our torso is just a little bit turned toward the right leg. Inhale, lengthen the spine, arms come up. Exhale and fold forward. Let your hand fall wherever it does onto your right leg that's extended. Maybe if you grab onto the toe, maybe you don't, doesn't really matter. The point is that the toes are pointing back towards you and the leg is nice and straight. So we're building all of that strength along the side of the leg. What we don't want is for that foot to rotate out, go to the side, rotate in. We don't want any of that. We want it to be right down the middle. And then when you're ready, slowly roll your way up, just switching legs. So now the left leg comes straight, right leg bends, right knee comes arms out to the side, creating that L-shape, bringing the torso in toward the left leg, making sure that the flats of the left foot are pointing back towards you. Inhale, reach your arms to the sky. Exhale and fold forward. Bring your hand down wherever it feels good. Maybe you grab onto the foot and maybe you don't. Grabbing onto the foot isn't really the main part of this. It's the making sure that the foot is pointing back towards you so that you're feeling this all along here, underneath the leg, inside of the leg. We're building up that strength. Slowly rolling your way up. I'm releasing. You'll take the left leg and bring it up to meet the right leg so that the soles of your feet are together. There are two different ways to do this pose. You could bring your feet out, or you could hug your feet in as close to you as possible. You could take your feet and peel them out. But in this case, we're trying to work on something entirely different, so we want to keep our feet together. Now, you should feel this right here in your inner thigh, but what we don't want is to feel it on the out of our back of our ankle. So we're just trying to keep those as straight as we can and the feet and the heels together as much as we can, just kind of pinching them there, lengthening through the fine. And if it feels good, stay where you're at. Maybe slightly fold forward, that will increase the inner thigh. Good. If you would like more, you can bring your hands onto your legs and start to press your knees down. That'll give you even more, but you don't have to do that, it's just an option. Okay, go ahead and slowly come up. Now we've done a lot of forward bending today, so I'd like to do just a few back bends to help counteract our forward bends, just so that we feel really nice and good. Before going into our final resting pose. Take any props that you have and put them away. Bring your knees together and find your way onto lying on your stomach. When we're here on our stomach, I'm just gonna have you come into a nice easy Sphinx Pose. So bringing your hands together, forearms onto the mat. Just looking forward, let your glutes relax, and you'll notice that your heels tend to come out. And just kind of relax in the shoulders, but draw them back, and you'll feel that in your low back. And we're just kind of counteracting all of the forward bends that we did today, releasing that energy. Go ahead and let it come down. Use your arms as a pillow as you relax. I like to move my hips around a little bit to just kind of really release, and then we're just going Bring our hands in line with the chest. Don't put any pressure on the hands, just slightly lift the chest. You can use your hands as a guideline if you want. Draw your shoulders back, draw your shoulder blades back, open up through the sternum. Keep the feet onto the ground and relax the glutes. And then go ahead and release down, just let it go. We're going to go ahead and just find our way into lying on our back, coming into some easy twists, and then into our final resting pose. Hug the knees into the chest. Maybe just roll around a little bit to give yourself a nice back massage. I'm gonna let those knees fall to the left as we bring our right arm out and turn and look over our right shoulder. Start to let the breath slow. Bring the knees back to center. Let the knees come over to the right side now, and left arm extends out, turning and looking over your left shoulder. Bringing it back to center. Now we'll go ahead and just extend those legs out straight. Let your arms come to the sides, let your palms face up. Sighing as you relax, let your whole body melt into the mat as we come into our final shavasana. Hang with me here until the end. I'll let you know when the shavasana is over, so don't feel like you have to have any tension or stress around that. Just enjoy lying there and Feeling the bliss of relaxation after yoga practice. This is the single most important pose that you will do today. It is the most transformative pose in your life, so don't skip it. Stick with it. You got it. I'm here for you to let you know when it's time to release. [FOREIGN] When you're ready, begin to wiggle your toes and your fingers. Very gently allowing your energy to come back into the room, reaching your arms overhead and bending your knees, pulling over onto your right side into a fetal position. Using your left hand to press your way up, coming into a seated pose that feels comfortable for you. Maybe that's legs extended, maybe it's legs crossed. Lengthening your spine, relax down through the shoulders. Bring your hands to the heart center in Anjali Mudra. The light within me honors the divine and beautiful light within each and every one of you. Thank you so much for a wonderful class. Thank you for sticking around to the end. I appreciate you. Namaste. Thank you so much for joining me today. I really appreciate you. I would love if you hit the subscribe button, hit the like button, and left a comment below. It really helps my channel to grow and it means a lot to me. I have lots of resources below in the description, and if you are looking to go deeper into your yoga practice, you want to learn everything about yoga philosophy, yoga poses, how to teach yoga, but how to just work out everything that's going on inside of you and get deeper into your yoga practice, you don't even have to teach, you can just learn more about yoga, yoga teacher training might be for you. I do teach one-on-one private yoga teacher training, which is absolutely unheard of. Nobody does that, and it's online. I'll meet with you every week on Zoom, and we'll really get to be friends. So it would be awesome if you join me. You can check out that below in the description. Thank you so much. Mwah, mwah, mwah. I really, from the bottom of my heart, appreciate you. I'll see you in the next class.
¡Gracias!