Stop Using Take Profit Orders To Become Profitable FAST
Trader Jesse Rogers grew his account from $10,000 to over $220,000 in less than a year by ditching fixed take-profit orders and using trailing stops instead. He shows two methods: one based on swing points and another using order-flow analysis on Tradeavate's tools, with real trades that made $52,000 and $10,000.
Chapters
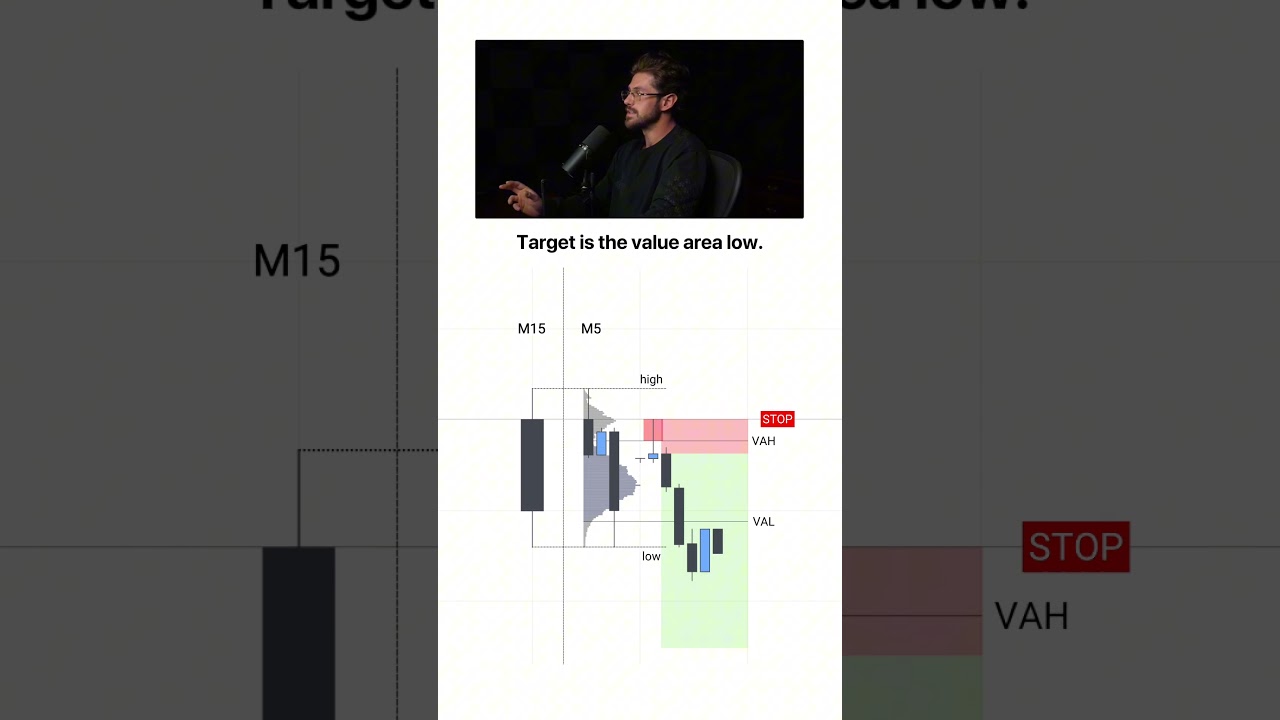
The easiest way that you can become profitable fast is to stop using take profit orders. Now, I want you to use this carefully because it will change everything about how you trade. I use this to take an account from $10K to $228,000 in less than a year, and I'm going to log into my broker and prove it to you. And then I'm going to walk you through exactly how I do it. It's simple, it's mechanical, and there's no guessing. So as you can see, I'm here on Tradeavate.com. This is a regulated US futures broker. And I want to go ahead and log in to show you guys proof of my results. As you can see, we're clicking live trading and once we get in here, we're going to go to the report section so you can see my overall performance. As you can see, just today I made $10,000 and I will give you guys a recording of that later in this video so you can see this whole process broke down in a live setting. So if we go back to whenever I started this account, which was in November of 2025, on the 5th, and then we go to date. As you can see, $212,000 total profit. And with the account sitting at $222,000, you could do the math and see that I started with $10K. Now I want to be clear, there have been some drawdowns during this. There have been some ups and downs. It's not always just up, but I would have never been able to do this had I not been able to let my winners run. So today I'm going to break down the exact system that I use. That way, by the end of this video, you walk away knowing how to manage your trades like a professional, because chances are you could already be a profitable trader had you let some of your winning trades run longer. All right. So I'm about to give you my full 3-part system that I use to exit trades without ever using a take profit order. I've never taken the time to really break this down publicly here on the channel, but this was one of the most impactful things to my trading in my entire 10-year career. So I wanted to dedicate an entire video to this as I think it can help a lot of you guys. So we're going to be breaking this down into 3 parts. First, we're going to talk about why taking profit is actually costing you money. And I promise you, this is not the reason that you think. Next, you're probably wondering, well, how do you actually make money? Well, the answer is we want to trail, meaning our stop losses, instead of using targets, meaning take profits. And I'm going to give you guys a full mechanical way to do this, which is going to be in step number 3. And in order to do this, you can use structure or my favorite, you can use order flow. And I'm going to break this down over multiple recent real trade examples that I took on my live account. This one I was able to make $52,000, and then this one from just this previous week, I was able to make $10,000. And as you can see, I only had 3 contracts on this trade. It's not like I was using huge size. And the only reason I was able to do this is because I was able to let my winner Run. And this is one of those pieces of trading advice that gets said a lot to beginner traders that seems obvious, but it's actually some of the most powerful trading advice you could ever hear. So let's hop right into section number 1. Now, you've probably been told that taking profit is discipline, but this is just optimizing for comfort instead of actually trying to make money as a trader. Simply put, it helps you secure profit, it removes risk, But all of this is just going into the act of trying to make more money. But what it actually does is it limits the amount of money you can take because as soon as you take profit, you are out of the market. And let's say you're in a winning trade that keeps running. Well, you didn't really make a smart decision and I get it. You're not going to be able to catch the entire move of every trade. That's not what this video is about. What it is about is being more logical rather than optimizing for comfort. Because most people just use take profit orders to get out of the market. And a lot of traders still can't even hold on to their trades all the way to that take profit order. And I guarantee if you went back and looked at your trades and saw how many of them ran further than wherever you got out, chances are if you would have captured even half of those extra profits, you would be a much more profitable trader. Like, for example, let's just break this down on this single trade. So let's just say the market had hit into your key level, which you see here with this blue line. And then the market ends up trading up into the level and back away from it. And we get this break in market structure where a candle closes underneath a recent point. Now, most traders in this position are going to look for a trade and they're going to short the market since we are selling off away from resistance. And you could enter the trade and maybe you put your stop loss up here at the high, and then you would target down here at the range low. This is typically how most traders are going to enter trades. But the problem with this is that many times the market's going to hit into that level and then immediately go much, much further than that level. And this is something that a lot of traders could easily fix with the rule that I'm going to explain in this video. Ironically, this is actually the exact setup that I'm going to break it down on. And as you can see here, this was the trade where I made $52,000 on because the example I was just drawing out would have been taking profit here at this range low. But as you can see, I was able to hold the trade all the way down to here by trailing out my stop loss. Now I want to be clear, I didn't catch the entire move. And again, I'm not teaching you or telling you that you're going to catch the entirety of every market move. That would be an unhealthy way to think. But what I am telling you is that you're likely leaving a lot of money on the table and you're optimizing for comfort, not profit, meaning you're just taking profit at a level because you think that the market might reverse there, but you don't know if it's going to reverse. You don't know if the market's going to be in a, quote, losing trade after we hit that level. And what do I mean by that? Well, let's just say if we're taking profit at this level, essentially what that would say is that we're not confident that the market is going to keep selling off. But the way I look at the market is we don't really predict things. We're just going to react to the market at key levels. So for example, what happens here that would make us think the market is bullish? Literally nothing. It doesn't even— I mean, it's just making bearish structure again and again and it continues to the downside. So why would we have wanted to exit a trade there? Well, I'll tell you, is because you are fearful that the market might reverse from this level before it even gets there. But instead, the paradigm shift you have to have is you need to look at how the market is reacting at key levels, just like you do to enter trades. In order to exit trades. So this all sounds great, but how do you actually do it? But how do you do this without adding risk to your trade? Because we obviously don't want to let a winning trade reverse and turn into a loser. Now, everybody teaches you the entry of trades, but nobody teaches you how to exit. So this brings us into step number 2, which is trail, don't target. Okay. Most people are going to exit trades based on a target, even though when they enter trades, they're not just setting a limit on a level saying that we're going to reverse from here. Like, let me give you an example. And once you think of it like this, it's so obvious. Most traders have a trading strategy where they'll pick a zone they want to trade from. And then once the market rushes up and let's say if they're trying to sell from resistance, then what they'll do is they'll watch how the market responds at this level and they'll wait for some kind of confirmation, like a market structure shift. What trading strategy just sets a random zone in the market and then you just sell from that zone or buy right at that zone? Not profitable ones. That's a great way to lose money. Most people would tell you this is an obvious bad strategy. However, that's exactly how they exit trades, because once they enter the trade, then they set some arbitrary target, maybe down below. And once the market hits into this level, then they just exit the trade. But this is the same logic as just entering trades randomly because you are trying to judge what's going to happen before the market gets there. And this is just not an intelligent way to think. Most traders do this because it feels comfortable, because they are able to remove the risk of being in a trade and secure a winner. But what if you could do the same thing but still let the trade run? Well, it all depends on how the trade reacts, because sometimes the market's going to hit into this level and maybe it does reverse. And in that scenario, we want to be out of the market. But a lot of times, and I guarantee if you look back at your trading, more times than not, the market is likely going to pause for a second and then continue on the down move because you already did the work up here and figured out that sellers were in control of the market. You didn't do the work down here to determine if sellers were still in control of the market. And many times they are since you're already in a bearish market. And if we look at any market, it's going to be majority trend following, then we want to let the market run and let it tell us whether or not we're still in a good trade. You don't want to just exit the trade based on some predisposed area. So in this example, you're going to be able to trail up your stop loss, and as the market runs, we're going to trail up our stops and let the trade keep running. But it's really important that we do this in a way where we don't open ourself up to the risk of the market reversing on us and taking back a winning trade and turning into a loser, which brings us right into step number 3, which is the 2 different ways that we are going to actually trail our stop losses up. Now, the first one we're going to go over is structure, and the second is order flow. So now let's break it down over 2 real live trade examples that I recently took. So as you can see here on this day, which is July 2nd, I had marked out the zones that I was looking to trade from. All right, so now let's break this down over two real and recent trades that I took on my own account. So as you can see, I have these two zones marked and these were zones that I was looking to trade from. Now there's something that I want to be very clear on, and if you don't follow this, then nothing I am teaching you today will work. This is a trailing stop loss strategy. In order for it to work, you have to be able to catch winning trades consistently. And in order to do that, you need a clear and proven plan. And if you guys don't have a solid way of creating a morning plan that you go through before you start trading, I do put out this whole free PDF every single day that goes over my entire plan for the market, all the key levels that I'm watching, the options positioning environment, tons of data and stuff that will help you trade more like a professional. If you want to get access to these plans, I'll leave a link in the description to my free trading Discord. As you can see, I post these plans and trades that I'm taking along with updates on my portfolio, free courses, and a ton of other valuable stuff that can help you on your journey as a trader. So let's break down our first trade. As you can see right here, we hit into this zone of resistance. And then the market pushed away from the trade pretty rapidly. When it did this, we closed underneath this low and this is a break in structure to the downside. Now, I'm not going to explain my full strategy in this video because I have other videos on that and that's an entire video in and of itself. But just know we had a reason to take a trade at this level. So let's just say we enter our trade based on structure and we'll go over order flow in a second. But we enter the trade and we put our stop loss up here at this level. Now typically where most traders are going to look to take profits is they're going to look for a recent range low and just take profits at that level. And this can be okay, you could get 1.5 to 1 risk to reward, meaning you would make $1.57 for every dollar you risked. And this is okay, but let's just watch how this trade unfolds. So as you can see, the market starts moving pretty quickly, and it ends up going down to this target in just a couple of minutes, but then it ends up going a lot further. And as we can see, the market doesn't really retrace too much, but the market does run for a very long time. And if you would have just exited the trade here, you're effectively cutting your profits in half, and actually worse on this trade example. And this is something that used to happen to me as a trader all the time until I realized this simple trick I'm about to show you. So let's take a look at my trade entry. Now, you'll notice I entered at a different spot, and I'm going to show you how I was able to get even better risk to reward using order flow in just a second. But as you can see, I held the trade much further than that range low. I held it all the way down to this area right here. So how did I do that? Well, it's really, really simple. Every time that the market ended up making a new swing point. Now this is the structure way. For beginners, this is very powerful as well. So as you can see right here, we formed a swing point. Now when I say a swing point, I just mean any candle with a higher high or lower low than the candle right next to it. So you can see that this candle's high was higher than this candle and this candle, so that makes it a swing point. Then we we see it happen again. So you would have trailed up your stop loss right here, and then right here, and then right here, and then right here, and then right here. And no, this one did not hit, it was very close. And so on. And as you can see, you're basically letting the winner run without adding a ton of extra risk. And then finally, on this trade, I ended up getting trailed out as we hit into this high right here. So let's break this down just so you can see how much more money I was able to make by letting my trade run. Let's just say you entered at that original point right here and you put your stop loss right here. On this example, you would have made about 1.57 risk to reward. But if we trail down our stops to right here, you made 3.9. However, I actually entered the trade over in this candle and I had an even tighter stop loss using order flow. So my risk reward was closer to 5. Now let's just break down how insane that is. So I was able to make over 3 times as much money on this trade just by moving up my stops, not changing anything about the entry or my strategy. Imagine— and do the math on this, go ask AI with your trading results— how much more profitable would you be if, let's just say, half of your winners were 2 or 3 times as profitable? I guarantee if you go do the math, this trick that's been hidden under your nose the entire time could have already made you into a profitable trader. Or if you're just starting out and you're a beginner, this is going to save you from a lot of wasted time and money that you're just giving back, or I should say not getting from the markets. So now let's break this down with order flow. So in order to do this with order flow, there's two different tools we can use. The first we're going to do here on Deep Trades. So if you go up here to the indicators area and you don't already have it, we're which I have my template. You can get this in the free community that'll just load your whole chart up for you. But right here I have something called Deep Trades. Now this is going to rebuild the chart because it has a lot of data. And what this is showing us is where there were big trades put into the market. And we want to think of the market in terms of effort. Okay, so let's just say we see right here the market was putting a lot of buying effort. You see these little blue bubbles right here. So there were buyers and they were getting a good return on their effort, meaning when buyers stepped into the market, the market went up. So buyers were in control. However, we start to see very large amounts of sellers step in and the market start moving to the downside. So this shows us that sellers are taking control. And the important thing is this is happening at this key zone. Okay, so once we see sellers starting to take control, we want to see one more thing. To use an order flow entry, and this is going to be the same logic that we use to trail stops as well. So what we want to see is if we are selling, we need to see the other side of the market wrong. So we want to see buyers try to push the market up, but then sellers really aggressively come into the market and win. So in this example, right here at this area, we saw those buyers attempt to push the market up and sellers really aggressively push the market down. So you can enter once the market is pushing away from this area, and then we can put our stop loss just above those areas where those failed or trapped buyers are, because the market isn't likely not going to give them chance to get back out of the market. So if the market were to move above them, we're likely going to go up here anyways because buyers would be taking control of the market. And if they're in control of the market, there's really only one place we can go. So as you can see, this helped me get a much tighter stop loss. Now let's look at how we can trail our stop losses down using order flow as well. So in this example, we see that the market ended up having a large amount of sellers here and then a large amount of buyers here, but buyers were not able to push the market up. So let's just imagine that we enter a second trade, almost like— think of it like this. The first trade you had, you were targeting here, and then the second trade you had, if the market is running further and you're now in a trade, like, what's the worst that can happen if the market ends up reversing to this high, right? Like, if we're trailing up our stop and the— we're putting our stop right there, we're likely going to do that right here. So on this trade, you had about 70 points at risk. So let's just say you are placing your stop loss up here and you're doing so right here. You're essentially taking a second trade with less risk than the first one. Even though you're already in a trade and there's really not any risk at all, it's just profits that you're risking, which you should still look at as something you should defend. You're essentially just taking a second trade, and that's kind of like the mindset I want you to have. Because understanding how to manage a trade, and what this really comes down to, is that if you're in a sell and sellers are in control, which you're visualizing through order flow, then you shouldn't want to get out of that trade. That is the best opportunity you have. It's not going to happen often where you're in a trade and as they say, you have a tiger by the tail. Okay. If you're holding on to a trade and it's very powerfully moving in one direction, that's not, that's not going to happen every day. So you want to make the most out of it. Actually, it's going to happen like maybe 5 times a month or so when you're going to get a big trending day. And with this strategy, you're going to be able to capture a lot of those. But as you can see, we had more aggressive traders hitting the market. So every time we see this happening, that is even more confirmation for us to trail up our stops more aggressively or even scale into a new position. And as you can see, finally over in this area— why I exited where I did— look right here, we had this area where we had some buyers, and then the market ended up trading back above that area. So if you go back and look at the trade where I took— I ended up getting out right there. Now let's take a look at this second trade because this one was a little different, and I'm actually going to give you a full recording to this entire trade as I was taking it after this, so that way you have a complete example and this really sits in. So for this one, we're going to take a look at a tool called DeepDOM, which is over here on the right side of the screen. Now DeepDOM is my favorite tool for order flow. DeepCharts is great for charting, But deep DOM is how you get real x-ray vision on the markets. And I'm gonna break this down in a really simple way. I know this thing can look intimidating, but it's actually really simple. So on this trading day, and again, I'm not gonna teach like my full trading strategy here, and I do have videos about that on my channel. I'm not like withholding it. I'm just trying to stay focused for this video, but you can watch the video for my updated strategy. I'll leave a link in the description. But right here, just know that I'm looking to trade away from the previous day's low. Value area. So what you're looking at here is a volume profile. Essentially what it shows is where the volume was traded at different price levels. So the previous day, this box you see here is called the value area, and this is where 70% of volume traded. So this means that if we're opening up above this area, we're bullish, because if all of the trading or most of the trading happened in this area and we're moving up from it and we're opening a new session above it, then the market is accepting higher prices. So what we want to do in that scenario is we want to look and see how the market reacts at that level. So this little box here would act as a support zone and we would be looking to see if there is a buy setup. So when we traded into this zone, this is what it looked like on DeepDOM. Now I want to break down what this actually means. So kind of what I was talking about earlier with the overall effort. So if we look right here, all of these silver bubbles you see show aggressive sellers, meaning sellers that are using market orders that are trying to get into the market to sell. Okay. So what it means when they're using market orders is they're willing, they're raising their hand and they're basically saying, I'm willing to sell for any price. Then you see these little heat maps here which are showing passive buyers. So the reason they're buyers is because it was below price. The price is just this line. So if there is someone placing a limit order and then there are aggressive traders The aggressive traders are using market orders, and then these people who are using the limit orders are called passive. So typically larger and smarter market participants are going to use limit orders and more retail traders are going to use market orders. So the market orders are going down into this area where you see there's a trap waiting. There's a lot of liquidity, a lot of large buyers ready to buy, and that's happening at a key zone. So then what ends up happening is the market starts to move away from this and we shift structure to the upside. So right around this area was my trade entry. And I won't spend a ton of time here because like I said, I'm going to give you a full trade recording of this full execution. But this is important to understand for the trailing stops. So the reason that I entered this trade is because I look at this like these traders now, all of these guys who are then sell, sell, sell, they were super bearish in the market. All of these guys are trapped. So every time the opposition is trapped, I look at that as an area the market shouldn't trade through. So if the market was going to be bullish here, and as you can see, the market ended up trading pretty aggressively. So we traded to the upside and got this big move. When I entered the trade, I said, okay, well, I don't want to see us trade under this area. Well, why? Because this is the last area traders were trapped. And this concept is pretty much the basis of all order flow. And if you can master this, you can master order flow. So the market is always going to be trapping one side of the market, whether it's buyers or sellers. So as you can see, the market ends up trading down lower. A lot more sellers get in the market, they're trapped. A lot more sellers get into the market, they're trapped. Every time that we have a confirmation that buyers are in control, and a very specific way to do that is any time that you're trading above recent structure you see right here, and more aggressive buyers are taking control. And when I say taking control, notice how when buyers get into the market, right? So when buyers are getting into the market, the market ends up actually moving to the upside. And as we get above this recent high that we formed right here, right there, more aggressive buyers are getting in. And guess what's happening when they hit into all of these passive sellers? And this is really going to be the trick. Understanding who's in control is going to be viewed using real liquidity, not guessing with, you know, just drawing out price action. But what we're looking at here is a lot of passive sellers were in the market, but there were more aggressive buyers that ended up overpowering them. So as you can see, what ends up happening is they actually push the market higher. So every time you're seeing this happen, when you see these failed attempts from sellers and aggressive buyers pushing through, failed attempts from sellers, buyers pushing through. This is how you're going to be able to trail up your stops every time the other side of the market is wrong. And as you can see, the market ends up reversing right here, and this is where I got out of the trade. Now, I was able to get out near at the top because I look at the market from a sense of Am I in a winning trade? Meaning, are buyers in control if I'm long? And in this example, where do we see the buyers actually lost control? Well, once we started to see sellers get rewarded for their effort, meaning we had sellers coming to the market here, the market just popped up. They weren't rewarded there. But then we started to see these buyers getting trapped and the market actually reversing away from these areas. And as you can see, you can always watch this happen on a price chart as well. But there's so much more to the markets than just looking at candlesticks. And you have to understand that candlesticks are a reaction and a result of order flow. And when you look at the markets like this, you will never see them the same again. So as you can see right here, just using candles on, uh, DeepDot or, uh, DeepCharts, we had a lot of aggressive sellers get into the market. Aggressive sellers, aggressive sellers, again and again and again. And what ends up happening? Well, these traders, they can't push the market down. And we can see clearly that buyers are in control. And then finally, we start to see some of these buyers, as you can see up here, right here, here, and here, they started to lose control a bit. And then the market did go higher. I didn't get out at the absolute, you know, perfect time. But what you'll notice is that you're not trying to get every single last point and every capture capture everything in the whole trade. You're trying to be able to get more than you're already getting. So again, I want to restate that because I'm not trying to tell you to just hold on to trades forever because that's not smart either. If there's one thing that I want you to take away from this video, it's to let your winners run and to cut your losers fast. But remember what a real winner and a real loser actually looks like. If you want to get access to trade with me live, get access to my Smart Trader AI software, and get every single trade that you take reviewed and learn more about my full trading system all the way from the basics to advanced risk management and trading strategies, then I'll leave a link down in the description for my mentorship. Now I want to be clear, I do not work with just anybody because it's a very intensive program, so I'll leave a link where you can apply, and as long as that link works, then we still have slots remaining for this enrollment. Also, as promised, I'm leaving a video up on your screen, and that video is a full recording on my second channel where I post less edited, really tactical content, mostly just actual recordings of me at, you know, really trading. Because I know that whenever I was a new trader, all I wanted was to see execution. And information is good, uh, but a lot of you guys don't necessarily need a tremendous amount more information. You just need to learn how to actually execute on what you already know. So go ahead and subscribe to this channel and to my second channel Watch that full video right now so it seeps in and you really drill this in. And I want you guys to go out and actually practice doing this on your very next trade, because just watching this video and not taking action on it is actually worse than watching trading content at all. So thank you guys for watching, and I will see you guys in the next video.