How to set up a TP-Link wireless bridge to connect an egauge meter to your facility Wi-Fi. Power it via USB, connect your computer to the bridge SSID, set it to Client mode, select your network, then connect it to the meter so it can collect machine runtime data.
Chapters
Welcome to Guidewheel.
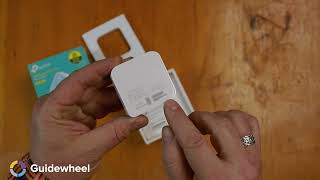
You may have received a TP link from Guidewheel to provide connectivity to the meters you'll be using to collect machine runtime data for Guidewheel. In this video, we will walk through how to set up the TP Link Initially, before the TP Link bridge is installed, it needs to be configured to the wireless network where the meter will be located.
Be sure you have the network ID and the correct password on hand before starting the setup process. Also, do not connect Ethernet to the TP Link Bridge before setup via WI FI is complete. If an egauge meter or other device is connected via Ethernet to the TP Link Bridge, the initial setup will not work.
Let's begin. The bridge should be within WI FI range of the network it will connect to. Power the TP Link bridge via USB.
Using a computer with WI FI enabled. Connect to the wireless network broadcasted by the TP Link Bridge. The SSID and password are located on a card that comes with the wireless bridge and this information is also printed on the bottom of the bridge itself.
Once connected to the Wireless Bridges network, open a web browser to the address on your screen. If you see this screen, you may need to enter the IP address manually.
You will be immediately prompted to choose an admin password. Enter that password here. Keep a record of this password as you will have to reset the TP link and repeat this process should that password be lost. Now select Start.
To begin the quick setup procedure. Select Next. We want to run the bridge in client mode. Select Client and click Next.
A list of in range WI FI networks will be displayed. Choose the network you're connecting the egauge meter to and choose Connect. Enter the password for the WI FI network and click Next.
Choose Smart IP for the LAN type. This will automatically assign the admin interface and IP address from the main network and any egauge meters connected to the ethernet port will obtain an IP address from the main network. Press Next to continue.
Review the configuration. Write down any information you need to keep on hand and press Finish to save and reboot.
The TP link is easily mounted using heavy duty hook and loop tape. It is recommended that you mount the TP link on the outside of the NEMA enclosure and it may be necessary to mount it in a location nearby that has a stronger WI FI signal. Here I've mounted it to the inside of our NEMA enclosure lid as our main WI FI router is merely 8ft away.
Now that your TP link bridge is configured, it can be connected to the egauge meter. Connect both the USB and Ethernet cable to the meter. The meter will supply power to the bridge, and the bridge will supply an Ethernet connection for the meter. You have now successfully configured and installed your TP link bridge. In our next video, you'll be on the fast track to peak performance as you connect your meter to the sensors. Thank you for working with Guidewheel. If you have any questions, please reach out to your Guidewheel Technical Account Manager or email. Success at guidewheel. Com.