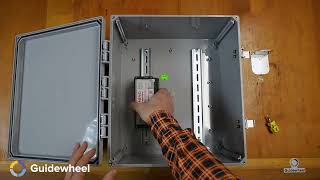
Watch how to unbox a Guidewheel meter and mount it in a NEMA enclosure using DIN rails. The kit includes the meter, current transformers, power cable, and networking hardware. A follow-up video covers wiring it to power and internet.
Chapters
Welcome to Guide Wheel. In this video we will cover unboxing and mounting the meter inside the enclosure. Everything you need to get started with your Guide Wheel installation is in the packages shipped by your account team. Installation is simple Mount the enclosure and meter near your machines. Connect your meter clip on the CT sensors to your machine's main phase and connect the sensors to the meter. Lets begin by looking at the hardware you've received and how to mount the meter in the enclosure.
When you receive your hardware from Guidewheel, it will be sent from a third party and you may receive multiple boxes of Hardware. You'll receive Cat 5 cable separately, depending on the length of cable needed to complete your installation. Be sure to check the contents of the hardware shipped using the provided packing slip. Your hardware includes a NEMA rated enclosure, DIN mounting hardware, a meter, cts, a DC power cable, and if not connecting directly to the Internet via Ethernet cable, a TP link access point. The DIN mounting hardware consists of this DIN clip, L bracket, DIN rails and some screws. The first thing you want to do is mount the DIN rails into the enclosure. Install them using the included screws and washers.
Now let's mount the DIN clip to the egauge meter. Take extra care when unboxing the meter.
On the back side of the meter there are four mounting holes. The DIN clip mounts directly to these holes using the included screws. Note the orientation of the clip.
Now that the DIN clip has been mounted onto the back of your meter, we can simply attach it to the DIN rail in the enclosure. Your meter is now securely mounted. Alternatively, the DIN clip can be turned 90 degrees so it can be mounted to a DIN rail vertically or horizontally. Another mounting option is to use the right angle bracket and a DIN clip. These alternative mounting solutions allow for a variety of configurations based on your specific installation needs.
In the next video demonstration, you will learn how to connect your meter to your machine, Internet and Power.
Thank you for working with Guidewheel. If you have any questions, please please reach out to your Guidewheel Technical Account manager or email successidewheel.com.