Community Lightning Talks | Developer Day 2021
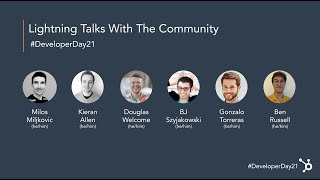
Six developers share quick talks on HubSpot tools and workflows. Topics include MJML email templates, HubDB filtering, APIs, and webpack plugins. Recorded at Developer Day 2021 in November.
Hello, my name is Douglas Welcome. And I'm really excited to be sharing a little bit about a side project I've been working on with you today. So today I'm going to be talking about using MJML for HubSpot and how to use this markup language to quickly develop HubSpot email templates. But first, a little bit about myself. Like I said, my name is Douglas Welcome. I'm the brand design lead at sama, which is an ethical AI company based here in San Francisco. I oversee our digital design and marketing related development. So that's anything related to the website or email templates or anything like that. And I've been developing on the HubSpot CMS since about 2018. So before I jump in, what is MJML? Some of you may have heard of it before, maybe you haven't. Mjml basically is a really, really simple markup language that then spits out that really, really nasty HTML that you need when developing emails. I don't know if you've ever hand coded an email before, but it's a pain and mjml makes that a whole lot easier. So I was thinking, how could I do this? How could I use mjml to develop the content module, different content blocks that I could reuse and rearrange for HubSpot email templates? And so here's an example. Like I could, I could write some MJML markup for a header, for a body, for a footer. The problem is those get put, they get outputted to as individual HTML files, complete with the opening and close HTML tag and the head and everything. And those don't work very well if I'm trying to just stack them together in a template. So what I did is develop a little script here that basically you can write your MJML markup for different modules for a header, for body, for a footer, it's going to output that HTML for those, then you need to strip off that opening and closing HTML content so you can just get to the meat of those content modules and then you can stack them and reorder them into a HubSpot template. So to show how this works, I thought I'd clone one of my favorite emails out there, the Hustle email put out by HubSpot. Thanks HubSpot. And I thought I would see how quickly I could create a clone of this email. So you can see here, there's basically a header, there's some body copy, there's a little section header, an image, and some more body copy and so forth. So I've done most of it here. I've got this again, the header, the copy here, image, little divider line, you can see it squished in there, but you don't see that section header. So that's what I'm going to go ahead and show you how this works. So to do this, we're going to take a look at the code here. Basically in this project, here's your dist folder. This is all your compiled HTML in your source folder, you have all your mjml and then the necessary node scripts that are used to make this happen. I originally wrote this with shell scripts, and Windows users can't use those because I built this on Mac. And so I decided to refactor this into Node. This is my first node project and so it's probably sloppy and messy and not very elegant. So if anybody wants to help out, happy to have some help. So to go ahead and get started, here's my template and you can see I've got my. The section header. I've got it commented out because I haven't used it yet. But I'm going to start this up npm, run email, and it's going to go ahead and upload all of the necessary files that I have in my dist folder just to get started. And I went ahead and built this section thing here with mjml, save us some time. And I'm going to drop it into my modules here because it's going to be a content module, so I'm going to move it in. And you'll notice the script recognizes that there's not a module created. So it's going to create that for me. It's going to create the necessary files within that module folder. So the fields meta and then the module markup. And there you can see there's my HTML markup right there. So basically it took this mjml between the begin and end modules, stripped it out and gave me this HTML here. So next I need to add in the required text field. We'll do this real quick text and we'll save. And then lastly, I've got it commented here. I'm going to just change the number, just give it a unique identifier, comment out, add it in and save. So it's uploaded this section module into HubSpot. So let's take a look over in HubSpot and we can see this in the content editor here. So I'm gonna go ahead and refresh. And there you go. There's my section header and there's my text field. So let's see, it was the big idea, right? What is the big idea is that we had. Yeah, the big idea there in red. So there you go, it inputs that text and then I can refresh this and oh, there it is. Now let's say I wanted to update the styling a little bit. I can do that really quick. Going to jump back over to my code, go into this mjml file and let's make it color red and let's say text transform equals uppercase and we'll save that and you'll see it'll run recompile and then it'll upload that file, upload that HTML over here. Then let's flip back over to the browser and I'll go ahead and refresh the email and there you go, the styles are updated. So yeah, that's basically my project. Thanks so much for listening to this talk. There's the link for the GitHub project and would love any contributions anybody else wants to provide. Thanks again.
Hi everyone, my name is Milos Milkovic and I am the lead web developer at Whitehat, a HubSpot Gold Solutions partner agency based in Athens, Greece. Today I will be illustrating an implementation of HubDB with multi filtering, sorting and pagination features. Our main goal was designing an interface through which the user could have the ability to filter, sort of and view the results. Due to the large DataSet, more than 500 records HAPDb was chosen as the database, while the HubDB API endpoint was utilized to query all the data for the front end. A couple of libraries were also used to enhance UX over the datepicker and pagination respectively. The pagination library called for a JSON object dataset in order to control the size of the elements contained within each page. So the AJAX call to the HubDB API was conducted with impgination. It also provided a callback function that came in very handy when rendering the data once it was returned, the rendering itself was performed on JavaScript using the HTML template element. So upon finalization, all that was left was creating the URL variable that forms the API endpoint containing all the data, pass it to the pagination plugin and handle the rendering. That was performed using a form that contained all the filters as input elements and was binded to an event listener so that on submission all fields are processed, stored to variables and the URL is built. Then the pagination function is called with the URL as a parameter. There were also a couple of pain points that needed to be taken care of. In the first case, we had the city and region variables within the URL as parameters sent from another page, so a special function for that case was created. The other case was when no further parameters were included in the URL and all of the records needed to be shown, so a function that called the whole table was created. A special case was the date field. I used a jQuery library that allowed the jQuery picker to show only years and months, therefore the returned timestamp was the beginning of the month. Our case urged for all the listings to show up within that certain month. For that reason, we have utilized this timestamp in in order to generate the first and last day of the month, afterwards, store them to variables, and use the HubDB API query filters to narrow down the results between those two dates. If a listing was dated in the past, it should have not shown in the results. Thus I used the HubDB query parameters to limit the results if the timestamp value was greater than null, meaning greater than zero. The general impression that we have gained through our experience utilizing the HubDB feature is that HubDB may seem easy to handle and quite simplified. However, it is a powerful tool if used in a sophisticated way.
Hi, I'm Kieran Allen, co founder and developer at KJ Digital, a small software development company based in Bristol, England. In this quick, fast session, I'm going to do my best to show you how easy it is to get started with the HubSpot APIs. Let's jump straight in. Authentication the majority of HubSpot's APIs require authentication. There are two main ways for you to authenticate OAuth and the API key. In this talk, we're going to use the API key because it's quicker. However, it's really recommended that you use the OAuth method. It's much safer and much more flexible. We're going to be creating a very simple command line script which will allow us to populate a portal with some test contacts. Let's get coding Here's a Visual Studio code project. I've already installed two dependencies. The HubSpot API client, it's a Node JS client and then the Faker library, which is a library which allows us to generate test data very easily. We'll get started by including the HubSpot SDK. Then we'll include Faker is a third party library for generating test dummy data. And then what we do is we'll create an async top level Async function self calling. So we can actually use promises at the top level or use a weight at the top level. So now what we're going to do is we're going to create a client using HubSpot NewHubSpot client and this requires the API key. We're using API key and I'll show you how to find that in a second. And then what we're going to do is set a variable called total contacts, create 20 Test contacts and then we'll create a loop and then we say smaller than total contacts, implement that. And then in here we're going to create a JavaScript object properties, we're going to populate that with first name so we can use faker names, first name and then here last name we can use the same method and then an email address and you can extend this to include many different properties. You can, you know, on the left hand side this is your HubSpot property name. So if you create custom properties you can include them in here. But for this simple use case we're going to now invoke the API. So we're going to work, we're going to use. One thing we did forget to do is add new above here. So we're going to use the HubSpot client and we're going to go CRM contacts and then the basic API and then create passing properties, save that and we're done. We just need to jump across to our portal to grab the API key. So let's jump across. It's not recommended to do what I'm doing right now and showing my API key as I'm sharing my screen because this API key gives you full root access to a portal and that is why it's better to use OAuth. So now if we jump back to our code, we paste that directly into here. Another thing, this, if you do do need to use an API key, make sure you don't commit it to source control, revision control or git because you don't want it to be accidentally published. It happens more often than you'd expect. So here we go, we run node index and that will generate the contacts. So we'll jump back to our test portal. There we go. And we should see eventually 20 contacts. There we go. Okay, so that was how simple it was. Hopefully you followed along there. So some quick tips. Some methods are not implemented into the client SDKs. That'll usually be the v2 methods. HubSpot is slowly migrating methods across to the v3. But if you do need to access to a v2 method. It's fairly straightforward. It's mentioned on the documentation. Just use API request method Favor batch methods we could have converted our code to use batch methods. It would have only been two API requests creating 10 contacts at a time rather than 20 API requests. Expect failures. Obviously network requests stuff can go wrong. And then even though we didn't use OAuth, this was the perfect this was a perfect example of an application that could have been converted to OAuth. Fairly fairly simple. So yeah, okay, thank you for listening. Hopefully this was helpful and if you have any questions, just feel free to reach out to me. Have a fantastic day.
Thank you Hi Community, I am Gonzalo Torreiras, a hashpot freelance developer. I have been around the HubSpot ecosystem for the past eight years working for partners and customers. You might remember me from the 2019 Developer Day when I shared some tips about how to handle a multilingual setup on HubSpot Cos. Or maybe from the Haspot Developers log or the Community forum. It could be that you might recognize my name from from the Dev Chrome extension as I am one of the co authors. What? You don't know what I am talking about? It's called Haspot Developer Extension. It's been around since 2019, used by over 2,000 HubSpot developers around the world. Here you can see the link to the extension. It's basically a redirect pointing to the Chrome web Store. An extra tiny announcement related to the extension. I am officially becoming the maintainer of the extension from now on and I have a lot of ideas to help us to improve our workflow. So expect some exciting functionalities starting next year. Also, we have a dedicated Slack channel for us to discuss new features or bugs. So join the channel Community Browser Extension to stay up to date, but today I'm here to present you a new resource where you can find all kind of HubSpot related content from tutorials to open source snippets and ready to use solutions to help you leverage your work. It's currently hosted within my blog, but as we grow we might migrate to our own dedicated page. You can check it at gonzalotoreas.com blog alright, let's jump right in to see a few of those preload hero images about default to improve your speed. Ok, this is an easy one. It will help us to boost our page speed, specifically LCP or Largest containfull Paint. Basically it creates an image preload resource so the HTML parser doesn't have to wait to get the Call from the body instead. It will start to download the image while parsing the head. You can see here I am using the post feature image so this snippet is for the blog post template, but it can be easily implemented with few changes on all your HERO custom modules that are used above the folder. If you want to use it across different templates, I suggest converting this one to a macro so you can just call your macro with the image that you want to preload. Next one Generate a table of contents for your blog post automatically. The macro will create a list of anchor links based on the H2 titles given at the execring. In this case a post body. This is a bit more complex and we don't have enough time to go down the rabbit hole, but let me summarize the main step that we are doing here. First we split and loop the post body by the ending edge to tag. It's using the ending tag because the starting tag can be inconsistent. For example it might contain a class or a style attribute. Ideally this should be done with regex, but I am not an expert and I didn't test it much yet. Hopefully an upgrade on the snippet will eventually arrive, simplifying the steps. Second, we split now the given substring for the starting h2 without the ending angle bracket for the very same reasons. And splitting by the ending angle bracket should be avoided at this state because it could break the H2 title if it contains one of those. Finally we clean the title text removing any possible extra tag like span or strong etc. Now we can save the title on a list. Each element of the list will be a dictionary with two attributes, name and id. We need to sanitize the ID as it will be used on the Azure link. So depending on the language that you use it can get a bit dirty. You can see here I'm sanitizing common symbols but also other language specific. Now we can finally print our table of contents with the title list. All of this is self contained in the macro, so you want to add the macro in the post template where you want to append the table of contents. Finally we go to the section where we print the post body and replace it with the snippet. It will print the post body updated with each H2 tag and their ID attributes. Don't worry about the code. I believe the slide with DEC will be shared and you can find all of Those snippets in gonzalotorreras.com plugin where I explain in depth what the Code actually does, along with many other resources. Don't forget to subscribe. Happy Developer Day.
Hey, I'm Ben. And I'm BJ and we're here to talk about a webpack plugin we wrote called Parachute. So Parachute is basically meant to solve the problem of having repeating field groups that are used across multiple modules and how to manage that and in an elegant, singular way, rather than having to edit each module individually. Right. So let's take a little look at what all of that exactly means. I'm going to share my screen real quick. Okay, so over here we've got just the test module that we built. So it's just test, very simple, just has a single text field, and that text field is called text. Now, if we move on over into our text editor, you'll notice something that looks pretty similar to what you guys are used to looking at in your standard local development builds for HubSpot. What we're primarily going to be focused on today though, is just our module field group. And like Ben was saying before, what we're going to try to be doing, what Parachute does is it's going to take any number of JSON files that are essentially global files, right? And it's going to combine them all and boil them down into one single fields JSON file. So let's take a look at how that works. If we look at our test module here, we're gonna see something that looks pretty much how it usually looks, right? We've got field fields, JSON meta, JSON module css, HTML and our module js. The one thing that is a little bit different is you're going to notice that we also have this fields JS file. That's what Parachute is actually going to be looking for. So if we click into there fields JS is pretty simple, right? It's basically just going to be a compilation of JSON objects, right? So we're gonna start out by listing out our variable, and this variable is an array of objects, right? And this is essentially going to become our, our base house for our fields.JSON file. So inside of our array here, we're going to just list anything, any fields that are custom to this module. So in this case we've got our text field, right? Which again was referenced right over here. Now, what we don't see over in HubSpot land here is this new field that we're or field group rather, that we're going to be trying to add. So here we've declared a variable called animations and we're going to require our animations JSON file. And just so we have an idea as to what that is, we're going to go take a quick look. So this is just a simple group with a one choice field in it, and that's it. And this choice field is just giving our content editor a couple different options for animations, right? So once we've required that, we're just going to simply append it to our fields array up here. Now, the cool thing about this is that we don't have to just push it on the end of it. We can slap it in really wherever we want, using any methods that are good for operating on JSON objects and arrays. The last part of this process is that we're going to export it all using this Get JSON function, which Parachute is going to latch onto. And that's how it's going to bundle and build our fields JSON file. Let's take a quick look at how that works. All you're going to do is run your webpack build process once you have it in, or once you have Parachute installed in our case, NPM run start. And we're gonna see a whole bunch of stuff get logged here. And if it all works out, we're gonna refresh this page here. And now we've got our animations field group down here. And you can see this has been changed live. Well, that's not quite true yet. So let's go into animations again. And we wanna make that something that's actually useful. So let's just call this Animate content, maybe it's an option, and hop back over here, give it a refresh, and we can see that it has changed animate content. So now when your content editors come on over here, they're gonna see a question. Do you want to animate the content? And if they say yes, great. If they say no, that's okay too, because now they have the option. And again, the beauty of this is that you can have one single source of truth now for all of your modules, and it'll update across all of your modules. So it's really unique. So you can imagine you've got some buttons that you want to keep consistent, or the editing experience for cards or animations, etc. One single source of truth for all of your modules. That's Parachute for you. All right, again, my name is bj. I'm Ben, and thanks for tuning in.
All right, y', all, turn those cameras and show those smiling faces because this is our brilliant community out here. If you guys have any questions, please go ahead and drop them into the Q and A. I think probably one of the most burning questions is am I okay? And I can say yes for sure. I made it. You guys have yes. Thank you. Let's go ahead and get into it right now. Tuan asked a question for Milos. Were you able to use any other column type other than the select or multi select for filtering?
Yeah, Well, I guess any type would work. I think this question refers to the front end, right? If I'm not mistaken.
I would imagine so, yeah.
Yeah. So checkboxes are a thing on the front end, but this case didn't call for any of those. They weren't used. But anything could be used with HubDB, yes or no, Boolean, anything.
And Daniel asked, and he's almost afraid to ask at this point in the developer day. But as someone new to this community, where is the Slack everyone keeps mentioning? And I guess I'll go ahead and answer that. I think John will probably put into the chat here in a second a link to sign up to the developer slack. I'm just going to assign that to him right now and hope that he did it because I'm not really paying attention to that. So next question is going to be from our friend John McLaren. What challenges do you run into building your project and what did you learn? I'm going to start with BJ and Ben because you guys solved for an interesting problem or a solution to make something easier.
Yeah. So one, I think trying to find a use case for webpack was. And I think for us mainly we're in and out of so many different portals on a daily basis that it's not always in like a necessary thing for us to just keep setting up these Webpack builds. But when it comes to theme maintenance or if you're maintaining like a single site, it makes a lot of sense. And then just being able to now have like a single source of truth, like we said for our JSON files that we can port anywhere works really nicely. But I would say that another hindrance to webpack is that if we're. Another problem we ran into trying to build on Webpack was that if we're going to use it, we're going to try to really use it. And Post CSS is something we wanted to use, but it really freaks out when you run some Hubble through it. We ended up writing our own parser to integrate into Post css, so now that's available as well. I think John might have the link for that. So if you can also post that John, I'm going to not work at HubSpot and assign that to you as well. But yeah, we built this parser and now Hubble works perfectly with post css so we're slowly getting the whole build to be beautiful.
Cool.
Sadly, we have absolutely zero time left, so I just. Once again, I want to thank you all for doing this. Some amazing, amazing projects. You guys are all on Dev Slack and the community in general, so if anyone has questions, I'm sure they can find you there. Everyone, let's get over to that next session.
Have a good day.
Thanks everyone.










