Create Your Own Customer Portal with SmartSuite + Softr
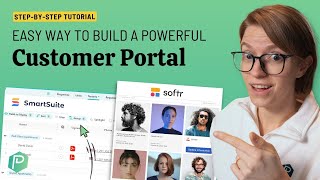
Learn how to build a custom client portal by connecting SmartSuite and Softr. The tutorial walks through setting up templates, linking data sources, and designing interfaces so clients can access property information without you manually copying data over.
So one day you find yourself in your work management software. You're looking at this beautiful smartsuite and you're thinking, wow, if only my clients could have access to this, all this information in one place, they wouldn't have to email me or call me at all hours. What a miracle that would be. You know that there are public views in SmartSuite. You know, you could technically sort of invite your clients into SmartSuite and sort of collaborate with them, but you want something more pretty. And in order to make that happen, you're thinking about designing it just like you would design anything else you do for your marketing. But you don't want to copy and paste the information you have in SmartSuite in order to make it pretty. It's not worth that extra work. You know, the most cliche ending for a story is that it was all a dream. Well, this YouTube video is like the opposite, because your dream is actually reality. And in the step by step tutorial, I'll show you how we can give SmartSuite a facelift using a tool called Smart Softer to give you that beautiful client portal experience that your team will actually want to use, that your clients will actually use, and that will look like your brand and not somebody else's. So let's get started. To bring this to life, we apparently need multiple outfits because I couldn't manage to film this all in one day. And we also need multiple pieces of software. In this case, the two tools we're using are SmartSuite and Softr. Softr and SmartSuite kind of work together like gift wrapping. The core gift. The information we're trying to transfer is how inside of SmartSuite. It's inside the box we are trying to wrap. But that box by itself is maybe not the most appealing, it's not the most accessible, it's not something people are going to see and say, ah, I can't wait to dive in if we're dealing with a busy client or tenant. So we can wrap this gift inside of the interface, the look and feel of the tool called softr, which basically uses the data, wraps the present into a more palatable and beautiful and customized interface. And to overly simplify the entire relationship between these two tools. Softr is like the wrapping paper that takes the core present, the core information we need to share with somebody and makes it a lot prettier so people actually want to engage with it. Now, in this case, the gift I'm trying to wrap is going to be the property management Solution inside of SmartSuite. Here we are inside a SmartSuite. If you use our affiliate link in the description below and sign up, your account will look something like this. All you need to do is to click plus, start with Template and then select the template I'm using in this demo, which again is the Property management solution template. Just click Use Template, then we're at the same spot. If you're looking to organize some other type of client relationship, feel free to just search the solution gallery. Pretty much any of the solutions that you find in here, you can connect in softer in a similar way. But for now we're just going to go inside the property management template and I'm going to show you how this is set up so you know what the gift is before we start gift wrapping. So. So the core data we have here are five different tables or mini databases. If you are new to SmartSuite, you can think of these almost like little spreadsheets on steroids. The very first one is just a map of all of our properties. What are the addresses that we own? Then within those we have this other area called units. Again, this is just almost like a spreadsheet, but a lot fancier. And it's just showing us what are the addresses of specific units on those properties. This of course is built for property management and that's the kind of example using today. If you're dealing with another type of client, you might very easily have something like contracts and projects. Your terms might be different, but the same kind of connection is going to apply here. Beyond units, we have tenants. This is essentially our client list, our list of human beings that we need to keep track of where they're living and so on. And this is basically our tenants table. If we move over one more, we see the requests area and here is where we're tracking some of the ad hoc tasks we need to do and maintenance issues, requests from clients, showings that we need to do for vacant apartments. Finally, beyond requests, we have just some key documents we might need to reference. This is almost like a Google Drive of sorts where we're tracking for quick reference the kinds of information we may need to find later. For more in this template, you can watch my video up above that kind of goes through some of the finer details of this. But leave it to say this is like a super sized spreadsheet where we have a lot of information all connected together to allow us to organize our property management. One thing I want to highlight for you before we move on is that each of these areas that I've shown you have fields in place. Some of them you can see, like these columns, but if we actually open some of these, like let me open this record right here, this row in the spreadsheet, you can see there's actually a lot more information that's not even showing up as visible. It's here. But when I'm at the overview level, it doesn't show up. That's because in SmartSuite we have two kind of different layers. We can look at things on, we can look at the overview, where we just see whatever we choose to see and then we've got the details when we open the record and see all of the good stuff. Ultimately, these kinds of fields, that's what these things are called, by the way, whether they are in the overview or not. If the fields exist and they show up, these are the things that we can adjust and segment by and make conditions for and help customize our experience when it comes to working with software later on. Almost everything about SmartSuite here is something you can customize. And so I could be going through an adjusting every single thing to capture the type of fields that are important to me. But for this tutorial, we're just going to keep this pretty basic and we're going to move on to the wrapping paper, which is where it all comes to life. And by the way, this video is brought to you thanks to the support of SmartSuite and Softr. If you'd like to make sure we're able to produce more videos like this, you want to support this channel at no cost to you, please do like, comment, subscribe and while you're in the description area down below, check out the software we're featuring here. Not only can you get the templates and use cases that I'm demonstrating right inside those accounts, it also when you use that link for free, no cost to you, it lets these companies know that we sent you and that helps them support us and keeps this channel producing the content that you enjoy. Your help helping them help us is very appreciated. While not the most direct way to support our content, it really, really makes a difference and I really appreciate it. So thank you. Let's get back to the content. So after this quick tour, we have a nice organized area to keep track of everything when it comes to property management for our properties. But how does this connect to the outside world? Right? We don't just operate in isolation, even though my whole team could see this area. What happens when a client has a request? What happens when we have a new tenant? How does the Outside information in the outside world, get into this beautiful database to make sure it's actually up to date. Well, that's where we have some options. The first option would be to start creating some forms. This is something that we can do inside of SmartSuite, where we create a form view where people can input data. Outsiders could fill in a form view and submit a request, submit an application, submit other information. But this overall form, even though we can really customize it and add in different fields and all this other stuff so it looks quite nice and pretty, then share this form. You can see an example of what it looks like right here. But even though creating these forms, dragging and dropping fields can create a quite simple form that creates information into our SmartSuite, it's only a one way path. They can only submit information and it's not exactly the most white glove experience. It's just a simple form. So what else could we do? Well, our second option could be to create a public view or even to invite that client into SmartSuite. Essentially what we're doing in this option would be to create a section of data that we actually share with the outside world. For example, right here I created a public view by clicking a few buttons and now this URL I can share with anybody in the world, including any tenants, and they can see all this information, but they can't interact with it. Also not great. Our third option would be to actually have our tenants come into our SmartSuite account, have them join in just like our team is, and have them be inside our workspace. Now, I don't know about you guys, but I don't imagine many tenants would be willing to learn this system just to submit a work request. So option three kind of goes out the window too. So because a form's not going to cut it, a public view isn't powerful enough. And inviting them into SmartSuite doesn't quite make sense. We're down to our fourth option, which is to incorporate some kind of interface, a client portal of sorts that sits on top of our SmartSuite data. So our SmartSuite information stays just as it is. It's protected, it's safe, it's updated when it needs to be. But on top of that, we've got some kind of beauty layer, a makeup layer that's going to make all of our information look more powerful, palatable to users. And if we want to allow some sort of editing access for this information as we choose to do so, that's where softer comes in. So go ahead, use My affiliate link below. Sign up for your Softer account and when you sign up using our affiliate link to support this channel at no cost to you. Shameless plug, you should see something like this appear. This is kind of the blank empty account. And this is where we can start building out our own wrapping paper. Just like we're going to wrap a gift. Okay, once we are inside of Softer, the first thing we want to do is make sure that Softer knows about software. SmartSuite. We want them to be the best of friends and we can't do that if we don't introduce them. So go to the bottom left corner of your account, click on Data sources. Fancy word for just saying, what are we connecting to? What are the gifts we're wrapping? Okay, once we're in this area, we're going to connect data Source and choose SmartSuite. Notice you can also connect to other sources. And much like other tools out there right now, I wouldn't be surprised if we see many more options pop up for software in the very near future. But right now we're going for SmartSuite. Then we're going to click continue and inside here it's going to prompt us to connect our Softr account with our SmartSuite account. Once you've successfully logged in, you should see something like this inside your data sources area and then you are good to hop out of there by clicking that button in the top left corner. Congratulations. Your software has now made a friend. Once we have this set up, we are ready to start building our wrapping paper. Now we're going to click new application and we're going to create a blank application, meaning we are starting from scratch and we are going to build out a beautiful end experience for our tenants. In this case, the first thing it's going to ask us is to choose what pages we want to have. What do we need our clients or our tenants to be able to see or do to get us started? I'm actually going to leave all of these pages on. We're probably going to delete some as we get in that we may or may not need. But we're just going to start with everything ready to go. Once it loads, you're going to be taken into an area that looks like this. And this is where we're actually going to build out softr. This is the Softr builder. It's kind of like taking that Sharpie and writing your own wrapping paper. This is where we can design exactly what our customers do or do not see of SmartSuite. If we wanted to we could pretty much just embed smartsuite, make it look almost identical. We could do that or we could make it a whole lot sexier. And that's what we're going to do here. Let me show you an example. Over here on the left hand side of this builder we have those pages that we saw earlier, you remember from the Creation Wizard. It kind of asked us what do we want to create. Well, we created all the defaults and for now I'm going to pop over to the list one. You see there are two types of blocks you can have inside of softer. There's dynamic and static. As the name implies, things in this static category are different blocks of information that remain unchanged. They look the same for everybody, they're just there. So for example, this pretty little header, this hero section looks the same no matter what you're doing. It's just static. In contrast, a dynamic block in Softer allows us to show peek inside our present and show parts of SmartSuite. So in this case I'm actually going to look up. Let's do a kanban. Now there's an option here. We're going to do a kanban view that shows our SmartSuite data and we're going to choose our workspace, our solution, the one that I showed you before, the property management one. And then we can connect a specific area of work. In this case I might want to show work requests. So right now what I'm telling softr is hey, show me all of my stuff back over here in SmartSuite in this work request area, but show it to me in a kanban like a column view Here I'm going to now flip over to the content side and adjust some of these settings. First I'm going to change the name of this, then the subtitle. Next up we have filters. We have the ability to allow folks who are seeing this to easily filter through different pieces of information. So in this case I might choose to filter things by the type of thing going on, whatever it is, whether it's cleaning, maintenance, move and prep. We can see those little buttons appeared right here. That is what we've got going on. I'll sort them A to Z. We'll make them maybe a dropdown so they can filter by category rather than tags. And sure, we'll do multi select and we could continue on with this if we want to. The next option we have here is to search so we can change it in this words here. If we want to say search for a work request, we can do that search by. We're going to search by the actual details of the request as well as the request name, as well as how it was resolved. We'll search by all of that information. Essentially we're telling software, hey, look at all of these different fields. The one that says request details. The other ones that we have here, the words for resolution. Search all of these different areas to try to find something that matches what that person is looking for. Then we have group by. In this case, I'm going to choose status. Again, we're choosing the fields that exist inside of SmartSuite so we can show people what we've got going on. Next up we have item fields and item fields inside. A softer is basically the same as fields inside of SmartSuite. It's these different kind of categories of information. Which ones do we want to show and how do we want to show them? The first piece we have here is the image in this case. I am going to map this to the work images field we have inside of SmartSuite. So if someone did upload an image of what was broken or what we're working on or the great new development, we could have that image show up here. Next up we have the heading, which right now is just heading one for everything. That's not so great. Let's go over to SmartSuite and we see we have request as the name inside of our account. Let's show that to customers. Let's give them the same request. So we could have this be request as the name. Note, if you wanted to have a different version of the name, maybe you wanted to have a field called Client version, client title, you could do that. But for now I'll just use the same exact one. Below this we have additional fields we could add. We could add many, many, many more details to these. How much do we want to show to customers is really up to us. In this case, I might take the date of date updated. So here we've got last updated and I'm going to make this just a text field and we'll have this here with last update and I could add additional fields as well. As you can see from this dropdown, we can do rich text, URLs, tags, videos, audio, and then let's just add one more in here we're going to add a tag field that pulls in from the type of request it is and shows the type. I don't need a label for this one. I'm fine with it looking as is. I'm going to rearrange These fields. So that shows up at the top. And there we go. If I want to change how this type field looks, I can actually change some of this information, such as changing the color of it, the text size, the margins, the roundness, all of these different things. I can adjust the border here. I might make that a little bit more pronounced so you can actually see what we got going on here. And there we go. We've got our tags added and this is just kind of an example of how we can customize each of the blocks we choose to show here. And just like that, we're taking a section of the information we have inside of our SmartSuite, beautifying it and putting it inside a tool that our tenants can log into and see the results of and see our updates and whatever else we choose to let them see. So now we have the Content tab looking pretty good. Over in the actions area, I'm going to disable drag and drop. I don't want my tenants to be able to change the status of these right now, so I'm going to keep that off. Over here I have the option to allow my clients to interact with this by actually submitting new items. I'm actually fine with that. I think that would be a great spot to keep folks engaged and interacting in this. So I'm going to have a Submit Request button in this case. I'm going to allow people to add a record to my SmartSuite using this integration here. Maybe I want to add some additional fields like asking what their unit is if I don't have that information or anything like that. But I can have a Submit Request button in here allowing them to essentially interact with this kanban even though they can't move them because I've disabled that here. So there's some more options here. We can continue to add more pieces if we want to, more buttons if we want to on a specific item. For example, if we wanted to allow people to go inside and see more details or interact with these requests in some way, we could do that. For now, not going to worry about this. I'm also not going to allow people to open these requests. I don't necessarily need my tenants to see every detail about the leak we're working on. I'm going to keep this as no action. They cannot open this up and see more. Over to the right we have styles. This is where you can fonts and padding and colors and all that stuff. For now, I'm going to skip that. And then over at visibility, we can change who is able to see this? I have logged in users or non logged in. I'm going to restrict this to people who are logged in. Really, this whole app is going to end up getting restricted to logged in folks. But for now I'll just have that there. Finally, I'm going to give this a name. Now, this setup can be done for any of these dynamic variables to create some kind of view that your whole logged in user base can see. But what happens if you want information to only be shared with one user? Like if you only want a client to see their own projects or only a tenant should see stuff about their own property? Well, we can actually make that happen by going back to the source tab and setting up a conditional filter that says, hey, only show them stuff that matches their profile. To do this, we're going to head over to the users tab. We're actually going to start connecting software with our user data, our tenant data at this point and let them know, hey, who are the VIPs who lives where all of the information we have inside of SmartSuite on each of these tenants, we want to basically connect that to software as well. So we're heading back over to software. We're going to sync with data source and we're going to fill out this information the same way we did before, but this time we're going to tell software to connect with our tenants area, our tenants table. And this is where we can actually connect the fields that we have. So the email address that we have inside a software, we want it to connect to the email address we have inside of SmartSuite. We're going to fill in the email field, the name field, we're going to leave the rest of these blank and we're going to choose Magic Link as our authentication method. Essentially all this is saying is, hey, softer send my folks a link so they can log in. We don't want them to have to memorize and change passwords. So save and sync. There we go. We're going to let it think for a little bit here. Now that we have this connected and our information is starting to sync over, we're going to see an exact copy of all of the information we have over here appear inside of software. That's showing that software is making the connection. Now the fun part starts. We can go back over to our pages. And now all of this user data can be used to customize what people see inside of software. It's like a website on steroids. If we go to the list view that we were Working on previously, we can now go to our work requests area. Go to the Source tab, scroll down to Conditional filters and start setting up filters based on the SmartSuite information. Let me show you what it looks like. Rather than seeing everything here, what if I just want to show them things where the unit includes any of the units that that user actually has. So in other words, only the unit that you are living at or have lived at or are going to live at the things that are connected to you over here in SmartSuite, right here you're only going to see work requests about that given unit. So here I am logged in as dear friend Bob here. If I scroll down, I see one work request showing up here. Even though when we were looking at it behind the scenes we saw all of them, Bob is only seeing the ones that match where his profile in SmartSuite says he is living. So let's go into SmartSuite and check that. Here we see Bob. Bob has access to just this one property and guess what? That's the only place that we have showing up here as well. So now that we have the knowledge to create both static information by dragging them over from the sidebar, as well as dynamic information that's either the same for all users or customized to an individual, we now just need to wash, rinse and repeat this to customize each page of our softer app. This will mean adding static sections, dynamic sections, as well as sections that are different for different types of users. Like right at the top here, you see we've got one bar for non logged in users of what they see and another for logged in tenants in our case of what they see. So sometimes we're going to have to duplicate our efforts a little bit to design two experiences for the logged in and the logged out person. But really all we need to do is just repeat ourselves. So I think I'm going to fast forward through some of this beautification and then we'll wrap it all up together. So I will, I'll keep you on, but we're going to fast forward through this it. So after about 30 minutes or so of polishing this baby up, let's go into preview mode and experience what our customers or our clients or our tenants in this case would see if we were to go into our users area and share our magic login link with each of these customers. Because ultimately we want to tell these folks, hey, log in. What are they going to see? That's what we're going to experience when we click preview. So let's go over to the preview mode. All right, so what Bob would see when he logs in is right here. I'm essentially inside Bob's account. If I head over to his profile, I can view a few fields that I've set up. Not only account management stuff, but also his profile picture, his lease information, the parking pass I have. All of this information, by the way, is just pulling straight from SmartSuite. I'm giving a copy of his lease and just having it show up here so he can one click download it. I can also have him request to update information. Right here. To the left of this we have work requests. You might be familiar with this area because we set it up together. And here we can see all the work requests that Bob is currently experiencing in some way, shape or form based on his specific apartment that he is in. And here you can see it took a little second to load, but we have our one work request here. Next to this we have a contact us button which is actually taking them over to my website or, you know, whatever your main website would be. We don't need to have all of our stuff stay inside a software. We can link out to other areas. And that's what we're doing here. Next up we have a billing page where we could integrate different tools such as a simple checkout or a stripe customer portal where we could allow people to manage their account. Right now for this demo one, I don't have a whole stripe and payment system to preview with you, but if you'd like to see more on this, just shout. This seems like a nice addition for any tenant portal. And then I've got a kind of a nice meet your neighbors page. This is more of a gallery view where I'm showing them other tenants that are in their community that I can filter through by different units to see who might be in their neighborhood. Below this we have a commenting area where we can actually have a forum discussion with our fellow neighbors here. And that's kind of the basics of what we have inside this super simple portal that we built in about an hour here. As you can probably tell by this demo right here, the limitations that you'll experience with softer and smartsuite is kind of like the limitations you feel with marking up your own packaging. It's really down to your creativity. If I were setting this up for my properties, I'd probably go even further. I would set up a billing section in here, I'd set up an FAQ section in here. I'd set up a bunch of databases for Any information I might possibly need and really deck out this client website. I'd customize the domain, I'd set up all the additional settings we have inside of Softer here to make it feel even more like my own brand. And then I'd send this out to my clients because this, this is such a great way to make sure that your smartsuite stuff isn't just in this little silo disconnected from your customers. So if you're working with any external stakeholders, whether they're tenants or some other group, and you'd like to organize that relationship so you can give them information, but also get information, but just the right amount, definitely check out Softr. Not only does it integrate beautifully with SmartSuite, with more features I'm sure to come, it also integrates with other tools both in your tech stack right now, such as Google Sheets, as well as integrations with other third party offerings such as hotjar, HubSpot, Intercom. The other tools that you use in other parts of your business can all be connected through softr. So you can have one cohesive customer portal experience regardless of how many tools you use internally. And did you notice that everything we've done in this tutorial did not require you to copy and paste information? Yeah. You've one source of truth for your tasks or your work or your client info. It's in one spot and all we're doing is having it show up in different ways with a little bit of beautification, so that way our clients can actually consume it. If you are someone who's in the habit of using a Notion client portal or building a custom website or using Dubsado or honeybook, and you'd like to bring everything under one roof. This idea of having one source of truth for your client information, but then multiple ways to view that same information thanks to Softer is a really nice strategy to look towards to add a little bit more automation into your project management, which by the way, automation of project management, we have a whole video on that up here. This video took forever to create, so if you enjoyed it even a little bit, Norman and I would both request your support in yawning and also in making sure that you like, subscribe and comment. Because those things make this video show up to other people. It doesn't cost you anything, but it makes the 10, 20 billion hours it takes to make these videos worth it, right? You think they should subscribe? Yeah. See, that's a definitive yes from Norman. So he has spoken. Enjoy the process.










