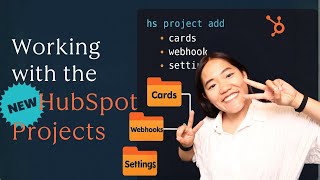
Brooke walks through HubSpot's new project structure for CRM apps, showing how the CLI generates folders for features like cards, settings, and webhooks. You'll see the metadata files that control distribution and scopes, and how to add features with HS project add and install dependencies.
Questions this video answers
2025.2
HS Get Started
HS migrate
HS project add
HS project install deps
Chapters
Hey, y', all, It's Brooke with HubSpot. Today I'm going to go over the new HubSpot projects structure. Now, if you've worked with projects before, like creating UI extensions, then a lot of this will feel familiar. But if you're new, we'll also go over the main parts of a HubSpot project and what each piece does. To help you get started with building a HubSpot project on the new platform version, we're going to use the brand new CLI command HS Get Started. This command guide you through setting up a new project, whether you're building for the CMS or the CRM. In this video, I'm going to focus on a CRM project setup. So let's go ahead and run HS Get Started. And then once you run this command, it's going to ask you if you're looking to build apps or CMS assets. So you just hover over the one that you want, it should be highlighted and then click Enter. And then you can go ahead and give it a name. So I'm going to say my test app and then just choose the folder you want it to build in, and it will go ahead and install all of the dependencies that you need. So with HS Get Started, it's automatically going to go ahead and create an app called Card. So let's actually go into the file directory so we can see what this file directory looks like. So over here, in my test app, if we open this, you're going to see a source folder. The source folder is where everything is going to live. And the way that this project knows that your source folder is where everything lives is because of our HS Project JSON file. Now, our HS Project JSON file folder for the new HubSpot developer platform should be on platform version 2025.2. So if you're using a project that is on a different platform version, you can use the HS migrate command to migrate those projects to 2025.2 automatically. We also have some really helpful things in here for AI. Specifically, we have a cursor folder that has some cursor rules as well, as well as a claude markdown file. So if you're using Claude there, it will use this. So when we open up our source folder, we will be inside of the app folder first. That is nested inside of the source folder. And inside of your app folder is where your app HSMETA JSON file lives. Now, your app HSMETA JSON file is going to be a very important File. This is going to give your project all of the information that it will need when it's uploaded. So as you can see, you have a UID here. You need to make sure that all of your projects in a single account have unique IDs. You also will choose the type which will be app in this case. And then here you have your config where you can add a description and a name. If you're using the HS Get Started app, before you go ahead and upload it to your account, just go in and update this app hsmeta JSON file so that you know that you're working on specifically this new project that you just created. And then here in the config is where you're going to set your distribution type. So in the new unified system, all you have to do to change something from a private distribution, which would be a static auth type, to a marketplace. One is to change this distribution line so from private to marketplace. Then inside of your off, you would change it from off type of static to off. Also in the off is where you're going to go ahead and add in your required scopes. So this is what gives your access token or OAuth, the ability to get different objects like contacts or deals, or get other things like the file manager, all that good stuff that that's where that will live in your required scopes. And if you need a list of required scopes, go on our developer documentation. You can also add optional scopes and conditionally required scopes. The next part is going to be permitted URLs. This is if you're using our HubSpot fetch in order to make API calls. Here is where you're going to submit your permitted URLs and and it automatically adds in the API.hub API.com so that you are good to go if you are going to be calling any of our public endpoints. And last but not least is our support information. If this is going to be privately distributed, this won't matter as much. But if you are building a Marketplace public app, you really need to make sure that the support information is up to date so that when you are submitting it to be on the marketplace, they know who to contact. Now, inside of your app folder is where all of your subfolders are going to live for each feature type that you can add. So right now we only have a cards folder and this cards folder is where your app card lives. So this will be your UI components and inside of it you will have a another HS Meta file. Each folder will have its own HS meta file. And then this will include all of your information about this specific thing. So here you have your UID for your app card, as well as the type, the config. And then finally you can set your object types so you can have it show up on contacts, companies, other types of CRM objects. And finally you'll have your JSX file, which will include your extension. So this will be all of the stuff that you use to write your jsx. Now, when you want to add a new feature to this project, it will add it to its own specific folder. Just like the cards have their own folders, different things like webhooks and app settings have their own folders. And we have this really great new command that you can use to easily add things to your project. So let me go ahead and open up the terminal again and then when I open up this terminal. So now in my terminal I'm going to CD into this test app folder that we created. And now I'm going to be able to run the command HS Project add. And this will go ahead and show me the different features that I have available. So let's go ahead and why don't we add another card. So in order to choose this, you're going to click your space bar and and then it will fill in the dot there. And let's also go ahead and add in a web hook and why don't we add a settings page as well for our app? And then you're just going to go ahead and return that and it will go ahead and create those cards. And then once you've done that, you need to go ahead and run HS project install deps. This will go ahead and install all the dependencies that you need for your different features. So now as you can see, we have our three folders here for our cards, for our settings and for our web hooks. So if we go back into the cards, we can see that we have two HS meta files now, one for the Get Started app card meta information and one for our new HS meta that was just created. So you're going to have multiple HS meta files inside of your cards. Now next, in our settings, you're going to see the same setup in every single folder. You're going to have your HS meta JSON information with the different types and you're going to have your TSX file. And finally, if we look at webhooks, webhooks will just have your HS meta file and then we'll have all of your information for your different subscriptions for your webhooks. So that is the new project structure for projects on the HubSpot developer platform. Everything now lives within one project and all you have to do to add new features is use HS project add and it will go ahead and add in your new files that you need and put it in the correct folder directories. Thank you so much for watching. Make sure to like and subscribe to the HubSpot Developers YouTube channel and I will see you all in another video. Bye all. Bye bye.