How to Automate Client Emails using Make (formerly Integromat) (Part 3)
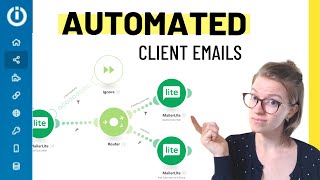
Sam walks through automating client onboarding emails with Make and Mailerlite. You'll set up workflows to sync data between tools, handle errors, and send emails automatically when clients sign up.
Whether you're selling a product or a service, there's a good amount of communication that needs to happen between you and the buyer of whatever it is you're selling to make sure that whatever you're trying to deliver is able to be delivered. For a product business that might be something like your order has shipped, look out for it here. For a service business, it might be more like, here's where we're going to meet for our first call, or here's where we can go to have our first consultation. Those kinds of communications are all part of the client onboarding experience, which is why it fits in perfectly with this video series we're doing today. In this video, we're going to take the workflow we created in the Part two video, which looks something like this, and we're going to add on an additional step. Specifically, we're going to add a few emails into this client onboarding flow. So we're not just getting the logistical paperwork done of contracts and invoices, which again is what we covered in that second video. Go watch it if you haven't. In this video, it's going to be more about communicating expectations between the invoice being sent and the project actually starting to make this happen. We're going to be using two different tools. We're going to be using Integromat. Go figure. Integromat, if you're not familiar by now, is an automation tool that allows you to connect different pieces of cloud software together to make something automatic happen. The second tool in our toolbox today is going to be some kind of email marketing tool. The tool I'm going to be using today is called Mailerlite. But you could really use any tool you have in your toolbox as long as it has these basic features that we're going to be going through in this video here. So don't let the tools itself work you up. We're going to just need those two basic pieces to build an automated email campaign. But before we dive into the actual step by step setup, I want to make sure we're all on the same page as to what exactly this workflow is going to do. So here we are in Miro, and this should look pretty darn familiar. This is the same workflow we talked about in the part two video. Last warning. If you haven't watched that, go watch that first. But today what we're going to be doing is expanding this workflow. So rather than just letting someone pick something from a proposal, sign a contract, and get sent an invoice we're actually going to go and add on some additional steps after we send the initial confirmation email, which I think at this point we're going to be sending from our personal email account saying, yeah, you're booked, welcome, all that stuff. We're going to send some automated emails where we're going to use our marketing tool for those. So we're going to send a what to Expect email and a reminder email. These emails serve two purposes, which the name kind of suggests. The what to Expect email is describing what to expect at your upcoming sessions, because we're assuming this is, I think, a VIP day, some kind of example. The second email here is a reminder email telling someone, hey, we're looking forward to your session. It's in 24 hours. Don't miss this, that and the other, the basic kind of stuff. But if we just scroll over to this old chart from the last video, we're going to look at our extension area here and talk through these next few pieces for this what to Expect email to make sure that gets sent. We're going to look to Integromat to send the relevant information over. After all, Integromat knows at this point who is our client. And Integromat can then tell Mailerlite, our marketing tool, hey, send them an email. Once they send the first email, we can actually have Mailerlite wait until a specific date and then send another email. And while this feels pretty simple, and ultimately it is, there's some important things we need to set up in Integromat in order to make sure that Mailerlite has the data it needs to know when to send the emails. So we're going to go into Integromat, picking up where we left off in the last video, and add on an additional module to make this happen. So here we are in Integromat again. If you probably recognize some of the stuff we've got going on here, we have the proposal being submitted. We create a customer an invoice, send that invoice, create a task in ClickUp, and we send a confirmation email. Oh, and I should say now, if you are looking at this video and you're considering using Integromat, please use the link in the description below to get a free trial of the standard plan. Integromat has been amazing in hooking this community up with that free link, which will allow you to get into Integromat on the standard plan for free, while also supporting this channel because it's an affiliate link. And I would really really appreciate it. All right, back to business because we want this next step to happen exactly next. We don't need any delays here. All, all we need to do is add one more module into this scenario. To do that, I'm going to go down and click the plus sign to add a new module to Integromat. I'm going to type in Mailerlite right there and I'm going to choose which action I want to have Integromat execute. The very first step I want to choose is get subscriber because I want to locate the existing subscriber inside my email list. So I'm going to click into this cell and I'm going to try to find the email field which I have identified earlier on, which is why it shows up on the side here. So let's just go through search items. Email. Look, we've got a lot of different email addresses here, but we're going to go ahead and pick the original email address that was filled in as the answer to the form in step one. So when they fill that stuff out, they put in their email address by selecting that field here, it's going to replace the field name with the actual email address. Once I do that, I'm going to click ok. And now I've got the step asking Integromat to look for a subscriber. Let's just go ahead and run this module only to see if it's working. I need to manually type the email address for test purposes. Going to click ok. And here we go. Let's see what happened. We can click into here and we can see that yes, TestrocessDrifying Co was sent seven emails. It's giving me a bunch of stats about this email address. The fact that it got a result is telling me that this module is working. But I want to try one more test. I want to try testing putting in an email that doesn't yet exist. So let's try this again. We're going to click run this module only just to test this one and we're going to do a fake email address. Click ok. We're going to let it run and there we go. It is giving me an error saying that this type of person does not exist. This is really helpful to do because now I know that if there is somebody who becomes a client but isn't on my email list, I'm going to get this error and I don't want every time a new person signs up to cause an error in my automation. So I'm going to add an error handler into the workflow at this point. So Integromat automatically adds this ignore module in, but we're actually going to need to adjust this when we actually go to test it because this is not going to quite do what we need to. So, just a bit of a teaser there. We'll talk about why we're going to have to replace this at the end when we start troubleshooting. So that brings us to our next step. We are going to add a router into the workflow here. I'm adding this because a router can be a fork in the road and I can have two different things happen, either both of them or just one of them, depending on, again, one of those filters. The reason I'm going to split this off here is because if the subscriber was looked up and they were found, I just want to edit a few things. But if the subscriber was looked up and they didn't exist and that error was shot off, then I want to actually add that subscriber and update all those fields. So I want to make sure I'm accounting for both possibilities here, which is why I'm putting the fork or the router in the road. Let's go ahead and do the successful lookup first. So if one of these things here, let's say maybe subscriber id, let's say the subscriber id, if that exists, then you go through the path on the top. But if that's not true or anything else comes up where you aren't able to find that subscriber id, then we're going to follow this other path. And I'm just going to call this otherwise, meaning if that's not true, always go down this other path. I'm now making a condition or a fork in the road. If the existing subscriber exists. All I need to do now is add another Mailerlite element and update that subscriber with some new data. In this case, what I want to do is update the subscriber with a few key pieces of information. Specifically, we're going to be looking at adding date fields and into the subscriber's profile. The reason I'm able to do that is because Mailerlite allows me to create custom fields on a per subscriber basis. If you're using ActiveCampaign or similar tools, you can also accomplish this in your own tool. The important thing is to make sure that you have created those custom fields in your email marketing tool. And now all we do is Fill them in. The main field I want to fill in is their start date. Now this is where kind of knowing how your business works can be very helpful. When is the start date of this client engagement? When do I want to trigger all of this stuff to start happening for me, I'm going to say that the start date of this client engagement is whenever they accepted the proposal. So I can go back in time, scrolling way down all this data to look for the Cognito form entry. Remember, this is what kicked off the whole automation. I'm going to look for the date this was submitted. So I'm going to add that date in and make sure that that date shows up inside the custom field in Mailerlite. I could also add the end date here. Now again, this end date is something that we could fill in in multiple ways. Maybe we had a dropdown in the initial form. Maybe it's just always one year after the start date. Maybe. I mean, there's a lot of possibilities. For this example, I'm just going to say that my end date is always 30 days after the start date. So I'm going to click in here, find our start date, and then I'm going to use an Integromat equation to add time into that. So I'm going to go over here, click before the date, click Add Months, drag my date field into that equation and add the number. If you're ever not sure how to use these kinds of formulas in Integromat, I know they can be kind of funky. It gives you an example of what exactly you should be putting into a particular formula. So if I look at the Add months one hover over that here I scroll up, I can see Add months. I put the date first and then the number of months later. And that's how we get to this. When it's actually added into Mailerlite, it will obviously show the date, not just the formula. It's going to show the result of that formula. Now I just need to fill out the other path, which is if someone is not currently a subscriber. So for the second path, we actually need to create a subscriber. Strangely, the Mailerlite module actually doesn't have just a normal Create a subscriber button. I don't know why maybe it's coming, but we can create a subscriber using the Add Subscriber to Group module. We're going to click Add Subscriber to a group, wait till it loads, then we're going to select the email address of the subscriber which again, I'm going to scroll all the way down and just grab it from the initial form I can fill out some other fields. So scrolling down to the start date, I'm going to add that in just like I did in the other module. Then I'm going to click ok. As with before, I want to do a quick test to make sure each of these modules is working independently. So that way when I test the whole thing, I know at least some of these parts are going to be functioning properly. So to go in here, we want to click run this module only and run this. But we realize we actually need an ID in order to get this. Not just the email address but an ID of a person. So I'm going to do one step backwards and run a real subscriber through this one to get the information about them. So here's a test email. I'm going to click ok, let this one run, get rid of that stuff and see what the subscriber's ID is. There we go. Now I'm going to use that ID to test out the update subscriber ones. So here is the ID and let's put a date. Great. Click ok. Now it's just running this final one. Hmm, that's weird. So right now I have that ID field come in. I looked up the idea of a pass step and then I went to put that inside this step to test it out and it's not recognizing the ID that it gave me. So I'm going to try a plan B here and actually switch it from looking up based on ID to looking up based on email address. We have both pieces of data shouldn't make a difference and I'm wondering if that might help us troubleshoot this. So I'm going to change the baseline function here to go from looking up the ID to looking up the email address and I'll click OK on this one. I'm going to do the same. Now I'm going to go ahead and test this again. Instead of putting in the id, I'm going to write the email. Then I'm going to add my date. I'm going to click ok. And now it's working. I'm not sure why that was giving us some trouble because it even says on the form that you can use ID or email, but it seems to have a preference for email in this one. So that's what we're going to go with in our tested work. So we'll keep moving on. The next thing I want to do is troubleshoot My otherwise column or the fallback route, if case this is not already an existing subscriber, we want to create one. So in this one I'm going to run this module only. And here I actually need to fill out all this information. If this was a real run, it would pull in data from the form from beforehand. But since we're just testing, it's not smart enough to do that. So we're going to go in and type in this data. All right, let's click ok, it's loading over here and it says it successfully created the subscriber. Of course I want to look it up inside Mailerlite as well, just to be sure. Here I can see testermyctest is indeed inside my Mailerlite account. And if I scroll down, I am seeing a start date and an end date of one month after the 1st of September, which is great to see that it looks like it is indeed working. So to check back in here on our flowchart, we have now successfully accomplished the very first step. I know only the first step, can you believe it? But these last steps are going to be pretty darn quick. So for the final steps here, we're going to run this entirely through Mailerlite. Because we gave Mailerlite this data, we don't need to do anything more in Integromat to bring this baby to life. So this final piece of the puzzle comes together in Mailerlite. Specifically, we're going to have this workflow start when a field is updated. In other words, when our automation works, which is going to update the field. When the Integromat automation works, the then I want you to trigger this Mailer light automation. So here we're going to say whenever the start date is provided, when that is updated, then we want to start this workflow. What this will allow us to do is send that very first email of saying, hey, you're in. Here's what to expect. Now, we could continue to add additional steps here. We could set a delay of say a few days and then send another email and go through this whole thing just like we would in a Dubsado workflow or ClickUp automation. But. But if we want to have something trigger based on a different event, we need to create a different automation. So in this case, maybe I also want to add an email which wasn't on the workflow, maybe want to add an email saying, hey, your project just ended, here's your next steps, or here's how you can upgrade, or here's how you can stay A valued member. If I want to do that, I want to create one more automation using again that same data that we pulled from Integromat. To do that, I'm going to start a brand new automation and again, I'll zoom in so you can see it. We'll say we'll call this goodbye or not Workflow Automation, which is our internal name. As soon as that clicking up end date arrives. Now I'm a bit too zoomed in. As soon as that exact match of the clicking up end date arrives, we want to send an email saying, are you sure? And we can then design that email to make sure that we're inviting somebody to continue working with us and continue to get access. All right, now for the moment of truth, we're going to use our proposal here on the right side, which is the form that kicks off this whole process, and run a test through this whole scenario to make sure all of it works as planned. All right, so we're going to go through the checkout process here using our cognito forms, which is our first step. Going to go over to the date field and click sign contract. Now, we should be able to run this process existing and have Integromat pull in that data and run it through our scenario to see if something's going to work. Now teaser here. It's not going to. And the reason why is this guy right here. So this was added automatically by Integromat to handle our errors. But the problem is this particular module has the attribute that when something hits this ignore, it automatically stops anything in the future, all these steps from going forward. So we actually need to swap out this error handler with another type of error handler to ensure that our scenario goes through all of the steps even if there is an error. So ignore doesn't actually mean ignore. Ignore means give up in this case. So we're going to delete this module and replace it with the correct error handler we would need here, which is resume. So resume is going to say replace the missing data with something if we want to and just resume the automation. Keep going, even if there is that error here. So we're just going to add that new error handler in here and let's give it one more test now to make sure that this is all working as intended. All right, we're going to go through and submit the package, go to contract, sign the contract, add in the date, and we are going to run through this scenario again, this time with the new resume area handler. So we see our module start to process We've got our initial form being created, we've got our customer, we've got our invoice, we've got our invoice being sent, a task being created, an email being sent. We've been able to get a subscriber here. It did indeed trigger our error handler, but because we used resume instead of ignore, it continued through the rest of the process. We realized that it was not an existing subscriber, which is why we see nothing happening here. We did not end up having an id. So we went down our fallback path of creating a subscriber and adding them into our group. If we look up this person inside Mailerlite, we do see that this person is indeed added as a subscriber, added into our fake sample group and has their data popping up in there, including the start date and the end date, which is again that one month later. These are two different automations which are able to happen simply because we have Integromat. Sending data originally from Cognito forms into Mailerlite. And I think that's one of the big takeaways from this video and from Integromat in general. Having data is fantastic, but having data in each relevant tool that you need it in, that's all in sync and all showing the correct stuff, that is really, really a huge time saver. Because if I didn't have the start date in Mailerlite, if I didn't have the end date in Mailerlite, I couldn't do this. And that's why we get kind of caught into all in one tools like Dubsado, which I talked about in the first video in this series. But if we're able to use Integromat or Google Sheets like we talked about in the first video, and build our own central repository of information and make sure it's syncs out to all the other places, well then we don't need to be stuck in such rigid tools and we can really build our own suite of best in class tools. Now I know this was a bit of a long video, but if you guys have any questions about this, please do post them in the comments below. I may not know the answer, but we can figure it out together and we can all automate our way to an easier tomorrow. Let's hope with the help of Integromat. So to state the obvious, if you haven't already tried out your free trial of Integromat, go down to the description and do it. Not only do you get a free month trial of the standard plan which is something you would not get otherwise. You also support this channel by sending us affiliate revenue. Woo. Because Integromat gives us a small thank you if you do go through that link. So please do use it. Share it with a friend. You know, tattoo it on your body. Please don't do that, but definitely check out Integromat. It is a super powerful tool. And thank you Integromat for sponsoring this video. Thank you guys so much for watching and as always, enjoy the process. Sam.










