How to Digitize Customer Orders (ClickUp Example)
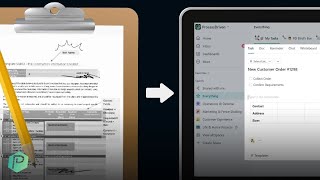
George B. Thomas walks Sarah through converting paper order forms into ClickUp, a digital work management system. They cover where to store information, how to organize structured data, and how to start using the system for new orders.
Today, I'm going to show you how and why to take your physical order forms, whether it's a PDF or notebook like this, and digitize it inside your work management software. Our goal is to reduce the risk of this information goes missing, ensure that we can't accidentally spill coffee on our physical notes, and to make sure that we don't lose customer information just because we can't read our own handwriting. Plus, when we stop writing physical sticky notes or using a PDF as our order form, we unlock some additional features and powers that we didn't have available to us before. Because even though your physical order can only be on one person's desk at a time, when we're digital, we can allow people to see and edit and interact with the same order in real time. That is a huge advantage for collaboration. The other advantage of going digital is that we are able to then start automating based on our information. We could automatically sort information by customer name by deadline. We could automatically report on things like how many jobs do we have scheduled for March? Or we could even automatically have actions happen based on our order information. We could say, when a customer order is complete, automatically send an email to our customer, because we track their email address and ask them how we did get their feedback. Or we could say, hey, when a new project comes in that's a design project, automatically have a checklist of all of our steps needed to do that design project pop up. This ability to sort, group, automate and report on our information is not something we could easily do without a bunch of manual data entry if we were using physical order forms, which are some of the advantages of switching over. But if you're convinced of the benefits of digitizing your customer orders, the next natural question is, how do you actually go about doing it? You might have your physical order form, but how do you put it inside your work management software of choice? What are those steps involved? Well, that was the exact question that my client, Sarah, brought to me inside one of our foundation's rapid reviews. And during this call, I actually guided her through the way that she could digitize her customer order forms. And I thought this would be a fun way to share these four steps with you as well. So to get ready to go through the four steps of digitizing your customer order forms, what I want you to do is identify what forms you need to digitize. And that's exactly where we started with Sarah as well.
So these are my client brief, sort of. They're just checklists really, and sort of note taking things. So Putting those into forms, I think. So I have that one and I have the more sort of site assessment one and sort of linked to that is the CDM stuff, which is the form that I just. The list, the document I just showed you before which kind of tied into this. So sort of almost like three different forms. So I'm just wondering where the best place to put them would be. So in my CRM I have clients, inquiries, sort of other contacts like suppliers or retailers or fabricators, and then obviously my CX and testimonials. So forms are all in there for the CX and testimonials. And then the fulfillment side of things, I've got like general admin tasks, waiting lists. So that'll be all kind of automated stuff so they don't feel like they're ignored. And then my. The different phases. So like for example, in. In here got all my different projects. So, you know, that could be hidden. I find works quite well because I don't end up with these just massive long lists of tasks or subtasks right with within it. So it's breaking it out because between the project, between the phases of the projects, there may be months before, you know, when one finishes, before I start the next one. So I just end up with all these projects which weren't complete. And that doesn't do me very well.
All right, so did you hear what Sarah just highlighted there? She went very quickly through it. But I want to flag this for you because this is so step one of digitizing your orders for yourself. First thing we want to do is realize where do we want this information to go? In Sarah's case, she has two locations already set up. She's got a customer database, a place where she's tracking all of her customer information. And then she also has a projects or an orders database where she's tracking all of the details about a particular job. So these are our two destinations for where we want to have the information from our offline form. If you're not quite as advanced as Sarah and you don't yet have either of these places set up, or what I'd like you to do here is to create your destination. Create the spot where all of your information can go. So this is step one. We want to pick a spot to put our information. In Sarah's case, we're having two separate spots, customers area and orders area. Because she's a little bit more sophisticated than my example. But in my example, I'm just going to keep it very simple and put one spot for all customer information and all order information. If you're not sure which path is right for you, go ahead and start off with the simpler option like I'm demonstrating here. You can always get fancier later. Got step one. All right, let's have Sarah continue and go on to step two.
So my question about the. Where do I put the forms for the client brief? So these. Yeah.
I'm so glad you brought this up with the visual this time, because I know we talked about this at the top of the top of the hour. Yeah, I know you currently use a clipboard for a lot of these notes. Do you ever find yourself writing freestyle notes on that clipboard? Like they mentioned something you didn't ask about and you wrote a little note on the side.
Well, you probably can't see, but it's very rarely actually, you know, I'll just. It's not normally in the in line with it, or I'll just drop something down. So I did think I'd have to have some sort of, like, free text field for additional notes or whatever was it called long text or something?
Yeah. And. And do you ever find yourself going back and updating answers as you talk to them more as the project evolves?
Well, so the way I do it, when I go and see a client, because I'm a garden designer, so the first thing we normally do after sort of pleasantries is we go and have a look at the garden. And so I'll ask sort of questions, and we'll just have a general chat about, you know, things. So then I sort of go through those forms afterwards. So some of the answers I already have, so I can sort of fill them in because we've spoken about it. But then it's almost like a jogger for my memory, which, as you can tell, and. And basically just make sure I don't miss anything, you know, because you get carried away in a conversation and you're in the car going home and you're like, oh, I didn't ask them that. Or I forgot this. So it's really kind of like a memory aid, but also documenting something for me to bring it together. So I don't know whether or not I have. Maybe I have some of the. Maybe the client brief. I don't know where the form lives and what list it populates. That's the thing.
I think we might be asking the wrong question.
All right.
The reason I. I'm pushing a little bit on, like.
Sorry, you just said you're asking the wrong question. If you watch the tree Detective, because that's what Jody Foster always says.
Yes, ask again. By the way, if you're enjoying this kind of use case video where I'm going through actual client challenges and sharing the solutions with you, go ahead and write Sarah in the comments below. Not only does this thank Sarah for contributing her time to this video, but but it also acts as a vote to let me know that we should produce more videos like this. So leave that comment below like and subscribe while you're down there. And let's get back to the video. Well, the reason I'm saying that is because as I'm hearing this a little bit more and I'm seeing the actual forms, you showed them up earlier, but I didn't read some of the questions. Looking at them now.
Look at them now.
Sure, let's pop them up. Because looking at these, these seem like conversation starters, the major things you want to hit on. But when I read this, I was like, oh, I know if I was you, I'd probably be writing notes on the side and little things that they mention to me. This may actually not be necessarily something we need as a form because you said yourself it's very unlikely the client is going to be filling this in. They might fill in a few notes, but let's be realistic. To me, the client details. Sure, that might be something we want as a form, but that will be at the very beginning of your process and you may already have. When you receive a new client, let's ask the basic questions only the client can answer. But the rest of this stuff about property, information, client information, features, style. I almost think I'm assuming you already have a task, your subtask where you broke it all down. One of your tasks is let's do the initial walkthrough of the garden or whatever you call your first meeting.
Yeah. So initial consultation. So, yeah. So do you think it. Because I was thinking some of it is definitely kind of like a checkbox. Yes or no. So sort of answers, you know, to do with features they want or, you know, things. But yeah. So I do have a task for the initial consultation which. Could you open that?
All right. So did you hear that kind of redirect I put in there? And this is the redirect that's going to lead us to the actual step two of digitizing your customer orders. Our second step is to look at the information you already have on your order form and categorize it. There are two categories I want you to consider. One is structured information and two is freestyle information. Or general notes. So looking at your order form, I want you to really review the questions you have. What we want to identify here are what fields that we've created that actually require structure and what fields are more like conversation starters or general notes. The reason this matters is because it changes how you actually put the information, the form, into your software of choice. For an example of this, let's look at Sarah's form. I know this is blurry and it's a live stream, so thanks for humoring us here. But up at the very top there's a section that's called Client details. And here it says things like telephone, email, name, address. These are some fields up at the top and below this there's information about the property. And these questions tend to be more qualitative. How long do you plan to stay here? What are your favorite colors? Different things around the preferences people have around the garden and architecture that, that Sarah's going to be redesigning. What I want Sarah to do here is start to identify which of these fields she really needs to have structured pieces of data for. She wants to have to be a fill in the blank. In that case, for her, it's actually this whole client detail section. Every single one of these is a structured piece of data. The rest of this is more like conversation starters, general notes. She doesn't need them to be structured pieces of information that she has all together written at once. They're actually just areas of conversation that she may revisit, add notes to. It might change for every client. It's a little bit more free. So what we want to do here is identify which sections of this form are structured and which areas of this form are unstructured. Once we have identified that, we're actually ready for the third step of digitizing our orders, which is putting the information into our tool of choice. In Sarah's case, she's using a tool called ClickUp and so she has two places where she could put this information. It's all kind of pre built. She can either use custom fields or she can use the freestyle description or comments area built in into ClickUp. This is very common for other work management software. If you're using ClickUp Notion Monday, it's all going to be pretty similar to this. But here's where it gets interesting. We actually already know from earlier in this call that Sarah has a structured area for a CRM, a place where she tracks all of her customer information. It's all structured and organized and so she does not need to track all of that information a second time for each order. Instead, she just needs to focus on tracking the freestyle information she has. Where do we track the these customer notes? Well, there's one obvious place for most work management software to put it in the freestyle notes area, which is called the description of your tasks. Let me actually play the clip where I coach Sarah through this decision of where to put the information in ClickUp and then we'll come back together and I'll show you how to do it inside a Google sheet before we move on to our next step. What I think might suit a little bit better is number three that currently says initial consultation booked. I would rename that initial consultation complete because I don't care how many times they book and reschedule, you want to make sure it gets done. And inside that task, I would build out a beautiful templated description for that task. You can make little baby checklists for the major things you want to make sure you talk about. So you might copy and paste in your form fields that are just. Yes, no, like, did I ask about this?
Yeah.
But then you might also create just some freestyle areas where you can track notes. So it might be notes on aesthetics, notes on family, notes on whatever. But you can see an example of this. I know Sarah put previously the link to our CRM template. We actually use something very similar for our own kind of client relationship management stuff where we can track who are the main contacts, who's in the family, what kind of yard do they have. Let's attach a picture of the house when we went to visit. All of that can be housed right here, so you don't have to go to a different spot. This currently, you know, there's not, not much going on inside the description, why not make it take advantage of this rather than adding another area?
And so, yeah, and I suppose once, once I've written the brief, I don't need that anymore anyway because the brief exists. So if that's marked as complete. Exactly right. Or even like writing the client brief is part of that task.
You could put your final client brief in the parent task if you want to be able to quickly reference it. Maybe it's a custom field of final client brief. Here it is. But your working stuff, your, your clipboard is essentially a working file. And so why not just track it right where the work happens? You could have this open on your phone or on your laptop while you're in the meeting, taking notes, adding pictures, just having this task open. All right, so if you're not like Sarah and you're just looking to digitize things from scratch inside, say, Google Sheets. Here's what this might look like. We're going to create a column header for each of our structured fields. So this might be first name, last name, address, email, anything that we want to have as a fill in the blank field, we're going to create a column header for it in a spreadsheet. We don't have the benefit of having just a description or a freestyle text field, so we need to create one. And in this case, this might just be a notes column. That's it. We're going to delete the rest of our columns. We'll resize this one to be huge in case we need it and allow ourselves to wrap that text. In this case, just like Sarah, we would then put the customer information in the structured fields. And then when it comes to the unstructured information, since we don't have a task like Sarah does, we would just use this notes area. So this is where we could have client brief notes, and we can use this notes area to track any miscellaneous odds and ends for this job. Now, just like I told Sarah though, if you want to be a bit more structured about this unstructured area to make sure you don't miss anything in your freestyle notes, you can also have a bit of a template here, which is what I told Sarah to do when it comes to ClickUp. So here's what this might look like inside Google Sheets. This could be something like this, where we just have headers to give us a little bit of a way to structure our notes in. We could even make multiple notes fields if we wanted to inside of a Google Sheet. This is very similar to what you do inside a tool like ClickUp, where you could add sections into your task description to help prompt certain areas. So that way you add a little bit of structure to your unstructured notes. A great example of this might be what you see here actually, for filming this video. We have these sections and headers and lines and dividers and just to prompt us to keep track of our freestyle notes without missing any information. The key thing to remember about this setup part of the journey is that structured information such as these are always going to have one answer to it. It's always going to need the same kind of information. And when you have information broken out in this way, you're able to automate, report, sort, group, do all sorts of magic based on this information. For example, we can have this email automatically sent into our contacts directory or automatically be sent an email. We can do that because we've structured the data. But this other information that's more of a scratch pad of notes, we can't automate based on it. But we don't need to because it's just notes to self general information, not something we're going to need to automate, report, sort or anything else by. So we can just freestyle track that in whatever way works best for our brain. When you're done with step three, everything that you were prompted to track on your physical order form should now be inside your digital system. Whether it's a spreadsheet, ClickUp or anything else. You now have a spot for each of those things you used to track on that physical form. That's it's simple as what it is. Which I think might actually be really effective here because you don't have to.
Yeah, I think, I think the thing that I. The slash thing I just didn't know exists. Well, I think I did see it about how to click up or maybe in like. Yeah, a long time ago. But because it's not. I think with all these things until you actually start, you have a purpose for using them. They. You just. It's the using and the repetition that makes you remember things and, and yes, otherwise it just goes.
Another one I'll just add to your repertoire here is slash table. I think that's another one that you'll probably find useful. You can essentially copy and paste your Google Doc directly here. Your VA could do it in maybe 10 seconds rather than 10 minutes by just copy and pasting. And those tables would come in. Your checkboxes could come in.
Really?
Yeah.
Okay.
All right. So now that you've got a spot to put all of your order information, you've categorized the information you need and then you've created a spot for each type of information by either creating fields or utilizing a general note taking area. You're now ready for the very last step which is starting to use the system. That's step four. Rather than going back and digitizing all of your old orders in general, my suggestion would be to just start using this new system for new orders coming in. So from today or next week, pick a date and say from that point on, we will only use this digital system to start tracking our orders. So that way once you finish those existing orders you have in the queue that might still be on those physical forms moving forward, they will all be digital and ready for use. Once you start using them, you're probably going to realize new fields that could be helpful or things you might want to tweak about the system. And that is exactly what we want to have start simple, start using the system and then little by little start changing it over time to better suit the kinds of automations, the sorting, the grouping, the fields that allow you to do the work you need to do in the most effective way. By the way, this whole process of digitizing customer order forms is just one small example of how we can equip processes in our business to have less risk or to just be more pleasant to work on. In this case, we're doing both. If you're not sure what other areas of your business you might be able to strengthen by adding equipment, you might want to check out the webinar I have in the description below. It's called the Blueprint and not only does it go through the overall approach we believe here at ProcessDriven that works well for systemizing small teams, it'll also introduce you to an exercise to help you start defining what your processes are. So you can watch the blueprint down in the description below for a free training more about this stuff. By the way, if you enjoy these use case videos, check out this one on the end screen where I help another client, Mallory, demystify key metrics for her team. Until next time, enjoy the process.










