How to use Make (formerly Integromat) to Automate Client Onboarding (Part 2)
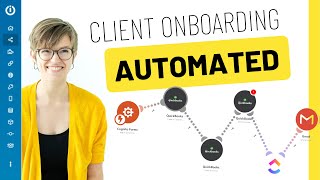
A tutorial on automating client onboarding with Make, connecting Cognito Forms, QuickBooks, ClickUp, and Gmail to handle proposals, contracts, invoices, and task creation in one workflow.
A few weeks back, I released a video talking about how we are switching from Dubsado to Integromat. And really that was about how we are switching from using one tool that kind of can do a lot but poorly, to using a selection of tools that are really good at what they do and combining them together using the glue of the Internet, AKA integromat. You guys had a lot of great feedback from that video and two of the comments that jumped out at me, among the many were from Shelby and Julie, who are both curious about how you could build a proposal contract invoice flow using integromat and kind of a suite of best in class tools. So we're actually going to build out this scenario today using integromat, which you can see here. But before we get to the automating, I want to make sure you and I are on the same page about what exactly this workflow is doing. So we're going to take a quick detour into Miro just to flowchart out the basic steps and then we'll pop right back into Integromat to show you the click by click by click of building out that proposal contract invoice flow inside integration Integromat. So here is the workflow that we're going to be automating today. The very first step is allowing our Customer, this is Mr. Customer, to pick things from our proposal. Once they pick things from the proposal, they select whatever they needed to do, fill out whatever information we need. We want them to be able to sign a contract. That means kind of simultaneously we need that contract to be generated. So we'll talk tools here in a second, but this is the next step. We want the experience to feel like after this point, we want to have three things happen pretty much simultaneously. We want to make sure the client receives an invoice or the ability to pay, depending on how you bill. We want to make sure we have an internal task for us to personally review this. This could be saying, hey, it's time to countersign, we have a new client coming, congratulations on that sale, whatever you want to have here. But we want to make sure we have some kind of task step generated to let us know what's going on. Finally, we want to send some kind of confirmation to the client to let them know that their proposal has been submitted, that their contract has been countersigned or signed, to give them a copy of all this stuff so they know that the stuff they just submitt committed actually went through. In total, these are our simple Five steps that we're going to be building out today. Now, naturally, the next question is what tools are we going to use to make this happen? I'm partial to using things that I already have and I know just going through my head of the tech stack we already have. So if we just scroll over to the right, you'll see what tools I'm going to use to make this come to life. So for the proposal and the contract, I'm going to turn to Cognito Forms and build out a form system there from Cognito Forms where we're going to collect all that form information. We're going to use Integromat, shown here, to do three things. Create a QuickBooks invoice, because that's what we're going to invoice by. You could choose whatever you prefer. We're going to create a task and ClickUp to let us know that the project is starting. And we're also going to send an email just from our personal Gmail account to let people know, hey, your stuff's been submitted. We'll be in touch with next steps or here are our next steps, whatever we decide to communicate. So our very first stop on this journey is going to be going inside Cognito Forms and building out a form that will actually allow us to collect the information we need to and generate a ready to sign contract. So I've just gone ahead and built out a quick form that's going to summarize all of this. Here is our example. Client to proposal contract. We could choose to require more fields here. Right now I have most of this optional, so if I click on here, I can close VIP Rate that ends up getting rid of the other one. If I switch to Standard rate, it gets rid of VIP Rate. You kind of get how that works. If I take you to the back end of Cognito Forms, we'll go into the build area scrolling way on down here. Basically we have each of these text sections which could have pictures, videos, I mean, whatever the heck you want. Embedded content. I have an option that just adjusted so that it only shows this content if it's selected or if nothing's been selected yet. Any other time, those details are hidden from view, which is how we have that kind of modular visibility happening inside this dropdown. We also have a price assigned to each value and this is what's going to allow us to ensure that whatever they pick can drive information later on. We want to know that if someone picks VIP Rate, the price of say, $2,000, that gets sent along to QuickBooks and sent along to Clickout because we want to know that information down the line. So we're using the Assigned Prices option Incognito Forms in order to do that. So in summary, that is how these first two steps are going to happen. We have them built directly into a Cognito form that is ready to go. And honestly, those two steps are pretty much done in this process. From there we need to start incorporating integromat, which is the tool of the hour today, because that's what's going to make all of this possible. We want to connect the information which is originating all Incognito forms and shoot that to wherever we need it to go next. In this case, QuickBooks ClickUp and an email. So let's go ahead and go into integromat and we will dive into how to build that. We need to tell Integromat to watch all of the stuff that comes into that form in Cognito forms to make that happen. We start off Integromat by using the Cognito Forms module. To do this, you're going to first need to connect Cognito and Integromat. It walks you through it, promise. It's very easy. From there you want to click Add and then just tell Integromat what forms you want it to watch. And then in this case, I want to watch the example form that we just built out. So it's going to watch all responses from this and I can even name this webhook to make sure I know internally what exactly that is watching. What this module is doing is watching all new entries Incognito forms and getting ready to do whatever we want to do next. It's just collecting that data and waiting for our queue. Now I have to mention this little lightning bolt guy here in the corner. This is the scheduling of the scenario. Basically what when we do see new entries, Incognito Forms, how often do we want it to run through this whole process that we're drawing here? How often do we want all these steps to occur? We're going to choose immediately. So in other words, every time a form is submitted, right away it's going to start this whole scenario, this whole process of automating the next steps. So I'm going to leave that as immediately and click OK. Next up, I have it creating a customer inside QuickBooks because I want to make sure that whoever just fill out this information, I get their information in our QuickBooks account. So, so to add this module, you can Go down here and type QuickBooks. I already have it here, so I'm just going to click on top of QuickBooks and click Create a Customer. Once you find the module there, you can select whatever piece it is and just drag that into your workflow, which is what I did to add this next step of the process. Once we go into Create a Customer, it gives us a few options. This is basically asking us, hey, you got all this data from the Cognito forms. What do you want me to put into QuickBooks and where? So. So here you can see the display name in QuickBooks. I'm going to make that equal to the business's legal name, the given name or the person's name. I'm going to make the contact down here where it's company name. I'm going to put the legal name again, the email address. We can map any number of these fields into QuickBooks. It really depends how many of them you need, but we're going to stick with just the basics. For this example, assuming I didn't have any of these mapped, to map them, all I have to do is scroll down on the right side and this is browsing all the fields that came in from Cognito and just click on them. Click and it adds it in there. It's not going to type in the words business legal name. It'll actually replace that with whatever entry in this case, test Test was used in the test submission. I don't really want to add any of this other stuff. I certainly could, but we're just going to leave it at that and click ok. The next step in the process, which again will be using QuickBooks, I want to create an invoice, so I'm going to go down here, type invoice, create an invoice and drag that into my flow. I already did that, so I'm actually going to just delete this one. So. So once again, we need to tell QuickBooks what information it needs to know in order to create the invoice. The very first thing is what customer is this for? Well, we just created a customer, so we're going to use the customer we just created with all of our person's information as the customer for this invoice. Next up, we need to actually add the line items or the rows on the invoice. I'm going to click Add Items and it's going to show me all the options of all the different data that we've collected so far and let me choose where I want to put that data on the invoice. So the very first thing is the amount, the total of the invoice. In this case, I'm going to just put the individual price of the package because that's the main. I mean, that's the only thing we're selling here today. Description. I'm going to do the name of the package. So I'm typing the word package to search through all these options so I don't have to scroll so far and I'm going to look for what package would you like? That's the question where the answer will be the package name. You can see it right here. Vip. It's kind of small there, but VIP rate. That lets me know that that's going to tell me my package name. These are just the questions incognito. We're just pulling them in here to give us that data. Next up, the quantity. How many of these packages are they buying? Well, I know I'm only going to sell one at a time. We're not buying five of these at once. So I'm just going to hard type, meaning just type with my keyboard, the number one tax code class. We could add all these other things that you might need for your QuickBooks. But for me, those are the basics and the main thing that I need to know. Click ok. That gives me enough to create that invoice. So so far we've collected a bunch of information. We've got a contract signed at least by one party. We have a customer created, we have an invoice created. We are almost ready to send things into ClickUp, but there's actually one missing step in this scenario. Do you see what it is? Right, we need to send the invoice. So to make that happen, we're going to add one more module, these guys down here, into our scenario. If we were looking for a new app, we could search it here. But since We've been using QuickBooks before, Integromat is kind enough to keep it stuck to the bottom to make it very quick to add another step in here. So down here we're going to look for. Send an invoice. There it is. Send an invoice. And we're actually going to take this module, this additional step and just drag it right in to our flow. Now it's a little smushed here. Maybe I'll spread this out a bit. Isn't that just so fun how you can just drag things around? Love that, love that visual nature of this tool. But once we have this in here, maybe we'll just Click Auto align so it looks nice and pretty. We need to format this new module. It's got a little red guy up here telling us that this isn't quite done, this isn't quite ready to work. So there's only two pieces of data that this module needs. First of all is Invoice ID Pro tip. Just search the words and you'll find what you need. Next, we want to send to. In this case, I need to just find the email address of the person. Again, it's now showing up in multiple places, but we're just going to go with the original email address that was submitted. You can see that it's coming from Cognito by the color and also because Cognito is now kind of pulsing in the background there. There we go. Once we click ok, this step no longer has that red warning and we are good to move on with our process. And in case I lost you here, we finished this one, we finished this one, we finished this one, this kind of path and we finished the invoice one. So we are pretty much there. We've got two more steps to go through and Integromat is going to help us do it. Now the next step in this process is going to be to actually create a task in ClickUp. This is kind of the formal handoff between we are selling to, we are fulfilling. We want to make a easy way for us to know who are we actually working with to create this task. You can add ClickUp into the mix, which I already have added here, and click Create a task. You can see there are a few different Create a task options. I'm going to choose the standard Create a task option here. You're going to need to connect it to ClickUp. This follows just like all the other ones. It prompts you exactly through it. It's not hard. Then you need to choose what workspace it's working on, what folder, what space, all that good stuff. But just to save us a bit of time here, I'm going to open up one that I've already formatted so we can dive right into reviewing it. So you can see one that's fully filled out here. So we've got the workspace, processdriven the space, products and services. We've got the folder called certification and then we get to task name. And this is the first time we're seeing some funky stuff coming in which by now should look familiar to you. Scrolling down, we can choose assignees, tags, due dates, any of this stuff that you might want. And then Very importantly, we get to the custom fields. This custom fields piece is the reason, I mean it's like the main reason why we are making this video today. Because integromat and ClickUp play very well together. They are like peanut butter and jelly. So if you're going to become a ClickUp Power user, you're almost inevitably going to become an Integromat power user as well. Because integromat is one of the few tools that allows you to set things like this. Custom fields inside ClickUp. Zapier does not do it. It's very frustrating. Integromat and actually in the description of this video, we have a link that will allow you to test out Integromat on the nice fancy schmancy paid plan for one month. So you can kind of try it out for yourself and give a comparison. I did that and I was hooked. And here I am so giant thanks to integromat for both sponsoring this video and for hooking us up with that special link. So here you can see directly inside integromat I'm able to pull in our custom fields that we have set in ClickUp and put values in them from data we collected earlier on. So in this case the trainee email, I'm going to again type up here, look for email, pull that in. Here we have the intake outcome. This is actually a dropdown custom field I have in ClickUp. And here we can see we can set it directly in this automation saying the application was received or the proposal was accepted. Next we have the invoice URL which I'm pulling from the QuickBooks data here. Next we have the intake link. This is the link to the proposal. So this is actually grabbing the view link down at the very bottom. And finally our last dropdown, which is the invoice status. Now right now I have it defaulting to pending review. Because prior to us, you know, you and I working together on this, we did not have it auto sending. But now since we know our invoices are getting sent automatically, we're going to default that to saying sent. So I'm going to click OK on that to save that. And now we are ready for the final step in our scenario, which is sending an email, a confirmation or a kickoff. I mean, whatever you want to do, send something to the client to let them know their stuff's been submitted. You're excited to get started. Now there are a few ways we could send this email. Maybe we have our, you know, activecampaign, we're sending emails to Our marketing system, in which case we would just say, you know, add user to a group, something like that, to send an email. But for this example, we're going to pretend we're sending this. Perfect. Personally, we want it to come from our personal email. So that's why we have the Gmail module added here. Instead down here we're just going to click send an email send and we drag that on, which is what we already did and why that one's already there. When we start formatting this Gmail module, we see some basic information by now too. Should be very familiar. Again, this is just getting the email address. From there we've got the subject line where we have some typed words and some dynamic things, things that are coming in from earlier data. And then we have the actual body of the email and attachments if we want them. The body of the email is an important point and one that I didn't touch on in our last video. So in that last video again, if you haven't watched it, link is around here. In the original Leaving Dubsado video, we talked about sending email notifications. And in that video I just went here and I typed a quick message of like, hi, hi, hi, hi. And sent an email. That way when you send an email like that with Integromat, it shows up as a plain text email, meaning it's not very pretty. It just looks like a robot typed it. And to make our emails look a little bit more inviting, it's going to be helpful for us if we're using Integromat to use HTML. This is not required by any means, but I just want to highlight this as a possibility here to wrap up this step. Once we are done, once we're happy with that email, we're just going to click okay in the corner down here and we are ready to delete that junk one and test out this automation. And this should be all we need in order to have this automation flow. Once we are done with that step, we can now turn on our automation. So this means it'll always be watching that cognito form because this is automatically happening and we can actually test this out for ourselves. So we're going to go back out to our test proposal. John Doe, ACME Inc. We'll skip the address. We'll pick the VIP package. We're going to go to contract. We're going to date the contract. Click sign. We should now see this get picked up by Integromat. Look at that. Just like that. There it goes. So we've Got the information submitted here. We can see that test ink, test McTest, test at ProcessDriven, VIP, RADA, all this information. This is what came out of the watching this first step. From there, it created a customer inside QuickBooks. This includes Test McTest, Test Ink, Test Ink Test. It created a contract here with these terms as written there. If we go down and create an invoice, we see this is what the invoice details include. We see it created a task in ClickUp where it had the input data and then the output was the task itself. Now, of course, just because it says it is a success inside Integromat does not mean we want to take that at face value. Let's go into each of these tools and make sure. So here we can see test McTest, we can see the submission here inside Cognito Forms. Let's go into QuickBooks and check there. Here's the link to the invoice that was created. Here we can see the email that was actually sent. It did bounce because this isn't a real email. But we can see all this stuff came through here and voila, we see it did indeed create a task inside ClickUp with the name of the person as the task name. It pulled in the links that we had. It set those custom fields for us, which is amazing. And we have some additional fields we can keep moving forward with if we wanted to move this automation further. So we crushed this goal, right? We now have a way for someone to fill out a proposal, adjust our options, sign a contract, get an invoice from us, create a task in ClickUp, and also receive a welcome email. There's many different ways we could do this. We could also add in more steps if we wanted to. Maybe we wanted to have a social media post, post every time we got a new client saying, hey, new client. Maybe we wanted to automatically send them a card in the mail using one of those services. We could integrate that. There are so many possibilities for where we could build upon this process. You know, come to think of it, maybe it even involves using this little checkbox here. Let me just scroll to the right. I know it's a little hard to see. Maybe every time we click Enroll, maybe that triggers something in Integromat that sends people a welcome gift or does this or does that. You know, there are so many possibilities of how we could build on this, but that is our rough prototype for building out that proposal flow using cognito forms, QuickBooks, Gmail, ClickUp, and most importantly, Integromat to hold it all together. So once again I've proven that I am incapable of making short 10 minute videos is what it is. Thank you guys for sticking with me on this one. If you guys haven't already signed up for an Integromat account to play around with this for free on your own, go ahead and use the link in the description. It will give you a free month of the fancy schmancy standard plan, which I highly recommend. I'm planning another video about Integromat and ClickUp in an coming weeks, so I'd love to hear from you guys to help guide what that content is going to be. I'm thinking something with Google Sheets and ClickUp, maybe an Integromat based on this feedback here. I don't know, but this has been a very long video and I'm pretty sure my feet are falling asleep. So thank you guys so much for watching. I'll see you next time. Enjoy the process.










