SmartSuite for Project Management? You NEED to use this feature...
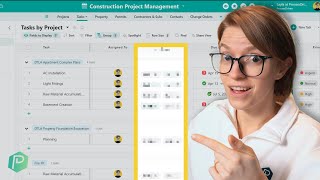
Two project managers walk through SmartSuite's dependency field, showing how to set up task dependencies, use Gantt views, and enable auto scheduling to keep project timelines on track.
If you're project managing anything in SmartSuite, there is one feature you cannot skip.
Let me start at the beginning.
Sure.
Serious project managers have always deserved serious tools. Bigger, badder. The most powerful project management tools in the universe. The one feature that makes everyone stop in their tracks. The order of operations.
I'm sorry, I'm sorry, but are you just talking about the dependency field?
So SmartSuite's dependencies push efficiency, communication and clarity to levels beyond what you had thought possible.
Okay, okay, okay. I mean, you're not wrong about the power of dependencies to help you organize when things get done. Avoid people doing things in the wrong order. It can make a huge difference, but the way you're saying, it's just kind of meh. Either way, thank you for that intro, but let's dive into the actual tutorial here. SmartSuite paid for this video, so that way they can watch it for free. So we have to do the video. Okay. In this video, we'll be covering what the dependency field is in SmartSuite, how you can set it up, and what use cases you might find it to be very helpful for sticking stay throughout the entire video because there are some advanced things that even if you're super confident using dependencies, I'm guessing you didn't know about. So stay till the end. Now, this construction management template is really powerful. The sections in it are really nice. I would argue that this template is something I would use for any kind of complex project, not just ones in construction. But there is one key feature missing in here. Do you spot it? This template by default doesn't have a dependency field, which means we cannot define.
Our order of operations.
Are you going to do that every.
Time I say order of operations?
Okay, then. Sure. You win. We're going to go through today and we're going to start off our journey by adding in that dependency field so we can have our operational order nicely arranged. So to do that, we're going to head over to the right side here. We're going to add a new field. We could also do this from inside a given record by clicking the plus button on any field or at the bottom, they all do the same thing. But for now, I'm going to click right over here. I'm going to type in the word dependency and I'm going to add the dependency field type. Now, SmartSuite waited a fair amount of time before introducing this dependency feature to their overall structure. And because they waited, they ended up building one of the most powerful dependency features on the market. I'm not like hyping this up. I'm not getting paid to say this or anything. I've used many, many project management software out there. And when I saw the beta tests of this dependency feature and, and all the features I'm about to show you that are tucked inside here, my mind was blown. I mean, this is some of the most advanced stuff that I've found in the no code project management space, period. So to add this into your account, all you need to do is find the dependency field, give it whatever name you want, and click Add field. And once you add this field in, you'll see something like this appear. If we give it a click, you'll see that it is broken down for us predecessors and successors. In other words, what happens before, what happens after? We have those broken down by default when this dependency field is set up. So for example, I could say lighting fittings is something that we can only do after the AC installation happens. I can click over here, go to predecessors, and say, hey, this is waiting on AC installation, and click add. By creating these predecessors and successors, these relationships between things, we can better define the order of the better order of things happening to make sure that we're having the project run smoothly because you don't want people coming in and finishing the floor before you do the drywall or whatever. The preferred order is now by default. As you can see, this dependency field looks like any other field. When you see it in your overview, it looks like this. If you open up a task and find the field, it looks like this. It's nothing really that crazy, but you can also view this information in its own little special view, called a Gantt view as well. And I'm going to show you what that looks like. Not because it's showing you anything new, but just because it shows this same information in an even prettier way. To add a Gantt view, I'm going to head over to my sidebar, I'm going to create a new view, and I'm going to look around for Gantt2t's not Nat. I know a lot of people call it that. It's Gantt View. Give this a click, give it a name if you want. And here is what you see. This Gantt view allows you to view all of your dependency relationships between tasks on one schedule. For example, if I scroll over and adjust some dates, you can see that right here we have our AC installation and our light fittings. There's this magical arrow that now appears between them which is letting us Know that that dependency relationship exists. That's why earlier on in this video when we had our magic weapon come out, it looked like an arrow. That's because usually that order of operations is defined by kind of directional arrow. So this GAN view allows you to see that relationship visually and it also allows you to create new ones. If I scroll over here and you might not be able to see it on the video, it's very subtle, but there's a gray circle that appears above my cursor. If I click on that, all of a sudden I have this magical little connector starting to follow my cursor. I'm clicking and holding here. I can use this to now connect other dependency relationships. In other words, create more arrows. Say this needs to be done before, this needs to be done. Creating more of them on the fly. Being able to see arrows to see what needs to happen next is pretty cool. But there are actually some extra features hidden inside this dependency field that can crank this up a notch if you are looking for some more power. So over here in the settings field, we can actually adjust what this GANTT chart looks like. We can hide those arrows, although why would you? They're so pretty. You can hide the task labels. You see those words going away on the right side you can highlight the preferred path of action, AKA the critical path. What needs to happen when this feature is really helpful? If you have a bunch of different tasks all at once and you're trying to figure out wait, which are the most important to unblock other things down the line. Critical path here is built right in. We have one other box here which allows us to show the start and end dates of a project. So if something gets delayed all of a sudden, we can magically adjust automatically that project end date so that stakeholders who might be looking at this view can easily understand whether we're ahead or behind of schedule. And then we have some more features around formatting today, and so on and so forth. Now, just by itself, these GANTT view settings put SmartSuite in the running with other project management software who allow you to do dependencies. But these aren't the features that make my jaw drop. And so I want to show you the more advanced stuff one level up higher inside the dependency field itself. So for that one we could just click right here. But I'm going to go back to the familiar view so you can see how we get here more easily. I'm going to go open up my record, I'm going to locate my dependency field and I'm going to Click Edit. I could have also done it from back there, but here's the detailed way to get there. Inside this dependency feature, not only do we have our typical help text and instructions, which I love about the SmartSuite interface, we also have these two bonus settings, auto Scheduling and Dependency Mode. Now I'm going to focus on auto scheduling first, then we'll flip over. This first little checkbox is something I would suggest just about any team out there keeps on when you update this field and have this feature enabled and we head back to a Gantt view because you can really see it visually there. This auto scheduling feature allows you to adjust tasks if things run behind schedule. As someone who's doing a home remodel project right now, I will tell you what. Unfortunately that is the nature of most construction projects. So if for example, our AC installation is running behind this for some reason, the contractors can't come, they have to come a few days later. We move that back. SmartSuite will automatically move the rest of the tasks backwards as well. Everything in one shape or form that is connected and blocked by that dependency will be adjusted. This applies to any of the steps along the way as well. You can use this feature by clicking and dragging just like you saw, or even just by modifying the field settings here and you'll see stuff move over on the right. You can do this in any view, but I find it easiest to see when you're in the Gantt view. And keep in mind, this kind of rescheduling can also work the opposite direction. If your AC installation happens super fast, you can drag that back and everything else moves forward with it. This can happen for any task along the way and it just moves things that are down the stream from it forward. Related to auto scheduling, there's this one right here which is backwards scheduling. I'm going to update it and show you it just so you have a preview. Essentially what this does is it works off of durations and end dates and the only thing it changes is the start date. So for example, if I were to say, hey, this task is running long, SmartSuite's not going to move things backwards for me, it's going to move things forwards for me. This particular feature is one that I really like to use when I'm planning out a project from scratch. So maybe you know that the project needs to end on April, whatever it is, April 28, but you don't necessarily know when you have to start the project to make that possible. If you add that end date and start filling in Tasks and you know approximately how long each of them take, it'll start backfilling the start date. So you know, hey, what, when do I actually need to start this project to get things going beyond setting up a project, I personally don't like to keep that checkbox on all the time. I think it trips me up a little bit. But it is there in case you are nerding out and really want to get a project set up right the first time around. Now the next suite of features that are tucked into the dependency field is the dependency mode. And this is where we can kind of define what does a dependency mean inside of SmartSuite. By default, if we don't touch this at all, SmartSuite assumes that we want things to be finished before the next thing starts. So we do one, then we do two, then we do three in that order, no overlap. I don't know about you, but most of my tasks when there's dependencies, especially on a home renovation project, yeah, there's dependencies there, but sometimes things overlap. Sometimes I start one thing and I start another thing, but they just both need to be finished at the time. Same, same time. There's. There's some nuance here. Problem is most project management tools out there, all the big ones that you're thinking of, only allow you to have finish to start relationship saying do this, then do that. No gray space in between. SmartSuite actually has a basically a gray mode, an advanced mode we can turn our dependencies into that allow us to define with more detail what kind of dependency we are dealing with. And if we update our field here, you'll actually see these four new types of dependencies pop up to show you them. I'm just going to open one of these records and again scroll down to our dependency field, which now has a bit of a facelift. We still have our predecessors and successors broken down here, so that's familiar. But there is now these new dropdowns showing up and this is where we can start defining the subtype of dependency we have. And again, warning to you, this is a nerdy one. So if you are not someone that uses dependencies yet, you might want to skip through this section because this is going to get into the weeds. This is for the sophisticated project managers that want all of the money muscles that they can possibly have. Okay, so let's talk through what these four are. The first one is finish.
I got this one.
Sure, sure, sure, why not? Go ahead.
These beautiful beasts allow you to say finish this before we start that. Finish this before we finish that, Start this before you finish that, and the ultra rare start this before you start that. Advanced options. So powerful Ms. Projects will feel like a little hybrid at the demo derby, everyone just knowing you don't got it.
Okay, okay, that's enough. We're not going to condone violence towards project management software. Okay, now back to you here, friend. Once we have picked out our preferred format of dependency here, we're just going to select it to make sure that we are instilling the correct order of operations. Yeah, got me again. A classic example would be something like paint drying, right? If you're painting one day and you're going to be working on the floor the next day, you might want to give yourself one day to let the paint dry. And that's what this lag is here for. You can also think of lag as buffer. So that way if things fall behind schedule, you've got one or two days of buffer time that you can just bleed into without delaying the project. Once you add these pieces in and you click save, you're going to see these relationships populate as two way connections. One other key thing to note here is if I go under accessories installation again, just clicking on that here, this is waiting on light fittings to be done. So if light fittings for some reason was to become finished and then I went back to my accessories installation, I would now see that that waiting on has a green check mark, meaning this dependency is now complete, it's cleared and nothing is blocking my way. I am good to go. That's what this little symbol is telling us. Normally when something is not quite good to go, you're going to see different symbols such as this one here letting you know, hey, cautionary tale, don't go flying into this one quite yet. So that's how you can go about adding the dependency field into your SmartSuite account and having it show up on any of the views that you like to see most. Whether you prefer a Kanban, a Gantt chart, a calendar, something else, you can see these dependency relationships as complex or as simple as you want them to be, all inside your preferred view. Once you have these set up, you can walk away feeling confident that the project that you have set up will be operating in the correct order and that each person is going to know what they need to do to clear the next person in the view. Well, I think the Gantt view is a fantastic pairing with this feature. Know that you can see this in any view you prefer to use and hopefully this will give you one more powerful tool to put into your toolbox if you are looking to start project managing in SmartSuite now, I do truly believe that dependencies are the number one feature for project managers, but it is not the only tool. It can't be the only thing in your tool stack. By the way, if you want to sharpen your project management skill set even further, go beyond just dependencies and start thinking about ways you can automate the mundane parts of project management. We have a video on that on the end screen here, so head down to the description below. Sign up for your SmartSuite account so you can follow along with this tutorial and others. Get the template I was using for no cost to you, and until next time, enjoy the process. All right, now the actual shot of this.










