Workload Management for Agencies: How to Gain Workload & Capacity Visibility in ClickUp
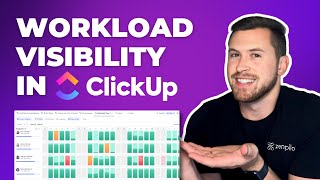
Andrew walks through ClickUp's workload features to help agencies see who is overbooked and who has capacity. He shows how to build workload views, set up templates, mark time off, and track tasks so teams don't burn out.
Every agency operator wants and needs to know how much capacity their team has, because burnout is a real thing. And if you have no idea how much work your team has on their plate, then you're at risk of either under or overworking your team, leading them to getting burnt out. So let's walk through the five steps that you need to take to start to understand workload and capacity inside of ClickUp. Let's get started. All right, so let's jump out of ClickUp now and talk about the five steps that you need to to start to understand workload and capacity for your team. So the first one is super easy. There's probably a chance that you've already done it inside of ClickUp. I want to give you a few additional things to know about when you're building this out. So the first one is going to be building your workload view here at the everything level. And the reason I'm doing at the everything level because there's a chance that you probably have a bunch of different spaces, folders and lists and people have work in all those different spaces and folders and lists. If I build the work of you out of space, folder or list, I'm only going to see the work within that list, folder or space. So I want to make sure I'm telling the full story and understanding all of the work and capacity for the team inside of ClickUp. So I need to build that at the everything level so I can funnel all those spaces, folders and lists into that one view. So go ahead to your everything level. Very easy. All you need to do, navigate there, go to add a view just like this, go to workload, add workload, and there you go. You've completed step one. Congratulations. So there's a chance that you create that workload view though, and it doesn't look like this. We're going to go over all that in this video, but that might just because you don't have tasks or signees or due dates or time estimates. So there's a chance that this might be blank and not look exactly like this. So as you'll see here in the everything level workload view, I have all my settings and filters just like I would any other view. But if I navigate over here, I'm going to see one week or two weeks. If you built a workload view inside of ClickUp, you'll know that if you build out a space, folder or list, you have the ability to create it across a whole month. So see, if I do one week first, two weeks I can now see across two weeks in sort of this one view. I can over here navigate from sort of these two weeks, the next week to the next week to the next week, which is great, but I want to have a picture of just all of that in one place. I want to be able to see across a whole month. Fortunately, ClickUp at the time I'm recording this video. You cannot do that at the everything level. However, I have a quick because you're watching this video, I have a quick little ClickUp hack for you that can make it so that you can actually see one month here at the everything level. So let's put a pause on this and let's go build this and talk about this quick ClickUp hack. So what you're going to want to do is you're going to want to create a workload view view template, and I'll go over how to build a view template if you've never done that before, but you can really build this wherever you want to. It's not a big deal of where you actually build this view template. However, I like to keep all this organized. So I want to go down into my process library and I have my view templates here in a folder. You'll see I have these everything view inside of just one list and they're all built out here of what I could use at the everything level. So right here I have my overall workload view and I'm going to save this as a template. But let's talk about a few of the settings that you're going to want on this before you actually save this as a template. Deploy it at the everything level. So here, and this is what yours might look like to start. If you don't have any tasks or anything inside of ClickUp, it's going to look blank, like you're not going to have anything that has an assignee on it. So it's just going to look like this and it's not very exciting, but we're going to go over how to actually make that accurate and populate it throughout this video. So what you're going to want to do, we're going to group this by assignee. You can also do status, custom field tags, things like that. But very helpful to do assignees. So let's do that. You have a couple of filters if you want to adjust anything on there as well. Don't do me mode or assignees. We're going to show close because it's always helpful to see the close tasks in there as well. We don't want that to disappear from our workload. And as you'll see over here, as I navigate here, I can show one month. So that's what I said. If you do at the list folder or space, you have the opportunity to do one month. So I'll show you how you can move that to the everything level. But you want to make sure one month's turned on and workload, we're going to do time estimates. If you use Sprint points, you can do that. Probably don't do tasks, but if you want to do time estimates, that's what I would recommend here. A big thing to note within your workload view, go to customize. You're going to see workload options. A lot of this will be turned on already. I like to have weekends on. That's one that's just super helpful because if a task does fall on a Saturday or Sunday, we'll make sure we get that move to a Monday or Tuesday. So that can be very helpful to see that. So have weekends turned on. But the one thing in this that's not turned on when you first create your workload view is the subtasks. And oftentimes this is why people are like, my workload view is not accurate is because the subtasks is not turned on. And, and so if you work out of subtasks, then nothing's going to show up inside of your workload view. So you need to make sure that your subtasks are turned on. So go ahead, toggle that on and just leave the rest of this turn on as well. That's all going to be helpful information. Again, we want to tell the full story. So just leave all this turned on, but make sure you go and turn on subtasks, otherwise your workload view is going to look very inaccurate. So after that you're good to go. If you want to adjust anything else you can, but I think this is the best way of doing it. So go ahead and X that out. And now we are good to save this as a view template. So what I'm going to do is I'm going to come up here to my overall workload. I'm going to click on this and then I'm going to go into templates. Save this as a template just like that. You can name it, he knows who is supposed to do it. So as you can see in this basic deliverable here, I'm assigned to it, Andrew's assigned to it, as well as Hero. And if we're all assigned to it, then no one knows who's actually in charge of doing this, so things can easily see through the cracks. But in addition, when you have a task with a time estimate, a due date and the assignee on it, what that does with that time estimate is it's now going to say that Andrew has three hours and five minutes of capacity. I also do as well zero. So we need to make sure that that doesn't happen because that might not be necessarily accurate. This whole deliverable might take 3 hours and 5 minutes doesn't mean each of us are going to take 3 hours and 5 minutes. On this task right here there is a click app that you can turn on instead of ClickUp. So if I go here into my settings and look at the click apps, this is going to be turned on anyways. It's called time estimates. For you to actually have time estimates you need this turned on. But there's also called estimates per assignee. What that is essentially going to do is if there is, let's say a three hour time estimate on a task and there's three assignees on there, without that turned on again it's going to be three hours per person totaling nine hours. But if this is turned on, that's going to take the time estimate and split it up evenly amongst us. So it'll be an hour for me, an hour for Andrew, an hour for zero. That might seem good, but unfortunately with this turned on, what that does then is it takes the time estimate, it applies it to me. So if I were to be on that, I get the hour assigned to me, I can also edit that too. So if maybe I'm doing a little bit more work on that task, an hour and five minutes, hour and 10 minutes for someone else, that's maybe just doing 50 minutes, I can customize that. But with this, if I then take myself and unassign myself, maybe reassign someone, that time estimate is going to come with me. So essentially it's going to disappear from that task. So just take note of that. If you do turn that on, what that'll do is the time estimate then basically gets to assign to the person instead of the task. And so if they get removed from that task, it's going to take the time estimate from the task and just bring where the person essentially just disappear. So just be careful of that. Again, that's your time estimates click app. You're going to need that turned on. But estimates per assignee may sound kind of good, but I just would not recommend it based off of those time Estimates kind of disappearing there. So that's the first step is just making sure that again, every task only has one assignee on it. That's going to make it so much easier to one not let things fall through the cracks and just make time estimates on workload much easier. In addition to that, you're also see here my first example. I have a start date and a due date on this task. What that's going to do if I have a start date and a due date is that time estimate of three hours and five minutes is basically going to be spread across all of those days. So if you have three days from the distance between the start date and due date, it's going to take that three hour time estimate, make it one hour on each day. We might not necessarily want that. Again, that doesn't tell us a great story because when are they actually working on it? Maybe they're doing three hours on one day versus the other days. So what I would recommend is when you go to build out your tasks instead of having it set up like this, where I have one task, maybe that's my deliverable. Let's say that this is a blog post with multiple assignees on it. Start date and due date and a time estimate. I need to take that. And now the parent task becomes the blog post. So this deliverable and then I break that up into different steps. So all of these steps, one, it's going to make it so things don't fall through the cracks because I'm able to build out this workflow and pass work back and forth. In addition, instead of having start dates and due dates, I just have due dates on all of these tasks. And what we would recommend is that the due date becomes the due date or the do date. So I'm going to do step number one on Monday. I'm not going to have a start date and due date. The due date just becomes the D O date. And that's just going to be super helpful because now instead of having that time estimate span across multiple days, the time estimate is going to be one hour on Monday. It's going to be way easier to see that give you way more visibility into everything that's happening and going on. And just make it a little bit more granular for these tasks to know what day they're actually doing it as opposed to again spreading that time estimate across multiple days. And so what this is going to do inside of my workload, you'll see this here. If I do have and I got to go to this Next week, as you'll see here, if I have that deliverable again spanning across multiple days, it's going to spread it like that. And the time estimate is just going to be split. The three hours of five minutes can be split up each day versus the steps as you'll see. Gives me way more visibility to know when I'm actually doing this. So step number one, step number four are following those dates as you see deliverable again right there, it's breaking up. Step number two is right there. So it's going to be way easier to see what people are actually working on, what work is on their plates for that day. Just make it way easier for the whole team. So you want to make sure that you go through and you build all of your tasks like that. What I would recommend is that each of these become one user in one sitting. Not to exceed four hours. Four hours is just kind of a great way to navigate that. Again, if I do an 8 to 12 hour time estimate, then when am I actually working on that? We like to have tasks that are a little bit more bite sized pieces, not too granular that you're overwhelmed with amount of tasks, but a little bit more bite sized to know, hey, I'm going to do this, I can do it in one sitting, just get it done, I'm going to finish it that day and I'm also going to start it that day. So. And that's going to help you a lot with understanding workload and capacity for your team. And aside from just how you build out your tasks inside of clickups, a few additional things is you're going to want to have a sort of a good culture around this, but you want to make sure a people are not letting their tasks fall overdue. So if you think about in your workload view, if I do have these tasks fall overdue and again that's just going to happen. You're going to maybe not get to something, something else comes up. So with this I need to make sure I have some sort of view set up where I can see all those overdue tasks. You can break this up sort of how you want. Maybe it's by team, maybe it's by department, however it's set up, or maybe you have one person that kind of comes through and checks all of these, but you want to have a view that's going to show all of your overdue tasks sort of in one spot. So I can kind of come through and see Derek has a lot that were due four days ago and basically what that does in your workload is let's go back to my example tasks over here in True Farms. If I have a task that falls overdue, let's say that this was on the 9th. If I go back here to the workload, what that's going to be is this is not done right here on Thursday. I have an hour assigned to Thursday for step number one. If that's not moved into the future, that's not going to show up here in future workload. So essentially there's going to be hour of work that I still have to do, but it's not showing up here because it's overdue. So we need to make sure that we have our tasks remapped to not fall overdue and we keep moving them. Always leave context into why it's not complete within the comments. But just make sure that the overdue tasks are not falling overdue and people move those so that they actually will reflect on workload to know, hey, I have an extra hour of work on this day as opposed to that being back here because I still need to do it. It's not done and it's not going to be done on Thursday in the past because it wasn't complete then. In addition to your overdue tasks having a view here where you're going to go through and adjust those, you can also have a QA view. Essentially this QA view is going to be a place where you can and this could be made into a dashboard or a view right here. I'm going to go through. I have some filters set up here just to show me where tasks where the due date's not set, where the sign is not set and the time estimates not set. Because again, I need to make sure I come through and every task in my ClickUp workspace needs to have those three key ingredients. So I'm going to come through and I'm going to make sure that these are assigned. They have a due date and a time estimate on it because without that then we're going to get into trouble because those aren't going to show up on the workload view. We need to make sure every task is accounted for. So I create this view here. This is at the everything level. Again, dashboard or view, whatever you prefer. You want to have a ClickUp champion or someone that comes through this on a daily basis to make sure all those tasks have the key ingredients. And within this view, again I can just show assigning due date time estimate and I can show who created this task because what that's going to do is it's going to say, hey Andrew, who should be assigned to this? And I know who I can ask and leave that in the comments here. So the great part about this too is once I go and I actually do assign this to someone, this is actually going to go ahead and disappear from this view because I have this filter set up so you can kind of just go through. And until this is at zero, then you'll keep working through these tasks to make sure everything has those three key ingredients on them. All right? And so that's just step number two of starting to understand workloading capacity for your team there and now is where it really starts to build on the momentum here. So if you've ever gone and put tasks into your workspace or whatever product system you may have, I'm just ad hoc. There's a chance that maybe you forget the time estimate. You'll probably put a due date and assignee on there. But we want to make sure again, this gets to be a bit more scalable because it might be hard to get all of your work everything into ClickUp without sort of any templates or, or process templates that you've built out inside of the system. So you want to make sure that you go in. The big part of actually understanding workloading capacity is building out your process templates here inside of ClickUp. So what I'd recommend is you go ahead and and you build out a process library where you're going to store all of the source files for your process templates. This is going to make it very easy to organize them and then save them into the ClickUp template center. As you'll see down here, my process library, I have a ton of different templates. I have templates for growth for my sales and marketing team. I have templates for operations for anything from recruiting to finance to any party planning, whatever it may be. I have all those templates put out, then also have delivery templates as well. And this is where probably would recommend that you start anything that you do for your clients. You want to make sure you get those templates built out, because that's going to be super important because you really need to know your delivery team, your client service team, how much work they have on their plates. So you want to build everything you do for people, you got to build out as a process template. So I kind of went over some good fundamentals of how your tasks should be in the system, but I'll kind of show you a little bit more realistic example of what That'll look like. So if I go down into this inbound list, I have a bunch of different templates from podcasts, case studies, landing pages, all the way down to blog posts. This is a good example to walk through. And you'll see in here I have again, as I showed you earlier, the deliverable as the parent task and then the subtasks are all of the steps that are needed to complete this blog post. So this makes it very easy for me to take this save as a template. I can utilize the task descriptions in here to give instructions on how to do it. I can make this very scalable for my team. That way nothing slips through the cracks. Nothing. And I'm going to see workload because I have all the tasks built out with the due dates and time estimates in here. So as you can see, just like I was showing that example earlier, we have all of our steps. Create the blog strategy, write the blog outline, schedule the interview. We have our due dates in here, we have our time estimates in here. And then I also have delivery role, which this is going to, in the future, become the assignee, because I want to make these templates scalable. So I'm not going to put assignees on these templates because you might have some someone that's strategist for one client, but not the other. So we want to make sure I do put the asides on there. Then it's going to be hard to switch all those up. So we can use this delivery role as a way to just say, who's a senior strategist for Dun Mifflin? And then assign them to all the tasks that are senior strategist for Dunder Mifflin. So it makes it super easy to assign those out. But you're going to go ahead, you're going to build all these templates, all the subtasks in here. The due dates are great because I'll just build out a date map of the sort of the distance between these of when they should be due to. Then when I can go deploy this after I save it as a template, I can remap it and it's all just going to remap together. And so May 2nd may become December 2nd, and this will become November 18th or whatever that may be, and then it'll all remap altogether. In addition to that, you're also going to build dependencies into these tasks as well. And the beauty of that is then it's going to be very easy for your project manager or whoever does the remapping of due dates. It'll make it very easy for them to remap that, skip the weekends and things like that. So you can see it here. I have all my dependencies built out and if I wanted to go and again in the future you'll do this one. It's actually deployed in live, but I can take this and I can drag it. So in the Gantt view, you'll just need to make sure that you have your settings set up your GAN options here to have rescheduled dependencies and hide and skip weekends turned on. Because that way I can take a task and say maybe this gets pushed out. I can go and remap the due dates just like that. Everything is going to go with it. So very helpful. And again, it's skipping the weekends. As you can see, the weekends are hidden. So you want to be able to do that because again, you want to make sure things are not falling overdue. So if you have to remap tasks, that's going to help with just making your workload a bit more accurate for your team. So go ahead, build dependencies in your tasks as well. And you can use the Gantt view for your project managers to to remap the due dates to make sure that things are not falling overdue. So once you're done with that, once you've built out your task template, you'll also have list templates as well. For larger projects like especially client onboarding or your website projects, you want to build all of those out inside of ClickUp. I can go ahead and I would save this. I'm at the template center, similar to how we did it with a view template earlier. Save as a template and then I'm going to go ahead in my template center. I can then deploy those into all of my client folders. And again, you're going to have the same sort of methodology that I was discussing. One user, one sitting not to exceed four hours on all these tasks because it's make it super actionable, make it due on the due date just like that, follow that methodology. That's going to be very helpful for you and your team. And so just to show you what this all looks like, once you take that blog post and all of your other templates that you build out, I mean, put them in your delivery space here into your client folders. You'll see I have all of these listed out. I have my due dates on there, they're all signed. I don't have my start dates on there, but all the time estimates are in There with the assignees, that's going to all just populate my workload view and I'm able to plan out way in advance. So I can go, I can remap these if I have to, but when I deploy all these templates here, you can. And to do that I would go in the list settings, I can go to my templates, browse templates, I can find my blog post right in here. I can go ahead and just deploy it very easily. I'm going to go to task templates. There we'll see my blog post, use the template, I can name it if I want to. I can remap the dates as well. Put a parent task due date on there, put it out four weeks, December 8th, use the template and it's going to deploy it right into that folder. And then I'm going to go ahead and assign that to whoever is in charge of that blog post. But makes it super easy that way. Once you get all of your tasks here in to the system, that's going to be what populates your workload view again, the assignees, due dates and those time estimates as well. All right, so that's really just phase three. That's going to be the big one though. You're going to want to get all your processes built out. But phase four, what we're going to do is we just need to start living by the philosophy that if it's not in ClickUp, it doesn't exist. So with that, that just means that you need to make sure that everything, everything you do, every task is gets into ClickUp. So people forget about a lot of things. They might get their processes like that for the blog post, but oftentimes they forget about things like internal meetings or personal development or even just like going on LinkedIn and sending emails, which sometimes is just helpful to have a basic task that you maybe do and have it recur every single day. You want to make sure that you don't forget about that stuff. So we want to make sure that we get everything into ClickUp and so you can build processes for things like that. So if I go here, I have a meeting template built out and we need to make sure again, someone needs to prepare for the meeting, we need to attend the meetings and then if someone also has some action items after the meeting to all of that takes time. All that is going to contribute to our workload. So we need to make sure all that is in the system as well. And you can make these recurring tasks too so that you can see those in the future. But we need to make sure that we have all of our meetings in ClickUp, all of our growth tasks, all of our operations tasks. Anything that's internal, we need to have that in ClickUp as well. Because you might have people in your client services team that are doing things internally as well. So we want to make sure that we get all that accounted for. So get all of that into ClickUp. In addition to that, we also need to take into consideration out of office. So that's a big part of seeing workload as well. And the way that you can manage that in ClickUp is you're going to have sort of an out of office manager. This can be a separate space if you want it to be. And you're going to have a folder in here with this, this can have form on this that essentially I can come into the out of request form, I can send this to everyone. So if they, they want to request out of office, they just fill out this form with their time off, start date, time off, end dates, leave type, things like that. And then what you want to do, and this is the big thing that's going to contribute to workload is that you're going to have tasks for everyone that is out of office. So what this is is this is where I'm actually going to use my start dates and due dates, but I'm going to have the task will be named say Jeff Seifer out of office. The assignee is going to be me. The start date, maybe this is going to be on Monday, is that you're going to have tasks for everyone that is out of office. So what this is is this is where I'm actually going to use my start dates and due dates. But I'm going to have the task will be named say Jeff Seifer out of office. The assignee is going to be me. The start date, maybe this is going to be on Monday. The date's going to be the day that I start taking off. The due date is going to be the day that I finish taking off. And then I'm also need to make sure I have a time estimate on there as well. So that time estimate if I'm taking off all week will be 40 hours. Again. It's going to split it up across the start date to the due date. So 40 hours, that'll be perfect to split that up. And that's essentially in the workload view. It's just going to show that I'm fully booked up. That might not be tasks me being filled up because of tasks. That's me just being out of office. That'll let project managers or whoever know that, hey, I don't have the capacity to take any work on because I'm not going to be here in the office. So that's a big thing too is you want to make sure you get that out of office inside of ClickUp. So get a management process for that with a form also with tasks in there. And you can do this for holidays as well. But just have people listed out their name is the task. You're going to have a start date, first date of when they're taking off, due date, the last date, as well as that time estimate to populate that workload view. So that's what you want to do. Make sure everything is in ClickUp. It's not ClickUp, it doesn't exist. Get all your internal tasks in there as well as out of office, managed in ClickUp as well. And so that is all great. But now we move to step number five. Phase number five is now we need to actually optimize. So once we build all of our processes, get our tasks in the system, we need to be continuing to make it better. So our processes need to be updated with time estimates and we need to continue to just optimize what we've built because that's how we're going to actually start to see workloads. You might not see it right away, but over time, as you begin to continue to develop your do you optimize what you've built out already? You're going to continue to see that workload and just keep getting better inside of ClickUp. So to do that, what I would recommend is a one, you're going to want to have an estimated versus actual dashboard to see all this information. This is a great way to just sort of start seeing your time estimates for time that was actually tracked. So you'd be able to see sort of last month's or this month's or whatever cadence you want to work on that. Again, this is where it's helpful to have a ClickUp champion. Well, you're going to want to make sure that you come into a dashboard you have time reporting for, for all of your clients, time reporting by client and time reporting by users at least, because then I can start to see sort of at the high level where we're estimated versus tracked way off. And then I can start to dig into that to see if I can see any issues. And then you get to the point where now you're looking at Time reporting by users. And I can look at my tasks here to know, okay, tracked was three hours, estimate was 30 minutes. Why did I take so long? And so that kind of tells me, hey, maybe this task in our process, I need to up that time estimate or decrease it, whatever it may be. So that is a great way of doing that is having a dashboard where you're looking at time estimates versus those actual time that was tracked to make sure that we're not seeing any too big of differences there. I mean, once you start to see someone or certain tasks that have taken people way longer on every single client, for every single person, that's when you know, hey, I need to go back into my process library and adjust that template so you can have a dashboard like this. In addition, you can have something like a completed deliverables view where essentially this is just showing me all of the deliverables that we finished for, for clients. And you can build this at the delivery space, your growth space, operations or wherever, even at the everything level. What this does is it shows me everything that we've complete. And I'm using this to then go look into our time estimates and time track. You're probably already looking at this data anyways. Um, but if I go here now, I can say, hey, this took, this was estimated at 9 hours. It only took 5 hours and 43 minutes. What were the differences there? And I can come down and I can look at right blog copy that was tracked 3 hours and our time estimate was 2 hours and 30 minutes. Now maybe I start to see the difference there and maybe I need to go back into this blog post process template and adjust that time estimate. So we're going to need to continue to develop those time estimates to be as accurate as possible because that's what's going to give us the accurate workload. And in addition, if there's some tasks that get moved out a bunch, then maybe I need to start to look at, hey, do we need to put these due dates in here to be a little bit further apart than what I originally did? Because all of that, again, you just need to continue to optimize those process templates that you've built, because that's what's going to contribute to workload as well. We need to make sure that get it as accurate as possible so that those tasks are always being done on the date that they're due. So that's going to be a big contributor in here as well. So create an estimated versus actual dashboard, a completed deliverables view. There's other things you can create as well that are just going to be super helpful for you when you go to optimize your process templates. And really after you do all those steps again, it's going to take a lot of hard work and effort as you do all this again, get all the processes built and start to optimize them as well as time goes on. But once you do all that, your workload view is just going to continue to get better and better and better sort of each cycle you go through. Because you're going to start off with not much showing here if you're building ad hoc tasks and putting them in a ClickUp. But as you start to get those processes, build out and get more and more processes and then more and more tasks in the system as well and actually do your workload or your out of office and click up there too, you'll start to get a very accurate view of workload here in the workload view. Again, this is very promising. There's a lot that you can do with this view and it's very helpful, but you need to have everything you click up, you need to have time estimates, due dates and assignees on every task. And you need to have your processes fully built out to really get the most out of this view. So if you want to start seeing your team's capacity, then follow this process. Unfortunately, there's no magical switch that you can just go and turn on and start to see all this data. It's going to take time and effort, but in the end, trust me, it is worth it. And at Zenpower, we've helped close to 3,000 different agencies streamline their operations at ClickUp so that they can see workloading capacity, profitability, utilization and project performance all in one place. So if you're ready to stop burning your employees out by either over or under working them, then go to zenpilot.com call and book a call with one of our experts. We are here to help. Taking your operations seriously will change your life and I want you to experience this life changing impact. I can't wait for you to be our next agency success story. I'll see you again next time.










