Lower back pain usually comes from tight hips that tilt your pelvis forward and squeeze your spine. The overhead squat test shows if your hips are the problem. Three stretches—hip flexor lunge, Spider-Man, and pigeon—held 30 to 90 seconds daily, plus strength training, can fix it.
Chapters
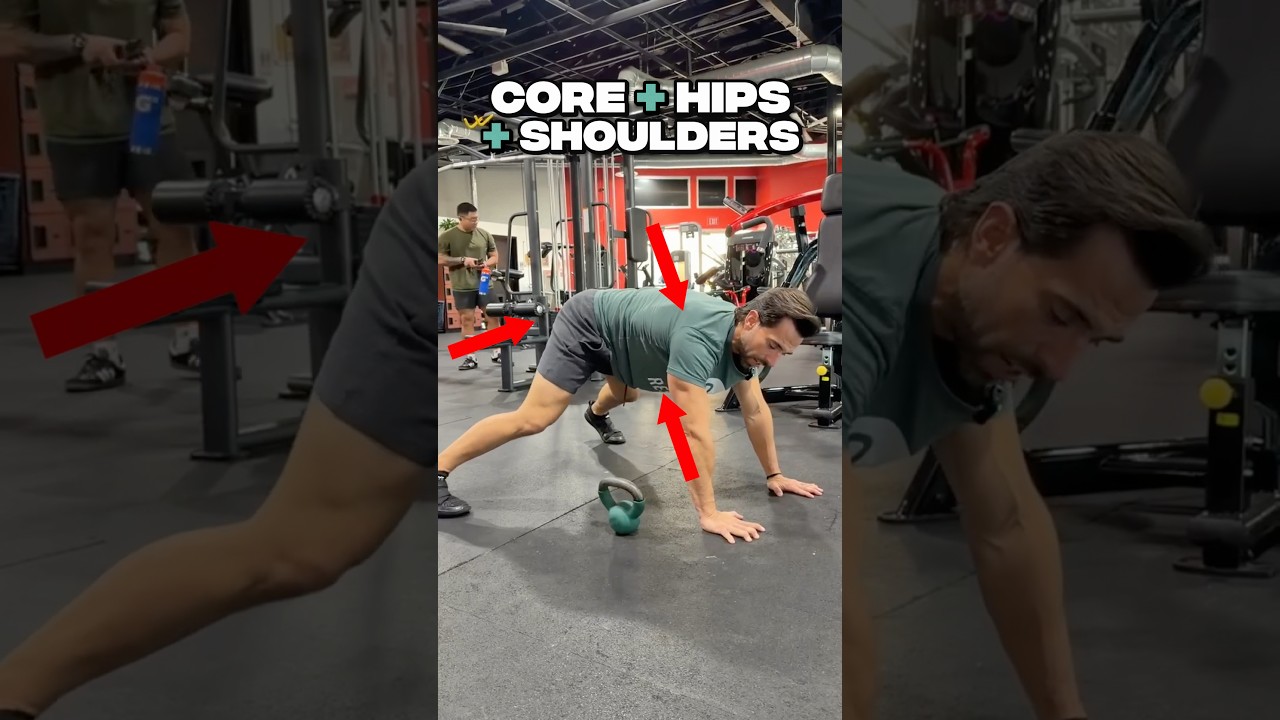
In today's video, we're going to explain why lower back pain happens, how it happens, and how you can prevent it in the future. I'm going to show you 3 moves that you can do to prevent it and why it keeps coming back. Today, we're literally going to cut the lower back pain out for good. So stick around. So first, we have to understand why lower back pain happens in the first place. Now, most time you go see a chiropractor or physical therapist, they will put the joint into alignment. So what's happening for your lower back? What's causing this back pain to happen? Think about this axe head as your hip and this, you know, handle part as your spine. As we sit at a desk or we get tight here, we develop what's called a muscular imbalance where the muscles pull too hard on one side and the other side, the opposite side, isn't pulling hard enough. So we start to tilt down and forward. Now, this creates more pressure on the lower back itself. It'll even push the discs out of alignment and create bulging discs. Most Americans actually have had some sort of bulging disc within the last year. Here's the stat right here. All right. Now, how do we diagnose it? How do we fix it? So the first thing I want you to do is something we do for all of our ResetU clients, literally just an overhead squat test. And with this, I can show you every single piece of your body that's out of alignment. Now, you are a novice. You've never done this before. So what I want you to do is just take it slow and follow along. So first things first, you need a stick, a broomstick, or in this case, an ax. You're going to make 90-degree angles with the ax above your head, press it up and forward, put your feet shoulder-width apart, and you're going to squat 3 times to the front and then 3 to the side. Videotape yourself using your cell phone. Put it in portrait mode, that way you can see everything. Now, what you're going to see is a breakdown of what could happen and where your hips are going. So first things first, on that side view, does the bar, broomstick, or anything move forward? If it moves forward at all, it means that your hips are tight. With your hips being tight, remember, That pelvis is slightly out of alignment, causing more friction on the lower back. We're going to show you how to fix that later on the video. Second, are your knees going in or out? That will tell you as you squat if this femur, this long bone here, is in alignment properly. Now, if it's not, it's going to be going in. There's a good chance you have a really tight groin. This outer area here is impinged, causing your hip to to be super, super, super tight. It's got another cause of lower back pain. Now if they go too wide like this or like this, you're gonna have a lot of glute and IT band issues 'cause those muscles are so tight. Now the last one you wanna think about is if your hips are completely rotated. So say this is my hips flat, if they're just tilted, one hip is higher. A lot of times your chiropractor or your physical therapist will say, hey, you have a shorter leg than the other. This can actually be caused by just the tissue here above the hip pulling too hard and pulling the hip up like so. How that'll look is it'll look like one foot's kind of staggered in front of the other when you're squatting, and this feels natural to you even though one foot's in front of the other. Now, if you had any of those hip problems, the easy fix for the symptoms are the stretches we're going to do. The long-term fix is to get those muscles to activate and hold it in place. So that way we're not just glorified chiropractors or physical therapists or people that are watching YouTube videos trying to fix their body. We're actually fixing it long term. Then we can get those muscles to activate on those opposite sides and hold everything in place. So there's an equal and opposite tug of war game. Check out these stretches. All right. So the first stretch we're going to do to loosen up the hips, because remember, if we can get the hips to be loose, that's getting a foundation solid. For a perfect lower back without tension. First thing we're gonna do is a hip flexor lunge stretch. So your hip flexor, your psoas, the muscles that come around the hip and then down and forward. You wanna raise your arms above your head and then drop this pelvis down forward and diagonal so you can get a good stretch here in this hip flexor. It's very important to keep your spine straight when you do this. And you're gonna hold this for at least 30 seconds I would say 90 seconds is best, and then rotate over the front leg to create even more of a stretch. The next one is a Spider-Man stretch. So you're going to take that same hip flexor lunge you just did. You're going to walk this foot outward and create a diagonal angle. From here, I want you to put your hand into the ground, the opposite hand, and then one hand into the inner thigh. Now we're going to push this away from center externally and look away. You're going to feel it bind up like a large spring, like a bed spring in the back of your hip capsule. And that's good. I want you to push this and look away 5 times. Now, on your 5th time, it's going to start to loosen on its own. You don't have to press past anything. Then take your elbow and place it next to your heel and slowly start to take your chest and push it away from that hip. Once you're here, you should feel a good stretch on the back side of this hip and this hip capsule. We've got one more for you. Last stretch we're going to do is a pigeon stretch. Now this one, I want you to use a couch at your house or a padded bench. It has to be padded because it's going to cause a lot of pain. Now you're set up, you're going to flop your calf so that the outside of your calf or shin is showing. Hold yourself up and then you're going to lower your back knee nice and slow into this stretch here. Now, this is plenty of stretch for most people. In fact, if you can't get into this stretch, raise up the backside, give yourself like a yoga block or something so you're higher up and you have less stretch here. From here, you would hold this for 90 seconds. You don't have to lean forward. And do all of this stuff. Most people don't have that flexibility, nor do you need it. This is perfectly fine. Hold here for 90 seconds and just rotate through this hip capsule until you feel it release. Doing these 3 stretches at least once a day will dramatically change the way your hips are in alignment and the amount of lower back pain you have. Now you have all the stretches that will help you relieve lower back pain. Remember, if you're not doing resistance training, tearing muscle fibers, getting those muscles to grow on the opposite side, the back pain is going to just return. Mark my words, it's going to come back. So what I would recommend is get a personal assessment either from us here at ResetU or from a local trainer or physical therapist to give you workout programming to solidify everything that you're doing for long term. Or you could just subscribe, like, right there below, right here, and then get the next video where we teach you proper workout programming to stabilize your back. It's up to you.