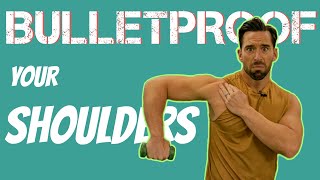
In this instructional video, Glenn Dawson of Reset U Fitness explains why shoulder pain occurs—primarily due to impingement and friction affecting the rotator cuff, supraspinatus, AC joint, and surrounding capsule—and presents a systematic two‑phase protocol to "reset" the shoulder. The first phase focuses on mobilizing the joint through a sleeper stretch, chest‑opening foam‑roller snow angels, and scapular retraction wall push‑ups, each with specific rep schemes and cues to avoid over‑stretching or shrugging. The second phase stabilizes the joint with advanced shoulder CARs performed face‑down, a 5‑5‑5 tempo band external‑rotation drill, and a weighted rotator‑cuff warm‑up using a foam‑roller pad. Throughout, Dawson emphasizes slow, controlled movement, fatigue‑based sets (not failure), and proper posture to prevent future impingement. The video concludes with a call to subscribe and share the tutorial for future reference.
Chapters
Are you dealing with shoulder pain? On this bench press right here, do you get up and just grab your shoulder? Well, I'm Glenn Dawson with Reset U Fitness, and today we're going to talk about how to reset the shoulder. First, we're going to talk about why that happens in the first place. So the shoulder joint is one of the most complex joints on your body. You're literally asking your shoulder, the ball and socket joint, to do all of this cool stuff. It's a lot. Now, if there's any kind of impingement or like friction in that joint as it's doing that circular motion, you're going to have pain. So pain is caused by the friction in the joint, whether it's your supraspinatus getting impinged, your AC joint getting slashed, your rotator cuff just chewing. It's going to give you a warning sign like a check engine light. So first, what we need to do is get rid of the pain. So first thing we're going to do is mobilize the joint, get it to move smoothly in the capsule and follow along. Then we're going to stabilize it. So activate the muscles so that it doesn't keep falling out of alignment. And that's what happens to most of us. We'll mobilize the joint, get it to feel good, and then those dominant muscles that pulled out of alignment before do it again. So follow along. First, we're going to mobilize the joint. So the first move we're going to do is we're going to stretch out the rotator cuff and posterior capsule. So the back rotation of the joint. Now the shoulder joint is supposed to rotate when when you press, it has to rotate. If it doesn't rotate, that's where you're going to have a lot of impingements and a lot of pain. So the first thing we're going to do is we're going to do sets of 10 with this sleeper stretch. Now, the sleeper stretch, I want you to use your foam roller or an actual pillow if you have one in the gym, which would be really weird. So use the foam roller and then put your arm out straight from your shoulder joint and slide it underneath you. Once it's underneath you, it should be underneath your torso. Bring your arm up. This is going to act like a lever, or lever if you're from Britain. You're going to push down nice and light and then push back. I'm using my opposite hand to guide, to just kind of move it. Now with this motion, with the sleeper stretch, you don't want to overdo it. Don't think of any one of these movements as a stretch. Think of it as just putting lotion and motion into the shoulder to release it. After 10 reps of going really slow, it's going to loosen. Now, if you have a current shoulder problem, you're going to want to do this at least twice a day. And then to avoid a shoulder problem, I would do it on your upper body days. So if you're lifting back or chest, make sure you knock this in. Next, we have to release our chest. Most of us work at a computer or we just have bad posture and everything gets tight and pulled forward. So for this exercise, we're going to open up our chest and actually get our scapulas to move correctly. So take your foam roller. Hopefully it's a long one. It's way easier with a long one. The longer, thicker, harder black one. Just joking. Lay down on top of the foam roller so that your spine is right in the center of the foam roller and your shoulder blades are on the outside. Now, those muscles in between your shoulder blades called your rhomboids. They get tight and kind of gunked up and knotty. We're going to make sure we release them too. You're going to go palms facing up, relax, and then just do like a snow angel but on your foam roller. Now I would do 10 reps of this. As you go, most of you will notice that at the top of your range of motion it gets tighter. It's because your chest is really tight. Take whatever your body gives you. Don't force it. Don't push. None of these are supposed to be super aggressive. You're just warming up the shoulder joint and loosening the tissue. Let gravity pull your chest open and just really create better posture from there. Last but not least, the most overlooked piece of the shoulder, the shoulder blade. As our shoulder moves, if you could see through me, the shoulder blade kind of wings open like a Lamborghini door with that shoulder. So what we're going to do is we're going to make sure those shoulder blades are gliding and sliding the way they're supposed to, because if they don't, it's going to lock up the shoulder joint. What we're going to do is called a scapular retraction or shoulder blade inner outer, if you're not saying science-y words. Put your hands on the wall and you're going to do a push-up without moving your elbows. So the goal is just to squeeze your shoulder blades together like there's a pencil in between your shoulder blades and then push them apart. You're going to want to do 10 of these and pause at each point, making sure that you create stability in each section of this movement. Now, some common mistakes people make are that will go up and they'll shrug up That's going to tighten all the upper trap muscles around your neck and it's going to be super uncomfortable. You don't want to do that. So try to keep your shoulders down and just pinch. Once you've done 10, we're going to focus on stabilizing the joint. All right, now that our shoulders are mobilized and you can do all the cool things with your shoulders, we got to stabilize them. So the first thing we're going to do is called shoulder cars. Pay attention, this is a very advanced movement, but we need to get all the muscles around your upper traps, lower traps, rhomboids, all to connect and hold that joint in stable position so you don't have any more friction, kind of like glue for all the work we just did. So the first thing you're going to do is you're going to find a nice clean mat because we're going to stick our face in it. If it's not a clean mat, it's going to be gross. And I know, but what would you rather have, shoulder pain or a gross face? Gross face every single time, right? You can take a shower afterwards. First thing you do is you're going to go with thumbs up and you're going to make a Y with your body. It's very important not to activate your glutes or your lower back in this movement. So I'm going to put my face down and pull my thumbs up. You're going to pause at each movement and just hold. Then you're going to twist your arms around and lift your knuckles up to the sky. And then twist one more time and raise your pinkies as high as they'll go. And then back. So do this until fatigue, not failure. You don't want to have your neck get too tight and just focus on proper positioning the whole entire time. I would do about 2 sets to 3 sets until fatigue. Next move, you need a band with light tension. You can use it literally any band for this. As long as you can complete the movement easily, because you want to go with tempo. So the first thing you're going to do is put your hands at 90-degree angles with your arms and then push your arms out. You want your fingers facing up, and you're going to pull your thumbs apart across your body and hold. Now we want to do what's called a 5-5-5 tempo, which means you're going to hold for 5 seconds, do a negative for 5 seconds, and then do another repetition for 5 seconds. This is going to elongate each part of the tempo, so basically the eccentric phase, isometric phase, and the contracture phase, which means science-y, we're activating every muscle in every single phase to create more stability. Again, do this until you're fatigued— not failure, just fatigue— and I would do 2 sets. This next exercise is a little bit complex, but it's very, very, very good. So for all of you with rotator cuff problems, this is a warm-up for all the muscles around your shoulder blade and your rotator cuff. What we're going to do is we're going to use that same foam roller that we used earlier to warm up with. We're going to use a 2, maybe even a 1— this is a 3-pound weight. This is heavy for this exercise. This is going to be the pad that you're going to put your head on and rest it. Next, you're going to pad your under elbow. Now you can use a towel rolled up or a pad for like a barbell hip thrust, and you're going to grip your weight. Now from here, you're going to squeeze down on the pad and slowly rotate your hand up and down. Same thing, you're going to want to do 2 sets until fatigue, not failure. And there you have it, bulletproof shoulders. You never have to worry about a shoulder impingement ever again. Now, if you haven't already done so, subscribe. I don't know why you haven't already. We're giving you all this insane info. You're going to feel amazing and reset your body. So subscribe. And I would actually share this video, I don't know, to like one of your profiles. Not because it would benefit reset you, which it probably will, but because it'll benefit you. You'll always remember where this video is at in case you need to do this exercise again. So you don't have to go search again and go try to find it. And get lost in YouTube and, you know, get drowned in 30 minutes of other videos when all you really wanted was this perfectly filmed video specific to your needs. See ya.