Wolfram Student Podcast S2 Ep 2: Modeling Shadows of Generated Trees
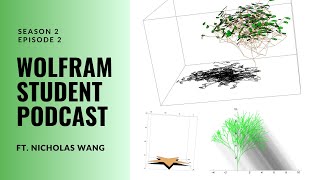
Nicholas, a high school junior, built a Wolfram Language project that generates random trees and models their shadows on the ground. He represents branches as vectors, projects them onto a plane for different sun angles, and visualizes the results in 2D and 3D. The main limitation: branches can't droop downward, only offset upward.
Questions this video answers
September 13, 2023
Nicholas — high school junior from North Carolina
Table
Wolfram Demonstrations Project "Tree Bender" demo
WELP (the program that follows the Wolfram High School Summer Research program)
Chapters
Hello, everyone, and welcome back to episode two of season two of the Wolfram Student Podcast. I'm Sam. And I'm Rashank, and we're your hosts.
This is the Wolfram Student Podcast, where every fortnight we dive into a new innovative project done by high schoolers using Wolfram language.
For this week's episode, let's welcome Nicholas. We'll be discussing his project on modeling shadows of generated trees. Hi, Nicholas.
Hi.
Hello. So. Well, it's great to have you here. Do you want to just get us started with your name, grade where you're from, etcetera?
Sure. Hi, everyone. My name is Nicholas. I'm a high school junior coming from North Carolina. I attended the Wolfram High School Summer Research program this past summer, where I first experienced the Wolfram language and that many amazing people. Outside of school, I enjoy different STEM and leadership projects. In my free time, I enjoy playing the saxophone, chess, running, doing things like that. Yeah, cool.
Yeah, that sounds great. We have a lot of people from the Wolfram Summer Research Program presenting their projects, so.
Yeah.
Wonderful.
Yeah. Well, this is, like, something we like to ask everyone who comes onto the podcast, but what's your favorite Wolfram function out of, like, you know, the few weeks that you were there at the Wolfram Summer Research Program this year?
That's a pretty interesting. It might just be table. I just feel like I use table a lot in my project, and it's, like, really useful instead of having to go through loops, and it's just like a one function, one line of code, and it can just do so much. So maybe that.
The classic. But it's. It's very good. Okay. Yeah. Thanks for sharing that with us. Cool. So let's just dive straight into your project. Why don't you first give us, like, a quick summary of what it's about?
Sure. So for my project, I modeled shadows of physical trees. My interests in math and my hobby in forestry, I guess, led me to this project. And I use vectors in 2D and 3D to make and then project different trees. Cool.
That sounds cool. I'm interested in seeing how you used vectors for this.
Yeah, definitely.
Why don't we just go straight in?
Okay. So the first thing I did, or this is a brief introduction. So for 2D vectors, you have a vector, which should be red, is the vector line in red. And then you have another vector, which is black, which is the black vector, which isn't the whole thing because the green is overlapping it, but the green would just be the projection onto the black vector at an angle perpendicular to the black vector. And so this is like the basis of what I did for the 2D shadows. The green vector being the shadow and the red vector being the branches. Yeah. And so I. I'll get into more of that later. But for 3D vectors, I tried a slightly different strategy because instead of projecting onto another vector, it's a little more complicated in 3D, obviously. So I just decided to set another vector, which in this case would be the red vector here. This would just be like an angle at which the sunlight would be. And it's just gonna take this blue vector, which is the tree branch we can imagine, and just find where that lands on the ground. And so that would just be our shadow after drawing a vector to this point on the ground. And that's how it would work for 3D and for leaves, which I'll get into later. I just took a polygon and then I projected like every point of this polygon because. Because polygons, they work by connecting a set of points. So I just projected every one of these points onto the ground and then reconnected it on the ground to make a kind of shadow with this star, which is our basic example. So for three 2D trees, we'll start back in 2D. Yeah. So I kind of split this into two ways. This is the first one is 2D sun from the top, and then 2D at an angle, and then I go into 3D and then 3D from the top and 3D at an angle. So for 2D, we'll just start with this. So in Wolfram, they can make lines, obviously, but it's in the start, start to end form. And vectors, as we know, we should really just have a vector and where to start that vector at a point. So I define these functions to make a vector at any point. And if I don't specify the point, it'll just draw the vector from 00, as vectors usually work. So the first step of this project was to actually generate the trees. Wolfram doesn't really have any useful built in tree models. Too much. So I modified Wolfram's tree bender demonstration, which I will pull up right now. I found in the Wolfram demonstration project. And this took some code. This is interactive, but you can see like. Anyways, it creates trees based on generation and thickness ratio. There you go. And it kind of just splits off two ends from every branch over and over. And I thought this would be a great foundation for my project. So I took this code and I changed it a little bit because I had to match it to my project. Let's see, I defined the initial trunk of the tree and then I defined the initial X and Y mirrored endpoints of the branches. This is important because you have to have branches on both sides of each branch and then it branches out the demo. Then what it does is it takes every point and adds this to the dot product of the vector of the line and the endpoint of the first branch point. And honestly, I'm not completely sure of how the math works, but. Because I sample it. But this is like all to add predictable variation, you might say, in these leaves because like every time you regenerate this tree, it's going to look slightly different. And then it just does this over and over. And you can see this three right here is the amount of generations. We can see there's one, two, three generations. And generally in this project we're going to be doing trees with smaller generations because it's. When you have a lot of generations, it gets more computationally heavy when you bottle shadows and whatnot. So we get our tree like this, which is great. And then I have to do a little bit of, a little bit of modifying to this because in this tree we're drawing with the line function, which isn't really what we want because we defined our own vector function. The main difference is the line function takes a start point and an end point when I really want a start point and the vector to the end point. And it's, it's pretty, it's in the changes. I really just have to do some list manipulation because start end, if you want it to start, you just find the vector between the start and end. You just do add minus start. So we just take our list, our list of points for this tree, and we, we just do some list manipulation onto our list and then we can display the tree with our own function, which is great, right? And here's an example of an eight generation tree. A side note for this project is that these trees aren't really too realistic because I am using Wolfram demonstration project demo. And so, and so these trees, the whole basis of making these trees is that you get random points from each point endpoint. So the trees really just obviously real trees don't grow randomly, they have certain patterns. But I didn't really have the time and it would be great future work to develop trees that are more realistic for shadowing.
I don't know, that tree looks really realistic to me, I guess, except for that one really long curve. Yeah, that looks really cool. So I guess when you're applying shadows to this, you just take your shadows function that you created earlier and apply that to every single branch.
Basically. Yeah, yeah. So I'll get into that. Now this is a lot of code, but you can, from the simplest case we can see that if this line is the branch we might see, well, this is from the top down. But if you see this line is the branch, this would be the vector you project onto, let's say. And then this would be the shadow on the ground. And then one thing, another thing I thought of was to put in like an opaque shadow, transparent shadow all over it. And obviously there's shadow above the branch, which doesn't make a whole lot of sense realistically, but I think it creates some pretty cool visualizations later on. Yeah, and so if we apply this technique to all of our branches, we get something like this, which is pretty cool. And if you look under the branches, you can see the shadows stacking on top of each other. You can see which parts would theoretically have more shadow and which parts would theoretically have less shadow. Yeah. So this would be our top down function. Then we go on to angle functions. This one is a little bit more complicated because if you look at this in, in reality you're projecting onto a vector that is this line right here. But it doesn't, but you'd have to extend this line. So in my code, what I did was I found the slope of that line basically. And, and then I, and then I made a vector align with that slope coming from the top. And then again I do this opaque polygon. And actually to get away, into, to get into this code a little bit more, basically each of these vectors is online in this, in this projection you can see there's. I have little notes. This would be the distance between the point and projection which would be like this line. Project onto would be like this line. And then it just. Every, every one is a line. And then, and then I should have a polygon, a polygon function with embedded into this function, which is basically the same function but with less lines so that we can see it. It'll show up later, but we can, we'll be able to see it better. You can see the angle projection. This is the simplest case. And then we can apply that to the whole thing again. And we'll get something like this, which is cool, but again there's too many lines. So I use this cleaner function which is just less guiding vectors, maybe not show the projection onto vector. And we can get something like this which is pretty cool for the eight generation vector.
Oh, that looks. Yeah, that looks really cool. So this is just taking the shadow of every single vector, assuming, like, the sun is like, in the top left corner kind of thing.
Right, right.
Do you, like, later develop something that, like, where you can, like, input where sun is and it, like, moves the vector, or do we just.
So it's a little bit easier in 3D because if I use that instead of I use a slightly different strategy, I set the sunlight angle. So you can kind of do it for 3D. Yeah.
Okay. That sounds really cool. I'd like to see it.
Yeah, I would say for 2D, it's a little less. Less clear because you're just setting a random function to project onto. And I like, for these visualizations, I chose them arbitrarily. But yeah, theoretically the sunlight would be perpendicular to the. Perpendicular to this. The angle, the vector you project onto. But yeah, it's not as clear.
Yeah.
Yeah.
Thank you.
For 3D trees, I do like, a. A similar thing. The. The starting vectors. I have to define vectors. How to start 3D. You can see here. It's like the same thing. I set a vector. It's just a line from start to end. But I wanted a vector and a start point. But here I added a color function, or not a function, a color parameter. Because, you know, in 3D, things may get a little more messy. And it just adds a lot to the visualizations later. This would just be like a vector. And so I modified the same tree. Bender demonstration for 3D. I had a Z coordinate. I basically add a Z coordinate to everything you can see here. And then. I don't think I touched on this earlier, but I define random values. This will add, like, the randomness in the trees. Rand 1, 2 would just be the X values of where to put the branches. And Rand 3 is Z value. And one thing that's not that accurate about my tree is that the Z values only are positive, meaning that the branches can only go up. And there's a lot of trees in real life that have, like, drooping branches, like a willow, if you think about it. Or even just like normal oak trees, some of the branches droop down. Yeah.
I was about to ask exactly the question. I was like, is there a particular reason why the Z coordinate only has a positive, like, offset added to it? Kind of. Just curious. And did you try, like, doing the negative thing? And did that cause it to, like, go below the, like, zero point? Because, like, underground branches are obviously unrealistic. But did that happen? Yeah, yeah.
So I originally had it in the negative, but the trees I were getting were just, like, so unrealistic. It was just like a bunch of lines and super messy because if you have, like, up, down, up, down, it, like, a branch would never do that. And so I actually never saw it go below the ground. But I'm definitely. I'm sure that's definitely possible. Yeah.
Got it. Yeah, that definitely makes sense. Like, if it's going down, it's going to be, like, going straight down or, like, curved down, but not, like, oscillating between.
That's right. Yeah. Yeah. I guess that's one of the problems with not creating my own. Well, I mean, just like, sampling another person's code. All right. So I basically do the same thing as the 2D trees, and I guess something like this. I set it to be brown because the branches are brown. It's pretty cool. For 3D projections, again, I set the angle, and each line is essentially a vector. I set something like this, I would say, with this part, 3D made everything a little bit harder. And again, I form a polygon between each of these points. Right. And I get something like this. Well, actually, for this one, for the top down, I took a little bit of shortcut because I don't actually need to find the angle. I can just set the Z coordinate to zero. And so you get something like this, which is pretty cool, but it's a little bit messy, and you can mess around with the visual settings to get something like this setting, like the background and things like that. Right.
This looks pretty neat. I agree. And I think, you know, it was great that you did this for the 2D case first, because otherwise jumping straight to 3D visualizations without any, like, 2D grounding could have been tough. So, yeah.
Yeah, I would say that the 2D was definitely a lot easier. And actually, I spent most of my time in 2D during. During. During camp. I got the 3D out much quicker than the 2D, which really surprised me, actually. But I had the 2D foundations, and by that point, I was. I was rolling with my project. Yeah, I guess I'll continue. This is like a simplified. Just less vectors. It just looks like a bunch of scribbles, honestly. But, I mean, it's pretty cool. Angle, again angle. I had to find the intersection point with the ground. So I just. There's. I just use the formula or the slope or, I mean, the intersection point, I guess. And then I put it into a function so that I can take any vector Set an angle and it'll find where that point is. And using these points, I can. Using these intersection points, I can draw vectors starting from somewhere and going to somewhere. And that's what each of these lines do. They're each a vector. Again, you can see I'm finding the intersection point for the different vectors and then drawing with these intersection points throughout the code. And again I'm doing the polygon. And so this is ultimately when my project comes to. It's these angled 3D projections, which is. And then of course, I do the polygons again. And then I can mess around it again to get something like this right. And then again I get rid of some of the vectors and I get something like this. And if I want to change the angle, you. We can see different things like this. You can see a relatively higher X value, a Y value, and a Z value, which is actually. You can see different angles. And it's actually quite realistic in this image collage. Yeah. And then I had a little bit of extra time in my project, so I added leaves. So the first thing I did was take a picture of a leaf and mesh it. I got a set of points for these leaves of this polygon of leaves. And so I messed around with these coins to scale it back down to our tree. And then I just did a little bit of manipulation with these points to get different things. And one standard of leaves is that I can just take an image from anywhere because leaves in real life are 2D, but it's just going to look like a plane in 3D. So I can really just add a z coordinate of 0 to these points to get. To just put a leaf in here. So that's one advantage of a leaf. Then I set a function to put a leaf at any point. And then finally I apply these leaves to the end points of my branches, which is pretty easy to do because my tree basically just is a set of points. And my vector function just draws the vectors or lines between these points. And then one more touch I do is I randomly rotate these leaves using the rotation transform function, or actually I rotate the points and then I get something like this, which is cool. And then I just put it on my tree and I get a tree with leaves. Pretty cool. Top down leaf shadow. If you remember, I use the. I find the intersection point of each of the points of the leaves and then connect them back on the ground. So we'll get something like this for the leaves. And then I just show this together with our earlier created tree and we Get a cool, really cool projection. The angle, it's the same thing as before, but with leaves. And you get something like that. It's pretty cool. Yeah, it's. Yeah. The leaves really were not too much of a hassle to project. I guess it was mainly. Yeah. Because I had the foundation from the 3D and I just basically did the same thing. You can see relative higher X, Y and z values. And again, because it's a visualization project, we can mess around with the settings and whatnot and you can set a background, you can set a ground and you get. It's. You can have a little fun, we might say. And we get.
Yeah, no, that looks. That looks really cool.
Yeah.
Wow. Yeah, no, that's amazing. That's great to see how you like, kind of built off different steps to make this.
Yeah, for sure. And I think the visualization at the end looks especially cool because of the texture and so it's the more realistic element. So.
Yeah.
But yeah, I think I really enjoy it. Sort of seeing how you progress from simple vector representations to, you know, adding on leaves and the ground and all of this and combining like each element to build this final visualization. I think that's pretty cool.
So I guess the conclusion of the project is that I have coded functions that successfully model the shadows of trees. And then I can. Given any random tree and any tree left leaf generation, I can create an accurate shadow projection. And the thing is, with my project, I can use this with any set of vectors and any set of polygons. So it doesn't have to be trees, it can be like something else. It could be like maybe the Eiffel Tower or maybe. The only limitation, I guess is that with vectors it might have to be like stick, like. So I can model shadows or something like that. Any, anything. There's still work to be done because for my trees, obviously the generation isn't entirely realistic nor able to be mapped to different species of trees because different species of trees grow differently, there's different leaves. And in the future I hope to create algorithms that will create species specific trees with different sets of vectors. So I can analyze like different shadows for different trees and perhaps connect it a little more real life. And also the leaves in real are only found on the outer edges of the branches. In real life, the leaves are found throughout the tree, throughout the branch. So there's that. Cool.
Yeah, that's great.
Yeah, it was really awesome to see your project. The tree shadows came out really nicely. Anyway, I guess now that you've like done this entire project, do you have any thoughts about like the Wolfram language? Whether or not like, I don't know, what have you learned, I guess about it? How do you think it compares to like other languages? Thoughts like that?
I thought the Wolfram language was really, really cool because coming into this camp I knew very little. I knew the basics of warframe and I was completely like perplexed as to how I was going to create a very specific project with incredible visualizations with the Wolfram language. So I thought it was really cool because Wolfram language has like an ease of accessibility, there's a lot of built in functions and for the most part the language is very clear and straightforward. And so before this I've only ever done basic coding like Java and Python and Wolfram. It's like, like you can be Newton, Warframe and you can be creating really cool stuff in a very short amount of time. You can see like with all the projects in the Wolfram High School program and a lot of those people are new to Wolfram. And so that's what I really like about Wolfram and why I think it's really unique. Cool.
Yeah, I definitely agree that it's certainly a unique language. And I know you've talked a lot about the future improvements that you identified for this project, which is really cool. Do you have any other interesting projects in mind that you might want to try out or just try to implement?
Yeah, I am thinking about, you know, more shadows, more maybe Applied Math. Currently I'm doing whelp, which is the program that follows the Wolfram High School summer program. And I'm taking a bit of a different turn. We're looking to do something in chemistry, which is also going to be cool. It might be a little different than visualizations, but it'll be really interesting to explore another aspect of the very broad Wolfram language.
Yeah, that sounds really cool. I'm looking forward to seeing your WELP project when it comes out.
Yeah, I think VELP is a pretty, you know, suitable follow up to the Wolfram summer research program. And yeah, I'm sure you learn a lot. I actually know a person from my year, I think Sam might know him too, who did a computational chemistry project and it was definitely some of the coolest work I've seen.
Yeah, I'm really looking forward to it too.
Anyway, thank you so much for coming on and sharing your product with us. It was really great. And yeah, best of luck to your chemistry project and any other stuff you do in the future.
Okay. Thank you for having me.
Thanks for listening to this episode of the Wolfram Student Podcast. We hope you learned something new and took away insights from today's discussion. If you want to be featured in a future episode, fill out the form@tinyorl.com WSP S2 interest and be sure to.
Tune back in two weeks time to hear our next episode. Once again, thanks for listening to this episode of the Wolfram Student Podcast.
More from Guy


Cheryl Strauss Einhorn | The Human Edge: Smarter Decisions in the Age of AI | Talks at Google



Rachel Glennerster | Innovation and the Center for Global Development | Talks at Google

Rebecca Winthrop | Rethinking the Purpose of Education in the Age of AI | Talks at Google

Dr. Robert Wachter | A Giant Leap: How AI Is Transforming Healthcare... | Talks at Google



