How To Create an Animated AI Influencer For Your Brand!
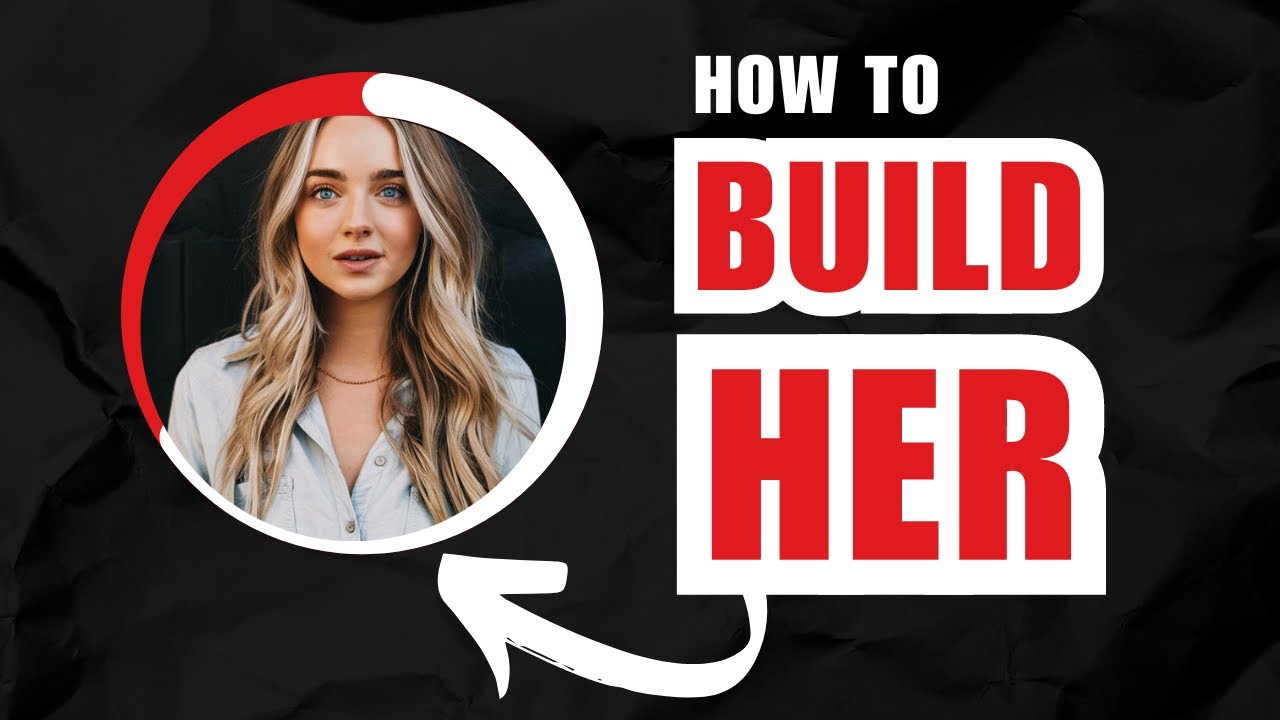
Helena Liu shows how to build an automated AI influencer using Ideogram for the image, GPT-4o to write scripts, and D-ID to animate talking-head videos. A Google Sheet triggers a Make.com workflow that generates a 100-word script and video in 30-60 seconds, then uploads to YouTube automatically or emails for review.
Chapters
So you want to grow your YouTube channel and promote your brand, but there's just one problem. You don't want to use your own voice or face, and hiring a spokesperson can be really expensive. So today we're going to create an AI influencer for your brand that can create videos, post them on YouTube, all on automation. If you're new to my channel, hi, my name is Helena and I'm an AI automation expert. And on this channel, we discuss everything about AI and automation, so please make sure you subscribe below. Also, if you haven't taken my free AI automation course, the link is in the description below as well. Okay, so the first thing that we need to do is we need to create our AI influencer. And we can use any AI image generation tool to do this. The 3 main ones are DALL-E 3, Midjourney, and Ideogram. Today we're going to use Ideogram because they have a pretty good free version. And if you want to get a paid version, I think it's $10, $20 per month, it just makes it faster for you to generate these images instead of having to wait about 2 minutes. Once we arrive on ideogram.ai, we can see some images that other people have generated that we can use as inspiration. What we want to do is put in our prompt right here. And for the aspect ratio, we want to go ahead and select 9:16 because we want to upload this either onto TikTok or YouTube Shorts. And that's the aspect ratio for those platforms. And then we want to press Generate. So I have already done so I waited about 2 minutes for this to completely generate. And my prompt here is a young woman who is a travel blogger with long blonde hair and blue eyes, casual attire, photo realistic. After I waited about 2 minutes, I got these 4 different images that was generated. I like the third one here. I think she looks the most realistic. And can you believe that she's not real, guys? That's just mind-blowing. Insane. Anyway, so then I click on her and I just have to save her image. I just right-click and, and then I press Save the Image and it saves to my download folder. After I have saved this image, I actually have to store this image somewhere on my server so I can store it on my WordPress blog or somewhere that I can access. If you do have WordPress, this will be the easiest thing to do. Once you log into your WordPress site, just go to the 3rd tab where it says Media, and then Add New Media File. If you're using GoHighLevel or some other platform for your website building and server and hosting, that is where you can also use to drop that media file. So if you're using WordPress, just simply press Select File here. So I have uploaded the file with the AI influencer that we have just generated. And now we're ready for the next step. So the next step is we want to create a list of YouTube Shorts videos that we want our AI influencer to do. And I just put all my ideas here. Even if it's 2 AM in the morning, you got a new idea for your YouTube Shorts, you can just open up your phone, go on to Google Sheets and add another row here. And your AI influencer will go to work and create your next video for you. So I just put 2 video ideas here so that you get the idea and you can add as many as you want. The first video that I want this AI travel influencer to make is best beaches in San Juan, Puerto Rico. By the way, I'm just using this travel blogger as an example, but you can do this on any niche that you want. The next thing we want to do is to create our automation so that this whole thing works even while we are sleeping. And we're going to use a tool called make.com to do this. This is an automation tool. Once you log into make.com, go over here to the top right-hand corner and click on Create a New Scenario. Then we'll be taken to this blank canvas where we can create— start creating our automation. So our trigger in this case will be Google Sheets. And by the way, if you want your AI influencer to cover the latest news, you can actually instead of doing the Google Sheets as a trigger, you can actually do an RSS feed as a trigger as well. Okay, so we're going to search for Google Sheets here for our trigger. And I'm going to select the third one here, which is watch for new row. Whenever a new row is entered into our spreadsheet, this whole automation will be triggered here. Next, we need to create our connection, which I have already done. So if this is your first first time connecting your Google Sheets to your Make account, click Add here and click Sign In with Google. After you have signed in, you just have to search and find the spreadsheet that you have just created. Okay, and then next you have to select the sheet that all of your ideas are stored on. There's only one sheet in this, this spreadsheet, so by default it's Sheet 1. And for the limit, I'm going to put 1 because I want 1 video to be created at a given time. I'm going to press OK. So for the next step, I actually want to turn this idea into an entire YouTube Shorts script. So I'm going to press Add here, and I'm going to search for OpenAI. And then next, I'm going to select Create a Completion Prompt. If this is your first time connecting your OpenAI account to your make.com account, press Add at the top, and you need to get your API key. In order to get your API key, go to this URL right here, platform.openai.com/api_key. You do need to put in your your credit card information. And that is how OpenAI will be able to charge you for all the generations that you do. There is no minimum or maximum, it just depends on how many words you are generating. Currently, if you're using the GPT-4o model, it's $5 for 1 million tokens of input or $15 for 1 million tokens of output. And if you're wondering how much is a token, roughly 1 token equals 5 to maybe 4 characters. That's the general rule of thumb here. So to create our API key, just click on Create New Secret Key, give it a name that can help you remember where you're using this key. Let's say we call it make.com. Create the key, copy over this key, and put it over to make.com right here. Press Save and you're all good to go. I have already done this before. And from here, you have to select the model that you want to use. The latest model for OpenAI is ChatGPT-4o. That's what we're going to use today. For the role, we're going to select User. And for the content, this is where we can put in our prompt. Okay, so here is the prompt that I have put in. You are a social media manager responsible for writing YouTube video scripts. Turn this YouTube idea into a YouTube script. Then I filled in the variable from column A in the spreadsheet. This is going to dynamically change whenever a new row is added to your Google Sheet, right? So this idea field is going to change. And then I put some additional instructions here to ChatGPT. Do not add labels like music or speaker. Keep your output to 100 words only. Return one paragraph. Okay, after I have finished my prompt, now I am able to connect the image that was just generated to the script. Okay, so now I have my script written in, I just have to put in the maximum number of tokens that I want, I'm going to put 1000 here. And I am done. Now that we have created our AI influencer and the script that we want her to say, the next step would be to have her actually start speaking that script. And to do so, we need a tool to allow these images to talk. And the tool that we're going to use today is called D-ID.com. If you take a look at their pricing, it starts at $18 per month. This will give you about 60 minutes of video. If you need it to generate more videos than that, then you have to go ahead and upgrade to the launch plan, which is $50 per month, and this will give you 45 minutes of video. So this has been the cheapest and most affordable AI video generation tool that I have been able to find on the market. I would suspect that over the next year, the price will continue to come down as more and more tools come onto the market and there's more competition. So in order to connect D-ID into your Make account, you actually have to make your own HTTP module because Make doesn't have a native one built in for D-ID. So in the app section, you have to search for HTTP. After you click here, you want to select Make an API key authorization request and then click Add here at the bottom and put in your D-ID API key. Key right here. And if you're wondering where to find your key, log into your account in D-ID. Then at the bottom, click on your name, click on Account and API Key, and copy your key right here. Put it over into make.com and then press Create. I have already done so, so I'm going to choose my key here. Next, I'm going to put in the URL that I want D-ID to call. For the URL, I'm going to in this particular endpoint. And for the method, I want to select POST. Okay, so for the body type, I put in raw. For the content type, I put in JSON. So basically, this is the URL that was generated once we saved the image into our WordPress. And in terms of the text, it's going to input the output that was just generated from OpenAI. I expanded on choices, I expanded on message, and I selected the content of that message here. So that's That's what this bit of JSON code is saying. And you want to make sure that this is parsing the responses. And now press OK. Okay, now that we have made our video, the next step is actually just to wait a couple more seconds for this video to finish generating. If you create the next module right away, I find that sometimes when the video is not generating, then this whole automation will fail. So we actually want to add in a wait step here in Make. And to do so, we want to search for the sleep module. And generally, you want to put a number between 30 seconds to 60 seconds here, just to wait until this video in the HTTP step that we just made finishes generating. After we have added in our sleep module, now we need to get the video that we have just generated, right? So we need to go on to the D-ID server and obtain the URL of the video that we just created. And again, we need to create a custom HTTP module to do so. We're going to select HTTP again and select Make an API Key Auth Request. The credentials that you just entered in should be automatically populated. We do need to use another endpoint here. The endpoint that we're going to use now is the endpoint that will allow us to get this video. So you want to use this, and you also want to specify the video that you want to get. So you want to enter in the ID of the video that was just created. To get the ID, expand on the HTTP module that we just created and expand on Data and click on ID. For the body type here, we want to select Raw. And we can keep all of this to the default settings. And in Parse Responses, we want to click Yes. Now notice here in the method, we want to now keep this at GET because now we're getting the video. The previous module, we want to put POST because we wanted to create the video. Okay, so after we do so, we just press OK here. And now we're ready to have this video that we just created to be posted on our social media accounts. So before we do that, let's just give it a test and see that this whole automation is running properly. I just saved it and I'm going to press run once. Okay, so it's been about a minute and our video has finished generating. Let's take a look at what it looks like.
Welcome to San Juan, Puerto Rico. Today we're exploring 3 unique cultural experiences you can't miss. First, immerse yourself in the vibrant colors and sounds of the San Sebastián Street Festival. A lively celebration of music, food, and art. Finally, experience the magic of a night at La Factoria, an iconic bar renowned for its creative cocktails and electrifying salsa dancing.
Pretty cool, right? We just made an entire AI influencer on automation. I know it does have the D-ID logo at the bottom, and you have to be on the Enterprise plan or above at the moment to have that removed. So yes, I know it's a little bit annoying. If you also want to remove it in some other fashion, you can always use Photoshop or Adobe Premiere do so as well. Now after we have our video, now we can either choose to email it to ourselves so that we can review it and manually upload it to all of our social media accounts, or we can do it on autopilot as well. I'll show you both methods. Some platforms like Facebook and Instagram and TikTok actually do not allow you to automatically upload these videos, so you do have to do it manually, but it's still much faster process than what you had to do if you had to do everything manually. So if I wanted to email everything to myself, I just need to add in a Gmail module. And this will allow me to review everything before I upload it onto all of my social media platforms. I have to make my connection again, just put in your Google email and your password, and then select the email address that you want this video to be emailed to, give it a subject line, I just call it video, call it whatever you want. And then I send the link of the result URL to myself here. To find the result URL, just go to search bar right here and type in result. And it's a result URL field that was just generated from the GET HTTP request. And that's it. All I need to do is press OK. And in this way, whenever a new video is created, it's sent to my email first, I can review it, then I can manually post it onto all my social media accounts. And this will give you some level of control. If you do want it to be posted automatically though, just disconnect here and add in another module. Let's say we want to automatically post it onto YouTube, just select YouTube and then select upload a video and fill in all of these fields and your video will be uploaded automatically as well. Unfortunately, platforms like TikTok and Instagram does not currently give you the ability to upload videos onto their platform automatically. Instagram does have the ability to upload the pictures, but unfortunately not for videos. So you do have to do it manually. But what I will say is that this will still speed up your content creation process by like tenfold. You have all these videos created for you on automation, and all you need to do is just to upload them. So it's still a big time saver here. And I hope you learned a lot from today's video. I hope you will give this automation a try. And create your own AI influencer to promote your brand. If you got any value of today's tutorial, I really hope you like and subscribe below. Also sign up for my free AI and automation course. The link is in the description below as well. Thank you so much, and I'll see you next time.
More from Helena

How to Use Claude Code to Get UNLIMITED Leads in 6 Mins | Best Lead Scraping Tool

These AI Videos Has 21.5M Views — Here's the Exact System (Fable 5 + Higgsfield)


NotebookLM 2.0 Update: Analyze Your Entire Business in Minutes! (Full Tutorial)