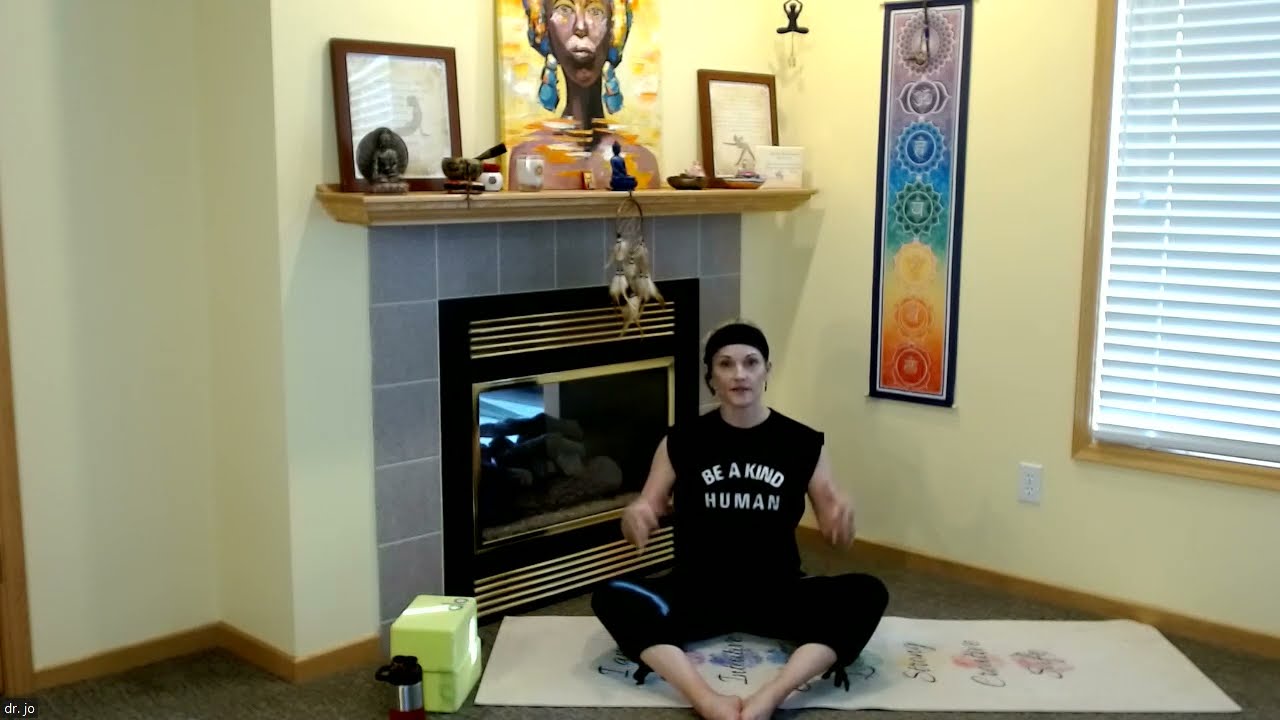
Speaker A leads a one-hour yoga class themed around freedom, moving through standing flows, lunges, and balance poses. The session includes breath work, a brief tremoring technique for trauma release, core work, and ends with restorative poses and a finger-awareness meditation in Shavasana.
Chapters
I invite you to reflect on freedom. Freedom. And what it means to you. What does it mean to be free in your mind, in your body, in your spirit? How can you cultivate more freedom in your practice today, throughout the day, and in your life? And if you have no idea, that is just fine. Having a curious, open mind is an advanced skill of a yogi. And find a few more breaths here. Whenever that feels complete, bring your hands together and rub them, creating some heat. And place your hands over your eyes. Blink them open if they were closed. And then place them on your lap. Let's begin with some neck stretches. We all have a lot of tension up here, especially with all our social media, our texting, and, uh, on our computers. So we'll begin by bringing our right ear to our right shoulder. If you'd like a bit of a deeper stretch, you can bring your right hand, gently pull a little bit. And breathe. Couple more breaths here. Now keeping your head tilted, use your couple of your fingers to lift the heavy head up. Excellent. Now we'll bring our left ear to left shoulder. This tight— this side is a little tighter for me. And then you can use your left hand Give a little more stretch. Today happens to be the Fourth of July, so I thought freedom would be a nice theme for us today. There's a lot of ways that we can increase our personal freedom and a lot of ways that we restrict it, just in our minds. Couple more breaths here. And again, using your fingertips to push that head up. Now bring your chin to your chest. And gently trace along your collarbone to the right shoulder and to the left. Do that a few more times. So for example, if we let go of the idea that we need to be perfect that would increase our personal freedom. On the other hand, if we hold ourselves to impossible standards and expectations, that limits our ability to feel free. So ask yourself, how can I set myself free? What can I do to be kinder to myself? And then one more round, chin to shoulder, and then back to center and lift the head.
Excellent.
Let's stretch out our arms. So bring both arms to the side. This is actually a back stretch too. And then bring your right arm underneath the left arm, twist them around. And if you can, you can bind the hands, otherwise just leave them like this. And then if you stretch the arms up, Elbows up. You should find a nice stretch here and just hold and breathe. And if you want to bring your arms forward and you find a little bit of a different stretch here. These are eagle arms. One more breath here. And then, ah, let the wings fly. Now we'll do the other side. So left arm under and right arm over. And hold and breathe. And then the option, of course, to push the arms forward. One more breath, and then open your wings and let them fly. Now we're gonna get another good stretch for that upper back area. So inhale, bring your arms up, interlace your fingers, push them up to the sky, and then round your back. Really round that upper back and just kind of stretch, and you can move side to side to get all those crunchy areas in the upper back. And inhale, we'll get a lateral stretch. Exhale to the right and hold. Taking some nice deep breaths.
One more breath. Inhale up. Exhale. To the left.
Inhale up and exhale, arms down by your side. We'll do a twist next. So inhale, arms up. Exhale, twist to your right. And then inhale back up. Exhaling, twist to your left. Inhale, twisting to your right. Inhale, twisting to your left. And then this time we'll hold. Inhale, exhale, twisting to your right, and breathe. Couple more breaths here.
Excellent.
Inhale. Now let's twist to the left. Exhale, twist and breathe. Couple more breaths. And release. Arms up. And arms by your side. We're gonna do a seated cat cow with a little twist. So bring your feet, your legs into, uh, butterfly pose or baddha konasana, and then press your feet together so that your leg muscles are engaged and place your hands on your shins. So the whole time our feet are going to be pressed together, and then on an inhale, we're going to arch our back, heart shines forward. Exhale, round your back. And look down. Inhale, arching the back, heart shines forward. Exhale, rounding the back. Continue on your own breath, keeping the legs engaged by pressing the feet together. Getting a nice warm-up with the spine. Do 3 more rounds, please.
I think that was 3.
Great. Now extend your legs in a V. Not too big of a V, just enough so it's comfortable. Have a micro bend in your knees. And flex your feet. Now walk your torso forward, not too far, just enough. And flexing your feet, find a tall spine and just hold and breathe. If you'd like, you can walk a little bit further forward, but maintain a strong spine. And once more, you have the option of walking a little bit further forward, again maintaining that strong and long spine. Excellent. Walk yourself back up. Now with your right leg, if you can, go ahead and bring that right foot behind you. If your knee doesn't have the ability to do this, then you can just go ahead and keep the knee bent forward. If your knee bends backwards, then go ahead and do that. And if it feels comfortable, you can lean back a little bit, getting a nice stretch here in the quad. We'll just hold and breathe. If you'd like, you can come down on your forearms. Couple more breaths here. And you can untuck that leg and go to the other side, bringing the left knee in, tucking it behind. Or you can stay in this pose too and holding and breathing. And if you'd like, you can go back onto your forearms if that's comfortable for you. Breathing and smiling. Smiling, just a half smile, can improve your mood, they found in research studies. So anytime if you're feeling down, just smiling a little bit can actually improve your mood. Couple more breaths here. Wonderful. And come back on up. Bring the leg around. Shake out your legs a little bit. And then we'll come to Cat-cow the floor. So hands under shoulders, knees under, under hips. And then inhaling, dropping the belly, heart forward. Exhale, rounding the spine, dropping the chin. Couple more rounds. Inhale. Exhale.
Inhale. And exhale. Great.
If you want, you can grab your blocks. We're going to do low lunge. I like to have more space in this pose. So bring your right foot between your hands. And back foot is flat. Right foot below the knee. And if you're on your hands, you can come onto your fingertips on the ground. Otherwise, come up onto your blocks. And you want your head to be forward on— in the line with your spine. And just breathe. Now stepping into the right foot, bring yourself up, arms up, and breathe. Hands back down, and then tuck your toes in the back foot, and we'll come into low lunge. Now flip your foot so that it's down The heel is down, and we're going to come into Warrior 1. Bend in the front leg, arms up, hold and breathe. And then bring the hands back down to the blocks or to the earth. And bring your knee back down. And we're just going to switch. So the right knee goes down, left leg, left foot comes between the hands. And hold and breathe. Now stepping into that left foot, we come on up, arms up, hands back to the earth or the blocks. Tuck your toe and push yourself up. And we're building on this. Spin your foot so that the heel is down and push yourself on up to Warrior 1. And then come back, feet to the— or hands to the blocks or the earth, knee down, and we'll come back into hands and knees. Excellent. Now bring your knees back, and we're into a sort of a push-up pose. And then bring yourself all the way to your belly. Rest your forehead on your hands and kind of shimmy your legs back, and we'll rest for a minute. And then once again, shimmy your legs back so they're as far back as they can go. And we're gonna lift just the right leg just a couple inches up.
And release.
And lift the left leg.
And release.
Once again, lift the left leg. Release. Right leg. Release. This time, lift both legs up just a little bit and hold and release. I'm sorry, hold and breathe. For an extra challenge, lift up your head off of your hands. Hold and breathe. This is Locust Pose. Few more breaths here. And release. Now we're gonna do the G.I.
Joe twist.
That's what my teacher calls it. So let's see. So bend your left left knee that's by your side, and then bring your left arm up. I'm sorry, your right arm up. And we're going to sort of roll onto our backs so that our— oops— left arm is splayed out to the side. Yeah, and just rest in this twist. Hard to explain how to get into this twist, but once you get there, it's worth it, right? I'm ambidextrous, so I have trouble with my left and right. I write left-handed, but I do everything else right-handed. I'm kind of an odd duck. Wonderful. Two more breaths here. And halfway roll up. And before we go to the other side with that stretch, make a pillow with your right arm. We're gonna do some inner thigh work. So keeping the left leg bent here, take your right leg and go ahead and pulse up many times. This little purse is— now make 10 little circles one way and then the other way. Excellent. I'm gonna switch that you can still see me to the other side. And now we're going to bend our right knee up and our left hand, our left arm up and roll over and extend left hand and be in our GI Joe twist. And just relax and breathe. Your arms can be kind of like this, or they can be parallel too. I don't know if you can hear the sirens out there. Probably a lot of fireworks going on today. I hope you all have a good day with picnics and spending time with family and friends. Or maybe you just have a quiet day to yourself, which is It's just good. I like to read all day.
And we'll enjoy a couple more breaths here.
And then roll back to your side, making a pillow with your left arm. And then let's pulse up 20 times with our left leg. And then 10 circles one way.
Like to point my foot. And then the other way. Great.
Now let's come onto our bellies again for Sphinx Pose. So come onto your forearms and again wiggle your legs back and shine your heart forward and just breathe. You can stay here in Sphinx Pose, or I invite you to come on to forearm plank if you'd like, where you bring your hands together and come up onto your tippy toes and hold and breathe. Couple more breaths here. And wherever you are, we're going to come into, uh, child's pose. So toes together, knees apart, and just sink on back to your heels and breathe. From here we'll come up to kneeling. I'm gonna switch around. I'm used to be used to facing this side. From here. Inhale, arms up. Exhale, we're going to fold forward, hands behind our back, forehead touching the mat. And then inhale, arms up. Again, folding forward. This time, change the hand on top. Forehead to the mat. Once again, arms up. And switching the hand on top, forehead down. One more time. Arms up and forehead down. Coming back up to kneeling, and we'll step one foot up and the other, and we're at the top of our mat. We'll come into Mountain Pose. So roll back and forth on your feet so you find a solid balance. Bend your knees a little bit, then find locked knees. Now find that perfect micro bend. Pretend that there's a beach ball in between your legs and you're pushing it, trying to pierce the beach ball so that your inner legs are engaged. Now pretend that you're trying to push the mat apart. That should engage your outer legs. Now find your tailbone down, shoulders up, back, and down with your palms facing forward. Pretend that there's a string at the top of your head pulling you up and your ears are over your shoulders. Hold and breathe. Feel like a mighty mountain. From here, we're going to go into a balance pose, Tree Pose. So if you'd like You can bring— first, let's stabilize into our left leg, finding a balance there. And then come to your tippy toes on your right foot, and you can come to bring your ankle— sorry, your heel onto your ankle, or bring your foot to your shin, or you can bring it up here. I myself like to keep my heel on my ankle. And then you can bring your hands here, Anjali Mudra, or if you'd like, you can grow your tree and have branches. We'll hold here and breathe. You can even wave your branches if you're very daring, and look up at the sun and smile.
Excellent. And you can bring your hands back to Anjali Mudra.
And step down. All right, we'll shake that out a little bit and then get solid in our right leg. Prepare to bring our foot up, heel, calf, or up to the thigh. I'm going to stay at this point today. Hands in Anjali Mudra. Or you may grow your branches, and if it's a windy day, you may want to sway, smiling, looking up, or look forward, grateful for for the solid tree. And if you fall out, be grateful for imperfection and the freedom to be imperfect. And step back again and again.
Excellent.
And we'll come back down. Now we're going to do one of my favorites, which is Star to Goddess Pose. The star is exactly like you'd imagine. Can't see my hands when they're up here, but they're just like this, open. So it looks like this, star pose with our feet up. Then when we come into goddess, we're going to bend our knees and our hands kind of flip backwards like this. And the last part of goddess pose is lion's breath, which is where you stick your tongue out and go, ah. So it looks kind of funny, but nobody's watching you. So go ahead and do it with me. So I'm gonna start in Star. Inhale into Goddess. Let's do it again. We are fierce goddesses. 3 more times. Excellent. How much fun is that? Now widen your stance a little bit and turn your toes in. Bring your arms out to the side. Let's fold forward with a flat back. Bring your arms down. Walk them forward a little bit so we're almost in a wide-legged downward dog and just hold. Micro bend in the knees. I can walk your hands back a little bit. And pushing your hands into the mat and draw your head down any amount. Now pushing yourself back up again, walk yourself to the right. Place your left hand wherever it feels comfortable, and if you'd like, you can twist up towards the left. And then coming back down, walking yourself over towards the left, placing your right hand down, and then twisting towards the right. And coming back down, bend your right knee, come into a side stretch, skandasana. I invite you to come down all the way if that feels comfortable, pointing your left foot up. If you want a balance challenge, you can try balancing on your toes, bringing your hands into Anjali mudra.
Smiling.
And we'll walk to the other side. You can stay here, or you can come down with your foot pointed up, flexed. And then if you'd like, you can try the balance challenge with a smile.
Wonderful.
And we're going to walk our way to the middle and come into malasana, yogi squat. So it might be here for you. You might want to come down a little bit more, or I got to walk myself in a little bit more. Come down to here and just hold and breathe with a smile, reflecting on freedom. If you'd like, I invite you to bring your right hand down outside the foot there, and then twist up to your left. Coming back to center, bring your left hand down outside the left foot, twist up to your right, and then coming back to center. Now we're going to gracefully come to seated by Just sitting back. Okay, now let's bring our legs forward into Dandasana, stick pose, and flex our feet. Now I'll show you a little trick to shake out some trauma. So something called TRE, which they do with soldiers, is, um, raising a leg, and you'll notice— and sit up tall if you can— you'll notice that it starts trembling right away, which is a little uncomfortable, but it actually is really good because it is releasing excess stress and trauma. You won't stay up for long. In fact, let's bring it back down. But it is actually a really great technique. Let's raise up our left leg. And there actually are whole classes called TRE if you want to look into it, but this is just a small demonstration. It's kind of surprising how quickly we begin trembling. So shaking is always good. If you think about— you can bring it down— an animal, when they come out of the water, what do they do? They shake off everything. That's our body's natural response. Now let's come into Paschimottanasana, forward fold. Inhale, arms up, and then fold forward any amount. And just hold and breathe. We're just slowing down the heart rate. Couple more breaths here. And then find your way back up. Come into baddha konasana or butterfly pose. And if you'd like, you can grab your blocks. Find my other one. Um, and put them on the side there so you have more support. And then you can find a tall spine. If it's comfortable for you, you can fold forward any amount, and we'll just hold and breathe. One more breath here. And then you can sit up, remove the blocks, and then bend in your left knee, extend the right leg long, and your torso over your right leg. Inhale, arms up, and exhale, fold forward any amount. One more breath here, and then bring yourself on up. Extend the left leg and the right knee. Bring your torso over the left leg. Inhale, arms up, and exhale, fold forward in your mouth. And one more breath here. And then come on up. From here, we're going to go into pigeon pose. So just keep your right leg bent here and then kind of swing yourself around so that your left leg is down and your front leg is— your knee is facing out and you can bend the knee any amount. So you might be here and you might bring it all the way in, whatever feels comfortable for you on your hip. And then start out up here and then we'll, we'll do folding forward. And we'll just lie in reclined pigeon. Just hold and breathe. Couple more breaths here, and then you can push yourself up, and we're just gonna Swing that left leg around, right leg back, and come into pigeon. Other side. First kind of sit up, and then you can just come on down, get onto your hands.
Hold and breathe.
Couple more breaths. And then swing that right leg around. Move my mats a little bit. And then come to your tippy toes here. And sit back, tuck your tail a little bit, hands underneath your knees, and then lift up just your right leg here and just hold. And let's switch, left leg up, and switch.
Switch. Switch. Switch.
I invite you to try both legs up, or you can just keep switching back and forth. And if you'd like, you can extend your arms and just hold. And if you'd like, you can keep going back and forth like so, and you can hold on. Excellent. Now put your toes down, sit up, get a little stretch, and then slowly roll yourself all the way down. Now let's find a twist. So cross your right leg over your left, put your hips to the left— to the right a little bit, and then let your legs fall to the left. If this is uncomfortable, you You can just stack your knees and let them fall, or you can even put a block or two so that your knees fall to the block. Extend your arms out to the side. Hold and breathe. And if you'd like, you can look or to the right. Couple more breaths here. Keeping your legs crossed, if your legs are crossed, bring your legs back up, then uncross them. Bring your hips back to center. Cross your left leg over your right. Put your hips to the left and then let them fall to the right. Again, you don't have to have your legs crossed and you can use a block. And Hold and breathe, and you can look to the left if you'd like. And a couple more breaths here. And then keeping your legs crossed, bring the legs up, uncross, bring your hips center, and then find happy baby. Maybe rock back and forth. If you'd like, you can straighten one leg and then another, just finding ease and freedom in the pose. And if you'd like any other movements before we come into Shavasana, go ahead and take them. And whenever you're ready, You can come down to shavasana, getting comfortable however you'd like. And if you'd rather, you can certainly sit up for shavasana, getting nice and comfy. You can just slow your breathing. I invite you to draw attention to your right hand.
Bring your thumb to the top of your first finger. Now your second finger, just the right hand. Your third finger, and your fourth, and release. Now draw your attention to your left hand only and bring your thumb, the tip of your thumb, to the tip of your first finger. Now your thumb to your second finger, your third finger, and your pinky finger. Pause. Now bring both thumbs to the tips of your first finger, second finger, your ring finger, the pinky finger. Release. Now bring your attention to just your left hand. Bring the tip of your thumb to the tip of your first finger. Second finger, ring finger, pinky finger. Release. Draw your attention to just your right hand. Bring the tip of your thumb to the tip of your first finger, second finger, ring finger, pinky finger. Release. Draw your attention to both hands. Bring the tip of your thumb to the tip of your first finger, second finger, ring finger, pinky finger. Release. Notice where do you find freedom in this moment? Allow yourself to float there.
When your mind dances, as it will, come back to the breath.
We'll be here for a few minutes more, and I will let you know when it's time. Slowly begin to deepen your breath. Find some movement in your fingers and toes. Whenever you're ready, you can roll onto one side, making a pillow with your arm, resting there for a moment. Eventually, in your own time, you can push yourself up to seated, bringing your hands into Anjali Mudra. Om Shanti Shanti Shanti. The teacher and student in me honors the teacher and student in you.
Namaste. Thank you so much. Have a wonderful day.
More from Jo

Mom and I off to Santa Fe and Taos for Yoga Nidra and Enlightenment #retreat #spirituality #family