Here's How I Passed My Funded Challenge in 1 TRADE With My Cheat Code Strategy
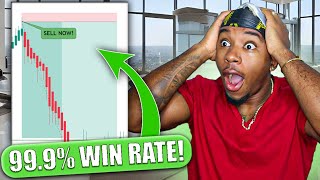
Josiah Stewart passed a funded trading challenge with one NAS100 short trade using a supply-resistance box on a 5-minute chart, risking 2.5% of the account for roughly $19-20k profit. He used Heikin-Ashi candles, a sell stop at the box top, and closed manually after a rapid drop.
Chapters
This strategy just made me pass my funded challenge in one single trade, and I'm gonna break it down just for you, not anybody else, just for you. What is goodie, my people? We are back again with another gem. Listen, today I have some super hot fire for y'all. Today I'm going to be breaking down this trade that I took this morning on NAS 100 that made me pass my funded challenge in one trade and in one freaking day. It was an absolutely beautiful trade. I'm going to show you guys exactly what I was thinking before I hopped into the trade, my game plan. I'm gonna show y'all what I was thinking during the trade. It's just gonna be great vibes. So hopefully you guys can be able to take what I show you in here, apply it to your own funded accounts or even your real accounts, and make some freaking stupid money. So if you're excited for this video, smash the like button, follow me on Instagram over there at juver_, and let's just hop right into this banger. Wait, before you go in the comments and type in, which funded account did you freaking use? Let me tell you real quick. So I use this FunderPro. Um, honestly, I heard some people on my Discord talking about it. I got a $200K account, which basically you just have to get 10% and you pass phase 1, you get 8%, pass phase 2, then you're fully funded. There are a couple reasons why I personally like it and why I decided to go with it, right? First of all, it goes with the broker that I use, which is Osprey. There's a link for it inside my bio if you guys want to use it. Um, Osprey FX, that's the broker that I use. So that funded account actually goes with Osprey, which I freaking love. Instead of having to use another funded account that goes with some other broker that I know nothing about, that was going to take all my freaking money and not hit my take profits when it hits the take profit in reverse and steal my freaking money and make me lose the challenge. So that's one reason why I like it. Another reason, you get 80/20 splits, you know what I'm saying? So if you make $10,000, you keep $8,000. If you make $100,000, you keep $80,000. So you get— you keep 80% of the profits, they take 20%. They can have that. I don't freaking care about that, you know what I'm saying? Another one, you can scale up to $5 million, uh, which I personally never really scaled that high. That would be cool to scale up to a $5 million account, um, but that would be cool. That's another one reason why I like it. But then the main reason why I personally like it— well, there's also other reasons, like they, they don't have any, um, maximum trading times like a lot of these, um, funding accounts. You have to complete the challenges within 30 days or something like that. This one says, F all that. There's no time limits. Take as much time as you want. You don't gotta be rushed into trades 'cause you're trying to beat that limit. Take as much time as you want. So that's another cool one. But back to what I was saying, the one that I really personally like is the fact that after 8 days of being funded, you can get your first payout. Now, the other funded challenges I've used, they want you to wait 2 weeks, a month. I saw one that was 2 months. Almost freaking threw up on my screen. But, um, this one was 8 days, which was absolutely amazing. Obviously, we like to make our money and take our money as soon as freaking possible. So that's a couple reasons why I like them. If you guys want to sign up for them, I actually have a link for 10% off. Hit the link inside my description down below. I'll also leave inside the comment section up above if you guys want to take— test them out. You can test it out for 10% cheaper than the rest of the world because you're special. But let's hop into this trade. All right, so boom, here we are on the freaking charts. Um, I took off all my drawings and everything. Let me take off my indicator. This is actually an indicator that I personally made. It's absolutely fire. I'm not good— I can't spoil it too much because it's not released yet. Um, but I have a whole indicator that's gonna be coming out soon. But that's besides the point. That's not what we're talking about. So this morning— let's go to the 5-minute chart— this morning, um, I hopped in the trade and caught this whole downside sell right here, right? But the reason why I caught this sell is because this morning when I looked at the charts, I saw that we were in an uptrend here And then after we went in, in this uptrend right here, I kind of drew my box around here because I saw that price came down here. Now what I mean by down here is that we had these lows right here. We're making lower highs. I mean, we're making higher highs. So high right here, a low, then a higher high, then a higher low right here. So once I saw all this happening, then I saw price come up to this zone right here and then it rejected off of it and actually created new lows, which is the new low right here. I was simply waiting to see if price would come back up into this box that I had drawn before. And if it did and gave me a nice sell signal, I would hop in that trade. Because for me personally, whenever price gets to a certain point, then reverses and creates a change of direction, and creates a change of direction like this— how I was explaining to you guys, we had a higher high, we had a higher low, then a higher high, but then it created a lower low right here— once ever price does that at a certain point, the place that it bounces off of is very interesting to me. It's very intriguing to me. I see it, I'm like, hmm, I like that, you know what I'm saying? So I drew a box around it, right, on the 5-minute time frame. I was looking at it around this time over here, 8:30, 8:35. I went down to the 1-minute time frame and— hold up, yeah, I went down to the 1-minute time frame and all I was looking for was price to come up here and start rejecting it. So as soon as price came up here, you can't really see it on the Heikin-Ashi candlesticks. If you guys don't know, I use Heikin-Ashi candlesticks. Let's see what it looks like on regular candlesticks. I don't actually know, but yeah. Oh, beautiful. So it came up here in this, in this box, created a doji, then it shot down crazy. Now keep in mind, I'm watching all this happen. I had an alert right here for when price came up back into the zone. If it did, the alert went off. I saw it come up here, then I just saw that— if you were watching NASDAQ 100 this morning, you saw how fast it dumped off of here. It literally dumped way too fast for me to hop into anything. I'm like, dang, I didn't miss my trade, but Bada bada boom, bada bada bing, you know what I'm saying? I'm like, dang, this sucks. But it also gave me extra confirmation due to the fact that it rejected off of it so strongly. So now I'm like, okay, that's really a zone. Now I'm really intrigued. Now I'm really like, um, this is something for me. I like this, you know what I'm saying? So, um, basically what I did— let me go back to Heikin-Ashi candlesticks— is I wanted to hop in on the same chart, on the same trade. I was hoping it would give me a little retracement back up into the zone, which it ended up doing, and I hopped right into it. And what I did, I just set a, um a sell stop right at the top of this Heiken Ashi candlestick. So for example, I had my sell stop literally right here. So it triggered me into a trade when it hit right here. So I got in literally right here. I put my stop loss— originally I had my stop loss up here, but I put it to the high right here. That's where my stop loss was the entire trade. And all I did was aim for the last lows. I did not know that price was going to freaking melt all the way down here. I simply was not going to be greedy. I was just going to go for my lows right here. So I went for the lows right here and completely crushed it extremely fast. Like, we had a little bit of hesitation right here on this zone right here, these two candlesticks, but then after that it just crashed down ridiculously fast. So during the trade, right, the first beginning of it, keep in mind I barely had any drawdown at all. Like, I really did not see red at all. As you see right here, when I hopped in it, it kind of reversed exactly at that point. So I really had no drawdown. This was not a stressful trade at all, but my heart was freaking pounding due to how fast these candlesticks were moving, how fast price just literally dropped down. If you follow me on Instagram, which I highly suggest you do, it's in the top right corner or left corner, I don't freaking know, somewhere up there, @juvra_. If you go today, if I upload— when I upload this video, you'll see me actually like screen recording and like I'm recording the price moving. It jumped from like $13,000 to $20,000 in a matter of like freaking 4 seconds. Um, so when I tell you, like, the price was literally going absolutely crazy and my heart was pumping. I'm like, dang, this, this is moving stupid. Um, and then when it got to my take profit, I ended up actually just closing the trade manually, as you saw on my Instagram story, if you did watch it on my Instagram story. So simply, all I really did was I saw a nice zone that price created a change of direction from, and then price came back up, and I waited for price to come back up into that zone And once price came up into that zone, I waited to see how it rejected it. Now, I told you guys this first candlestick, the first time it touched it, it just went stupid. It just rejected it completely down. But then once I saw this candlestick right here, this Heikin-Ashi candlestick, it goes along with some of the strategies that I teach inside my strategies, my profitable strategies course. If you don't know, I teach people how to trade exactly how I trade. I have 3 courses in there. The first one is the profitable strategies course, which is the strategies that I use every day to freaking just steal from the markets every freaking day. People love that course. People have made so much money from my course. It's amazing. But I have that one, but that's not for newbies. If you're a newbie, I have a Forex 101 course that teaches you all the basics as well as advanced knowledge. So you'll be able to understand the charts and trade for yourself. And I also have a crypto and DeFi course in there as well. But the Heikin-Ashi Super Scalper strategy that I was talking about when I saw this candlestick right here, the reason I placed my sell limit right here goes along with one of the strategies that I have in there. So if that is something that interests you, you can hit the link inside my description down below, or I'll leave inside the comment section down below as well. But once I saw that, then I hopped inside a trade, held it all the way down to the lows right here, and manually closed it at the lows. But as we see, price just completely melted through it. Um, but yeah, that's, that's, that's basically how I do it, how I did it. And a lot— I know a lot of people are going to ask, how much did you risk per trade? How much of the account did you risk per trade? I personally risk it around 2 point— it was like 2.5% of the, um, account with this one trade, um, which ended up with the risk-to-reward ratio that I used, it ended up giving me the entire amount, um, that I needed to pass the challenge in one trade technically. Okay, I lied, right? This trade was like $19,000, right? Then I had to scalp, um, a little bit more and just get— because when I closed it, it like flicked down to $19,000. I was telling y'all how fast it was moving, But when I press close, it like flipped down to $19,000. So I had to just scalp an extra $1,000 or something like that in there. And I just caught it on one of these sells earlier. Well, after this whole thing, because I knew price was just going crazy to the downside. So I ended up getting my $20,000. And I'll put a screenshot up so you guys can actually see that I passed it and I did it. You know what I'm saying? So that is the whole trade breakdown. It's a simple resistance rejection using my Heikin-Ashi strategy that I talk about inside my strategies course. It's very, very simple. It literally is just Beautiful, you know what I'm saying? I don't know why I just did that. That was— I'm not Italian or French. Who does like kissing? Like, you know what I'm talking about. I didn't— forget I did that. But that is the complete breakdown. Later on the day, I actually caught another sell with the, um, Super Scalping Strategy. This one right here, absolutely freaking beautiful trade. Super simple. I knew NAS was just selling off, um, and I caught that. I actually caught this based off of the indicator that I made. Like, it literally just gave me a sell signal right here, hopped in the sell signal and made money, which is always lit. If you guys want to know like when the indicator is going to come out, I'm testing it for the rest of this week, then I'll be releasing it to my students first. They'll get it at a huge discount and all that, um, and then I'll release to the public after that. I don't know how much long after that, but yeah, that's really the end of the video. Hopefully you guys, uh, were able to get something out of this, see kind of my thought process with this trade, see why I took this trade, how I was feeling during this trade. My risk tolerance as well, because a lot of people, I wouldn't suggest everybody does risk such high amounts when they're trading their funded accounts. I was just very confident in this trade due to how fast it rejected off of this zone, which shows me that it really, really respects that zone. That's why I was willing to risk a lot more during this trade and hold it a lot longer. But I don't suggest everybody just full lot size up in a funded account challenge. But I did it and it turned out to work well because I was— it was an A+ setup for me. It was very, very nice setup, is what I like to see. But that is the end of the video. If you guys do, like I said, want to get one of these funded challenges, you can get it for 10% off. There's a link for inside the description down below. And if you want to learn how to trade, how I trade, hit that link inside in my bio. We can all eat together. And if you don't believe that we all eat together, go to my Instagram over there. I post people making money all the freaking time. Every single day I post As like, it's, it's so many people that literally just send me thank yous and screenshots of them making a whole bunch of money. It's just amazing. Like I talked about on Twitter yesterday, I'm like, me making money is nowhere near as happy as I get when I see these messages and say, I just made $10,000, I just made $1,000, I made my first $100 trading. Like, that stuff is absolutely beautiful because that's me helping people actually become financially free and change their lives for the better. But that's all besides the point. Hopefully you guys enjoyed it. If you did, I would appreciate if you smash the like button. I'm always coming out with consistent bangers, so hit the subscribe button. You're not going to want to miss out. I'm, I'm entertaining, informational, and cool. So subscribe. Yeah, and I'll see you on the next video.